

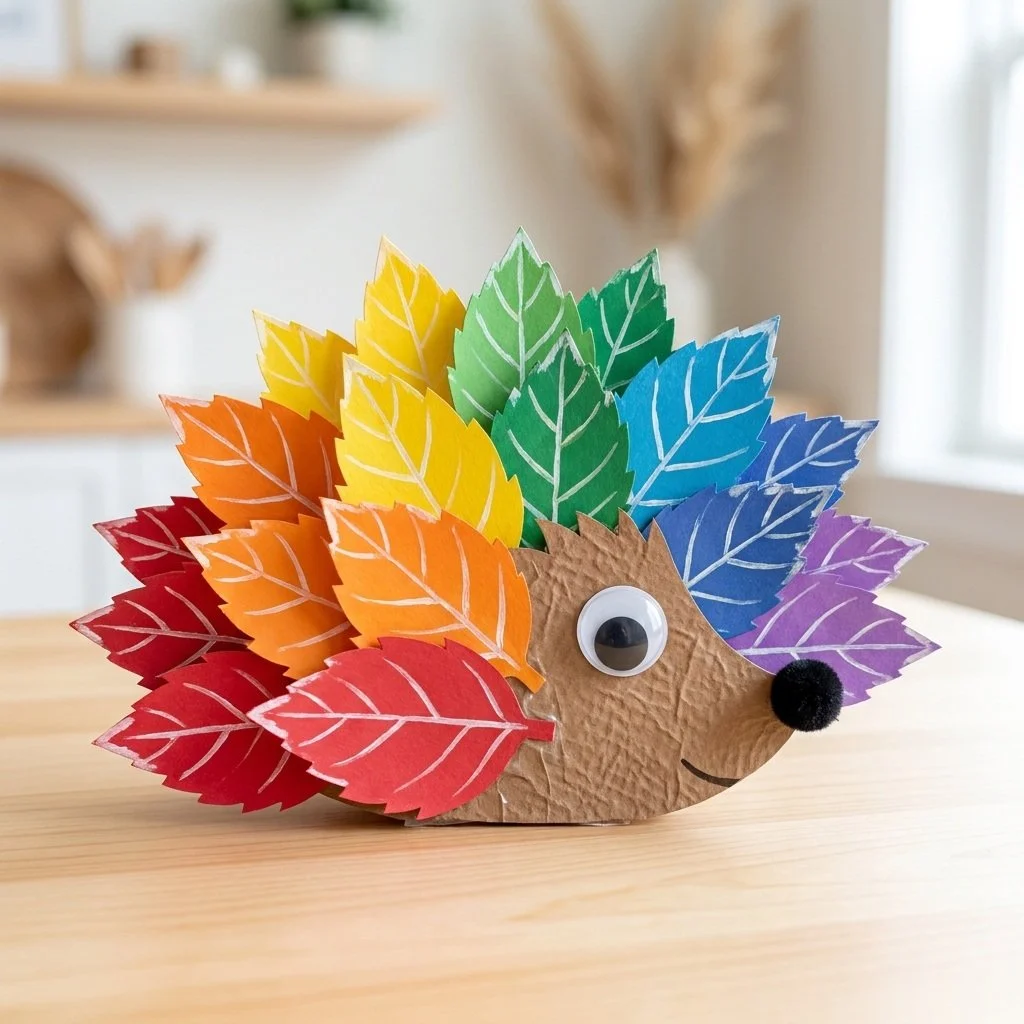
Creating is a tactile journey, a calm escape into a world of textures and colors. Imagine gathering soft, rustling leaves, warm sunlight filtering through trees, and letting creativity flow into something that reflects nature’s beauty. With the DIY Rainbow Leaf Hedgehog Craft, every leaf becomes a brushstroke on a serene canvas, bringing together the calming effects of craft and the vibrant spirit of the outdoors. This gentle project invites you to slow down, express yourself, and create a snug piece of art that echoes the beauty of autumn. You may also find Clear School Glue Diy Craft Calming useful.
The Heart Behind This DIY
The Rainbow Leaf Hedgehog Craft embodies the peaceful essence of creating with nature. It encourages you to connect with your surroundings while engaging your senses in a meaningful way. Each leaf carries its own story, whispering reminders of summer’s warmth and autumn’s crispness. This process of crafting feels cozy and intentional, inviting you to focus on the present moment. As you work, the rhythmic placement of leaves and materials cultivates a soothing environment, nurturing a sense of mindfulness. This project helps you to slow down, breathe, and appreciate the little things, turning simple materials into heartfelt treasures. You may also find Diy Bioplastic Suncatchers Homemade Craft useful.
A Gentle Look at the Process
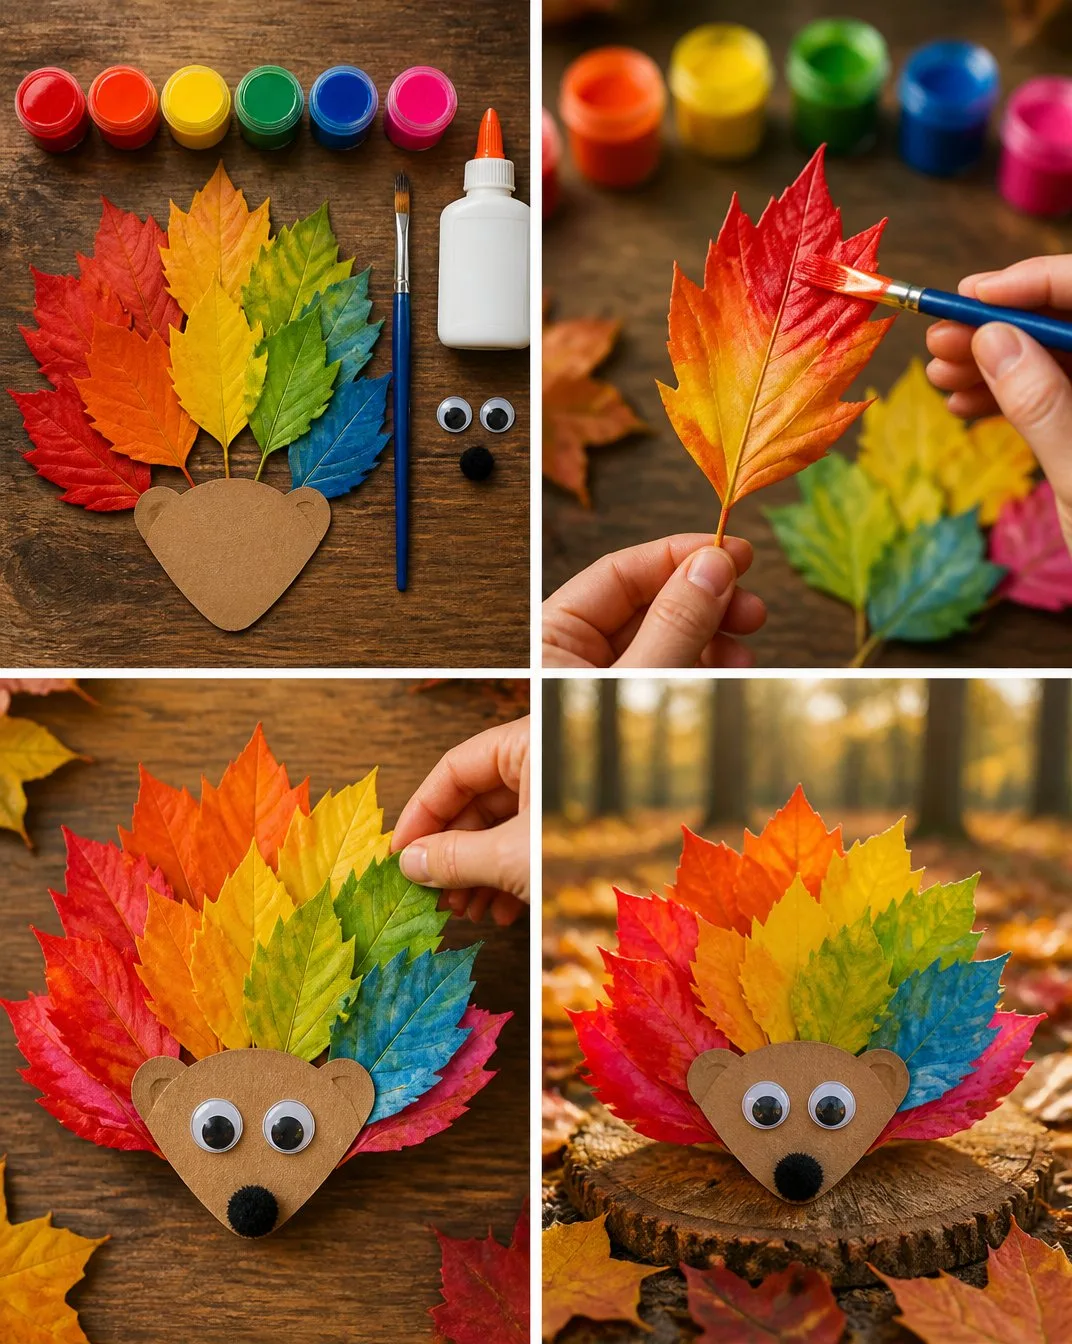
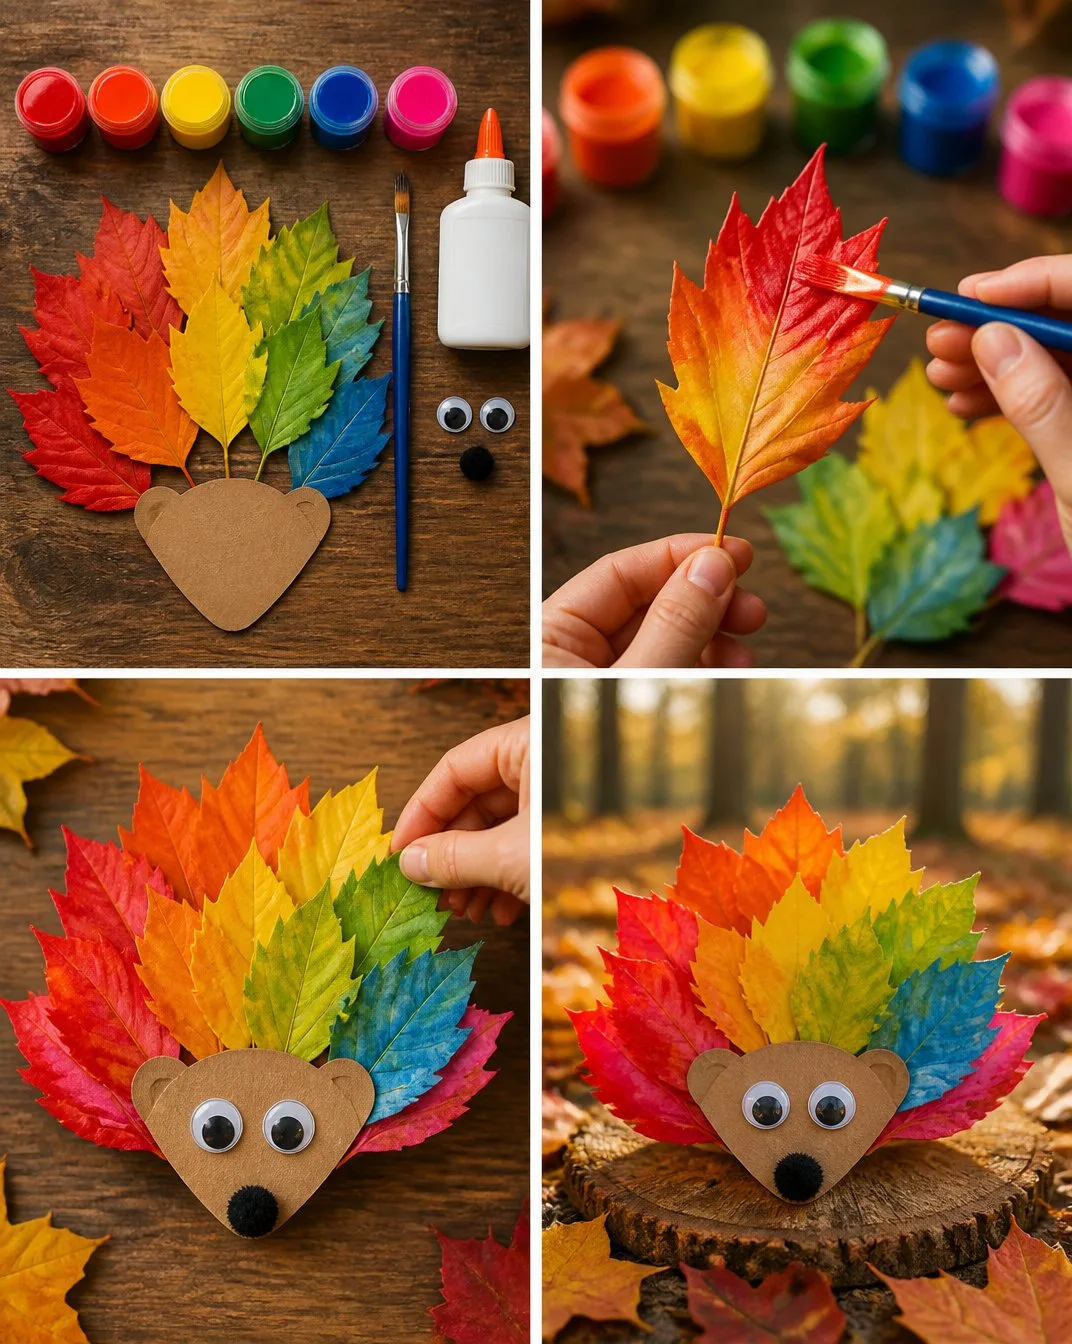
This DIY journey takes you through the delightful assembly of nature’s elements into a charming hedgehog figure. The process is gentle and fluid, as you layer textures, colors, and shapes together. As you gather the materials, the sound of rustling leaves and the cool touch of glue create a comfortable backdrop for your creation. The movements involved in this craft are deliberate, allowing space for reflection and calmness. Each stage of making unfolds like a quiet story, filled with the sensory joys of crafting and the anticipation of watching your hedgehog come to life.
Materials You’ll Need
To embark on this calming crafting journey, gather these simple supplies:
- Assorted dry leaves (easy to find in parks or gardens)
- Clear school glue (preferably washable)
- A piece of cardboard as a base
- Scissors (use with care)
- Optional embellishments like googly eyes or decorative markers
These materials are accessible and can often be found around your home or in nature, making this craft not only simple but also enjoyable.
Step-by-Step Directions
Begin by selecting a variety of leaves in different shapes and colors. Feel their textures and appreciate their natural beauty.
Cut a piece of cardboard into an oval shape for the hedgehog’s body. This serves as the stable foundation for your design.
Apply a thin layer of clear school glue to one side of the cardboard oval. The smooth texture of the glue can be soothing as you spread it.
Start arranging the leaves on the glued surface, layering them from the bottom to the top. This mimics the hedgehog’s spines, creating a delightful visual effect.
Allow the edges of the leaves to overlap slightly for a full, cozy look. As you work, enjoy the colors blending together, creating a rainbow palette.
Once all leaves are placed, gently press them down to secure with glue. Take a moment to appreciate the harmonious colors and textures forming your hedgehog.
If you have additional embellishments, like googly eyes, now is the time to add them for personality. These little touches make your hedgehog unique.
Let your piece dry completely. This drying time offers a moment to pause and appreciate your handiwork.
Enjoying the Finished Piece
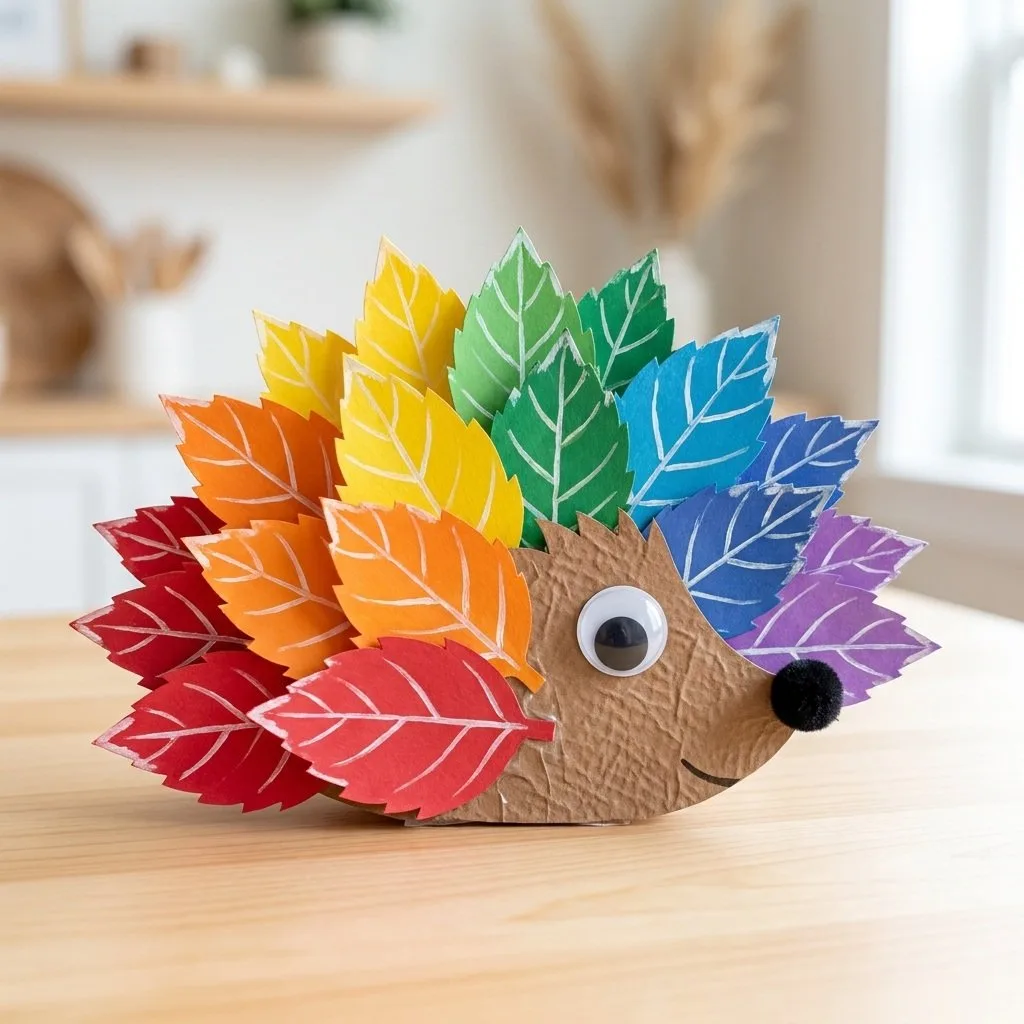
Once your hedgehog has dried, it’s time to celebrate the beauty of your creation. This charming DIY can be displayed as a centerpiece on a table, adding a touch of nature-inspired warmth to your space. You might also place it on a windowsill, where the sunlight can illuminate the vibrant leaves, dancing in the light. Sharing this handmade piece with family can spark conversations about nature and creativity, weaving joy into everyday moments. It’s a reminder that by slowing down and embracing creativity, you can cultivate a cozy atmosphere in your environment.
How to Store or Reuse DIY Rainbow Leaf Hedgehog Craft
To store your Rainbow Leaf Hedgehog, find a cool, dry area, and avoid exposure to moisture, as this can damage the dried leaves. If you’d like to reuse the leaves for other projects, consider carefully disassembling your hedgehog, which allows you to collect the materials again for new creativity. Be gentle during this process to preserve the leaves’ integrity, and feel free to save any extras for future projects, such as the Rainbow Clothespin Bat Craft or other fun, nature-inspired DIYs.
Small Ways to Make It Your Own
Crafting is inherently personal, and there are many ways to tailor this Rainbow Leaf Hedgehog to your preferences. Here are some gentle suggestions to inspire you:
- Experiment with different types of leaves for varied texture and color. Maples, oaks, and birches each bring unique beauty.
- Consider incorporating additional materials, such as twigs or acorns, for a truly mixed-media approach.
- Use natural dyes on the cardboard base to add an earthy tone that complements the leaves nicely.
- Invite friends or family to join you in making their own hedgehogs, fostering creativity in community.
- Display your creations at different heights using small stands or bases, enhancing their visual impact.
FAQs About DIY Rainbow Leaf Hedgehog Craft Tutorial
What kind of leaves are best for this craft?
Any wide, flat leaves work well, but consider selecting leaves in various colors and textures to create visual interest. Experiment with what you find in your surroundings!
Can children participate in this craft?
Absolutely! This DIY is perfect for kids with supervision. They can explore textures and colors while using safe materials like glue and scissors.
How can I keep my hedgehog looking fresh over time?
Store it in a dry, shaded area to prevent moisture and fading. You might consider applying a clear sealant to protect it if desired.
Is this a good project for seasonal decorating?
Yes! The Rainbow Leaf Hedgehog makes a charming addition to fall decorations and can be displayed year after year.
Can I incorporate this craft into my classroom activities?
Definitely! It’s a great way to bring lessons about nature into the classroom, while also practicing fine motor skills and creativity.
Conclusion
Creating your own Rainbow Leaf Hedgehog is a delightful way to engage with nature and enjoy the calming process of crafting. It’s an invitation to slow down, reflect, and let your imagination run wild. You may find further inspiration for your creative journey in guides like DIY Rainbow Leaf Hedgehog Craft: Easy Tutorial or explore more ideas for children, such as the options available at Kids Kubby – Easy Crafts & Fun Food Ideas. Embrace your creativity, and let each project you undertake bring warmth and joy to your life.
PrintDIY Rainbow Leaf Hedgehog Craft
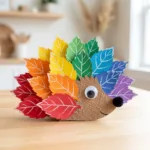
Create a charming hedgehog figure using assorted leaves and craft materials, inviting a peaceful connection with nature.
- Prep Time: 15 minutes
- Cook Time: N/A
- Total Time: 15 minutes
- Yield: 1 hedgehog craft
- Category: Craft
- Method: DIY Crafting
- Cuisine: N/A
- Diet: N/A
Ingredients
- Assorted dry leaves
- Clear school glue (preferably washable)
- A piece of cardboard
- Scissors
- Optional embellishments (googly eyes, decorative markers)
Instructions
- Begin by selecting a variety of leaves in different shapes and colors.
- Cut a piece of cardboard into an oval shape for the hedgehog’s body.
- Apply a thin layer of clear school glue to one side of the cardboard oval.
- Start arranging the leaves on the glued surface, layering them from the bottom to the top.
- Allow the edges of the leaves to overlap slightly for a full look.
- Once all leaves are placed, gently press them down to secure with glue.
- If you have additional embellishments, now is the time to add them.
- Let your piece dry completely.
Notes
Store in a cool, dry area to avoid moisture. Consider reusing the leaves by carefully disassembling the hedgehog.