

The surface of the Colorful Crystal Egg catches the morning light like a small, secret shore. My fingers remember the cool smoothness of eggshell, the slight grain where I scrubbed it clean, and the hush of salt crystals settling into their nests. I made one on a slow afternoon, and the ritual of stirring, dyeing, and watching color bloom into crystal felt like a quiet conversation with my hands. If you want to make something that invites you to sit still, breathe, and notice, this project offers soft textures, small bright details, and a gentle rhythm that soothes.
Why Colorful Crystal Egg Feels Comforting to Create

This project moves slowly by design. You soak, you dye, you wait, and each pause becomes part of the making. The Colorful Crystal Egg asks for attention in small measures and gives back a bright, tactile reward. The contrast between smooth eggshell and faceted crystal invites touch. Light moves across the crystals and refracts color into the nearby room.
When I made my first one, I noticed how the sound of salt pouring into a shallow dish settled me. The wet sponge made a soft, steady hiss as it smoothed dye around the shell. These small sensory moments create a calm loop: slow movement, quiet sound, and the soft glow of color. The result feels like a tiny treasure you can hold in your palm to steady a restless thought.
If you like exploring different crystal textures, you might enjoy the way other eggshell geode projects layer crystals in surprising patterns. I have a few notes and related projects that pair well with this, like my page on crystal eggshell geodes which explores larger, chunkier formations and different crystal sizes.
A Gentle Look at the Process
Making a Colorful Crystal Egg follows a gentle, repeating rhythm. You begin with a fragile shell, move through simple wet and dry steps, and finish with a small, hard jewel of color. The movement stays within a small workspace. Your hands do nearly all the sensing.
You will feel the thin warmth of your breath near the shell as you work, and you will sense slight changes in weight as moisture and crystals collect. The dye dissolves in water and moves like a slow cloud into tiny cracks and pores. Salt sits heavy and granular at first, then binds into crystalline forms as it dries. The whole flow invites quiet attention: mix, pour, place, wait, and watch.
If you want patterns that echo natural geodes, I recommend reading about different eggshell crystal techniques on my page about crystal eggshells. That page shows how small shifts in drying and layering change the final texture.
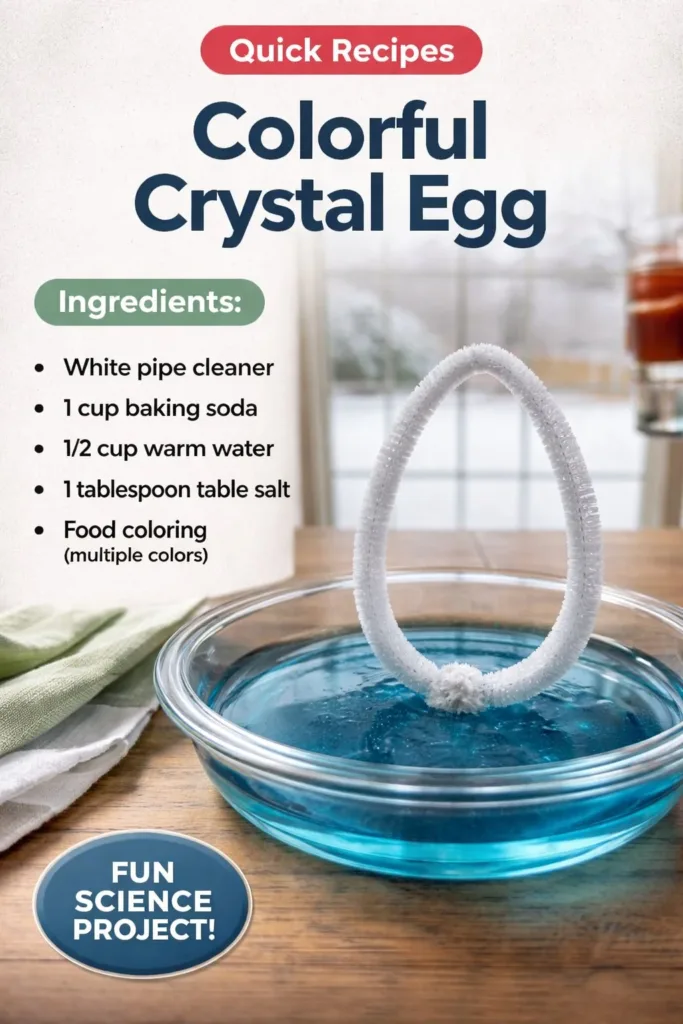
Materials You’ll Need
- Clean eggshell halves, emptied and rinsed – save both halves if you like symmetry.
- Table salt or coarse sea salt – easy to find, inexpensive.
- Clear glue or PVA glue – dries transparent and helps crystals adhere.
- Liquid dye or food coloring – pick bright colors for vivid crystals.
- Small cups or dishes for mixing – a few shallow bowls work well.
- Soft brushes or cotton swabs – for gentle application.
- A small pipette or dropper – optional, helps place liquid precisely.
- Tweezers – useful for moving large crystal fragments or delicate seeds.
- Protective tray or plate – to catch spills and support drying.
- Paper towels and a soft sponge – for gentle cleaning and blotting.
- Clear varnish or craft sealant – optional, for longevity and to reduce dusting.
Notes about materials
I use plain table salt for most of my pieces because it forms tight, sparkling crystals and remains simple to work with. Coarser salts create chunkier crystals and a different visual weight. PVA glue works well because it stays flexible while drying and makes the crystals stick firmly to the shell. If you want a brighter, jewel-like finish, a light spray of clear varnish after a full dry helps protect the piece without dulling the sparkle.
If you prefer a pastel look, substitute diluted dye or use a light hand when mixing. For more ideas on pink-hued crystal treatments, you may enjoy reading about my methods at pink crystal eggshell geodes which lean into gentle color palettes.
Step-by-Step Directions
-
Prepare your shell gently.
Wash the egg with warm, soapy water and rinse well. Pat dry with a soft cloth and let it air dry until only slight moisture remains.
Keep the edges intact and smooth any sharp fragments with fine sandpaper if needed. -
Mix glue and a little water.
Into a small dish, pour a thin layer of clear glue and add a splash of water until it flows smoothly. This thinned glue makes a good base for salt adherence.
Stir slowly to avoid bubbles and keep the mixture glossy, not runny. -
Apply a base of glue inside the shell.
Use a soft brush to paint a thin coat of the glue mixture where you want crystals to grow.
Work in small areas so the glue stays tacky and ready to hold salt. -
Sprinkle salt and press lightly.
While the glue is tacky, sprinkle a thin layer of salt into the shell. Tap gently to settle it into the glue.
Avoid overfilling; you want crystals to have room to form rather than be overwhelmed by a mound. -
Drop in color with a pipette.
Place a few drops of dye just at the salt surface. Watch how the color seeps and pools, changing the salt as it absorbs.
Use a lighter touch near the edges for a soft gradient or a heavier touch for concentrated bursts of color. -
Add layers if desired.
After the first layer dries slightly, repeat glue, salt, and color to build depth. Each layer creates new planes and refractive surfaces.
I often leave pauses between layers to breathe and notice how the piece shifts in daylight. -
Let the piece dry slowly.
Set the shell on a tray in a quiet place away from drafts. Drying overnight often gives the most controlled crystal growth.
If you move the shell too much while drying, crystals can settle unevenly. I leave mine alone for many hours. -
Strengthen the crystals with a top coat.
Once fully dry, paint a thin layer of glue over the crystals to lock them in. This reduces shedding and adds a slight sheen.
For extra protection, apply a light spray of clear varnish in a well-ventilated area. -
Clean the edges and display.
Gently remove any stray salt crystals from the shell edge with a soft brush. Place your Colorful Crystal Egg on a small cushion or in a bowl to catch light.
Hold it for a moment and notice the small weight shift as you turn it toward the light.
Enjoying the Finished Piece


Place your Colorful Crystal Egg where it can catch a slant of light. The crystals shimmer and throw tiny rainbows onto nearby surfaces. You can nest the egg in a small glass dish, on a bed of dried moss, or on a soft handmade coaster to accent its color.
I like to set mine on a windowsill where morning sun makes the crystals glow. When I need a pause, I pick it up and run my thumb along the smooth outer shell. The texture differences remind me of the process itself: fragile beginnings and careful layers that become something resilient and luminous.
If you collect similar pieces, arrange them together for a calm focal point. Different eggs reflect light in unique ways, and they pair well with simple ceramic bowls or warm wooden trays. For other projects that share this mineral, glass-like aesthetic, you may enjoy exploring my tutorial on pink eggshell crystal geodes which shows how colors shift with more intense layering.
How to Store or Reuse Colorful Crystal Egg
Treat your piece with gentle care. Keep it out of high-traffic areas where it might fall, and avoid very humid places that could soften glue or affect the salt. A cool, dry shelf works well.
For long-term storage, wrap the egg in acid-free tissue and set it inside a small box with padding. If a crystal layer loosens over time, you can spot-fix areas with a tiny dab of glue and a dusting of matching salt, then let it dry gently.
If you want to reuse elements, carefully remove loose crystals into a small jar. Use them as accents in mixed media projects or sprinkle them back into a new piece for a layered heritage effect. I sometimes save a few crystal fragments and press them into resin for small pendants or ornaments.
Gentle Tips & Variations
-
Invite slow color shifts by diluting dye more than usual.
A lighter dye concentration creates airy, watercolor-like crystals that feel soft and meditative. -
Try coarse salt for bold texture.
If you prefer chunkier, more faceted crystals, use coarse sea salt. Expect a different growth pattern and a more tactile surface. -
Mix metallic mica powders sparingly.
A whisper of mica enhances sparkle without overpowering color. Use a toothpick to apply tiny dots where you want a glint. -
Use both halves for a paired set.
Make two matching halves and place them facing each other in a shallow dish. The symmetry reads like a small ritual set and gives you two gentle keepsakes. -
Turn the shell into a small night light.
Affix a battery tea light under a clear resin base and set the shell over it for a soft glow. Keep electrical components away from exposed salt and moisture.
These are friendly invitations rather than rules. Each small choice changes the way the piece catches light and invites touch.
What I’ve Learned While Making This
I learned to trust slow drying. Patience lets the crystals form with clean facets and fewer stray granules. I also learned that mistakes carry texture. A spilled color can become a dramatic vein, and a patch of uneven salt can read as naturalism rather than flaw.
When I first began, I worried about perfection. Over time, I started to treat each shell like a small landscape that reacts to water, salt, and color. My tactile memory improved; I learned when a glue coat felt right by the brush’s resistance and when salt sat heavy enough to receive a color drop. These little signals guide me now.
I also learned to set a small ritual: a warm cup beside my workspace, a playlist of soft, instrumental music, and a timer that reminds me to take breaks. These habits make the making feel like tender self-care rather than a task.
FAQs About Colorful Crystal Egg
Q: How fragile is a finished Colorful Crystal Egg?
A: It holds up to gentle display and light handling. The shell itself stays fragile, so avoid dropping it. Clear top coats make crystals less likely to flake, but I still treat each piece like a delicate keepsake.
Q: Can I use natural dyes instead of food coloring?
A: Yes. Beet juice, turmeric water, or berry infusions can create beautiful, earthy shades. Natural dyes may produce subtler tones and sometimes require longer drying to set fully.
Q: What if my crystals do not form well?
A: Check humidity and glue consistency. Very damp rooms slow crystal formation. A thinner glue helps salt bind tightly. Try smaller salt grains or give the piece a longer, undisturbed dry time.
Q: Is this safe to make with kids?
A: With supervision, yes. Children can help sprinkle salt and add color. Handle sharp shell edges for them and keep glue and dyes out of mouths. Offer small tasks that match their fine-motor comfort.
Q: How long does the project take?
A: Active time is short – an hour or two of hands-on work. Most of the time is gentle waiting as pieces dry and crystals grow. I plan this as an afternoon practice or an evening ritual, not a quick craft.
A Gentle Note Before You Go
Sit with your finished Colorful Crystal Egg for a moment and notice how it makes you feel. Let your attention rest on the small details: the way light slices through a tiny facet, the subtle color shifts near the edge, the contrast between polished shell and rugged crystal. These small observations help return your attention to the present.
If a day feels busy, bring the egg close and inhale slowly. The object becomes an anchor that points you back to calm making and slow noticing. Take these soft processes with you into other projects and into daily life. Gentle making grows trust in your hands and patience in your rhythm.
Conclusion
I often look to classic egg-decorating traditions for inspiration when I choose colors and techniques, and you can find ready-made kits if you prefer a curated start with materials and dyes through PAAS® Easter Eggs | Dye and Easter Egg Decorating Kits. For a sense of how ornate crystal work appears in decorative art, consider the elegance of jeweled designs like the Bay Tree Faberge Egg with Colorful Crystals – Keren Kopal, which shows the delight of color and texture in a different scale.
These links are gentle reference points. Take what you love, leave the rest, and trust the quiet act of making to realign your day.
PrintColorful Crystal Egg

Create mesmerizing Colorful Crystal Eggs using simple materials and techniques that promote mindfulness and tranquility.
- Prep Time: 60 minutes
- Cook Time: 0 minutes
- Total Time: 60 minutes
- Yield: 1 egg
- Category: Craft
- Method: Crafting
- Cuisine: N/A
- Diet: N/A
Ingredients
- Clean eggshell halves, emptied and rinsed
- Table salt or coarse sea salt
- Clear glue or PVA glue
- Liquid dye or food coloring
- Small cups or dishes for mixing
- Soft brushes or cotton swabs
- A small pipette or dropper (optional)
- Tweezers
- Protective tray or plate
- Paper towels and a soft sponge
- Clear varnish or craft sealant (optional)
Instructions
- Prepare your shell gently.
- Wash the egg with warm, soapy water and rinse well. Pat dry with a soft cloth and let it air dry until only slight moisture remains.
- Keep the edges intact and smooth any sharp fragments with fine sandpaper if needed.
- Mix glue and a little water.
- Into a small dish, pour a thin layer of clear glue and add a splash of water until it flows smoothly.
- Apply a base of glue inside the shell.
- Use a soft brush to paint a thin coat of the glue mixture where you want crystals to grow.
- Sprinkle salt and press lightly.
- While the glue is tacky, sprinkle a thin layer of salt into the shell. Tap gently to settle it into the glue.
- Drop in color with a pipette.
- Place a few drops of dye just at the salt surface.
- Add layers if desired.
- After the first layer dries slightly, repeat glue, salt, and color to build depth.
- Let the piece dry slowly.
- Set the shell on a tray in a quiet place away from drafts.
- Strengthen the crystals with a top coat.
- Once fully dry, paint a thin layer of glue over the crystals to lock them in.
- Clean the edges and display.
- Gently remove any stray salt crystals from the shell edge with a soft brush.
Notes
Handle your Colorful Crystal Egg gently and keep it away from high-traffic areas.