

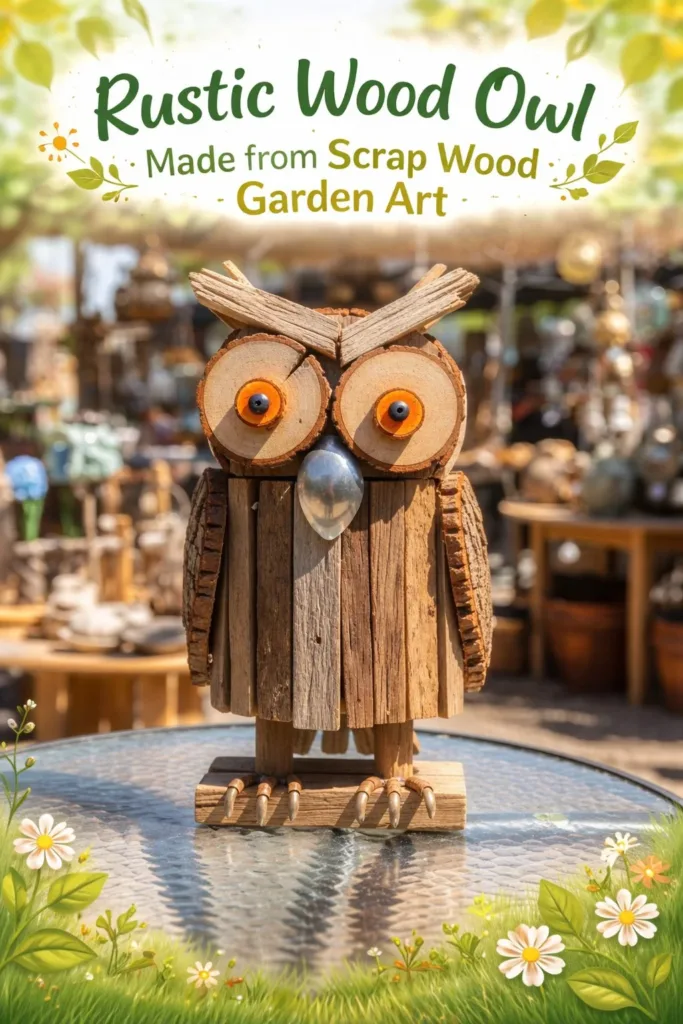
A cool morning light finds the old pallet boards on my workbench. I run my fingertips along their weathered grain and hear a faint, dry sigh as I peel away a loose splinter. The thought of shaping those quiet lines into a Rustic Wood Owl Made from Scrap Wood Garden Art feels gentle and right. I grip a small saw and begin, not to rush, but to listen to the wood and the rhythm of slow making.
The Quiet Joy of Making Rustic Wood Owl Made from Scrap Wood Garden Art
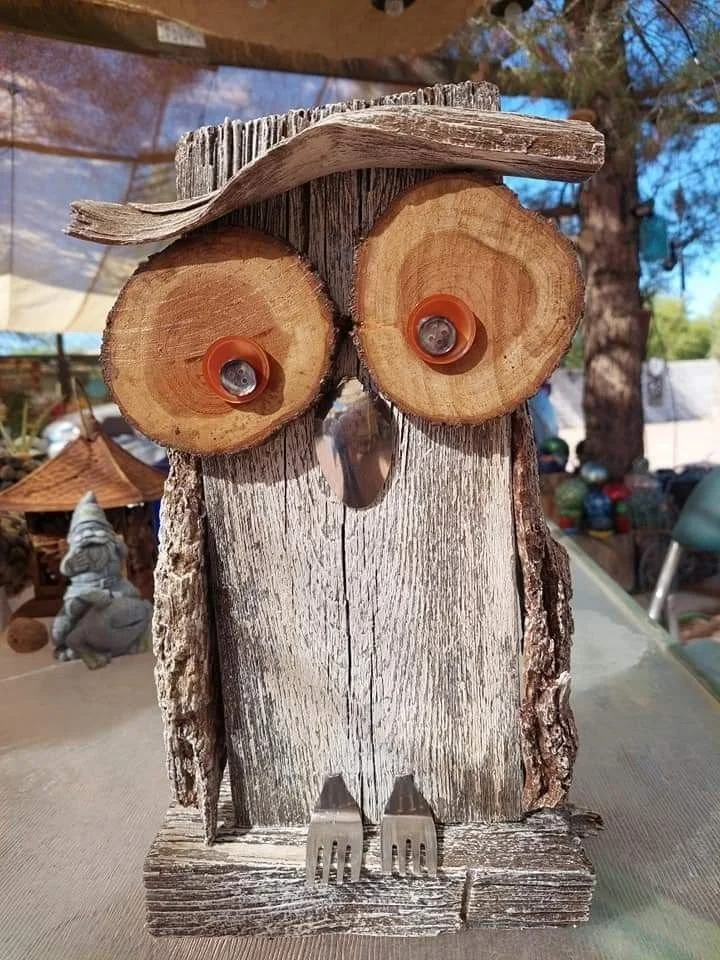
This little owl asks you to move slowly. It asks you to notice the rough and smooth, the soft scrape of sandpaper, the hollow sound when you tap a board, and the subtle warmth that comes from your hands. Making Rustic Wood Owl Made from Scrap Wood Garden Art offers more than a finished piece. It gives a small space to breathe, to focus on touch and shape, and to return to simple, tactile rhythms.
When you work from scrap wood, you work with a history. Each knot and nick keeps a small memory. You honor that memory by letting it stay visible. This practice calms the mind. It keeps the project honest and approachable. If you like slow, textured crafts, you might also enjoy my crystal heart project for a different kind of focused making, which blends the same quiet care with a crystalline finish crystal heart project.
A Gentle Look at the Process
Before we gather tools, take a soft moment to imagine the process. You will choose boards with character. You will mark simple shapes with pencil. You will cut, sand, and arrange pieces into a face and body. You will attach a stake or base so the owl sits steady in your garden.
The process moves in small rhythms. Cutting produces a clean metallic bite. Sanding makes a whispering sound and leaves your fingers warm and smooth. Painting, if you choose it, asks for slow, thin layers and a steady hand. Gluing calls for a breath and a patient wait while the bond sets. This flow keeps you present without hurry.
If you enjoy pattern and form, glance at my heart craft instructions for inspiration on combining texture and simple shapes into a calm finished piece heart craft instructions.
Materials You’ll Need
- Scrap wood boards, varied widths and thicknesses (easy to find; pallet boards work well)
- Pencil and ruler or a small template for the owl shape
- Hand saw or jigsaw (choose what feels steady in your hand)
- Sandpaper in 80, 120, and 220 grits (for rough to fine smoothing)
- Wood glue (outdoor rated if you plan to keep the owl outside)
- Small outdoor screws or galvanized nails (for added strength)
- A wooden stake or short 2×2 piece for the garden mount (optional)
- Small carving knife or chisel for detail (optional)
- Outdoor paint or clear sealer, natural stains, or beeswax finish (optional; substitute-friendly)
- Gloves and safety glasses (simple safety for calm hands)
- A soft cloth and a small brush for dusting and finishing
If you want to try another textured wooden craft beforehand, the second heart craft guide may give you small techniques to adapt for shaping and distressing wood second heart craft guide.
Step-by-Step Directions
Choose and prepare your wood. Take a moment to look through your scraps. Choose pieces with interesting grain and stable boards without deep rot. Lay them in sunlight and feel their weight.
Draw a simple owl silhouette. Sketch a rounded body and a small head on one board. Keep lines soft and spare. Think of the owl as a friendly shape, not a perfect form.
Cut the body and head pieces. Use a hand saw or jigsaw with a calm, steady pace. Let the tool lead. Stop and rest your hands if you need to. A slow cut keeps edges cleaner and safer.
Sand the rough edges. Start with 80 grit on rough spots, then move to 120 for smoothing, and finish with 220 for a gentle touch. Sand with the grain and notice the texture change under your fingertips.
Select contrast pieces for eyes and wing detail. Find smaller scrap pieces for round eyes and layered wings. The small pieces add personality. Keep them slightly raised for shadow and touch.
Carve or shape small details. Use a small carving knife to add feather marks or to round the edges of the eyes. Work slowly. Each small cut adds character and keeps the making mindful.
Dry-fit the pieces. Arrange the eyes, wings, and any beak without glue first. Adjust spacing until the owl looks balanced. The visual rhythm guides the final placement.
Glue and secure the layers. Apply outdoor wood glue in modest amounts. Press pieces together and hold briefly. For extra hold, add a small screw or nail through hidden areas. Wipe away any squeeze-out with a damp cloth.
Attach the stake or base. Center the stake under the body and secure with screws. If you prefer, glue and clamp until the glue sets. Feel the balance in your hands before committing.
Finish the surface. Choose a clear sealer to protect grain and keep that rustic look, or apply a light wash of paint to create a softened color. If you like natural finishes, rub a little beeswax into the wood and buff slowly with a cloth.
Let it rest and cure. Place the owl somewhere quiet while glue and finishes set. Use this time for a warm drink or a short walk. The slow wait is part of the making.
Install and listen to the garden. Push the stake into soil or anchor the base on a stone. Step back and take a breath. Notice how the owl feels among leaves and light.
Bringing Rustic Wood Owl Made from Scrap Wood Garden Art Into Your Space
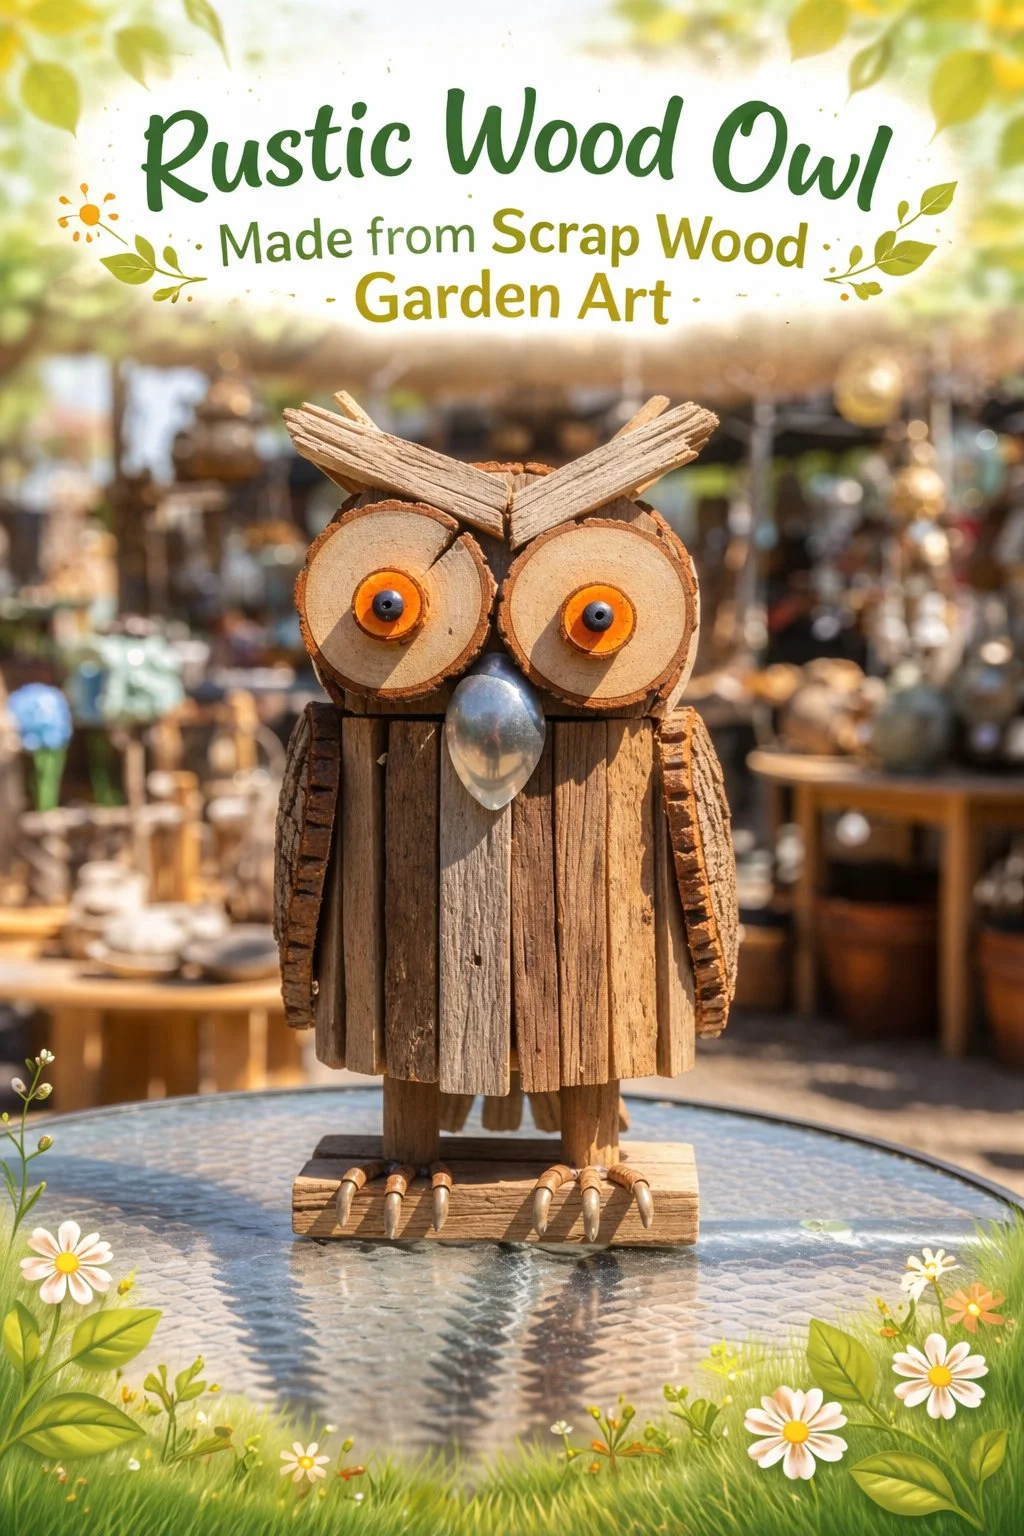
A small wooden owl fits gently into many corners. Place it by a rosebush where the textured wood complements soft petals. Tuck it between ferns so its weathered face peeks through green fronds. Mount it along a pathway where your hands brush its surface on quiet walks.
In the morning, dew will settle into grain lines and make the wood look darker and deeper. Later, sun will highlight splinters and knots. The owl changes as the day moves, and those changes invite you to come back and notice them.
I often set a few owls in an herb bed to mark thyme or lavender. They warm under the sun and smell faintly of earth. If you like small seasonal touches, dab a little moss on one shoulder in autumn or weave a thin ribbon around its neck in spring. For a different experiment in gentle garden decorations, try the baking soda crystal heart experiment for a complementary indoor display that contrasts wood with glassy texture baking soda crystal heart experiment.
Making This DIY Last
Keep your owl lovely for seasons to come with gentle care. If you leave it outside, choose a clear outdoor sealer and reapply each year. If you bring it indoors for winter, store it in a dry place away from extreme temperature swings.
Check the stake and screws periodically. Tighten or replace any hardware that loosens after wind or rain. If a small crack appears, fill it with a simple wood filler and sand lightly, then reseal. Treat the wood with beeswax every few months to keep the grain soft and nourished.
If you prefer the natural weathered look, you can let the wood age gracefully. Sun and rain will mellow tones and highlight grain. Embrace changes as part of the piece’s story.
What I’ve Learned While Making This
I learned that the smallest choice shapes the whole mood of a piece. A slight tilt in the head gives the owl curiosity. A darker eye set brings a sleepy calm. I learned to trust rougher boards. Their imperfections tell quiet stories and reduce the pressure to make something perfect.
I learned to breathe through each step. If a cut went oddly, I turned it into a quirky feather. If a board split, I leaned into that fracture and filled it with a tiny inlay. These small adaptations taught me to accept surprises as invitations.
I also learned to keep my tools simple. A steady hand saw and good sandpaper do more than expensive tools for this kind of making. You need comfort and confidence, not complexity.
Gentle safety practices matter. Wear glasses for cutting, clear wood dust from your space, and keep a small first aid kit nearby. These little precautions let you work without worry and keep the experience calm and steady.
Gentle Tips & Variations
Invite color with a thin whitewash. Mix a little paint with water and brush lightly to keep grain visible. This softens tones and adds a cottage feel.
Add found objects for personality. Small buttons, a bit of copper wire, or a little scrap of leather can become eyes or beak accents. Let them age naturally in the garden.
Make a family of owls. Vary heights and widths, then group them together near a porch. A small cluster creates conversation and a sense of home.
Create a weatherproof base. Coat the lower inch of the stake with spar urethane for extra protection where soil meets wood. This small step helps the owl last longer in damp ground.
Use contrast grain for depth. Choose lighter wood for the face and darker wood for the wings to create shadow and texture without paint.
These are gentle invitations. Try one, then rest and see how it feels. Each small change becomes a personal choice rather than a rule.
FAQs About Rustic Wood Owl Made from Scrap Wood Garden Art
Can I use any scrap wood for this project?
You can use many types of scrap wood, but choose boards that feel solid and free from deep rot. Hardwoods last longer, and pallet wood gives a nice rustic look. If a board looks crumbly, replace it. Trust your hands and senses.
Do I need power tools to make the owl?
No. A hand saw and a steady block plane or knife work well. Power tools can speed things up, but working by hand keeps the process slow and sensory. Use what feels safe and calm for you.
How do I make the owl stay outside without rotting?
Use an outdoor-rated wood glue and a clear sealer or spar urethane. Keep the stake off the wettest soil if you can, or use a small stone base to lift it slightly. Regular maintenance helps a small wood piece live longer.
Can children help with this project?
Yes, in a safe way. Let children sand edges, arrange pieces, or rub on beeswax. Keep cutting and stronger tool steps to adults and supervise closely. The sensory parts, like sanding and finishing, become meaningful tasks for little hands.
What if my owl cracks after a season?
Small cracks add character. For larger cracks, use an outdoor wood filler and sand smooth, then reseal. If the crack destabilizes the stake, replace the stake and refasten the body.
A Gentle Note Before You Go
Place your finished owl where it invites a pause. Watch how morning light fills grain lines with gold and how evening shadows deepen its features. When you touch the wood, remember the small decisions you made. Each notch and sanded edge carries your presence.
Savor the slow rhythm of making. Return to this craft when you need a calm moment. The owl will stand quietly and hold the memory of your hands.
Conclusion
If you ever want to see other artists’ reclaimed wood owls for visual inspiration, consider browsing this selection on Etsy Reclaimed Wood Owl – Etsy to compare styles and finishes. For a detailed step-by-step look at a similar scrap wood garden stake idea, this post offers clear photos and variations to spark gentle creativity Scrap Wood Owl Garden Stakes – Homeroad.
PrintRustic Wood Owl Made from Scrap Wood Garden Art
Create a charming rustic wood owl for your garden using scrap wood and a gentle approach to crafting. This project invites you to slow down and enjoy the process.
- Prep Time: 30 minutes
- Cook Time: 0 minutes
- Total Time: 30 minutes
- Yield: 1 rustic wood owl
- Category: Craft
- Method: Handcrafting
- Cuisine: N/A
- Diet: N/A
Ingredients
- Scrap wood boards, varied widths and thicknesses
- Pencil and ruler or small template for the owl shape
- Hand saw or jigsaw
- Sandpaper in 80, 120, and 220 grits
- Wood glue (outdoor rated)
- Small outdoor screws or galvanized nails
- A wooden stake or short 2×2 piece for the garden mount (optional)
- Small carving knife or chisel (optional)
- Outdoor paint or clear sealer, natural stains, or beeswax finish (optional)
- Gloves and safety glasses
- A soft cloth and a small brush for dusting and finishing
Instructions
- Choose and prepare your wood.
- Draw a simple owl silhouette.
- Cut the body and head pieces.
- Sand the rough edges.
- Select contrast pieces for eyes and wing detail.
- Carve or shape small details.
- Dry-fit the pieces.
- Glue and secure the layers.
- Attach the stake or base.
- Finish the surface.
- Let it rest and cure.
- Install and listen to the garden.
Notes
Invite children to help with safe tasks like sanding and arranging pieces. Regular maintenance will keep the owl looking great for years.