

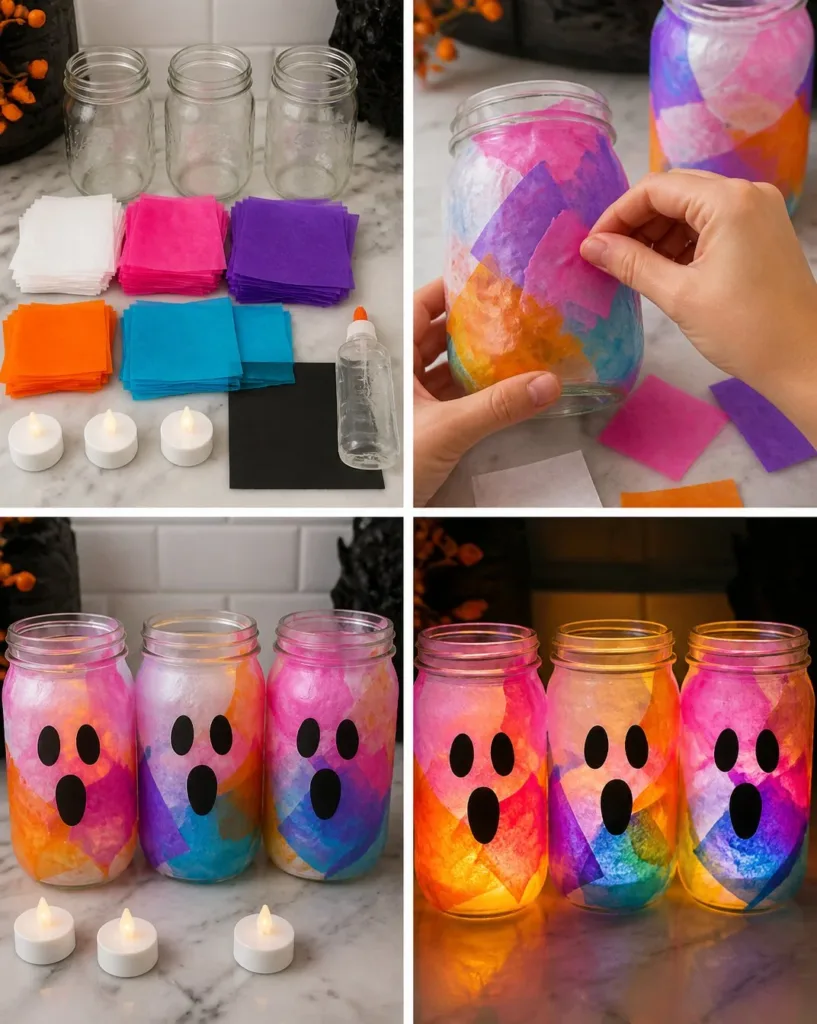
Creating Rainbow Glow Ghost Mason Jar Lanterns can be a gentle journey through light and color. Imagine the soft glow as the evening sets in, casting warm reflections that dance around your space. Each lantern feels like carrying a small piece of magic, a blend of color and light that brings comfort and calm. As you embark on this project, the process is as soothing as the final result a lovely reminder of cozy evenings spent side by side, crafting in peace. You may also find Diy Cotton Candy Glow Jars useful.
The Quiet Joy of Making Rainbow Glow Ghost Mason Jar Lanterns
Making these lanterns is more than just assembling materials; it’s a way to slow down and connect with your creative side. The rhythmic actions of pouring, swirling, and layering can be meditative. Working with vibrant colors allows you to engage your senses, creating a visual feast that brings cheer to your heart. This project serves as a delightful invitation to focus your attention, fostering a sense of calm that wraps around you warmly. You may also find Diy Rainbow Density Jar useful.
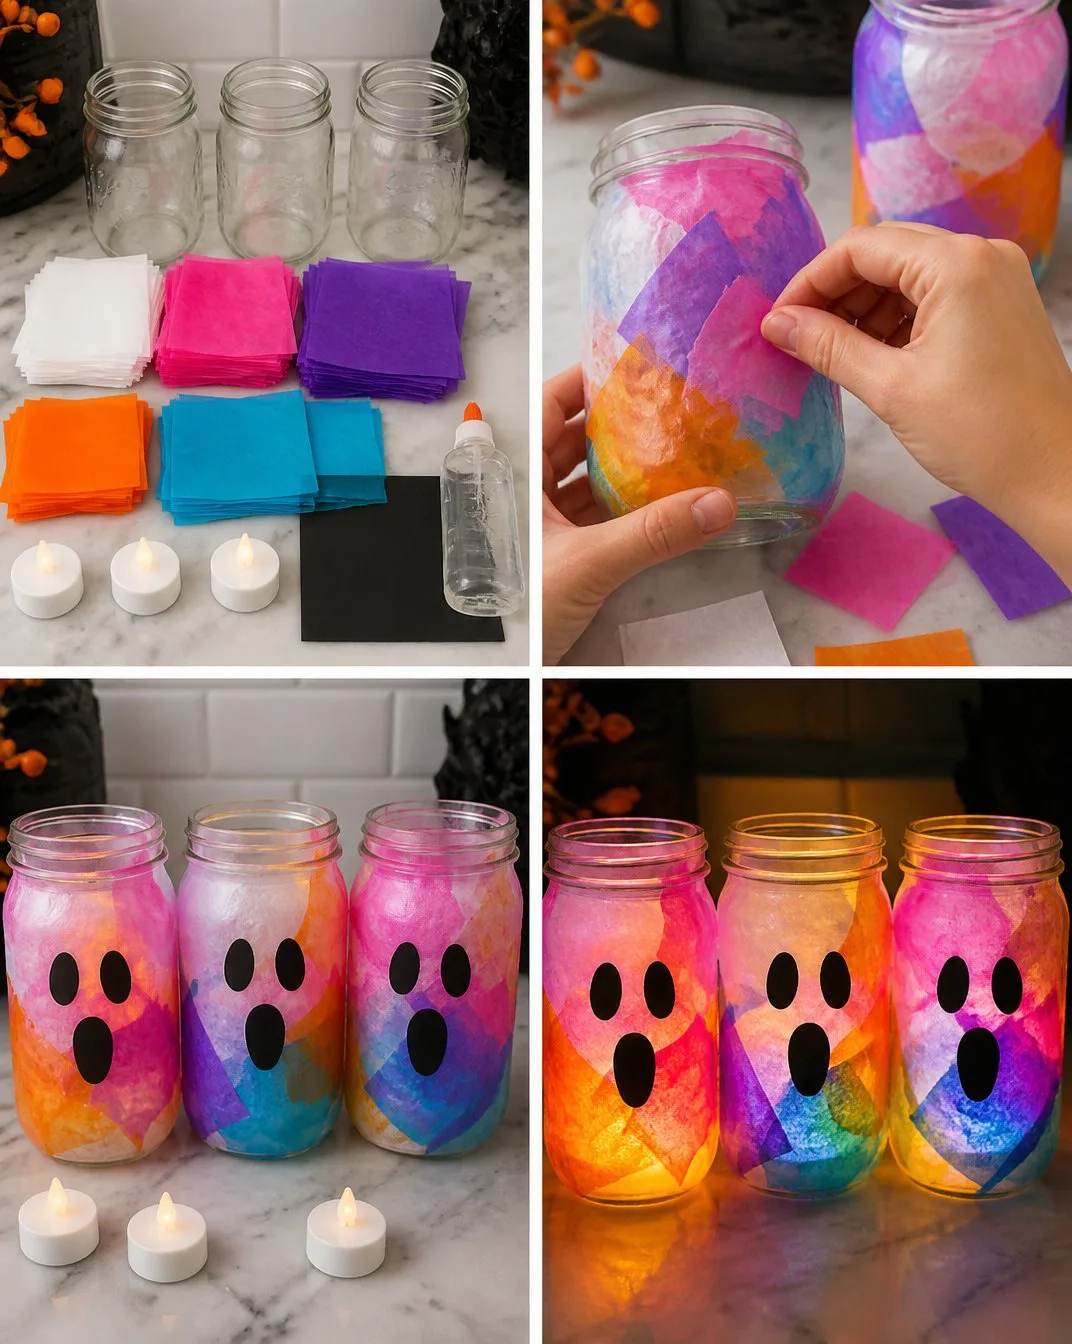
A Gentle Look at the Process
As you prepare to create these Rainbow Glow Ghost Mason Jar Lanterns, imagine the texture of the materials and the subtle sounds of your actions. The smooth glass of the jar, the gentle rustle of colorful tissue paper, and the soft hum of glue create a gentle backdrop for your making. Each step invites you to be present, encouraging mindful movement as you bring your vision to life. You may also find Fairy Glow Jars useful.
Materials You’ll Need
- Clear glass mason jars
- Tissue paper in various colors (red, orange, yellow, green, blue, indigo, violet)
- Mod Podge or a similar crafting adhesive
- Paintbrush (for applying the glue)
- LED tealight candles (for safe illumination)
- Scissors
- Optional: black marker or paint for ghostly faces
Don’t worry if you can’t find a specific color; substitute with whatever you have on hand. The joy is in the process of creating, not in perfection. You may also find Glow In The Dark Rain Cloud In A Jar useful.
Step-by-Step Directions
Prepare Your Workspace: Clear a flat surface and gather your materials. This creates a calming space to enjoy your crafting.
Cut the Tissue Paper: Snip the tissue paper into small squares or shapes. This tactile step can be surprisingly enjoyable, and the colors will soon come alive.
Apply Mod Podge: With your paintbrush, spread a thin layer of Mod Podge on the outside of the mason jar. Apply it softly, as the colors will appear more vibrant.
Layer the Colors: Begin placing your tissue paper pieces onto the jar where you applied the glue. Overlap them slightly to create a beautiful, colorful effect.
Seal the Tissue Paper: Once you are happy with the design, brush another layer of Mod Podge over the top of the tissue paper. This will help it adhere and stay vibrant.
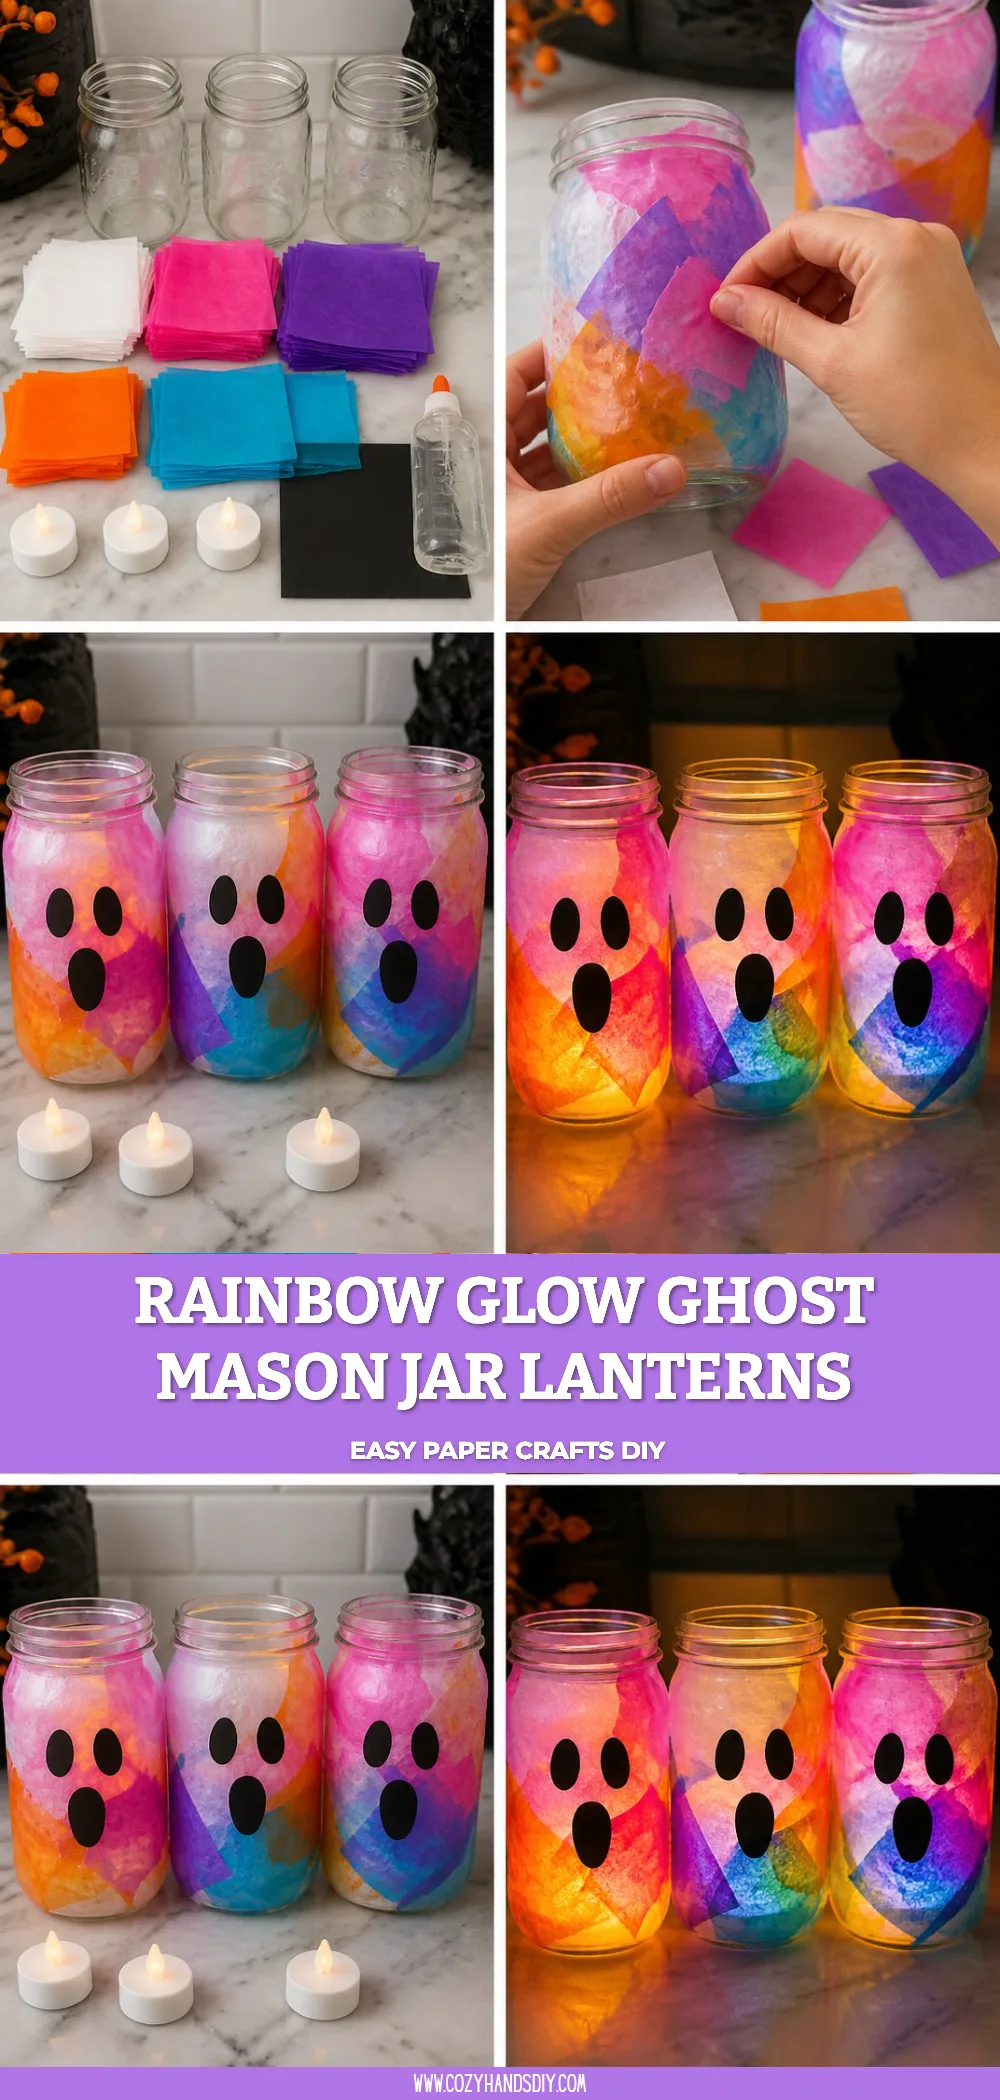
Add a Face (Optional): If you’d like to turn your lanterns into spooky glowing ghosts, draw simple faces on with a black marker or paint after the Mod Podge dries.
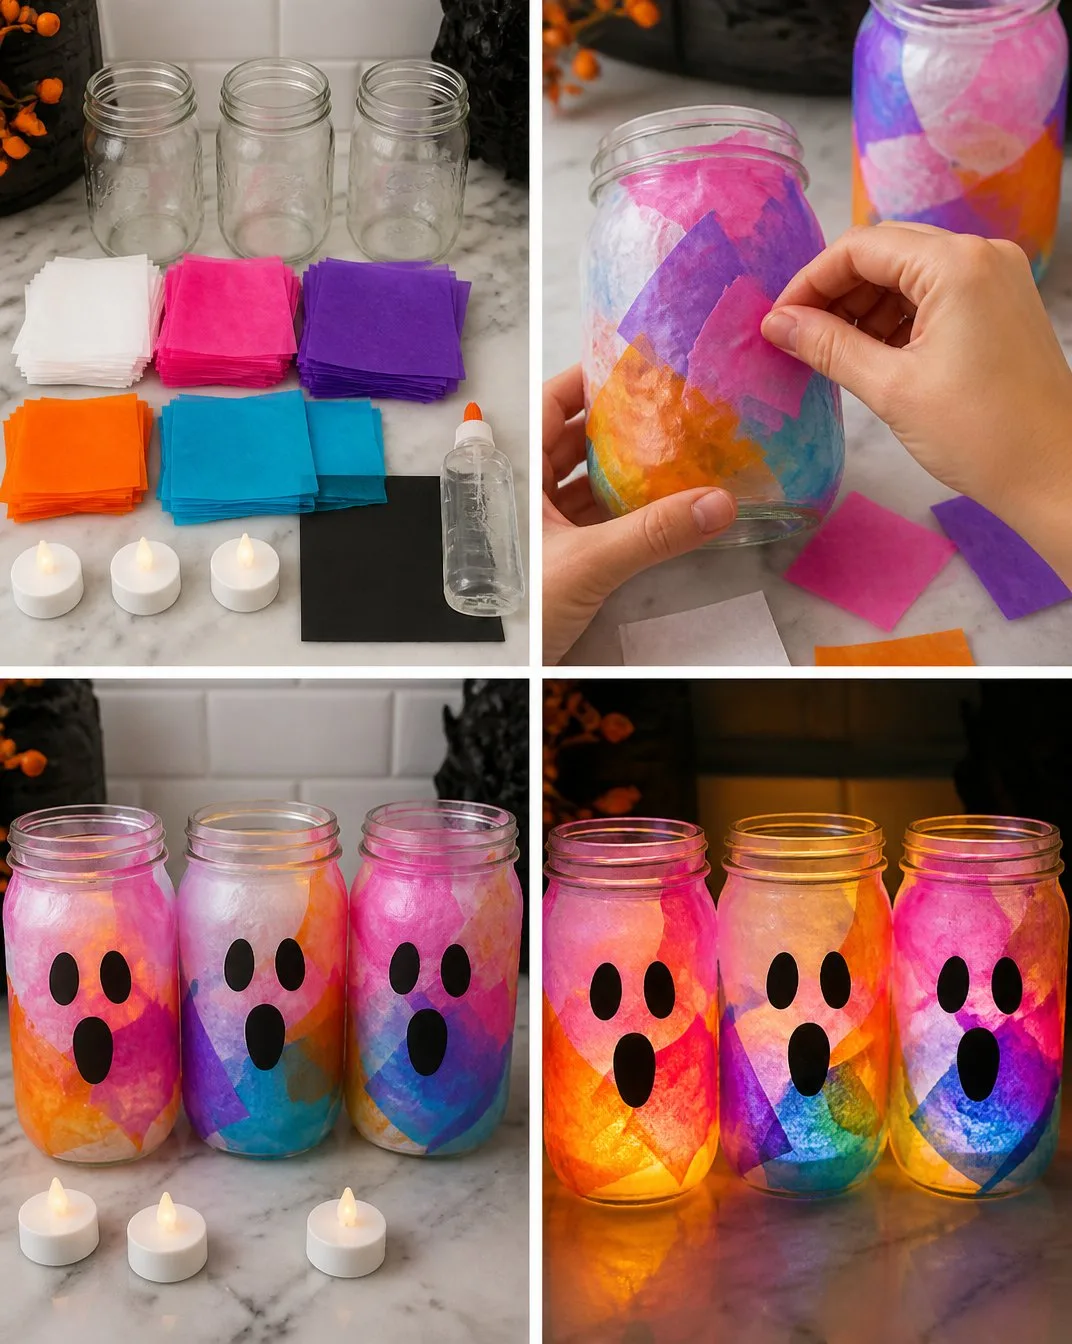
Insert the LED Tealight: Once everything is completely dry, place an LED tealight inside the jar. The light will shine through the colors, bringing your lantern to life.
Enjoy Your Lanterns: Display your Rainbow Glow Ghost Mason Jar Lanterns around your home. As the night falls, watch how they illuminate the space with a gentle, comforting glow.
Using Rainbow Glow Ghost Mason Jar Lanterns in Everyday Life
These lanterns can brighten up any part of your home. Place them on a windowsill to catch the soft glow of the dawn or let them light up your evenings outdoors. They create a wonderful ambiance for gatherings with friends or serve as a comforting reminder of your creative moments. Incorporating these into your routines invites light, color, and a touch of whimsy into daily life.
Caring for Your Finished DIY
To ensure your lanterns last, store them in a cool, dry place when not in use. If you need to clean them, simply wipe with a soft cloth and some water avoiding any harsh chemicals that could damage the finish. If your lanterns have spent time outdoors, check for any wear and repair with a little more Mod Podge as needed. Reuse them year after year, creating fresh memories with each crafting session.
Gentle Tips & Variations
- Experiment by using different shapes or patterns for your tissue paper to create unique designs that reflect your style.
- For a more natural look, try using biodegradable materials like leaves or dried flowers instead of tissue paper.
- Create a themed set for different celebrations throughout the year like autumnal colors for fall or pastels for spring.
- Engage kids in the process by letting them help design their lanterns; it makes for a joyful family activity.
FAQs About Rainbow Glow Ghost Mason Jar Lanterns
Are these lanterns safe to use with real candles?
It is best to use LED tealights since they provide illumination without the risk of fire or heat damaging your materials.
How long do the lanterns last?
With proper care, your lanterns can last for multiple seasons, maintaining their charm and vibrancy.
Can I use other types of jars?
Absolutely! Any clear glass jar will work, allowing for creativity in size and shape.
Conclusion
Creating Rainbow Glow Ghost Mason Jar Lanterns is a delightful way to engage with your senses and spark creativity. While you immerse yourself in this project, consider exploring other inspiration, like the handmade crafts from V&A or enjoy the enchanting world of art with a Northern Lights art lesson.
Take your time to enjoy the process, allowing the gentle rhythm of making to wash over you. Each lantern becomes not just a decoration, but a cherished expression of your creative spirit.
PrintRainbow Glow Ghost Mason Jar Lanterns
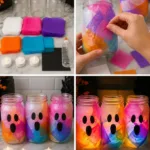
Create enchanting Rainbow Glow Ghost Mason Jar Lanterns that illuminate your space with vibrant colors and a warm glow, perfect for cozy evenings.
- Prep Time: 20 minutes
- Cook Time: N/A
- Total Time: 20 minutes
- Yield: 1 lantern
- Category: Craft
- Method: Crafting
- Cuisine: N/A
- Diet: N/A
Ingredients
- Clear glass mason jars
- Tissue paper in various colors (red, orange, yellow, green, blue, indigo, violet)
- Mod Podge or similar crafting adhesive
- Paintbrush
- LED tealight candles
- Scissors
- Optional: black marker or paint for ghostly faces
Instructions
- Prepare your workspace by clearing a flat surface and gathering your materials.
- Cut the tissue paper into small squares or shapes.
- Apply a thin layer of Mod Podge on the outside of the mason jar.
- Layer the tissue paper pieces onto the jar where you applied the glue.
- Seal the tissue paper with another layer of Mod Podge.
- Add simple faces with a black marker or paint if desired.
- Insert the LED tealight inside the jar once everything is dry.
- Enjoy your lanterns by displaying them around your home.
Notes
Store lanterns in a cool, dry place when not in use. Clean with a soft cloth and water as needed.
1 thought on “Rainbow Glow Ghost Mason Jar Lanterns”