

A cool sliver of light moves across a small glass bowl as it sits on my kitchen table. My fingers linger on the smooth rim while I breathe in the faint, clean scent of warm water. I set an eggshell half in the bowl and feel the roughness of its inner curves, the chalky sound it makes when I tap it gently. This quiet moment, this simple pairing of shell and crystal, is the start of my Crystal Egg Craft.
The Quiet Joy of Making Crystal Egg Craft

This project asks you to slow down and attend to small textures and subtle changes. Watching crystals form feels like listening to a soft, unseen rhythm. Each tiny growth flashes light differently, and each egg catches that light in its own way. When you make Crystal Egg Craft, you move deliberately, stirring slowly, placing eggs with care, and waiting with calm curiosity.
I have found these moments grounding. The initial preparation carries a warm, domestic comfort. The waiting period becomes a quiet ritual where time stretches gently. If you have followed our exploration of eggshell geodes, you will notice the familiar hush of coating, soaking, and gradual reveal. If you want to revisit a longer geode technique later, our tutorial on crystal eggshell geodes describes a similar slow-unveiling process you might enjoy.
Why this craft feels so soothing goes beyond the finished object. The textures of shells, the fine grain of crystals, and the soft clinking of spoons against ceramic ask you to be present. You work with humble materials and a simple chemical process, and the result rewards patience with something unexpectedly delicate and beautiful.
A Gentle Look at the Process
Before you gather supplies, imagine the movements. You will warm water until it steams slightly, stir in a mineral until it disappears, and then hold the shell halves as you fill them. You will listen for the small settling sounds as crystals begin to form. Over the next day, you will check them like tending a small plant, noticing where the crystals grow thicker, where they sparkle more.
The process uses dissolving and cooling. A hot, saturated solution carries more mineral than cool water will hold. As the mixture cools, crystals come out of the solution and attach to the shell surface. The porous inner texture of eggshells gives crystals a gentle place to latch. If you like the idea of combining shell texture with delicate growth, you can compare this to our earlier guide on crystal eggshells, which explores how shell surfaces invite mineral formations.
Movement stays small and deliberate here. You measure with tea spoons or cups, stir in the same direction a few times, and then pause. The visual rhythm grows over hours, and the soundscape narrows to household hums and the occasional drizzle of water. That silence is part of the practice.
Materials You’ll Need
- Clean eggshell halves, washed and dried
- Borax powder or alternative crystal-forming salt such as alum or Epsom salt (borax is common; alternatives are listed below)
- Hot water, nearly boiling but handled with care (use adult supervision if children help)
- Small glass or ceramic bowls to hold eggs (easy to find)
- A spoon for stirring (metal or heatproof)
- Food coloring or liquid watercolors for subtle color if you want (optional)
- Tweezers or a soft pair of tongs for moving eggs gently (optional)
- Thin wire or small wooden skewers to suspend crystals inside deep bowls (optional)
- Gloves and eye protection if you prefer for handling hot or strong solutions (recommended for safety)
Notes: I like borax for its consistent crystal shape and ease of dissolving in hot water. Alum produces very sparkly crystals too and feels gentler when you handle leftovers. If you plan to make heart-shaped versions later, our cozy tutorial on the crystal heart craft shows other ways to shape and color small crystal projects.
Step-by-Step Directions
Prepare your eggshells. Gently crack eggs near the top and separate halves with care. Rinse and let them dry on a soft towel. The inner surface should feel chalky and dry before you begin.
Handle shells with cushioning between your fingers and a towel to avoid accidental breaks.Warm water until steam rises, but do not leave it boiling. Pour measured hot water into a heatproof bowl.
The warmth helps dissolve the mineral thoroughly. Hold the bowl steady on a heatproof surface.Measure borax or your chosen mineral. For a basic solution, use about three tablespoons of borax per cup of hot water.
Stir until the powder fully dissolves. The solution should look clear and slightly syrupy.Add a drop or two of food coloring if you want tinted crystals. Stir gently to distribute color.
Use muted tones for a calm, natural look. Bright colors work too if you prefer a playful feel.Arrange your eggshells in small containers that hold them steady. You can nestle them in salt, rice, or soft fabric to keep them upright.
Stability reduces spills and keeps crystals forming where you want them to.Carefully pour the warm solution into the eggshells, filling them halfway or as you like.
Pour slowly and listen for the tiny settling sounds as solution meets shell. Move with a steady hand.If you want suspended crystals, tie a short length of thin wire across the shell and dip the wire into the solution.
Crystals will begin to form along the wire as well as the shell interior.Set the filled shells on a tray to catch any drips and place them in a quiet, undisturbed spot.
Cover them lightly with a paper towel if dust or pets might reach them. Keep the area still.Wait patiently. Crystals often form along the inner edges first and then grow inward over 12 to 24 hours.
Check gently after a few hours to admire the first sparkles. A slow reveal feels mindful and sweet.When the crystals look as you wish, remove the shells by lifting them carefully and letting excess solution drip back into the tray.
Use tweezers or a soft grip to protect the delicate formations.Dry the finished eggs in a warm, dry place. Let them sit until all moisture evaporates and the crystals harden.
Handle them minimally while they set to keep edges crisp and shimmering.If you plan to seal the crystals, apply a light clear-drying varnish or spray from a distance.
Test a small corner first. Sealing will reduce shedding and make the piece more durable.Clean your work area with warm water and dispose of leftover solution responsibly.
Follow local guidelines for disposal. Wipe surfaces with a damp cloth to remove residue.Store finished eggs gently in a box lined with soft tissue or cotton to protect fragile growth.
Label the box if you keep several designs to preserve their memory and care tips.
Enjoying the Finished Piece


When you finish a Crystal Egg Craft, you will notice how light plays across tiny facets. Place an egg on a windowsill where morning light can pass through crystal ridges. The smallest prisms scatter light into gentle glints that feel like quiet celebration.
I like to display a pair of eggs in a shallow bowl filled with moss or dried herbs. The contrast of soft, matte plant textures and hard, sparkly crystals looks satisfying. Another favorite is suspending a shell from a small stand so it moves with air currents and catches light in motion.
These eggs also make thoughtful, tactile gifts. Wrapped in simple cloth, they carry a meditative energy. When someone holds one, they often comment on how cool it feels and how the inner surface seems to tell a story about slow, careful making.
If you enjoy translating this motif into other shapes, our collection of crystal hearts offers a gentle way to adapt color and form into small keepsakes that live well on desks or bedside tables.
Making This DIY Last
Store finished crystal eggs where they will not soak in humidity. High moisture can soften some crystal types over long periods. Use fabric-lined boxes or glass domes to protect against dust and accidental knocks.
If crystals begin to dull, keep them away from water and humidity. For pieces you handle, consider a thin sealer to reduce shedding. Test any sealer on a small, unrelated crystal first to ensure it does not cloud the surface.
Reusing your shells works well for a second life. You can dissolve existing crystals back into a fresh solution if you gently warm and soak them, or carefully scrape and clean to start anew. I often reuse a few shells if I want a similar shape and feel for a different color experiment.
Label the box with a small note about the mineral used and the date made. This helps if you wish to revisit a formula or share the piece with someone else who may care for it.
When storing uncured solutions or leftover minerals, keep them in tightly closed containers out of reach of pets and children. Always follow safety recommendations on the product labels.
Gentle Tips & Variations
Try different minerals as an invitation to subtle change. Alum gives fine, sparkly crystals. Epsom salt offers softer formations. Borax produces more geometric shapes. Each one feels different in your hand.
I learned through small experiments that alum crystals tend to cling in smaller clusters, which I use for delicate, lacy effects.Add texture by dusting the inner shell lightly with fine sand or a tiny bit of glue before pouring your solution. This creates interesting nucleation points for crystals to gather.
Work slowly and test on a single shell first to see how the texture changes growth.Play with color in muted layers. Two soft shades layered across different shells create a calm palette that reads like a small collection rather than a single bright piece.
I often blend a pale blue with a soft gray for a coastal feel that feels soothing on a ledge.Make tiny stands or nests from natural materials. Warm wood slices, dried moss, and felt pads create grounding bases that keep the crystal eggs safe and visually cozy.
This small pairing of materials makes the craft feel like a finished object rather than a single experiment.If you want more symbolic forms, consider trying the heart templates and approaches shown in our crystal heart craft guide for inspiration.
Small variations like changing solution concentration or adding floating beads can change how the crystal landscape reads.
FAQs About Crystal Egg Craft
Q: Are the crystals safe to touch?
A: Most crystals feel hard and inert once fully dry. However, avoid ingestion and keep them away from small children and pets. If you used borax, avoid prolonged skin contact with any leftover solution and wash hands after handling.
Q: Can children do this project?
A: Children enjoy the sensory parts: rinsing shells, stirring, and watching growth. Supervise heating water and solution mixing. Let kids handle cooled, sealed final pieces for quiet play.
Q: Why did my crystals not form well?
A: Crystals form when a solution becomes supersaturated and then cools. If your solution did not have enough mineral, crystals may remain sparse. Heat and dissolve more mineral in the water, stir until clear, and try again. Patience matters too. Some growth appears only after a full day.
Q: How do I clean up leftover solution?
A: Dispose of small amounts down the drain with plenty of water if local guidelines allow. For larger quantities or if you used strong chemicals, follow product guidance. Wipe surfaces promptly to avoid residue and wear gloves if the product safety label recommends them.
Q: Can I preserve the crystals long term?
A: Yes. A light spray sealant can stabilize fragile edges and reduce shedding. Avoid sprays that fog or cloud crystal faces. Store pieces in low-humidity environments and handle them gently.
A Quiet Closing Thought
When you sit with this project, notice the small comforts: the heat of the bowl, the muffled clink of a spoon, the slow appearance of little points of light. This craft offers a gentle rhythm, a way to anchor minutes into a soft ritual. Let each egg become a memory of careful making, not just a pretty object on a shelf. Pause to enjoy the quiet when you check on the crystals, and let the act of tending them be its own reward.
Conclusion
If you would like a child-friendly approach with colorful variations and step-by-step photos, try this How To Make a Crystal Egg Easter Craft tutorial for playful ideas that pair well with family time.
For additional inspiration and a different take on crystal egg techniques, I recommend this clear and helpful Crystal Eggs guide.
PrintCrystal Egg Craft

A soothing DIY project that involves creating beautiful crystal eggs using simple materials and a gentle process of crystallization.
- Prep Time: 15 minutes
- Cook Time: 15 minutes
- Total Time: 30 minutes
- Yield: 1 craft project
- Category: Craft
- Method: Crafting
- Cuisine: N/A
- Diet: N/A
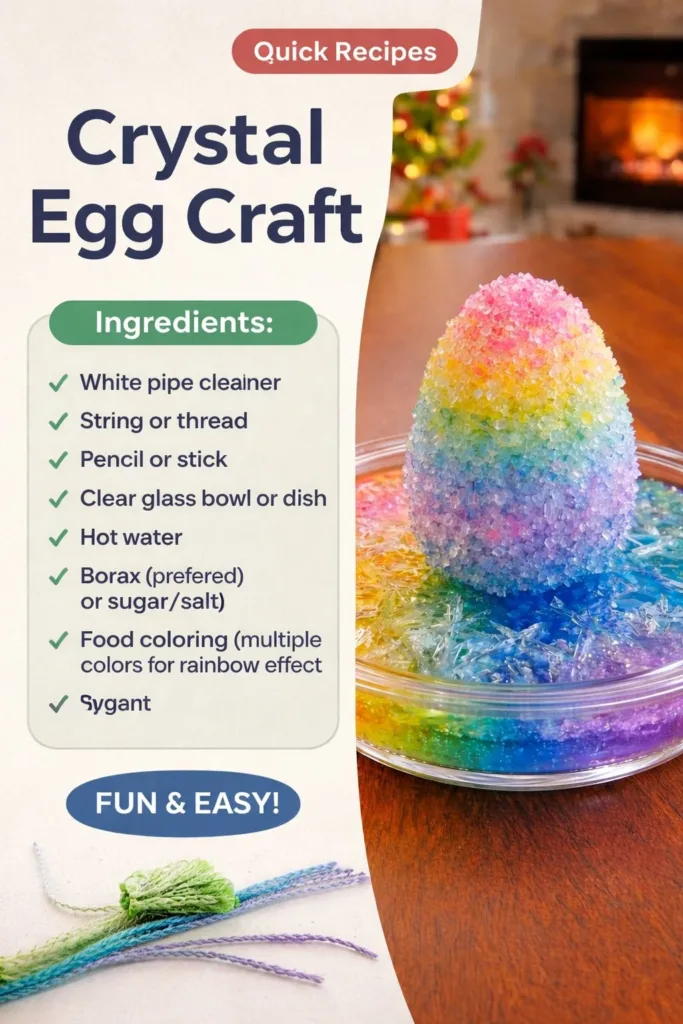
Ingredients
- Clean eggshell halves, washed and dried
- Borax powder or alternative crystal-forming salt (alum or Epsom salt)
- Hot water, nearly boiling
- Small glass or ceramic bowls
- A spoon for stirring
- Food coloring or liquid watercolors (optional)
- Tweezers or a soft pair of tongs (optional)
- Thin wire or small wooden skewers (optional)
- Gloves and eye protection (recommended)
Instructions
- Prepare your eggshells by gently cracking and rinsing them.
- Warm water until steam rises, pour it into a heatproof bowl.
- Measure borax or chosen mineral: use about three tablespoons per cup of hot water.
- Add a drop or two of food coloring if desired, then stir gently.
- Arrange eggshells in small containers to keep them upright.
- Carefully pour the warm solution into the eggshells.
- If desired, tie a wire across the shell for suspended crystals.
- Set the filled shells on a tray in a quiet place to prevent disturbance.
- Wait patiently for crystals to form over 12 to 24 hours.
- Remove the shells carefully when crystals reach the desired look.
- Dry the finished eggs in a warm, dry place.
- If desired, apply a light clear-drying varnish after drying.
- Clean your work area with warm water and dispose of leftovers responsibly.
- Store finished eggs gently in a box lined with soft tissue.
Notes
Borax is popular for its consistent crystal shape. Alternatives like alum produce equally beautiful crystals. Handle with care, especially during the dissolving process.