

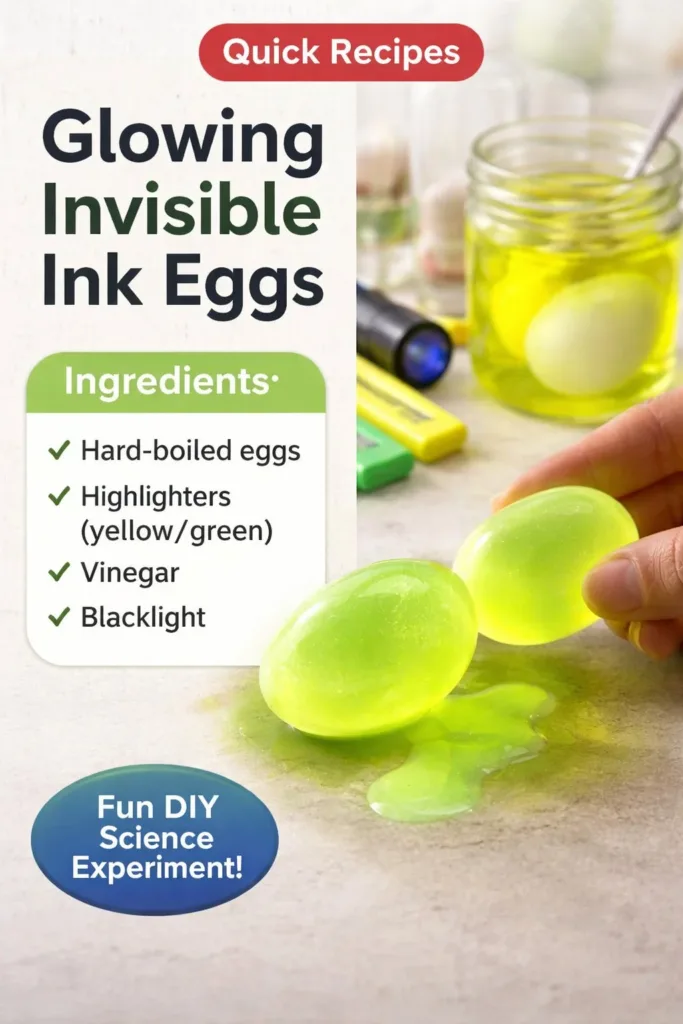
A soft pool of light rests on my palm as I hold an eggshell, cool and papery, while a faint blue glow waits beneath a secret writing. The small moment feels private and warm. I breathe with the slow rhythm of the making, the tonic water aroma bright and slightly citrus, the paper-thin shell humming under my fingertips as I trace invisible letters that will awake under a gentle black light. These are Glowing Invisible Ink Eggs, a quiet craft that invites focus, a little science, and the pleasure of hidden things revealed.
Why Glowing Invisible Ink Eggs Feels Comforting to Create
This project slows you with soft textures and small, careful movements. You sit with something fragile and familiar, and you use liquids that feel cool and smooth on the brush. The reveal comes in a hush, when the light finds the ink and the eggs seem to hold a private constellation. Making Glowing Invisible Ink Eggs helps people breathe through the small attentions of crafting. The steady rhythm of poking holes, rinsing shells, and painting invisible messages creates a sensory loop that calms the mind. The glow itself rewards patience. It rewards a quiet, gentle approach.
Many crafters tell me they return to this piece when they need a calm pause. The process asks hardly anything intensive from hands and asks a lot of presence. You can make these eggs with children, with friends, or alone beside a cup of tea. If you want to see another playful egg project that explores glow and texture in a different way, take a look at our post about glowing Easter eggs, which pairs simple dyeing with soft, luminous finishes.
A Gentle Look at the Process
Before you gather anything, imagine the movements you will use. You will blow out or empty eggs with small, steady taps and a careful breath. You will wash and let shells dry until they feel dust-dry and fragile in your fingers. You will dip a brush or cotton swab into a luminous solution and write a small mark. The surface will look ordinary while it dries. Then you will turn on a black light and watch the glow appear.
The making flows from slow to surprising. You work with tiny tools and quiet sounds. The tapping of a pin, the soft clink of eggshells in a bowl, the whisper of paper towel against shell—each sound keeps your attention in the room. I like to place the shells on a soft towel so they sit steady while I write. The tactile and visual rhythms help me stay present. If you want a crystalline variation that mixes stones with eggshell texture, try the lovely shapes shown in our guide to pink crystal eggshell geodes for inspiration.
Materials You’ll Need
- Empty eggshells, blown out or carefully emptied (egg shells add fragile beauty; follow safe cleaning steps below).
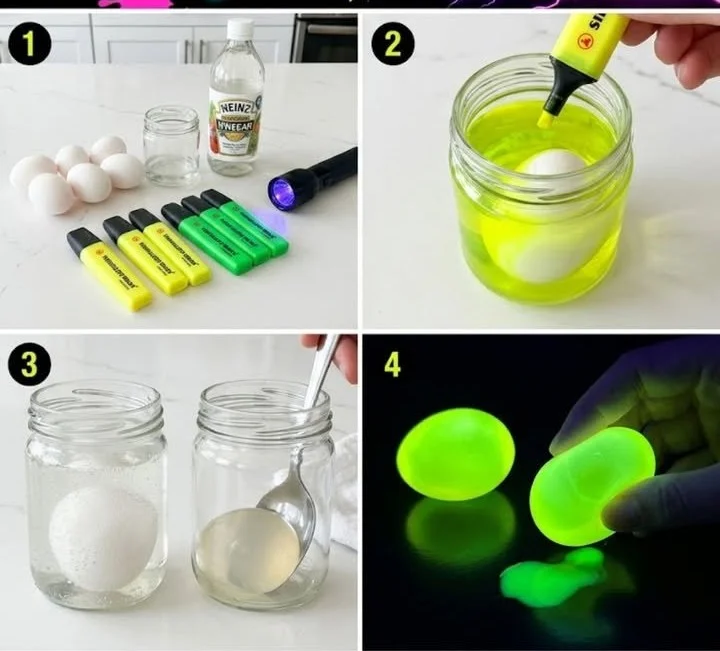
- Tonic water with quinine, or a diluted highlighter ink solution (tonic water glows blue under UV; highlighter ink glows bright yellow-green).
- A small black light or UV flashlight (small and inexpensive; optional battery-powered).
- Cotton swabs, fine paintbrushes, and toothpicks for precise writing.
- Paper towels and a shallow tray to keep your workspace tidy.
- A small needle or pin and a skewer for emptying eggshells safely.
- Warm soapy water for cleaning shells.
- Clear acrylic spray or diluted PVA glue (optional) to strengthen shells for display.
- Gloves and an apron if you prefer to avoid staining or contact with ink (optional).
- Small padded box or egg carton for storage.
A quick note on choices: tonic water offers a soft blue glow and feels safe to handle. Highlighter ink glows intensely but can stain and may contain dyes that you do not want on the skin. I use highlighter ink diluted with water when I want brighter colors, and I wear gloves. If you prefer a natural approach, test riboflavin (vitamin B2) solutions in small amounts, but tonic water gives reliable, gentle fluorescence and a pleasant scent.
Step-by-Step Directions
Prepare the shells.
Gently tap a pin into the top and bottom of the egg to make two small holes.
Blow the contents out into a bowl over a sink, then rinse shells in warm soapy water and let them dry on a towel.Strengthen the shell interior.
Coat the inside with a light layer of diluted PVA glue or clear acrylic spray.
Let the coating dry fully so the shell feels slightly more stable to touch.Set up your workspace.
Lay a soft towel on a table and arrange shells so they sit steady.
Keep brushes, tonic water, and paper towels within easy reach.Mix your glowing solution.
Pour a small amount of tonic water into a dish; for highlighter ink, squeeze a marker onto a palette and dilute with a little water.
Stir gently and test a cotton swab on a scrap paper to check glow under a black light.Practice your marks.
On a scrap piece of shell or porcelain, write small shapes to practice stroke pressure.
The brighter the application, the stronger the glow will appear when lit.Write or paint invisible messages.
Dip a fine brush or cotton swab into the tonic water solution.
Paint words, dots, patterns, or tiny drawings, moving with calm, steady strokes.Let the ink dry fully.
Allow the shells to rest undisturbed until the surface feels dry to the touch.
Avoid moving them while wet to keep lines crisp.Reveal the glow.
Turn on your black light in a dim room and hold it near the shell.
Breathe slowly and watch your writing bloom into light.Seal for longevity, if desired.
Spray with a light coat of clear acrylic or brush a thin glaze of diluted PVA glue.
Let the seal dry before handling further.Arrange or store.
Place finished eggs in a padded display, a shallow bowl lined with soft fabric, or an egg carton for safe keeping.
Keep them away from direct sunlight to preserve any applied dyes.
Using Glowing Invisible Ink Eggs in Everyday Life
Glowing Invisible Ink Eggs fit gently into quiet rituals and small celebrations. You can tuck a glowing shell into a bedside tray as a calm nightlight. You can hide a message and let a loved one find the secret by bringing a small black light into their hands. You can use these eggs as table markers for a slow dinner, where each guest reveals a tiny word or wish under soft UV light.
I like to place one in a low shelf with a tiny LED black light so it glows when I enter the room at dusk. The glow does not overwhelm. It offers a tiny, private charm that feels like a pocket of hush. If you enjoy combining crystalline textures and shells, you might like bringing these glowing eggs alongside pieces from our crystal eggshell geodes post to create a layered, tactile vignette.
How to Store or Reuse Glowing Invisible Ink Eggs
Store your eggs in a padded box or egg carton to keep them from bumping into each other. Wrap each shell in soft tissue or cotton batting for extra protection. Keep the box in a cool, dry place away from direct sunlight to prevent any fading of dyes or glue.
If a shell cracks, save the pieces in a small jar for collage or mixed-media projects. You can glue fragments to cards, shadow boxes, or gift tags for a second life. If you used a removable ink like tonic water, you can rinse and reapply new designs. If you sealed the shell with acrylic, use the finished piece as a long-term keepsake.
When I store finished eggs, I write the date and a tiny note on the inside with a pencil before sealing. That small record helps me recall the morning light, the tea I had, or the person I made it with. It turns simple craft into a gentle memory practice.
Gentle Tips & Variations
- Try layering. Paint a faint base color with watercolors before applying invisible ink to create depth when the shell glows. Work in thin washes so the glow still reads through.
- Use stencils or leaf shapes. Cut tiny stencils from paper and hold them lightly against the shell to paint leaves or stars with tonic water.
- Mix mediums. Add fine glitter to the sealing coat for a soft, embedded shimmer that plays with the glow.
- Try different lights. A handheld UV flashlight gives a directed reveal, while a small UV lamp creates a soft halo. If you do not want to buy a lamp, read about creative ways others use smartphone hacks in trusted guides, and always test carefully in a safe setting.
- Make it collaborative. Invite friends or family to write one-word wishes. Place completed eggs in a shared bowl and let each person reveal a message at their own pace.
What I’ve Learned While Making This
I learned to slow my inner voice first, before I touch the shell. Rushing the emptying step often led to a broken piece and a short, frustrated moment. When I started breathing and moving slowly, my hands steadied and the process felt richer.
I learned to treat mistakes as texture. A smudged line can look like a comet when lit. I learned that tonic water gives a calm, blue glow that reads as gentle in the evening, while highlighter dyes shout brighter and ask for careful handling. I also learned to label my materials. Leftover diluted marker ink can stain cloth, so I keep it in a small capped jar and store it upright.
I keep simple safety in mind. I avoid using highlighter inks on food-contact surfaces and I do not serve food on shells that once touched diluted marker solutions. I use gloves when I want to keep skin clean, and I encourage children to work with tonic water under close supervision.
FAQs About Glowing Invisible Ink Eggs
Q. What makes the ink glow under the light?
A. Tonic water contains quinine, which absorbs ultraviolet energy and emits visible blue light. Highlighter inks contain fluorescent dyes that behave similarly, emitting vibrant colors when exposed to UV or black light. The glow results from a physical reaction of fluorescence, not from any heat.
Q. Are these materials safe around kids?
A. Tonic water is a beverage, but I do not recommend ingesting solutions you mix with other inks. Keep marker liquids away from mouths and eyes. Use supervision and gloves if you feel more comfortable. For younger children, prefer tonic water or diluted riboflavin and focus on drawing with cotton swabs rather than open marker fluids.
Q. How long does the glow last?
A. The glow appears only while UV light hits the paints. The ink does not continue to glow in normal daylight. Sealing the shell can help preserve the design from smudging, but the fluorescence needs a black light to reveal itself.
Q. Can I use raw eggs instead of emptied shells?
A. You can work with hard-boiled eggs for a short-lived table display, and they make a fine, fast variation. For a lasting keepsake, empty shells last longer and avoid spoilage. If you use real eggs for dining, avoid applying any inks to shells that will touch food.
Q. What do I do if the shell breaks while making?
A. Pause and breathe. Collect the pieces and let the sensory moment continue in a different way. Glue fragments to cards, make a small mosaic, or press them into air-dry clay to preserve the pattern. Crafting often moves through repair and transformation.
A Quiet Closing Thought
This project lives at the intersection of quiet attention and small surprise. The act of making Glowing Invisible Ink Eggs invites a slower pace, a careful hand, and the joy of a private reveal. Treat each shell like a little ceremony. Let the work take the time it asks for. When you hold a glowing message in a soft room, you will likely notice how outward noise softens and how small light can clasp a gentle sense of calm. Trust your hands. Trust the quiet rhythm of this making. Let each glow remind you that the slow, simple things hold a steady kind of wonder.
Conclusion
If you like a hands-on project that combines gentle chemistry and playful discovery, you might enjoy the science approach in KiwiCo’s Glowing Bouncy Egg project for more ideas about glowing liquids. For clever tips on making a simple black light at home, explore the write-up on glowing bubbles and the smartphone black light hack, and always test any hack safely before use.
PrintGlowing Invisible Ink Eggs
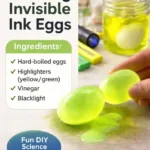
A calming craft project that combines creativity and science to create beautiful glowing invisible ink eggs.
- Prep Time: 15 minutes
- Cook Time: 0 minutes
- Total Time: 15 minutes
- Yield: 8 eggs
- Category: Craft
- Method: Crafting
- Cuisine: N/A
- Diet: N/A
Ingredients
- Empty eggshells (blown out or carefully emptied)
- Tonic water or diluted highlighter ink solution
- Small black light or UV flashlight
- Cotton swabs and fine paintbrushes
- Paper towels
- Shallow tray
- Small needle or pin
- Skewer
- Warm soapy water
- Clear acrylic spray or diluted PVA glue (optional)
- Gloves and apron (optional)
- Small padded box or egg carton for storage
Instructions
- Prepare the shells by tapping a pin into the top and bottom of the egg to make holes.
- Blow out the contents into a bowl, rinse shells, and let them dry on a towel.
- Coat the inside with diluted PVA glue or clear acrylic spray for stability and let it dry.
- Lay a soft towel on a table and arrange shells.
- Pour tonic water into a dish or dilute highlighter ink.
- Test with a cotton swab on scrap paper to check the glow.
- Practice writing small shapes to assess stroke pressure.
- Dip a fine brush or cotton swab into the glowing solution.
- Paint words, dots, or patterns on the shells with steady strokes.
- Let the ink dry fully on the shells.
- Turn on your black light in a dim room to reveal the glow.
- Seal with clear acrylic or diluted PVA glue if desired.
- Store the finished eggs in a padded display or egg carton.
Notes
Use tonic water for a gentle glow. Highlighter ink can be used but may stain. Always supervise children when crafting.