Glowing Invisible Ink Eggs
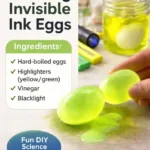
A calming craft project that combines creativity and science to create beautiful glowing invisible ink eggs.
- Prep Time: 15 minutes
- Cook Time: 0 minutes
- Total Time: 15 minutes
- Yield: 8 eggs
- Category: Craft
- Method: Crafting
- Cuisine: N/A
- Diet: N/A
Ingredients
- Empty eggshells (blown out or carefully emptied)
- Tonic water or diluted highlighter ink solution
- Small black light or UV flashlight
- Cotton swabs and fine paintbrushes
- Paper towels
- Shallow tray
- Small needle or pin
- Skewer
- Warm soapy water
- Clear acrylic spray or diluted PVA glue (optional)
- Gloves and apron (optional)
- Small padded box or egg carton for storage
Instructions
- Prepare the shells by tapping a pin into the top and bottom of the egg to make holes.
- Blow out the contents into a bowl, rinse shells, and let them dry on a towel.
- Coat the inside with diluted PVA glue or clear acrylic spray for stability and let it dry.
- Lay a soft towel on a table and arrange shells.
- Pour tonic water into a dish or dilute highlighter ink.
- Test with a cotton swab on scrap paper to check the glow.
- Practice writing small shapes to assess stroke pressure.
- Dip a fine brush or cotton swab into the glowing solution.
- Paint words, dots, or patterns on the shells with steady strokes.
- Let the ink dry fully on the shells.
- Turn on your black light in a dim room to reveal the glow.
- Seal with clear acrylic or diluted PVA glue if desired.
- Store the finished eggs in a padded display or egg carton.
Notes
Use tonic water for a gentle glow. Highlighter ink can be used but may stain. Always supervise children when crafting.
Find it online: https://www.cozyhandsdiy.com/glowing-invisible-ink-eggs/