

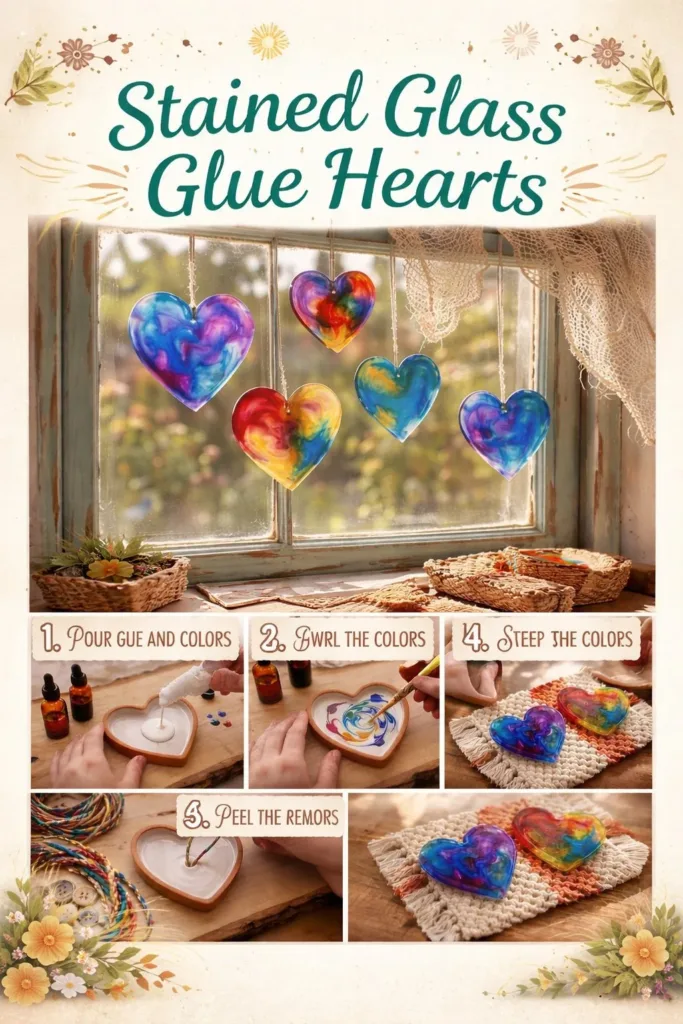
A quiet square of sunlight slides across my table and catches the slightly tacky shine of a freshly made heart. I press my fingertip near the edge and feel the cool, soft give of glue that will soon become a jewel of color. Stained Glass Glue Hearts sit in that still moment between making and light, and they always invite me to pause and watch how color breathes through a thin, handmade window. If you enjoy slow, sensory crafts, you might like this gentle project and other warm favorites like Valentine glue gem hearts that celebrate texture and quiet attention.
The Quiet Joy of Making Stained Glass Glue Hearts
Making Stained Glass Glue Hearts asks you to move slowly and notice small changes. You mix color, puddle glue, and watch light travel through thin layers. Those soft actions calm the nervous system in a way that fast crafts do not. You tune into the grain of the paper, the weight of a drop, the way a color spreads. That close noticing feels like a gentle meditation.
This craft creates objects that change with the day. A heart looks different in morning light than in late afternoon. That shift reminds you that simple things hold subtle surprises. I often leave a finished heart on my windowsill, fold it into a letter, or hang it with a thin string. Each use returns the reward of quiet attention.
There is also room for simple ritual. I like to brew a small cup of tea, set a soft playlist, and make a batch of glue hearts while the kettle cools. Those small habits anchor the project in care and make the act of creating feel like a restful habit rather than a task. If you want another gentle approach to glue-based hearts, I have a recipe-style version that explains measurements and drying tips at Valentine glue gem hearts recipe.
A Gentle Look at the Process
This project moves in simple rhythms. You choose color or tissue pieces. You squeeze a slow, even puddle of glue. You place bits of color and let light do the rest. The process stays tactile. Your fingers may feel sticky, your hands warm from holding the glue bottle, and your breath may match the soft, repetitive motions.
Sound plays a tiny role. The soft bubble of glue leaving a nozzle, the whisper of tissue as you trim it, the faint tick of drying glue these small noises help you stay present. You work with thin layers, and each layer invites a pause so you can notice how color blends and how light passes through. If you liked the way glued gems respond to light, you might also enjoy this other guide to making hearts with a similar, calm approach: how to make valentine glue gem hearts.
This craft does not rush. You will build hearts in stages. You will watch them dry and become firm. The slow changes reward patience and create soft, honest beauty.
Materials You’ll Need
- White school glue or clear craft glue (easy to find; clear gives a glass-like look)
- Food coloring or liquid watercolors (small drops give control)
- Wax paper or nonstick surface (prevents sticking)
- Small squeeze bottle or pipette (optional; helps control glue flow)
- A heart-shaped stencil or cookie cutter (optional; guides shape)
- Tweezers or a toothpick (for moving tiny tissue bits)
- Tissue paper in assorted colors (thin, translucent; substitute with vellum if needed)
- Scissors (sharp enough to cut tissue smoothly)
- A small tray or piece of cardboard to carry materials (keeps the space tidy)
- Baking sheet or flat surface for drying (a warm sunny spot works well)
- A sheet of clear contact paper or a laminator (optional; for longer-lasting pieces)
Notes on materials and why they work
- Clear craft glue dries translucent and holds color in place like a small pane of glass. It becomes slightly flexible, which helps the heart resist small cracks.
- Thin tissue paper layers transmit light beautifully. Thicker paper blocks light and loses the stained glass effect.
- A small nozzle or pipette helps you place glue precisely. If you do not have one, a steady squeeze from the bottle achieves the same result with a little more time.
- Contact paper or lamination adds durability. The glue alone becomes slightly flexible and can crease; sealing it keeps the piece flat and protected.
I like keeping my materials in a small tray to reduce clutter. That small habit keeps the making space calm and ready for the next time.
Step-by-Step Directions
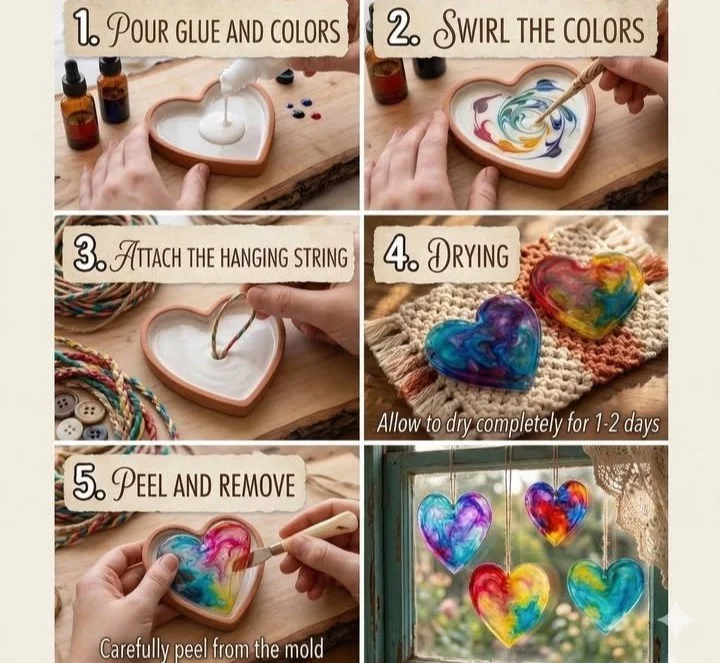
Prepare your surface. Lay wax paper on a flat table and smooth it with your hand so the glue will sit evenly. Feel the slight coolness of the wax paper and make a soft, wrinkle-free base.
Mix color into small glue puddles. Squeeze a little glue into shallow dishes and add one drop of food coloring. Stir slowly with a toothpick until the color blends into the glue. Use small amounts to control intensity.
Outline the heart lightly. Use a thin line of glue to trace a heart shape or follow a stencil underneath the wax paper. Work slowly so the line stays even. This frame guides your fill and keeps edges neat.
Fill the heart with thin layers. Add a little colored glue or place strips of tissue on the glue line. Spread gently with the back of a toothpick to smooth. Build color with thin layers so light can pass through.
Add small details. Use tiny bits of tissue or flecks of glitter for texture. Place them with tweezers. Let each addition sit briefly. Notice how color pools and blends where pieces overlap.
Smooth edges and clear bubbles. Tap gently to settle glue and use a toothpick to coax bubbles to the edge. This quiet motion feels like smoothing a small pond. The surface will look clearer as air escapes.
Let the heart dry slowly. Move the wax paper to a flat, warm spot away from direct drafts. Drying can take several hours. Check by gently touching the edge; it should feel set but not brittle.
Remove and finish. Carefully peel the heart from the wax paper. Trim any uneven edges with scissors. Seal with clear contact paper or a laminator for longer life, or leave it thin and slightly flexible for a delicate look.
Display or gift. Punch a small hole near the top and hang with thread, or place the heart in a window or on a card. Watch the light change through the layers across the day and enjoy how it quietly shifts.
These steps let you move at your own pace. Take a breath between each action and enjoy the slow reveal of color.
Enjoying the Finished Piece
{image_template}
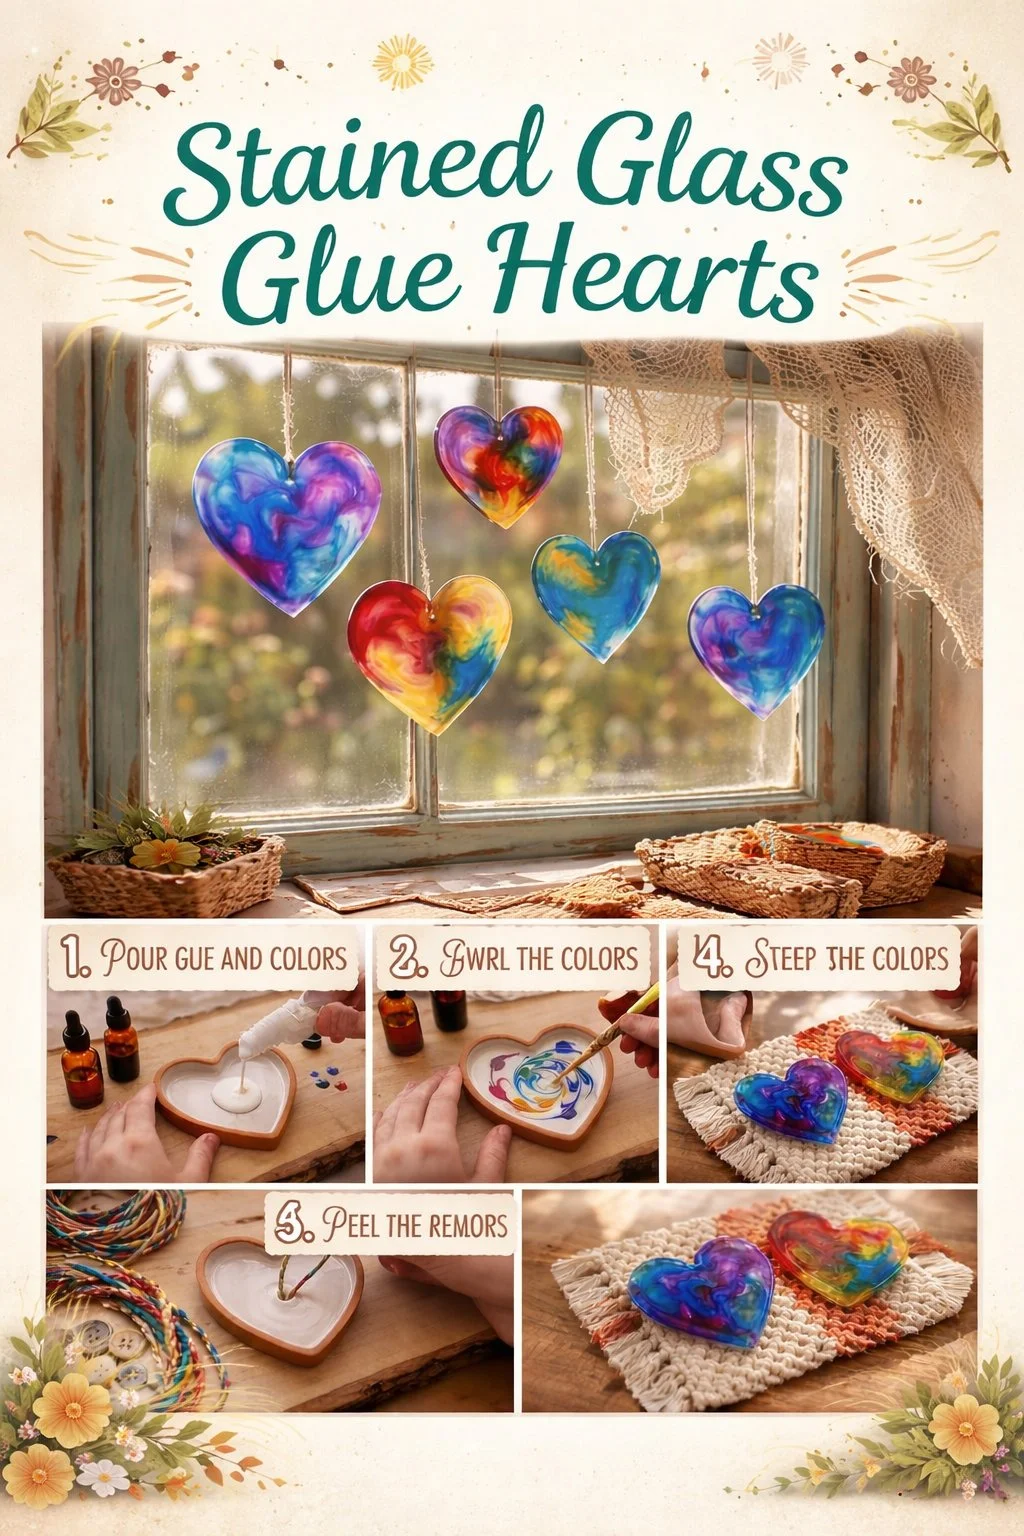
A finished Stained Glass Glue Heart feels like a small, wearable window. It shines when you hold it up and sends soft color across a tabletop. You can hang a heart with a thin string in a sunny window where it dances in the light. I like grouping three small hearts of different tones so they make a miniature constellation on a sill.
You can also press a heart into stationery or a gift package to make a moment of calm for someone else. When you tuck a heart into a letter, the receiver opens a little piece of sunlight. Another gentle option uses a heart as a shadow-catcher pinned to a fabric-covered corkboard. It becomes a quiet marker among photos and scraps.
I sometimes place a heart under a clear teacup and watch its color bloom when the cup warms. Little uses like this form a small language of cozy habits.
If you want another version with gem-like texture and a slightly different making rhythm, explore the technique shared in this tutorial: Valentine glue gem hearts tutorial.
Keeping It for Later
Store flat pieces between sheets of wax paper in a shallow box. Keep them away from high heat and heavy objects to avoid warping. If you sealed a heart with contact paper, it will resist humidity better and travel safely in a small envelope.
Reuse pieces in new projects. Trim small heart fragments and glue them onto cards or collage pages. If a heart chips at the edge, sand it gently with fine sandpaper and re-seal with a thin layer of clear glue. That small repair can restore the piece and make it feel lived-in rather than fragile.
When you plan to give hearts as gifts, stack them with tissue and a paper spacer to protect thin edges. Label a small bundle and store in a drawer where light cannot fade the colors.
These tiny storage rituals keep your pieces calm and ready for the moments you want to share them.
Gentle Tips & Variations
- Try a monochrome set. Use one color in three shades from light to dark to make a quiet, harmonious group. This variation emphasizes tone and makes the light feel soft.
- Add metallic thread. Stitch a tiny running stitch through a dried heart with fine metallic thread for a hint of shine and tactile contrast. This invites touch and catches the light differently.
- Experiment with negative space. Leave parts of the heart clear by using less glue in those areas. The empty parts create delicate windows and highlight the colored sections.
- Use patterned tissue. Soft floral or geometric tissue adds subtle pattern that shows up like textured glass. Cut tiny pieces and layer them slowly.
- Make a series. Create several hearts in one sitting and hang them together at varying heights. The collective bloom of color feels like a slow-moving mobile.
Frame each suggestion as a small experiment. Invite curiosity rather than perfection.
FAQs About Stained Glass Glue Hearts
Will the glue yellow over time?
Most clear craft glues resist yellowing for a long time if you use them in thin layers and keep pieces out of direct harsh sunlight. Sealing with contact paper or a laminator increases longevity.
Can I use regular craft glue instead of clear glue?
Yes, but choose a glue labeled clear when dry for the most glass-like look. Some white school glues dry slightly cloudy and reduce translucency. Thin layers help either kind dry clearer.
My heart feels brittle after drying. What can I do?
That can happen if a piece dries too quickly or too thickly. Trim the brittle edges and add a thin coat of clear glue to the surface, then let it dry slowly. If the heart sits in a warm, draft-free spot, it will flex a little once fully set.
How do I hang delicate hearts without damaging them?
Use a small hole punch near the top edge and thread fine embroidery floss or transparent thread. Reinforce the hole with a tiny dot of clear glue and let it dry before hanging. For very thin pieces, consider mounting them between two sheets of clear contact paper.
Is this project safe for children?
Yes, with supervision. Choose non-toxic craft glue and supervise scissors use. Younger children may enjoy placing pre-cut tissue pieces while adults handle glue application. These small adaptations keep the project calm and safe.
A Gentle Note Before You Go
Sit with your finished heart for a few quiet breaths. Notice how the color changes as you shift your head or move the piece a few inches. Treasure the small breaths of time you gave to making. The act of creating a Stained Glass Glue Heart brings focus and a gentle reward: a tiny pane of personal light you can hold or give away.
Return to this process when you need a calm minute. Gather your favorite tissue, put a pot of tea near your work, and let the making move at the pace of your breath. Each heart remembers the care you put into it and shares that calm when light passes through.
Conclusion
If you would like another approach to black glue stained glass techniques and a slightly different visual effect, this tutorial explores the method with careful photos and tips at DIY Black Glue Stained Glass Always & Whatever and a lovely tissue-paper heart lesson that complements this craft can be found at Tissue Paper ‘Stained Glass’ Hearts | Art with Mrs. Nguyen.
PrintStained Glass Glue Hearts
A gentle, sensory craft project creating beautiful stained glass hearts using glue and tissue paper.
- Prep Time: 15 minutes
- Cook Time: 240 minutes
- Total Time: 255 minutes
- Yield: Varies (depends on size and number of hearts)
- Category: Craft
- Method: Crafting
- Cuisine: N/A
- Diet: N/A
Ingredients
- White school glue or clear craft glue
- Food coloring or liquid watercolors
- Wax paper or nonstick surface
- Small squeeze bottle or pipette
- A heart-shaped stencil or cookie cutter (optional)
- Tweezers or a toothpick
- Tissue paper in assorted colors
- Scissors
- A small tray or piece of cardboard to carry materials
- Baking sheet or flat surface for drying
- A sheet of clear contact paper or a laminator (optional)
Instructions
- Prepare your surface. Lay wax paper on a flat table and smooth it with your hand.
- Mix color into small glue puddles. Squeeze some glue into shallow dishes and add one drop of food coloring.
- Outline the heart lightly with a thin line of glue.
- Fill the heart with thin layers of colored glue or tissue strips.
- Add small details using tiny bits of tissue or flecks of glitter.
- Smooth edges and clear bubbles by tapping gently and coaxing air to the edges.
- Let the heart dry slowly in a warm spot.
- Remove and finish by carefully peeling the heart from the wax paper and trimming any uneven edges.
- Display or gift it by hanging, placing in a window, or pressing into stationery.
Notes
For longer-lasting pieces, seal your heart with clear contact paper or laminate it. Thin layers ensure better translucency and prevent brittleness.