

The afternoon light slides across the table, warm and thin, and I hold a small scallop shell between my fingers. It feels cool and smooth where the tide once smoothed it, and I think of how salt and time can make such simple surfaces shine. The Bright Green Crystal Seashell Experiment begins in that quiet place, with slow breaths and the soft scrape of a spoon as green solution settles into the shell. If you like gentle crystal projects, you might enjoy this work as a calm, sensory way to slow down, much like my crystal growing guide which explores similar, patient rhythms.
Why Bright Green Crystal Seashell Experiment Feels Comforting to Create

This project gives you something small and bright to focus on. The act of mixing warm water, watching tiny bubbles rise, and setting the shell down to wait becomes a little ritual. The cool curve of the shell, the glossy sweep of dye, and the first spark of a forming crystal all give simple, steady rewards.
Making crystals asks for a slow kind of attention. You do not rush the solution. You notice how light catches the crystal faces. That attention helps the mind rest, and the hands learn a slow, deliberate movement that feels grounding. I have found this experiment especially soothing on grey afternoons when a small, tactile task brings a gentle lift.
This work also connects you to material science in a soft way. You watch salt leave the water and become solid again in tiny, ordered patterns. It makes the invisible visible. That quiet change feels meaningful and calming, because you can sit with a small process and witness a lot of careful, natural work.
A Gentle Look at the Process
Before we list materials, let us imagine the flow. You will warm water and dissolve a crystalline powder until the liquid looks full and heavy. You will add bright green dye and possibly a little glitter if you like a starry sheen. Then you will nest shells into a tray, pour or spoon the solution in, and leave the set in a place where the air moves slowly.
Listen for the soft sound of water as you pour. Notice the steam if the water is warm. Watch the first grains of crystal take shape as the solution cools and dries. Over days, the crystals grow a little more each morning. That slow rhythm becomes a daily check-in, a small kindness for your hands and mind.
If you want ideas for other shell-focused crystal projects, you can peek at the original DIY crystal seashells tutorial to see how slight changes in method create different textures. I like to switch up the pace and materials depending on how much waiting I want.
Materials You’ll Need
- Clean seashells, any small to medium size (easy to find at craft stores or from beach collections)
- Alum powder or Epsom salt (alum gives sharper, faceted crystals; Epsom creates softer, feathery forms)
- Hot water (near boiling, to dissolve the crystal material fully)
- Bright green food coloring or liquid dye (gives the vivid color; gel works too)
- Small tray or shallow container to hold shells while they grow (reuse an old dish)
- Stirring spoon or wooden craft stick
- Measuring spoons and a heat-safe cup
- Optional clear glue or nail polish (to seal the finished crystals)
- Paper towels and a small brush for gentle cleaning
- Gloves and safety glasses if you prefer to avoid skin contact with powder
- A small fan or a sunny windowsill for slow evaporation
Note: If you want different textures or sparkle, you can add a pinch of fine glitter or a drop of glycerin. These additions stay optional and reversible.
I sometimes reach for the other method in my practice when I want a different finish, like the alternative technique in the second seashell method. It gives you a sense of how material choices change final texture.
STEP-BY-STEP DIRECTIONS:
- Prepare your workspace and shells.
Put down paper towels and set your tray close by. Rinse shells gently and let them dry, feeling their smooth surfaces with your fingers. - Heat water and measure the crystal agent.
Heat a cup of water until very warm or near boiling. Spoon in alum or Epsom salt by the tablespoon, stirring until the grains dissolve and the solution looks clear and heavy. - Add color slowly.
Drop in a few drops of bright green food color. Stir slowly and watch how the color spreads like a small green cloud. Adjust one drop at a time until the tone feels warm to you. - Place shells in the tray.
Nest the shells open-side up in the tray. Arrange them with small gaps so air can circulate. Think about how each shell will catch the light. - Pour or spoon solution into shells.
Using a spoon, fill each shell with solution. Work carefully and slowly so the shell does not overflow. If drops spill, blot them gently with a paper towel. - Create a gentle environment for growth.
Place the tray in a warm windowsill or a room with a soft breeze. Avoid direct drafts or sunlight that might dry things too fast. The slow cool-down helps neat crystal faces form. - Check daily and top up as needed.
Look at your shells once a day. You may see a sheen at first and then tiny points begin to appear. If solution levels drop, add a little more so crystals grow from the liquid itself. - Wait patiently for several days.
Crystals take time. Let the shells sit undisturbed for between three and seven days. The longer you leave them, the larger and more defined the crystal shapes become. - Remove and dry carefully.
When you like the look, lift a shell and let it drain on a paper towel for a short time. Gently brush off loose grains with a soft brush. Handle by the non-crystal side if possible. - Seal or display as you wish.
If you plan to keep the crystals long-term, consider sealing them with a light coat of clear glue or nail polish. Let the shell dry fully before placing it on a shelf or in a jar for display.
Enjoy each step slowly. I often set a cup of tea beside me during the wait, and I check the shells like a friend. The small changes feel like letters arriving in the mail.
Enjoying the Finished Piece

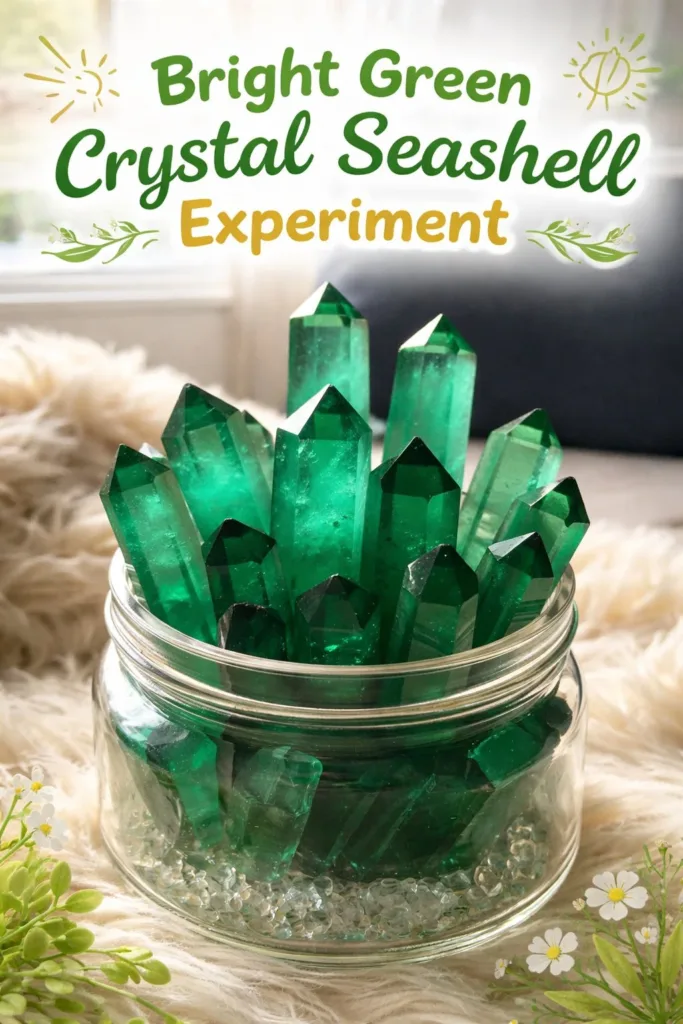
A finished bright green crystal seashell holds a soft kind of wonder. It makes a small, quiet ornament that catches light and invites touch. I set a few on a windowsill where morning light picks out the crystal faces and they seem to spark with tiny green stars.
You can nest a single shell in a shallow bowl of sand to make a coastal vignette. Or arrange several on a shelf with dried coral and small glass beads for a tender display. The shells also work as a mindful paperweight for a notepad you use to jot down gentle thoughts.
I sometimes keep one on my bedside table, a physical reminder of patience. When I feel restless, I reach out, trace the ridges, and watch the light play across the crystals. If you enjoy pairing textures, try combining a crystal shell with a soft linen cloth or a smooth pebble.
For another aesthetic, explore the galaxy style in my galaxy crystal seashells post, where color layering and glitter create cosmic-like surfaces. Mixing these pieces can make a small collection that feels like a quiet cabinet of curiosities.
Caring for Your Finished DIY
Crystals can be delicate. Treat them gently and avoid heavy handling to maintain their structure. Keep shells in a dry place away from pets and small children who might crush them.
If dust gathers, use a soft brush or a gentle puff of air rather than running them under water. Water can dissolve some crystals slowly or cause new minuscule growths that change their shape. If you sealed them with a clear coat, you can use a slightly damp cloth and then dry immediately.
Store extra shells in a shallow box lined with tissue if you want to conserve them. Avoid stacking them tightly. When you move them, cradle each shell so the crystal faces do not rub against another hard surface.
If a crystal breaks, treasure the fragment. Broken pieces can still hold color and texture, and they make lovely tiny accents in jars or shadow boxes.
What I’ve Learned While Making This

I have learned to trust slow processes. The first time I tried a bright green batch, I rushed the cooling and ended up with a dull, dusty surface. Letting the solution cool gradually changed the whole outcome. That taught me to respect temperature and time.
I learned that different powders create different moods. Alum makes sharp, faceted growth that glitters like cut glass. Epsom salt creates softer, feathery deposits that feel like sea foam frozen in time. Both have their quiet beauty.
I also learned to enjoy the waiting as part of the craft. Checking once a day became a ritual of noticing small changes in my space. I find these small check-ins help anchor my day, a way to be present without pressure.
A gentle note on safety and care: I keep powders out of reach of children and pets. I clean my tools between projects and label any containers I reuse. If you feel unsure about a material, test a small shell first. These small, careful choices keep the practice calm and clean.
Gentle Variations & Tips
- Try using a gradient of color by adding a drop more dye each day. The slow change creates a layered, watercolored look.
- Mix a pinch of fine glitter into the solution for a subtle sparkle. Use only biodegradable glitter if you are concerned about the environment.
- Seed a shell with a tiny crystal shard or a small bead to encourage growth at specific points. This gives you more control over where crystals form.
- If you want larger single crystals, use a deeper solution in a small jar and suspend a shell partially submerged. This gives crystals more room to build.
- Use warm, not boiling, water if you work near delicate surfaces. Very hot water can warp thin shells or age finishes on furniture.
These ideas invite small experiments rather than rules. Each tweak teaches you something gentle about materials and time.
FAQs About Bright Green Crystal Seashell Experiment:
Q: Is this experiment safe to do around children?
A: You can share parts of the project with children under supervision. Let kids handle the clean shells and watch the growing process, but keep powders and hot water out of reach. I freeze the “mixing” part to adults and give children safe tasks like arranging shells once the solution has cooled.
Q: How long will the crystals last?
A: With proper care, crystals can stay intact for many months to years. Keep them dry and handle them gently. If you seal them with a clear coat, they will better resist humidity and light wear.
Q: Can I use other colors?
A: Yes. Food coloring or liquid dyes let you choose any tone. Bright green feels fresh and coastal, but soft blues, deep purples, or sunset oranges can change the mood entirely. Mix colors slowly so you can watch the shade deepen.
Q: What if the crystals do not form well?
A: Check your solution concentration and cooling. If the powder did not fully dissolve, warm and stir it again. If the room is too dry or too drafty, crystals may form haphazardly. Try a different spot with gentler air flow, and give it more time.
Q: Can I display the shells outside?
A: I recommend showing them indoors, away from rain or direct sun. Outdoor humidity can soften and alter crystals. If you want an outside display, choose a covered area and treat the shells as temporary accents.
A Gentle Note Before You Go
When this small experiment ends, you will hold something made slowly and with care. The green color may remind you of sea glass or moss, and the crystal edges will catch light like tiny leaves. Place your finished shells where you will see them often, and let them be small, quiet companions.
If you find comfort in repeating the method, try making batches in different colors and arranging them by season. Keep a soft cloth or a lined box for storage. The act of making this project can become a little practice in patience and presence.
Conclusion
If you appreciate tools that help you focus on gentle sound and quiet, you might be interested in the thoughtful design of the Lightspeed Delta Zulu® ANR Headset for sustained, calm attention during creative time. For a deeper look at how certain materials interact with dyes and adsorption, this study on efficient adsorption of crystal violet dye using functionalized Argan offers a technical perspective that I find quietly interesting when thinking about how solutions and solids meet in craft.
PrintBright Green Crystal Seashell Experiment

A calming DIY project that focuses on creating bright green crystals in seashells using simple materials, perfect for soothing creativity.
- Prep Time: 15 minutes
- Cook Time: 180 minutes
- Total Time: 195 minutes
- Yield: 1-4 shells
- Category: Craft
- Method: DIY Craft
- Cuisine: N/A
- Diet: N/A
Ingredients
- Clean seashells, any small to medium size
- Alum powder or Epsom salt
- Hot water (near boiling)
- Bright green food coloring or liquid dye
- Small tray or shallow container
- Stirring spoon or wooden craft stick
- Measuring spoons
- Optional clear glue or nail polish
- Paper towels and a small brush
- Gloves and safety glasses (optional)
- A small fan or a sunny windowsill (for evaporation)
Instructions
- Prepare your workspace and shells.
- Heat water and measure the crystal agent.
- Add color slowly.
- Place shells in the tray.
- Pour or spoon solution into shells.
- Create a gentle environment for growth.
- Check daily and top up as needed.
- Wait patiently for several days.
- Remove and dry carefully.
- Seal or display as you wish.
Notes
Use warm, not boiling water near delicate surfaces. Crystals can be delicate—handle with care. Experiment with different colors and textures.