

A strip of sunlight warms the windowsill as I press soft, slightly cool bioplastic between my fingers. The thin sheet trembles with color when I lift it, and the tiny bubbles in the material catch the light like distant stars. Making DIY Vibrant Bioplastic Suncatchers slows my breath, calls my hands to gentle work, and leaves a small, glowing piece of calm to hang in the home. For a fuller method and color ideas, I often return to a favorite version of this recipe to inspire new shapes and textures: colorful DIY bioplastic suncatchers.
The Quiet Joy of Making DIY Vibrant Bioplastic Suncatchers
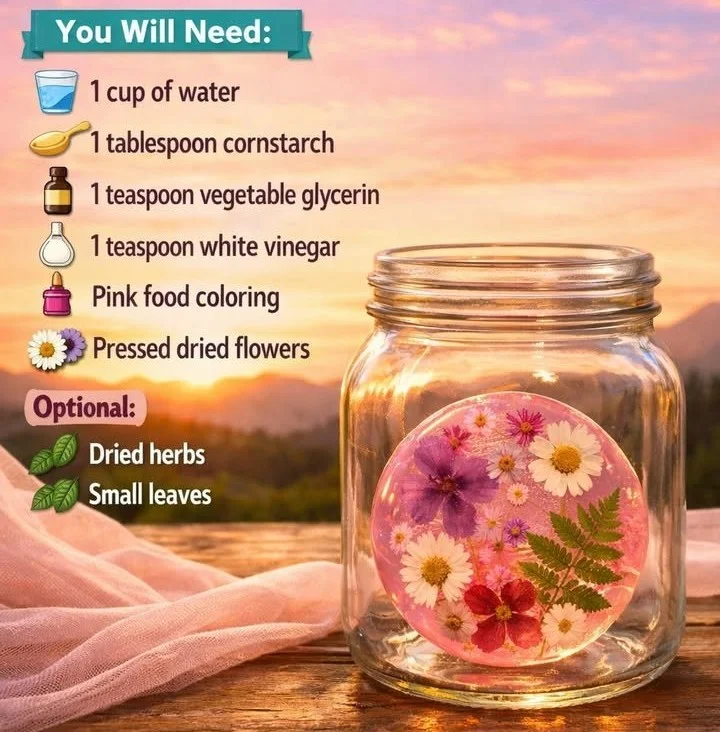
This craft feels like a soft ritual. It asks you to move slowly, measure with care, and notice small changes as gelatin melts, as color pools, and as the surface cools. The work rewards gentle attention with clear, jewel-like panels that throw calm light into the room.
Making these suncatchers helps slow the mind. The textures invite touch: the wet gloss of warmed bioplastic, the smoothness of a pressed leaf, the velvety lift of dried flowers. The rhythm of stirring and pouring creates a quiet loop of movement that feels almost meditative.
Many people tell me they use this project to rest hands between busier activities. It sits easily on a table next to tea, and it pairs well with a slow playlist or a quiet conversation. That presence makes the craft cozy, not fussy.
The Flow of Making DIY Vibrant Bioplastic Suncatchers
Before you gather tools, imagine the flow of the project. You will mix a gelatin base, add color, pour the mixture into a shallow mold, and allow the sheets to set. Your hands will alternate between quick small movements and long pauses while the pieces firm.
Expect soft sounds: the whisper of a spoon against a glass bowl, the tapping of a wooden skewer to remove air bubbles, the faint sliding of paper as you lift a cooled suncatcher. The visual rhythm matters, too. Layers take shape slowly, and each pause lets you notice how light and color blend.
This process is forgiving. If a piece bubbles or tears slightly, you can trim, layer, or reshape it. The gentle learning curve makes it a satisfying craft for beginners and a warm practice for those who return again and again. If you want another take on technique and preparation, this page shares a slightly different method to explore: different bioplastic suncatchers method.
Materials You’ll Need
- Gelatin powder, unflavored (easy to find in grocery stores)
- Distilled water (helps with clarity, optional if you use tap)
- Glycerin or vegetable glycerin (adds flexibility)
- Liquid food coloring or diluted watercolors (vibrant or soft tones)
- Shallow silicone mold or a flat baking tray lined with parchment (substitute-friendly)
- Heatproof glass bowl and small saucepan for a double boiler
- Wooden skewers or a toothpick for smoothing and popping bubbles
- Small brushes or droppers for color placement
- Scissors and a hole punch for finishing
- Dried leaves, pressed flowers, or translucent paper for embedding (optional; easy to find or press at home)
- Parchment paper or silicone mat for drying and storage
I like to keep a small tray of pressed flowers nearby for the tactile comfort of choosing shapes. For more thoughts on materials and eco choices, this guide offers added context: materials and eco choices for bioplastic suncatchers.
Step-by-Step Directions
- Gather your materials and set up a calm workspace.
Place a towel on the table, arrange your molds, and have a clean cup of water nearby. Clear light helps you notice color and bubbles. - Measure gelatin and water.
Sprinkle 1 part gelatin into 4 parts cold distilled water and let it bloom for a few minutes. The gelatin will swell into a soft, spongy texture. - Melt the gelatin gently over a double boiler.
Stir slowly until the gelatin becomes clear and smooth. Keep the heat low so it does not boil; gentle warmth keeps the texture even. - Add glycerin and stir.
Add a small splash of glycerin to the warm gelatin; this keeps the finished suncatcher a little flexible and less brittle. Stir until the mixture looks glossy. - Mix color separately and combine.
Drop a tiny amount of liquid food coloring into a spoonful of the gelatin and mix until you have the shade you like. Add the colored portion back into the main bowl and stir once or twice to create soft marbling. - Pour slowly into molds or onto lined tray.
Tilt the tray gently and pour in thin layers if you want gradient effects. Work with small pours to avoid big bubbles and to keep control of color placement. - Use a skewer to pop bubbles and arrange inclusions.
Tap the tray lightly and run a toothpick through any surface bubbles. Lay pressed flowers or leaves gently into the still-wet surface; they will sink slightly as the sheet evens. - Let the sheets cool and set at room temperature.
Allow the pieces to rest undisturbed for at least a few hours until they feel dry and firm. The slow cool helps the surface stay clear. - Peel off parchment and trim edges.
When the suncatcher lifts easily, use scissors to cut shapes and a hole punch to make a small hanging hole. The edges will feel smooth if you trim with care. - Hang and admire, or let layers cure longer for durability.
If you want to strengthen a piece, create a second thin layer and adhere it on the back once the first is dry. Press lightly and let it set until fully bonded. - Clean up gently.
Warm water and a soft cloth remove any residue. Save leftover gelatin in a sealed container for a short time if you plan to craft again soon. - Sing praise to your hands.
Pause and notice the small warmth where you held the tray, the faint smell of glycerin, and the way light now moves through your newly formed piece.
Enjoying the Finished Piece
Hang your suncatcher in a quiet window where morning or afternoon light can pass through it. Watch how colors sing differently through days and clouds. The same piece can feel like a jewel in bright sun and like a soft glow in the gray.
Use smaller pieces as sun tags on houseplants or place one inside a shallow bowl to catch and scatter light on a tabletop. You can layer several to make a mobile that moves with a slow draft, giving you gentle motion and shifting color.
I often tuck one into a drawer to carry a soft bit of color into another room when I want a familiar, calming sight. These pieces also work well as little gifts. I wrap them in soft tissue and tie with twine, and the act of wrapping becomes a second quiet making moment.
If you wonder about the environmental side of these pieces, consider weight and reuse. A few clear steps in display help your suncatcher feel both beautiful and responsible. For thoughts on lasting eco practices, see this cozy discussion: bioplastic suncatchers and eco friendliness.
Keeping It for Later
Store flat pieces in a cool, dry place to keep them from warping. Slip parchment or tissue between layers to prevent sticking. A shallow box or drawer lined with soft cloth works well and keeps edges safe.
Avoid direct heat or prolonged sun when not displaying your pieces, as strong heat can soften them and change their shape. If a suncatcher bends slightly, you can often flatten it again by placing it between two flat boards and leaving it at room temperature for a day.
For longer life, choose a small chain of care. Dust gently with a soft brush and avoid abrasive cleaning. If you layer or repair a piece, use a thin fresh layer of bioplastic formula to bond the parts rather than glue, which can cloud the clarity.
If you plan to reuse pieces as gift tags or ornaments, punch holes with care and tie with cotton thread. Keep a tiny tag of care instructions for the recipient so the piece stays cherished and not forgotten.
Gentle Tips & Variations
- Invite texture by pressing natural items lightly into the surface.
Try fern leaves, thin petals, or lace fabric. Press them flat and release slowly so you keep delicate detail. - Play with opacity by layering color.
Pour one thin tinted layer, let it set a little, then add another. Layers create soft depth without muddiness. - Swap glycerin amounts for different feels.
More glycerin makes the sheets more flexible. Less glycerin gives firmness. Adjust small amounts until you like the balance. - Add metallic accents sparingly.
A whisper of mica powder or edible glitter gives light-catching detail. Use a tiny brush and a restrained hand for a subtle glow. - Make small test pieces before committing to a large sheet.
This helps you check color intensity and drying time. Tests calm the mind and reduce waste.
Each suggestion invites gentle exploration rather than strict rules. Try one or two variations and notice which small changes please your hands and eyes.
FAQs About DIY Vibrant Bioplastic Suncatchers
Are these suncatchers safe around children and pets?
Yes, when made carefully they stay intact and non-toxic, since you use food-grade gelatin and glycerin. Keep finished pieces out of reach of very small children and curious pets to avoid accidental chewing.
How long do they last before becoming brittle?
Lifespan varies with thickness, glycerin content, and exposure to heat. With moderate glycerin and careful storage, many last months to a year. Thicker pieces resist crisping better.
Can I use agar agar instead of gelatin for a plant-based option?
Agar behaves differently and sets more rigidly and quickly. It can work but often needs more trial to get a clear sheet. Start with tiny tests to learn its texture.
How can I prevent bubbles and cloudy areas?
Warm the mix slowly and pour in thin layers. Let small bubbles rise and pop with a skewer right away. Avoid high heat and quick stirring; slow, steady movements help clarity.
Will the colors fade over time?
Some dyes lose vibrancy in prolonged, direct sunlight. Using concentrated color or layering helps, and rotating displayed pieces reduces continuous exposure and fading.
Are these suncatchers safe around children and pets?
Yes, when made carefully they stay intact and non-toxic, since you use food-grade gelatin and glycerin. Keep finished pieces out of reach of very small children and curious pets to avoid accidental chewing.
How long do they last before becoming brittle?
Lifespan varies with thickness, glycerin content, and exposure to heat. With moderate glycerin and careful storage, many last months to a year. Thicker pieces resist crisping better.
Can I use agar agar instead of gelatin for a plant-based option?
Agar behaves differently and sets more rigidly and quickly. It can work but often needs more trial to get a clear sheet. Start with tiny tests to learn its texture.
How can I prevent bubbles and cloudy areas?
Warm the mix slowly and pour in thin layers. Let small bubbles rise and pop with a skewer right away. Avoid high heat and quick stirring; slow, steady movements help clarity.
Will the colors fade over time?
Some dyes lose vibrancy in prolonged, direct sunlight. Using concentrated color or layering helps, and rotating displayed pieces reduces continuous exposure and fading.
A Quiet Closing Thought
Sit with your finished pieces for a few quiet minutes. Notice the tiny differences between sheets, the small fingerprints that show where you held the edge, and the way light paints a corner of your table. This craft gives a gentle pause in the day, a place for hands to practice patience, and a small bright object that holds a moment of calm. Enjoy the slow changes and let your work remind you that small, careful acts can shift the light in a room and the rhythm of a day.
Conclusion
If you want more inspiration and a different recipe that highlights eco-friendly choices, this lovely guide offers a practical take: DIY Bioplastic Suncatchers: Eco-Friendly Art That Shines Bright!. For a version that emphasizes natural ingredients like gelatin and crafting with found materials, this resource provides another warm approach: DIY Bioplastic Suncatchers: Craft With Nature & Gelatin.
Thank you for sharing this slow-making time. May your hands find steady pleasure, and may your new suncatchers bring quiet color to soft moments.
PrintDIY Vibrant Bioplastic Suncatchers

Create colorful bioplastic suncatchers that capture light and add a touch of calm to your home.
- Prep Time: 15 minutes
- Cook Time: 30 minutes
- Total Time: 45 minutes
- Yield: 4 suncatchers
- Category: Craft
- Method: Crafting
- Cuisine: N/A
- Diet: N/A
Ingredients
- 1 part unflavored gelatin powder
- 4 parts distilled water
- Glycerin or vegetable glycerin
- Liquid food coloring or diluted watercolors
- Shallow silicone mold or flat baking tray lined with parchment
- Heatproof glass bowl
- Small saucepan
- Wooden skewers or toothpick
- Small brushes or droppers
- Scissors
- Hole punch
- Dried leaves, pressed flowers, or translucent paper (optional)
- Parchment paper or silicone mat
Instructions
- Gather your materials and set up a calm workspace.
- Measure gelatin and water.
- Melt the gelatin gently over a double boiler.
- Add glycerin and stir.
- Mix color separately and combine.
- Pour slowly into molds or onto lined tray.
- Use a skewer to pop bubbles and arrange inclusions.
- Let the sheets cool and set at room temperature.
- Peel off parchment and trim edges.
- Hang and admire, or let layers cure longer for durability.
- Clean up gently.
- Sing praise to your hands.
Notes
Store flat pieces in a cool, dry place and avoid direct heat.