

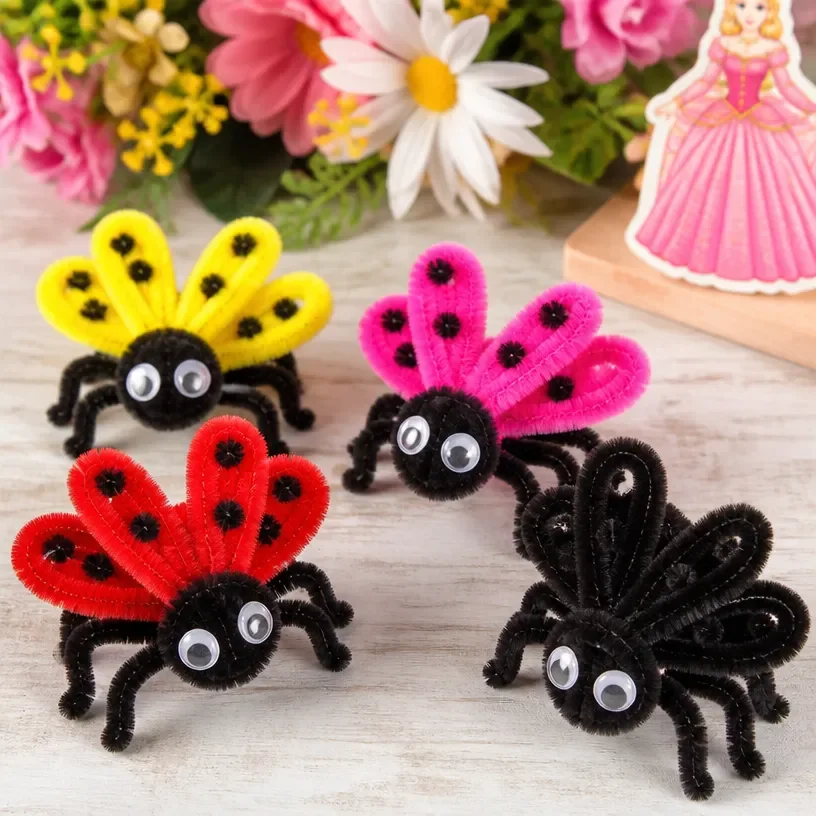
Creating a DIY ladybug craft using fuzzy wire and pipe cleaners invites a serene moment of focus and creativity. As you handle the soft fibers, the gentle sway of the pipe cleaners in your fingers feels soothing. Each twist and turn brings a calming rhythm, allowing your mind to slow down and immerse itself in the present. Engaging in such a tactile project shifts attention away from daily worries, fostering a sense of warmth and accomplishment. This guide to the DIY Ladybug Craft: Fuzzy Wire and Pipe Cleaners Tutorial encourages you to explore your creativity in a cozy, mindful way. You may also find Diy Ombre Sand Jar Craft Tutorial useful.
Why Make This DIY Ladybug Craft: Fuzzy Wire and Pipe Cleaners Tutorial
Crafting a ladybug from fuzzy wire and pipe cleaners embodies the heart of gentle making. The textures, colors, and shapes combine to create not just an object but a joyful experience. Each step offers a chance to breathe and connect with the materials. Working with your hands can be a meditative process, helping to anchor you in the moment. As you bend and shape these vibrant fibers, you cultivate awareness, inviting a soothing, satisfying rhythm into your day. You may also find Diy Pipe Cleaner Crystal Heart Tutorial useful.
You may also find Diy Snail Craft Beaded Pipe Cleaners useful.
A Gentle Look at the Process
Before we gather the materials, take a moment to envision the flow of this DIY. Picture the soft touch of the fuzzy wires and the bendable nature of the pipe cleaners. Feel the satisfaction of transforming simple components into something charming and playful. The sound of the wire bending, the subtle shifts in color as it catches light each aspect is an invitation to engage your senses. Now, let’s prepare for our crafting journey. You may also find Diy Watercolor Coffee Filter Garland Tutorial useful.
Materials You’ll Need
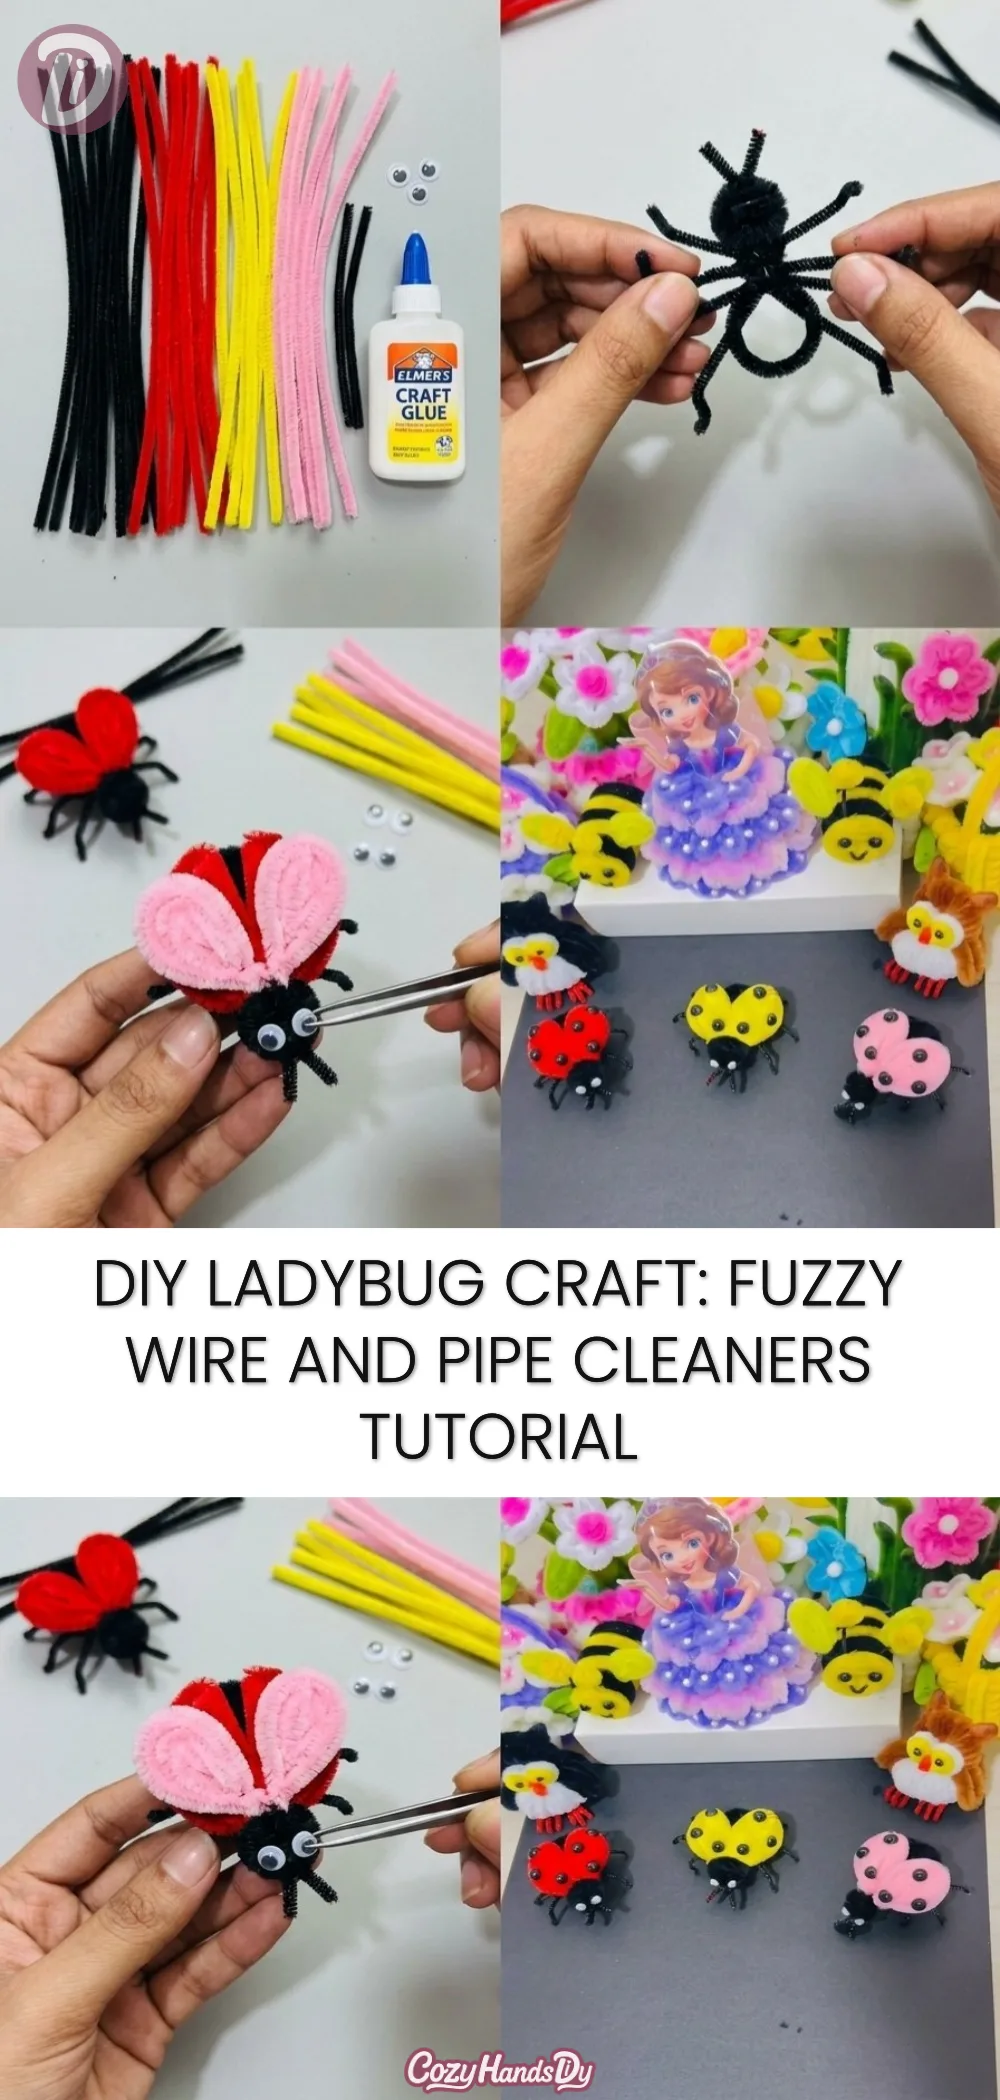
- Fuzzy pipe cleaners (various colors, but red and black are ideal)
- Googly eyes (for the ladybug’s face)
- Scissors (for trimming)
- Wire cutters (for precise lengths)
- Craft glue (for securing components)
- Optional: additional decorations like glitter or markers
Gathering these materials introduces a hint of anticipation. Many of these items are easy to find and may even be materials you have on hand. Once you have everything ready, you can embrace the creative process ahead.
Step-by-Step Directions
Create the Ladybug Body: Start by cutting a fuzzy pipe cleaner into two pieces one long for the body and a shorter piece for the head. The long piece should be about 12 inches, while the head piece should be around 4 inches.
Shape the Body: Take the long piece, fold it in half, and twist it a few times to form an oval shape. This will be the ladybug’s body. The twist gives it volume and structure.
Attach the Head: Take the shorter piece and attach it to one end of the oval by twisting it around. Ensure it feels secure, as this will be where you attach the googly eyes.
Add Details: Use smaller pipe cleaners or cut pieces to create legs and antennae. Bend and twist smaller segments onto the body, keeping them even, so your ladybug can stand well.
Decorate with Eyes: Use craft glue to attach two googly eyes to the head. Watch how they bring your ladybug to life.
Artistic Touches: If desired, you can add little dots with markers or glitter to give your ladybug character and charm.
Final Assembly: Once everything is glued and attached, take a moment to once again focus on your senses. Feel the softness of the materials and enjoy your completed piece.
Enjoying the Finished Piece
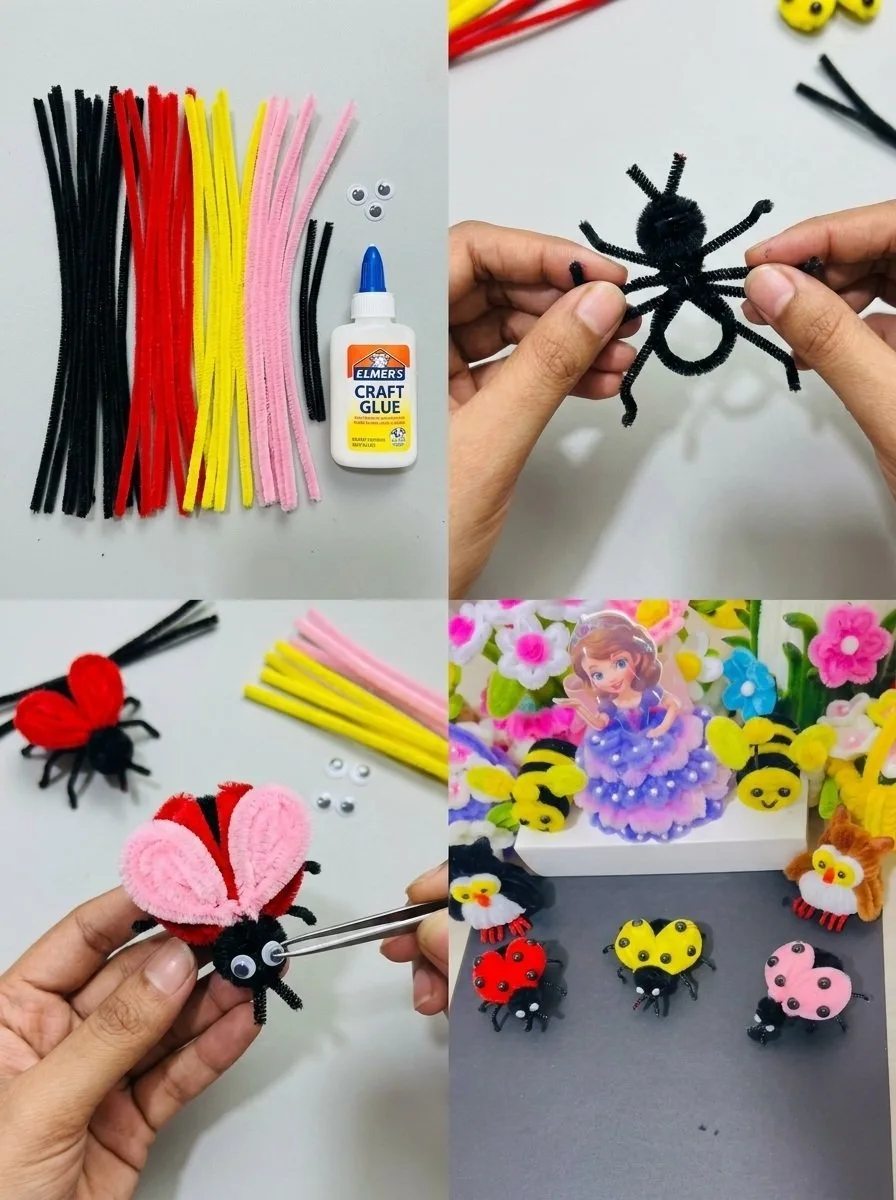
After crafting your ladybug, you may want to explore how to enjoy this creation in your space. You can place your ladybug on a shelf, bedside table, or as part of a larger display of your DIY projects. It serves not just as a decoration but as a gentle reminder of the calming experience you had while making it. The presence of your ladybug can subtly brighten your space, inviting joy and creativity into everyday life.
How to Store or Reuse DIY Ladybug Craft: Fuzzy Wire and Pipe Cleaners Tutorial
Whenever you choose to step away from your crafting, it helps to think about how to store your creative work. This ladybug can be placed in a small box or displayed on a shelf. If you decide to change your decor, remember that these materials can be taken apart and reconfigured into new creations. The soft, bendable nature of pipe cleaners and fuzzy wires means your project can evolve with your imaginative desires.
Gentle Tips & Variations
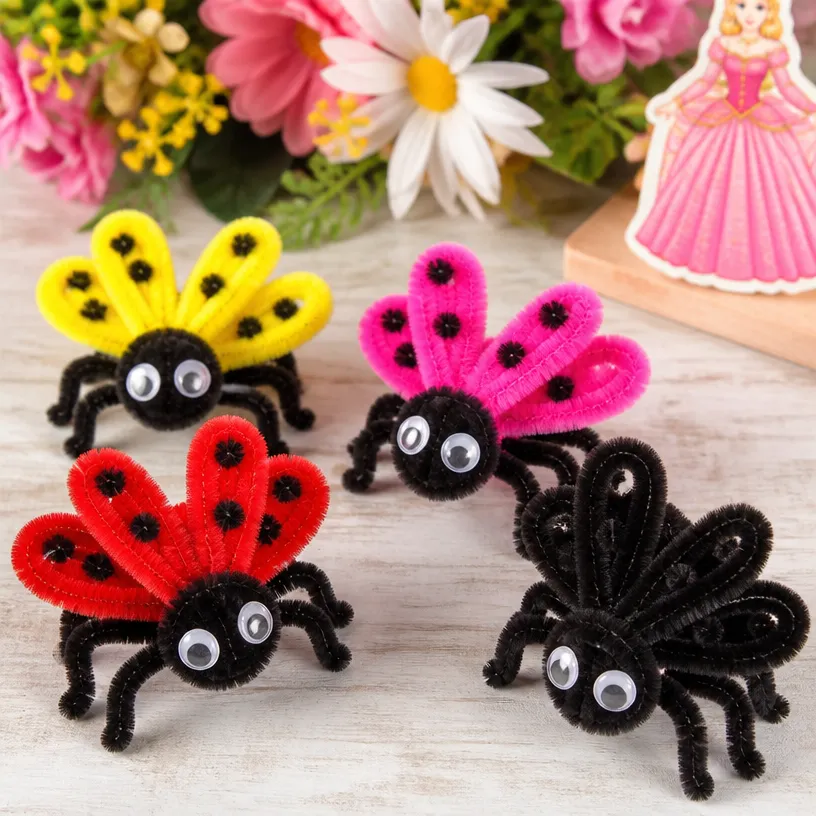
Color Choices: Feel free to experiment with different colors. Consider making a family of ladybugs in various hues, all bringing their unique flair.
Adding Texture: Combine textures by incorporating felt or fabric pieces into your ladybug design for added depth.
Seasonal Themes: Craft ladybugs with seasonal themes maybe use springtime colors or even festive decorations to celebrate different times of the year.
Small Gifts: Consider gifting your ladybug to a friend or neighbor. A handmade gift carries warmth that store-bought items cannot replicate.
Invite Family: Engage family members in this craft. Sharing creativity enhances the experience and forms cherished family memories.
FAQs About DIY Ladybug Craft: Fuzzy Wire and Pipe Cleaners Tutorial
Can I make other insects using the same materials?
Yes! Pipe cleaners and fuzzy wire are versatile. You can create various insects like butterflies and bumblebees with simple modifications and different colors.
Is this project suitable for children?
Absolutely. With supervision, children can enjoy crafting their ladybugs, adapting the project to their skill level. Just ensure all cutting is done by an adult.
How long can I expect my ladybug craft to last?
With gentle handling and storage away from direct sunlight, your craft can be enjoyed for a long time. The materials are durable, but they can be prone to dust buildup.
What if I don’t have googly eyes?
You can substitute them with drawn eyes or well-cut circles of paper. Imagination often finds solutions!
Conclusion
In closing, creating a DIY ladybug craft with fuzzy wire and pipe cleaners is a delightful way to engage your senses and slow down your busy mind. This project invites joy, creativity, and a sense of accomplishment. As you continue to explore similar projects, consider the myriad of possibilities available. For inspiration, you might enjoy browsing products like Pipe Cleaner Bugs on Etsy or creating a charming flower bouquet with the DIY Pipe Cleaners Flower Bouquet. Embrace the beauty of making and allow your creativity to flow freely.
PrintDIY Ladybug Craft: Fuzzy Wire and Pipe Cleaners
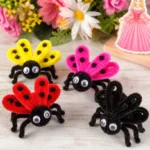
Create a charming ladybug using fuzzy wire and pipe cleaners in a soothing crafting experience.
- Prep Time: 15 minutes
- Cook Time: 30 minutes
- Total Time: 45 minutes
- Yield: 1 ladybug
- Category: Craft
- Method: Handcrafting
Ingredients
- Fuzzy pipe cleaners (various colors, red and black suggested)
- Googly eyes (for the ladybug’s face)
- Scissors (for trimming)
- Wire cutters (for precise lengths)
- Craft glue (for securing components)
- Optional: additional decorations like glitter or markers
Instructions
- Create the ladybug body: Cut a fuzzy pipe cleaner into two pieces—one long for the body (about 12 inches) and a shorter piece for the head (around 4 inches).
- Shape the body: Fold the long piece in half and twist it a few times to form an oval shape.
- Attach the head: Secure the shorter piece to one end of the oval by twisting it around.
- Add details: Use smaller pipe cleaners to create legs and antennae.
- Decorate with eyes: Use craft glue to attach two googly eyes to the head.
- Artistic touches: Add little dots with markers or glitter for character.
- Final assembly: Ensure everything is glued and attached, and enjoy your completed piece.
Notes
This craft can be adapted to create various insects and is suitable for all ages with supervision.