

I press the cool, slightly damp clay between my fingers and watch a tiny mote of sunlight trace the curve of a newly made aroma stone. The clay feels smooth and a little grainy at once. A soft breath of lavender rises when I hold the stone close to my nose. Making DIY Aroma Stones slows me down. It guides my hands and my attention to small, steady motions and small, honest pleasures.
Why DIY Aroma Stones Feels Comforting to Create

This simple craft asks for mindful time and gentle repetition. Each small stone asks for a slow press, a patient smoothing, and a quiet wait while it cures. Those motions offer calming rhythm. They also invite you to notice texture, scent, and the way light rests on a curved surface.
Aroma stones work by holding essential oils in a porous body so the scent breathes out slowly. That quiet release of scent becomes a steady, low-key companion in a room or on a bedside table. If you like, you can read more on our full DIY Aroma Stones page for extra variations and photos that show how stones age with use.
I find comfort in how forgiving this craft is. A pressed leaf will leave a ghosted impression. A rough edge can be smoothed with a wet fingertip. Little imperfections become part of the story of the stone. For me, that narrative is calming: you make something by hand, it becomes familiar, and it continues to give in a quiet way.
The Flow of Making DIY Aroma Stones
Before you begin, imagine a small, slow ritual. You will knead clay, fill molds, and watch the stones dry. The sounds remain soft: a gentle pat, the whisper of a spoon, the quiet scrape of a blade. Your hands will notice changes in temperature and moisture. The clay shifts from heavy and cool to lighter as it dries.
The process moves in short, pleasant stages. You will prepare, press, texture, and set aside. Each stage has its own pace. You will sense when the clay feels right for the next step. That sensory feedback matters more than a strict timer. Trusting your hands and the materials brings the calm this craft offers.
What You’ll Use to Make DIY Aroma Stones
- Air-dry clay (easy to find at craft stores or online)
- Fine white clay or plaster of Paris (optional, for a different finish)
- Simple silicone molds or small cookie cutters (substitute-friendly)
- Essential oils (lavender, eucalyptus, or your favorite gentle scents)
- Small bowl of water (for smoothing)
- Spoon or small spatula (for pressing and leveling)
- Sandpaper, fine grit (for gentle finishing)
- Cotton swabs or pipettes (for adding drops of oil)
- Small tray or piece of parchment (for drying)
- Clear beeswax or food-grade oil (optional, for sealing)
When you choose clay, softer, more porous clays tend to hold scent well. Plaster can work and gives a crisp, stone-like feel, but it dries differently and needs careful mixing. Silicone molds give neat shapes with little fuss. Homemade or found molds work too. You can also explore related projects, like aromatic gems or worry stones, by following guides such as our Aromatic Gems tutorial for more texture and color ideas.
Step-by-Step Directions

- Prepare your workspace and materials.
Keep a small bowl of water, your chosen clay, molds, and a tray nearby. Soft natural light helps you notice texture and color. - Soften the clay with your palms.
Work it slowly until it feels even and warm. Notice the change from cool to slightly warm under your fingers. - Press clay into the mold or shape with your hands.
Use even pressure and fill all corners. Smooth the back with a spoon so each piece sits flat. - Create texture or impressions.
Gently press a leaf, button, or thread into the surface. These small marks become personal details that catch the light. - Smooth edges with a wet fingertip.
Dip your finger lightly in water and trace the rim. This step quiets roughness and makes the piece feel finished. - Remove excess clay and level the back.
Use a small spatula or the edge of a spoon. Keep movements slow so the shape stays steady. - Let the pieces dry slowly on parchment.
Place them in a warm, still area away from direct sun. Turn them gently after a day if the back seems damp. - Sand gently when fully dry.
Use very fine sandpaper to soften any rough patches. Breathe slowly as you work and feel the texture change under your fingertips. - Add essential oil when the piece is fully dry.
Place 3 to 5 drops on the center of the stone or on the back. Let the oil sink in for a few minutes, then smell and adjust. - Optionally seal with a thin wax or food-safe oil.
This step smooths the surface and makes the scent last a little longer. Warm the beeswax and brush it on thinly; let cool. - Give the stones a gentle rest before use.
Let them sit overnight so the scent settles. Then hold one close and breathe. Take note of how the aroma unfolds.
These steps stay simple on purpose. The small, steady acts of pressing, smoothing, and waiting form the heart of the experience. I often pause between steps to breathe and notice how my hands feel. That pause helps the craft remain calming rather than hurried.
Bringing DIY Aroma Stones Into Your Space

Finished stones sit easily in a small bowl, on a nightstand, or under a pile of folded linens. You can tuck one into the upper corner of a closet or the pocket of a coat. The scent will whisper out slowly, not shout.
For bedside use, place a stone on a small ceramic dish. The material beneath changes how the scent moves; a fabric surface holds scent differently than a ceramic one. Placing a stone near a window that opens to fresh air helps the scent breathe gently throughout the day.
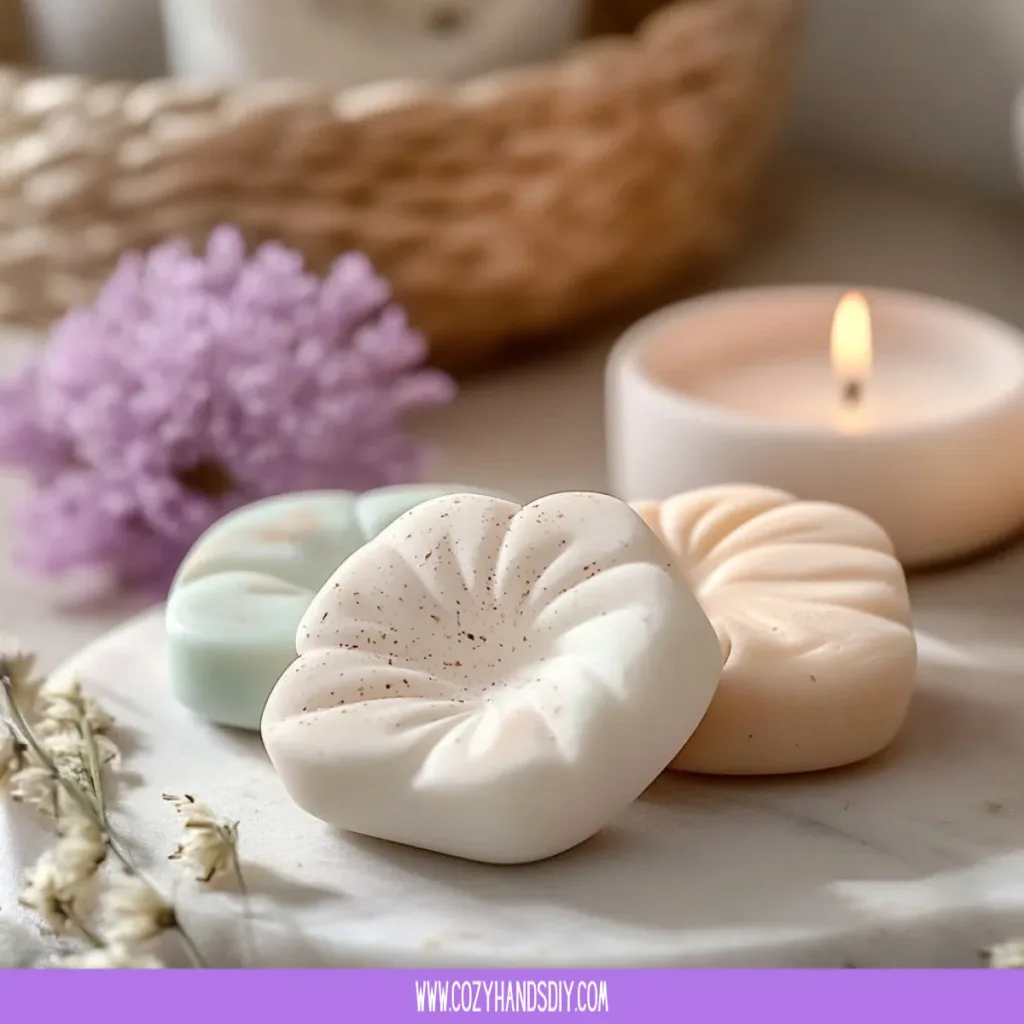
A small set on a coffee table becomes a quiet conversation piece. They invite fingers to trace their surfaces and hands to return for comfort. If you want a different visual, scatter a few among dried flowers or small branches in a shallow bowl. The stones become part of a still life that feels lived in and loved.
You can explore related calming crafts on our site, like the handmade aroma stones collection, where I share photos and thoughts about display ideas and scent pairings.
How to Store or Reuse DIY Aroma Stones
Store unused stones in a small glass jar or a breathable fabric pouch. Glass keeps out dust and helps the scent stay intact. A fabric pouch lets the aroma slip out a little more each time you open it. Both methods work; choose what fits the mood you want.
If the scent fades, refresh your stones with a few drops of essential oil. Apply the oil gently to the center or the back and let it absorb for an hour before using. You can change the scent over time if you like. A lavender stone may become a citrus stone with one careful refresh.
For long-term care, avoid high humidity and direct sun. Both can change the feel and look of the stone. Keep a note about the oils you used and the date you made them. That small record helps you remember which blends were your favorites and how long they lasted.
When a stone finally feels worn or its scent never seems to come back fully, you can repurpose it. Crush a faded stone into a small jar of dried flowers to make a sachet, or use the crushed bits in a potpourri bowl. The scent may linger and blend with new ingredients in a gentle, layered way.
Calm Customization Ideas
- Add botanicals to the surface. Press tiny dried flowers or seeds for a soft, natural look. These small additions also introduce a faint visual scent memory.
- Try color with clay slips or natural pigments. A faint wash of color can make stones feel like small keepsakes. I like a pale sage for its quiet warmth.
- Mix oils for a seasonal shift. Blend lavender with sweet orange in winter for a bright yet calm scent. Write down your blends so you can repeat the ones you love.
- Make a set with different textures. Smooth some stones and leave others slightly rough. Rotate them in a bowl so each touch brings a different sensory note.
- Craft small tokens for friends. Wrap a single aroma stone in soft paper with a short note. The gift becomes a shared pause that feels personal and calm.
These ideas remain invitations. Try one or two and notice how they make the object feel more like yours. I often make extra stones and keep them in a drawer; pulling one out on a tired evening feels like finding a quiet friend.
FAQs About DIY Aroma Stones:
u003cstrongu003eHow long will the scent last on an aroma stone?u003c/strongu003e
u003cpu003eScent longevity depends on clay type and oil. On porous air-dry clay, the scent can last from a few days to a few weeks. Refreshing with a drop of oil brings the aroma back. I usually refresh once every one to two weeks for regular use.u003c/pu003e
u003cstrongu003eCan I use any essential oil?u003c/strongu003e
u003cpu003eYou can use most essential oils, but choose calming, skin-safe scents if stones will sit near bedding. Lavender, chamomile, and cedar are gentle options. Avoid strong oils if someone nearby has sensitivities. When in doubt, test a small amount and smell it after a day.u003c/pu003e
u003cstrongu003eIs it safe to put aroma stones in children’s rooms?u003c/strongu003e
u003cpu003eUse caution. Choose mild oils and place stones out of reach. I prefer to use other calming rituals in a child’s space, like soft lighting and quiet stories, and reserve aroma stones for areas adults access easily.u003c/pu003e
u003cstrongu003eWhat if my stone cracks while drying?u003c/strongu003e
u003cpu003eSmall cracks are common and often fixable. Lightly smooth the cracked edge with a damp finger before it hardens fully. For plaster pieces, avoid rapid drying and slow the process with a slightly cooler spot.u003c/pu003e
u003cstrongu003eCan I make smaller worry-stone versions?u003c/strongu003e
u003cpu003eYes. Press clay into shallow molds and smooth into a palm-friendly shape. These tiny stones work well for steady breathing and gentle focus. If you want instructions for worry stones specifically, our u003ca href=u0022https://www.cozyhandsdiy.com/diy-worry-stones-you-can-craft-today/u0022u003eworry stones projectu003c/au003e has ideas that pair nicely with aroma stones.u003c/pu003e
A Gentle Note Before You Go
Take a moment to breathe in and picture a small bowl of stones sitting in soft light. Each one will remind you of a time you slowed down and made something by hand. Making these stones becomes a practice as much as it becomes a craft. The act of pressing clay, choosing an oil, and waiting for the scent to settle turns into a gentle ritual that you can return to again and again.
If you ever feel rushed, set your materials aside and return when you can move slowly. This craft rewards patience and quiet attention. Let your hands lead and your senses settle. Small things like a warmed palm, the scent of lavender, or the sight of a simple stone can keep you rooted in the moment.
Conclusion
If you want a different technique or a visual reference, the tutorial at DIY Aroma Stones – Rosemary And Pines Fiber Arts shows another approach and inspiring images to explore. For a lavender-focused method with clear steps, take a look at How to make lavender aroma stones as a natural diffuser – Nikura for a gentle variation on scent and materials.
PrintDIY Aroma Stones

Create calming DIY aroma stones that release essential oils gradually, perfect for enhancing your living space with soothing scents.
- Prep Time: 15 minutes
- Cook Time: 0 minutes
- Total Time: 15 minutes
- Yield: 6 aroma stones
- Category: Craft
- Method: Crafting
- Cuisine: N/A
- Diet: N/A
Ingredients
- Air-dry clay
- Fine white clay or plaster of Paris (optional)
- Simple silicone molds or small cookie cutters
- Essential oils (lavender, eucalyptus, or your favorite scents)
- Small bowl of water
- Spoon or small spatula
- Fine grit sandpaper
- Cotton swabs or pipettes
- Small tray or piece of parchment for drying
- Clear beeswax or food-grade oil (optional)
Instructions
- Prepare your workspace and materials.
- Soften the clay with your palms.
- Press clay into the mold or shape with your hands.
- Create texture or impressions.
- Smooth edges with a wet fingertip.
- Remove excess clay and level the back.
- Let the pieces dry slowly on parchment.
- Sand gently when fully dry.
- Add essential oil when the piece is fully dry.
- Optionally seal with a thin wax or food-safe oil.
- Give the stones a gentle rest before use.
Notes
This craft is forgiving; small imperfections add character and storytelling to each stone.