

Creating a DIY Gemstone Glow Jar offers a gentle escape into a realm of shimmering creativity. As you gather your materials, imagine the smoothness of colorful stones sliding between your fingers. Feel the soothing light that will eventually emanate from your completed jar, illuminating the room like a beacon of calm. It’s a moment to breathe, to connect with your senses, and to embrace the tranquil process of making something beautiful. You may also find Diy Lightning Storm In A Jar useful.
Why Make This DIY Gemstone Glow Jar
Making a DIY Gemstone Glow Jar brings a quiet joy that invites mindfulness into your day. Each step encourages you to slow down and foster a deeper connection with the materials in front of you. The process of layering stones, watching the glow emerge, and finally witnessing the calming display connects not just your hands but also your heart to the art of making. This project embodies a tactile experience that can help ease stress and cultivate tranquility. If you enjoy crafting with light and color, consider exploring our DIY Cotton Candy Glow Jars as well for a delightful twist on a similar concept.

A Gentle Look at the Process
Creating your Gemstone Glow Jar unfolds like an engaging story filled with soft textures and radiant hues. You’ll begin with the act of gathering each unique gemstone, savoring its weight and shine. The sounds of stones cascading against each other create a rhythmic background, enhancing your sensory journey. As you pour in the materials, the visual beauty builds layer by layer, inviting you to find joy in the movement and rhythm of the process. Let’s explore what you’ll need to get started. You may also find Diy Moon Rocks Glow Bounce useful.
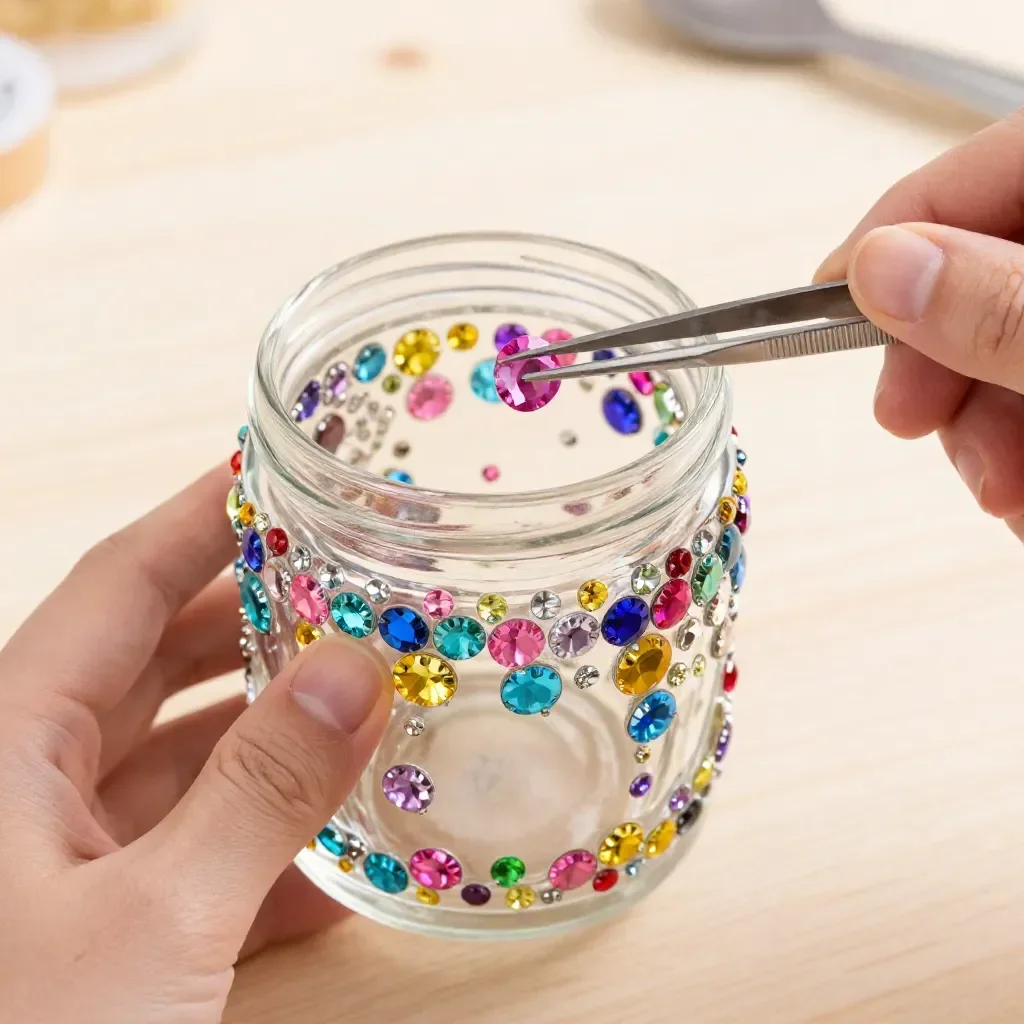
Materials You’ll Need
- A clear glass jar (any size you prefer)
- Glow-in-the-dark paint or powder (easy to find at craft stores)
- A selection of colorful gemstones or pebbles
- Water
- Optional: LED tea light (if you prefer a safer light source)
These materials are all fairly easy to source, and you might already have some at home. Feel free to get creative; even simple items can transform into your own version of a Gemstone Glow Jar! You may also find Diy Rainbow Density Jar useful.
Step-by-Step Directions
Begin by preparing your jar. Make sure it is clean and dry before starting. This preparation completes the calming atmosphere for your project.
If you’re using glow-in-the-dark paint, apply a coat evenly on the inside of the jar to create a glowing backdrop. Allow it to dry completely.
Once dry, start layering your gemstones inside the jar. Notice how each stone feels as it slides into place, creating a gentle rustling sound.
After adding the gemstones, fill the jar with water, letting it mix with the gemstones. This can create a lovely reflection of light that dances as you move the jar.
If desired, place an LED tea light at the base of the jar. This can enhance the glow effect when the room is dark and adds to the cozy ambiance.
Once assembled, find a perfect spot for your gem jar where it can shine. Watching the glow will remind you of the calm and mindful creation process every time you see it.

Enjoying the Finished Piece
Your finished DIY Gemstone Glow Jar can be a centerpiece in any room. It serves as a gentle nightlight in a bedroom, comforting you with its soft luminescence as you drift into relaxation. Another idea is to place it on a side table while enjoying a good book or meditation, enveloping your space in a comforting glow. Allow this glowing piece to remind you of the enriching experience of creating it, transforming momentary pauses into cherished reflections.
Keeping It for Later
To ensure your Gemstone Glow Jar lasts, store it away from direct sunlight if possible. Direct sunlight can impact the glow-in-the-dark materials over time. However, if you find the glow diminishing, simply recharge it under light for a while, whether natural or artificial. You can also reuse the jar by swapping out the gemstones, allowing for a fresh look with your favorite colors.
Gentle Tips & Variations
- Feel free to experiment with different types of stones or even glass beads to create unique effects.
- You can consider incorporating scents by adding a few drops of essential oils to the water, inviting both visual and olfactory joy.
- For a playful twist, try using colored water instead of clear water to complement the gemstones.
- Personalize your jar by adding small items like shells or tiny figures, combining elements that resonate with you.
- Make it a cozy gathering activity by inviting friends or family to create their own versions, fostering connection through craft.

FAQs About DIY Gemstone Glow Jar
Can I use regular stones instead of glow-in-the-dark materials?
Absolutely! While glow-in-the-dark stones enhance the luminescence, you can create beauty using regular decorative stones. The jar will still provide a lovely effect.
How can I clean my jar?
You can clean your jar using mild soap and warm water. Ensure it’s dried completely before adding any materials again.
Will the glow-in-the-dark paint fade over time?
Yes, it may diminish with prolonged exposure to sunlight, but simply recharging the paint under light will restore its glow.
Can I use this jar as a centerpiece for special occasions?
Certainly! The serene glow makes it a lovely decorative piece for events, enhancing the ambiance with a cozy touch.
Is it safe to leave a real candle inside the jar?
For safety reasons, it’s best to use LED tea lights instead of real candles, as they provide the same effect without fire risks.
Conclusion
Creating a DIY Gemstone Glow Jar is not just about the finished product; it’s also about the serene moments filled with creativity and calm that accompany the process. If you’re interested in similar projects that spark creativity and joy, consider exploring the Glow-in-the-Dark Spider Jar for a festive touch or enjoy the artistry found in diamond painting kits that offer another calming craft experience. Embrace the art of creating and enjoy the peaceful glow of your new gem jar!
PrintDIY Gemstone Glow Jar

Create a beautiful DIY Gemstone Glow Jar that brings a calming glow to your space, using colorful gemstones and glow-in-the-dark paint.
- Prep Time: 10 minutes
- Cook Time: null
- Total Time: 10 minutes
- Yield: 1 Glow Jar
- Category: Craft
- Method: Crafting
- Cuisine: Not Applicable
- Diet: Not Applicable
Ingredients
- A clear glass jar (any size you prefer)
- Glow-in-the-dark paint or powder
- A selection of colorful gemstones or pebbles
- Water
- Optional: LED tea light
Instructions
- Begin by preparing your jar. Make sure it is clean and dry before starting.
- If you’re using glow-in-the-dark paint, apply a coat evenly on the inside of the jar and allow it to dry completely.
- Once dry, start layering your gemstones inside the jar.
- After adding the gemstones, fill the jar with water, letting it mix with the gemstones.
- If desired, place an LED tea light at the base to enhance the glow effect.
- Once assembled, find a perfect spot for your gem jar to shine.
Notes
Store the jar away from direct sunlight to prolong the glow effect.