

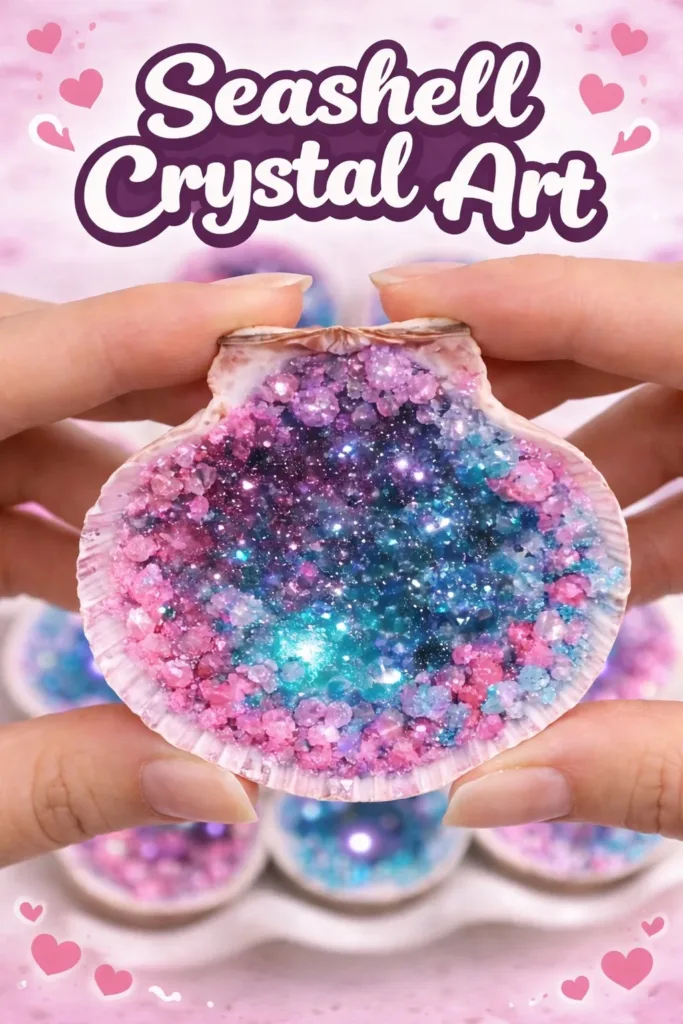
The afternoon light slides through linen curtains and warms the small worktable. I hold a pale scallop shell and trace the ridges with my thumb, feeling the faint grit of sand and the cool gloss of polished nacre. I set the shell in a shallow dish of warm, mineral-scented water and watch tiny crystals begin to gather like early frost. Seashell Crystal Art brings that hush of shoreline memory to the table, a quiet practice that asks only time, attention, and gentle hands. If you enjoy watching crystals bloom, you might also like our piece on the crystal heart for another slow, tactile project.
The Quiet Joy of Making Seashell Crystal Art

Seashell Crystal Art asks you to slow down and notice small changes. The first sensory gifts arrive in the textures: the smooth inside of a shell, the grainy salt granules, the whisper of the spoon against glass. The visual rewards come later, in the way crystals catch light and scatter tiny rainbows when they mature.
This craft sits at the meeting point of shoreline memory and patient making. You bring the shells, warm a solution, and let chemistry and time create a surface that feels both ancient and new. Many people tell me they make this when they need to be gentle with themselves. The work comforts without demanding perfection.
I make these pieces when I want a mindful pause. I cup a shell and breathe with it, listening for the small sounds water settling, sugar-like granules dissolving, the hiss of steam when I pour hot water. That sensory rhythm, slow and steady, helps me focus. It can help you, too, whether you make one small ornament or a trio to place on a shelf.
A Gentle Look at the Process
Before you begin, imagine the flow of the work. You measure and stir, feeling the warmth of the water and the grain of the minerals. You nestle shells into a shallow dish and watch the solution cling and then shrink as crystals form. The process blends active minutes with long quiet waits.
You move deliberately. You set a timer and let the mind soften while crystals grow. You return later to a new texture, a new catch of light. If you have tried other small crystal projects, this one will feel familiar in its patience and surprising in its organic shapes. For another slow crystal exploration, read our calm guide on the crystal heart craft to compare textures and techniques.
The rhythm helps you notice weather, time of day, and your own breathing. In this way, Seashell Crystal Art becomes less about an end result and more about being present with a small, unfolding transformation.
Materials You’ll Need
- Seashells, clean and dry (easy to find on walks or in craft stores)
- Hot water, boiled or from a kettle (warm helps dissolve materials)
- Epsom salt, borax, or table salt (Epsom salt feels gentle; borax grows faster but needs care)
- Clear shallow dish or glass jar (for holding shells and solution)
- Measuring cup and spoon (for gentle accuracy)
- Small funnel or spoon for pouring (optional)
- Fine sand or sand-sized beads for texture (optional)
- Clear-drying craft glue or a hot glue gun (for anchoring shells if needed)
- Food coloring or mica powder for subtle hue (optional)
- Thin string or wire for hanging, if you plan to make ornaments
- Gloves and a mask, if you use borax (safety first)
- A tray or cloth to catch spills (keeps the space calm and tidy)
A note on materials: Epsom salt dissolves easily and forms soft crystals that feel velvety. Borax tends to produce larger, sparkly crystals faster because it reaches a higher level of saturation when heated. Table salt will grow more modest crystals and can feel more delicate. I choose based on the feel I want in the finished piece.
Step-by-Step Directions
- Prepare your workspace and gather the materials.
Keep the surface clean and set a small tray or towel down.
Arrange shells, measuring tools, and a warm cup of tea nearby. - Clean and sort your shells.
Rinse shells to remove grit and let them dry.
Running your fingers over ridges connects you to the shell’s texture. - Heat water until just steaming.
Use a kettle or saucepan and pour carefully into a heatproof jar.
The warm steam carries a small, calming scent that feels like a shoreline memory. - Measure and dissolve your chosen crystal material.
For Epsom salt, use about 2 parts salt to 1 part hot water and stir until mostly dissolved.
For borax, use about 3 tablespoons per cup of water; stir until the solution looks clear and slightly glossy. - Add a hint of color if desired.
A few drops of food color or a pinch of mica powder lifts the palette.
Stir slowly and watch the liquid change, like a gentle tide. - Place shells in a shallow dish, concave side up or down, depending on the effect.
Arrange them with intention; space them so crystals can grow freely.
I often place a mix of larger and smaller shells for a layered look. - Pour the warm solution over the shells slowly.
Use a spoon or funnel to control the flow and avoid splash.
Watch how the liquid fills ridges and settles in nooks; this is part of the magic. - Set the dish in a quiet place away from drafts and direct sunlight.
Cover the dish loosely with a paper towel to keep dust out.
Leave the piece undisturbed for several hours to overnight, depending on the material and the size of crystals you want to grow. - Check gently after a few hours and then after a full day.
Crystals form first as tiny points and then knit into larger shapes.
I touch the air around the dish rather than the shells to keep the process calm. - Remove and dry when the crystals feel stable.
Lift shells slowly and set them on a soft cloth to air dry.
If you plan to hang them, attach string or wire while still slightly damp to help the attachment set. - Seal if you like a permanent finish.
A clear spray sealant preserves delicate crystals and reduces shedding.
Spray in short, even bursts outdoors or in a well-ventilated area and let dry fully. - Clean your workspace and store unused materials safely.
Label any remaining solution or powders, and keep them out of reach of children.
Washing hands after the project helps you end the practice in a mindful way.
In step 4, if you like watching different crystal recipes, try comparing results with our baking soda method in the baking soda crystal heart growth guide. It shows how small changes in solution and temperature create different textures and growth habits.
Bringing Seashell Crystal Art Into Your Space

Seashell Crystal Art blends easily into cozy corners. A single shell with a lacy halo of crystals looks lovely on a windowsill where light can pass through the facets. A small cluster of pieces arranged on a wooden tray makes a quiet centerpiece for a bedside table or a reading nook.
I like to tuck one into a shallow bowl of dried lavender or soft linen, where the contrast between soft and crystalline feels peaceful. Hanging pieces catch passing light and spin gently when a window opens. If you make several, group them by color or size so the display feels intentional rather than cluttered.
When I give these pieces as small gifts, I wrap them in tissue and tie them with twine. The giver and the receiver both share a sense of slow time and care. The pieces do well in low-traffic spots where they can be admired and handled occasionally.
Making This DIY Last
Crystals can be fragile, so choose a gentle spot for display.
Avoid high humidity or places where they will be knocked.
If a crystal edge begins to flake, you can re-dampen it with a tiny bit of the original solution to encourage minor regrowth, then let it dry slowly.
For more secure keepsakes, a thin coat of clear sealant or epoxy holds crystals in place without dimming their sparkle.
Store unused pieces in a padded box or wrapped in soft paper.
Layers of tissue prevent scratching and preserve the delicate texture.
If you plan to reuse shells, soak them gently in warm water to dissolve weaker crystals.
Do not use harsh scraping tools that could damage the shell surface.
I label and store shells with dates so I remember which ones came from walks and which I purchased.
When using borax, keep in mind that it can dissolve certain paints and finishes over time.
A sealant helps protect both the crystal and the underlying shell.
Gentle Tips & Variations

- Invite color slowly.
Add just a drop of dye or mica to the solution and grow a soft tint.
Subtle color often feels more peaceful than bright tones. - Try layering textures.
Before you pour the solution, add a dusting of fine sand or sugar on the shell for a textured starting point.
This can create tiny points of nucleation for crystals to grow around. - Make a tiny scene.
Glue a small driftwood base to a large shell and grow crystals only on the shell’s cup.
The contrast between wood and crystal makes a pleasing tactile story. - Use a shallow, wide dish for slow, lace-like growth.
A jar encourages taller crystal columns; a dish creates a delicate sheet of crystals. - Consider safety and substitutes.
If you craft near children or pets, choose Epsom salt or table salt instead of borax.
Borax works well for pronounced growth, but I use it sparingly and with gloves when I want bigger crystals.
If you enjoy experimenting, you might like the soft, petal-like forms in our crystal heart craft tutorial. It shows how small changes to drying time and solution concentration create very different feels.
FAQs About Seashell Crystal Art
How long does it take for crystals to form on a shell?
You will see tiny points within a few hours, and more substantial formation after 12 to 24 hours. For large, glittering crystals, allow two days or more. The temperature and type of material influence speed.
Is borax safe to use for this craft?
Borax works well but requires care. It irritates skin and can be harmful if ingested. Wear gloves, keep it away from children and pets, and store it in a labeled container. If you prefer a gentle approach, Epsom salt gives lovely results without the same safety concerns.
What if the crystals fall off or flake?
Crystals are fragile by nature. A thin coat of clear sealant helps prevent shedding. You can also reintroduce a tiny amount of the solution to encourage regrowth on small areas, then dry slowly to set the structure.
Can I use painted shells or shells with coatings?
Coatings may change how crystals attach. Natural, clean shells accept the solution best. If you use painted shells, test one first to see how the paint reacts to heat and solution. A primer or sealant can protect painted surfaces.
How do I clean the workspace after using borax or other salts?
Wipe surfaces carefully with a damp cloth, then rinse the cloth and wash your hands. Dispose of leftover solution according to local guidelines, and do not pour concentrated borax solutions where children or pets might reach them.
A Gentle Note Before You Go
When I finish a Seashell Crystal Art session, I sit for a moment and notice the small changes in the room. Light feels a little softer. I feel steadier. The work teaches patience: you release the need to hurry and welcome small shifts.
Make just one piece at first. Give it your time and attention. Let the process inform how you spend the rest of the afternoon. You may find that making this way helps you return to other tasks with a calmer mind and gentler hands.
Conclusion
If you admire decorative glass and want ideas about how pattern and form can echo seashell textures, the elegant shapes in this glass vessel offer visual inspiration for display choices, as shown on Ruvati’s Murano glass art vessel. For those who seek a lasting memorial or keepsake interpretation of seashell crystal aesthetics, you may find helpful options in the curated urn designs at Seashell Crystal Art Cremation Adult Urn.
PrintSeashell Crystal Art

Create beautiful crystal formations on seashells using a simple mixture of salts and warm water. This craft combines patience and creativity for a serene experience.
- Prep Time: 15 minutes
- Cook Time: 0 minutes
- Total Time: 24 hours
- Yield: Varies (depends on number of shells used)
- Category: Craft
- Method: DIY Craft
- Cuisine: N/A
- Diet: N/A
Ingredients
- Seashells, clean and dry
- Hot water
- Epsom salt, borax, or table salt
- Clear shallow dish or glass jar
- Measuring cup and spoon
- Small funnel or spoon for pouring (optional)
- Fine sand or sand-sized beads (optional)
- Clear-drying craft glue or hot glue gun (optional)
- Food coloring or mica powder (optional)
- Thin string or wire for hanging (optional)
- Gloves and a mask (if using borax)
- A tray or cloth to catch spills
Instructions
- Prepare your workspace and gather the materials.
- Clean and sort the shells by rinsing and drying them.
- Heat water until just steaming and pour it carefully into a heatproof jar.
- Measure and dissolve your chosen crystal material in the warm water.
- Add food coloring or mica powder if desired.
- Place the shells in a shallow dish and arrange them concave side up or down.
- Pour the warm solution over the shells slowly to avoid splashing.
- Set the dish in a quiet place and cover loosely with a paper towel.
- Check gently after a few hours and again after a full day for crystal growth.
- Once stable, remove the shells and let them air dry.
- Optionally seal the crystals with a clear spray sealant.
- Clean the workspace and store any unused materials safely.
Notes
Crystals can be fragile; display them in low-traffic areas. If crystals start to flake, re-dampen with the original solution to encourage minor regrowth.