

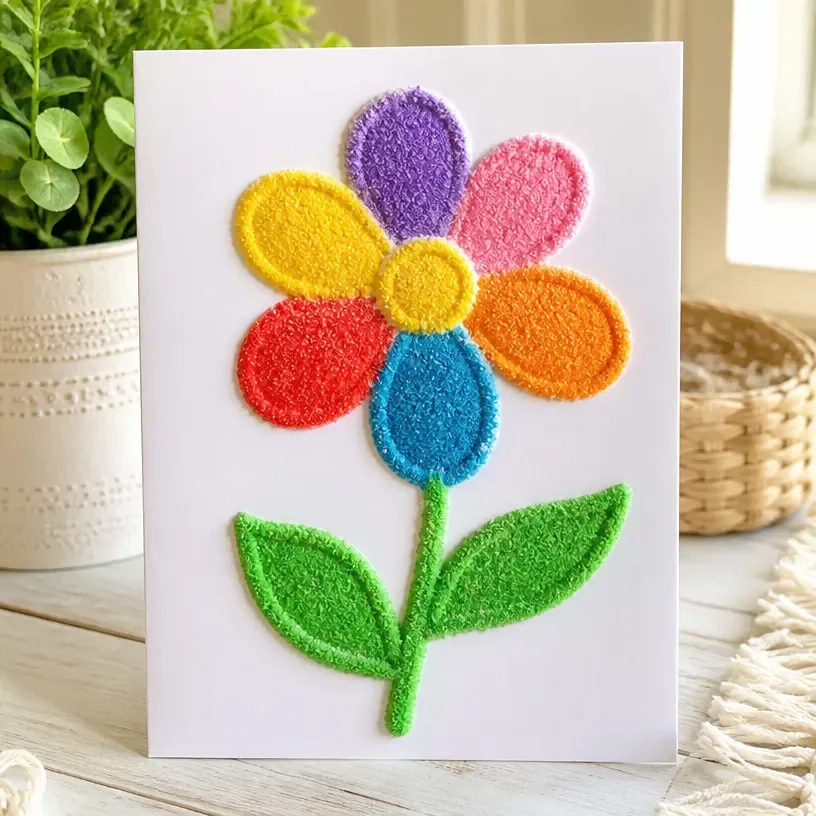
The quiet act of creating a textured piece of art can be an invitation to calmness. As you begin to mold salt and glue into a delicate form, the tactile sensation of the materials sweeps you into a sensory embrace. The gradual building of textures brings a gentle focus, like a breath in a still moment, encouraging you to linger and explore each layer. This is the essence of the 3D Raised Salt Art Tutorial, a beautiful, meditative process that immerses you in creativity and warmth. You may also find Diy Epsom Salt Window Frost Art Tutorial useful.
The Heart Behind This DIY
Creating art often serves as a soothing balm for the soul. The 3D Raised Salt Art Tutorial allows you to slow down, guiding your hands to work with simple materials while your mind finds tranquility. The rhythmic motion of applying glue and sprinkling salt not only produces a unique piece of art but also cultivates mindfulness and focus. Each step invites you to embrace the creative process, turning your attention away from busyness toward the simple joy of crafting. You may also find Diy Pipe Cleaner Crystal Heart Tutorial useful.
You may also find Epsom Salt Window Frost Art useful.
A Gentle Look at the Process
As you embark on this creative journey, consider how the blend of materials will come together. Picture the soft crunch of salt, the smoothness of glue, and the way they interact on the canvas. The process feels organic; there is no rush, and no end goal to pressure you. Instead, enjoy the gentle flow of making, where each element finds its place at its own pace. This quiet exploration is what makes the 3D Raised Salt Art feel comforting and engaging.
Materials You’ll Need
Gathering your materials is the first step toward turning your vision into reality. Here’s a gentle list of what you’ll need:
- White school glue (easy to find)
- Table salt (common kitchen item)
- A sturdy piece of cardboard or thick paper
- Food coloring (optional, for added creativity)
- Paintbrush (for applying glue)
- Small cups or bowls (to hold salt or colors)
- An old tray or newspaper (to catch excess salt)
The beauty of this project lies in its simplicity; you can substitute items with what you already have at home.
Step-by-Step Directions
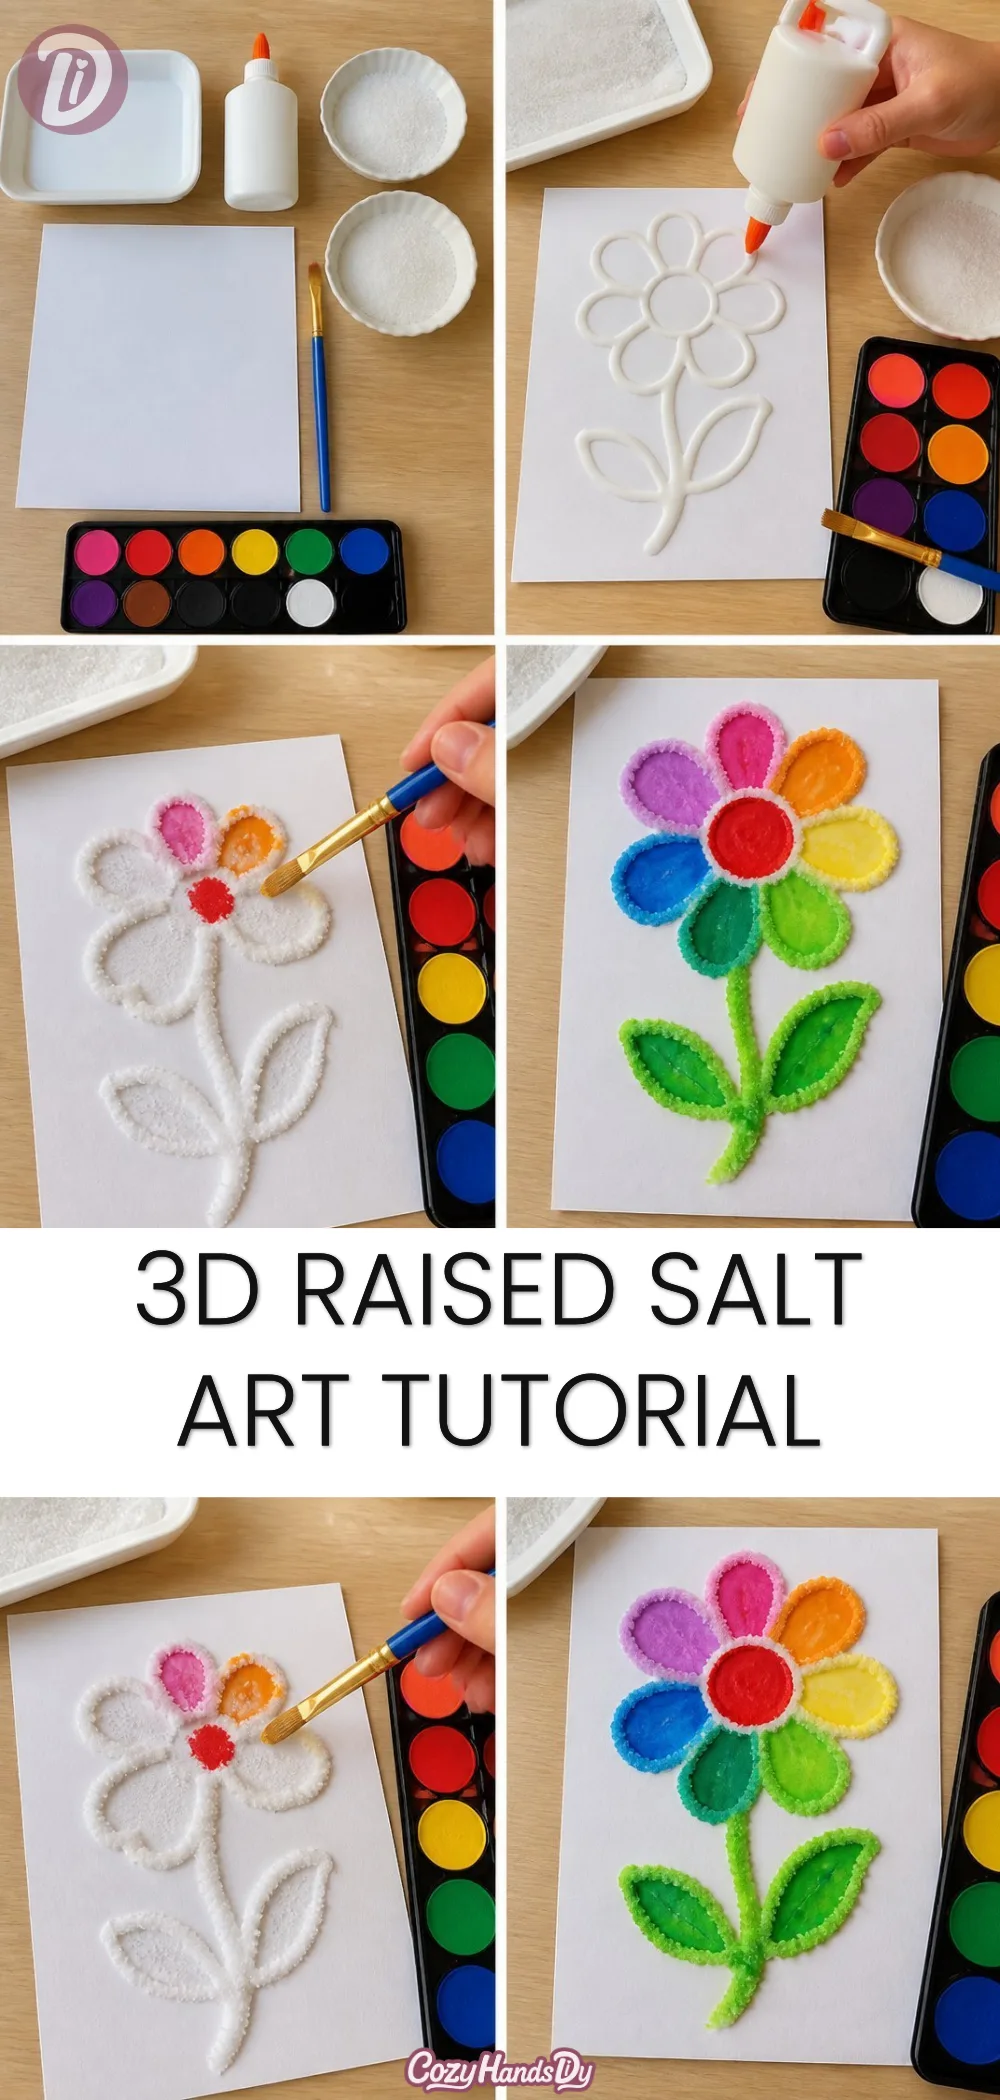
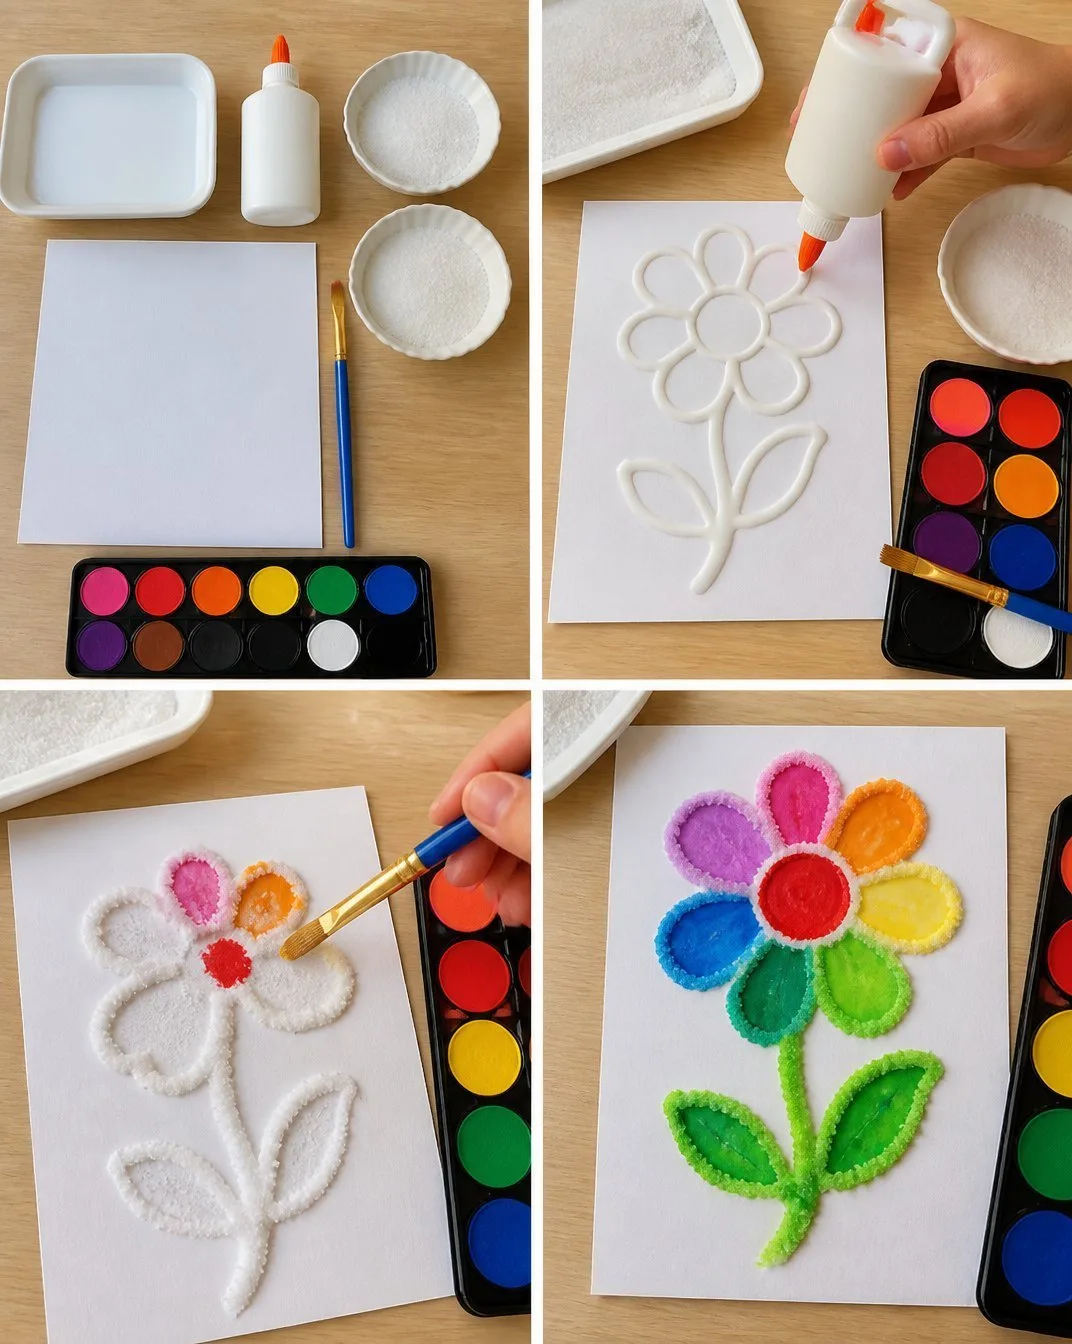
- Begin by preparing your workspace. Cover surfaces with an old tray or newspaper to catch any stray salt as you work.
- Draw your design lightly onto your cardboard. Feel free to use simple shapes or more intricate patterns, depending on your comfort level.
- Use the paintbrush to apply a generous layer of glue over your sketched design. Notice the smoothness as you lay it down.
- Gently sprinkle salt over the glued area, ensuring it is well covered. Let the salt cling to the glue, creating texture.
- Carefully shake off the excess salt, allowing the remaining salt to stay glued in place. This is where your design starts to truly take shape.
- If you’d like to add color, mix food coloring with a few drops of water in small bowls. Drip the colored water onto your salt areas; watch as colors blend and dance together.
- Allow the project to dry completely. This step might take a bit of time, but it’s worth the wait.
- Once dry, slowly tap the cardboard to remove any loose salt. This reveals the crisp texture of your art.
- Display your finished piece proudly or gift it to someone special; the joy of creation often doubles when shared.
Enjoying the Finished Piece
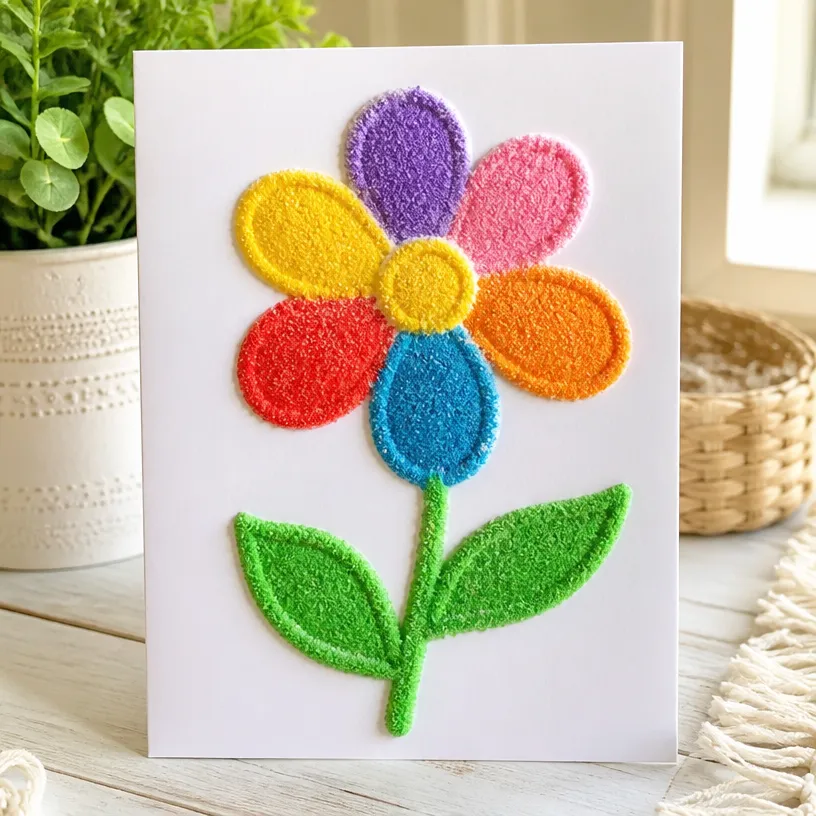
The finished 3D Raised Salt Art can bring a splash of beauty into your home. Consider displaying it on a windowsill where light can catch the salt crystals, making them sparkle gently. Alternatively, use it as a centerpiece on a table during gatherings, inviting others to admire your creation. It serves not only as decor but as a conversation starter about the calming practice of art-making.
Keeping It for Later
To preserve the integrity of your artwork, consider how you’ll store it. Keeping your salt art in a cool, dry place will help maintain its quality. If you notice any loose salt over time, you can gently reapply a thin layer of glue, followed by a sprinkle of additional salt. This simple act not only keeps your art fresh but also allows you to continue interacting with the piece in a nurturing way.
Gentle Tips & Variations
- For a different texture, experiment with different types of salt, like coarse sea salt, to see how it changes your artwork.
- Consider layering different colored salt in a single piece for a multi-dimensional effect.
- Enjoy making a series of smaller pieces and creating a gallery wall that reflects your journey with each one.
- Invite a friend or child to join you in this process. Sharing creative time can add joy to the experience and create cherished memories.
- Don’t worry about perfection. Let your intuition and play guide you in making.
FAQs About 3D Raised Salt Art Tutorial
What age is this project suitable for?
This project can be enjoyed by all ages, though younger children might need some help with the glue and the design. Encourage creativity at any skill level.
How long does the drying process take?
Typically, your artwork will need several hours to dry completely, depending on the thickness of the glue. It’s best to leave it overnight for the best results.
Can I use other colors besides food coloring?
Yes, you can experiment with watercolor paints or even pastel chalks mixed with water to see what effects you can create.
What can I do if some salt doesn’t stick?
If some areas didn’t hold the salt well, simply reapply glue and sprinkle more salt onto those sections; it’s a process of working together that fosters creativity.
Is this project messy?
A little mess is part of the journey! Use a tray or old newspapers to contain the salt, and enjoy the playful nature of crafting.
Conclusion
Creating art through the 3D Raised Salt Art Tutorial offers more than just a chance to craft; it becomes a path to mindfulness and self-expression. By focusing on each small action, you can find peace and satisfaction in the process. If you would like more detailed instructions, you can explore the
DIY 3D Raised Salt Art: Step-by-Step Tutorial – Cozy Hands DIY. Additionally, for more creative inspiration, try learning about the
3D Jellyfish Watercolor Hot Glue Texture Raised Salt Painting.