Shaving Foam Marbled Hearts
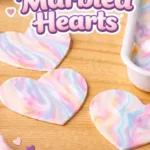
Create beautiful marbled hearts using shaving foam and liquid colors for a calming and creative crafting experience.
- Prep Time: 10 minutes
- Cook Time: 30 minutes
- Total Time: 40 minutes
- Yield: 10 marbled hearts
- Category: Craft
- Method: Crafting
- Cuisine: N/A
- Diet: N/A
Ingredients
- Shaving foam (regular, unscented)
- Liquid watercolors or food coloring
- A shallow tray or baking sheet
- Stiff paper or watercolor paper
- Droppers, pipettes, or small craft brushes
- A skewer, toothpick, or bamboo stick
- Heart-shaped cookie cutter or paper pattern (optional)
- Paper towels
- A ruler and pencil (optional)
- A small spatula or spoon
- Gloves (optional)
- Vinegar and soap for cleanup
Instructions
- Shake and dispense a generous puddle of shaving foam into your tray.
- Press it down gently with a spatula until it forms a smooth, even layer.
- Flatten the foam to about a half-inch depth, smoothing with long strokes.
- Using droppers, add a few small drops of color across the foam.
- Drag a skewer or toothpick through the drops in gentle S or spiral motions.
- Once you love the marbling pattern, place a sheet of paper over the foam.
- Lift the paper straight up to reveal the marbled print beneath.
- Pat the paper lightly with a paper towel to remove excess foam.
- If you want heart shapes, place a cookie cutter on the dry print and trace.
- Clean the tray and tools right after use with soap and warm water.
- Arrange your hearts to dry completely before displaying or gifting.
Notes
You can substitute liquid watercolors for thinned acrylic or fabric dyes if you plan to transfer patterns to cloth. Keep the workspace well-ventilated if you use scented foam.
Find it online: https://www.cozyhandsdiy.com/shaving-foam-marbled-hearts/