

There’s something deeply soothing about allowing the sun to filter through colors, creating a soft dance of light in your space. As you contemplate crafting a Rainbow Pumpkin Patch Window Suncatcher, you might find yourself drawn to the rich textures of the materials, the feel of warm light on your skin, and the joyful colors that transform a simple window into a beautiful focal point. This project is perfect for adults and children alike, bringing a sense of calm and creativity into your home. You may also find Colorful Rainbow Ghost Window Suncatcher Garland For Kids useful.
The Heart Behind This DIY
Creating this Rainbow Pumpkin Patch Window Suncatcher serves more than just a decorative purpose. Engaging in hands-on projects like this allows you to become present in your surroundings, inviting you to focus on textures, colors, and the process itself. The sensory engagement can be meditative, making it a perfect activity for slowing down in our fast-paced lives. As you cut, glue, and arrange your materials, you are also stitching together a thoughtful piece of art that can enhance your living space and your well-being. For ideas on similar cozy crafts, consider exploring the Rainbow Ghost Window Suncatchers.
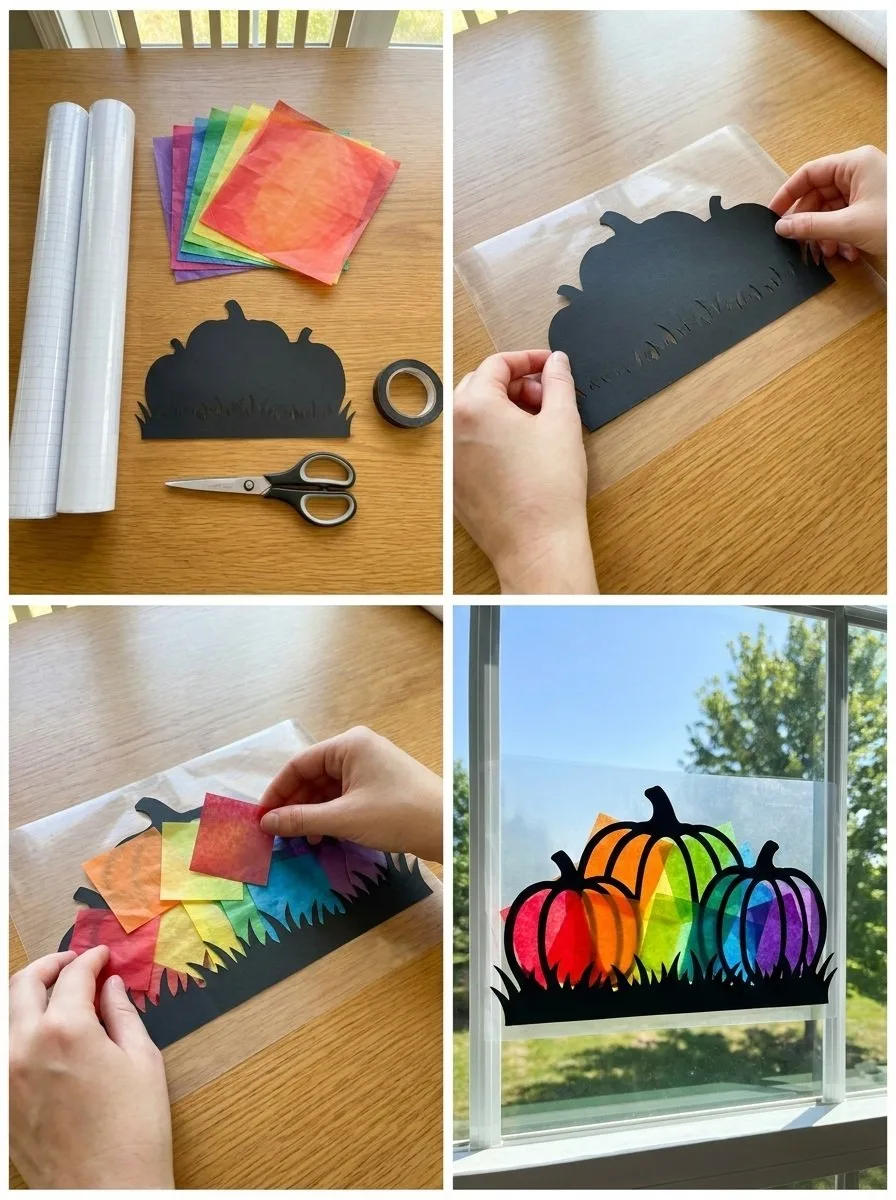
A Gentle Look at the Process
The journey of making a Rainbow Pumpkin Patch Window Suncatcher is filled with delightful moments. You will feel the smoothness of the transparent materials glide through your fingers while you prepare to assemble them. The gentle sound of scissors slicing through paper and the soft rustle of crafting supplies create a rhythmic backdrop that soothes the mind. Each step, from choosing your materials to the final placement in your window, leads you through a creative flow that punctuates a moment of calm in your day. You may also find Back To School Rainbow Pencil Suncatcher 2 useful.
What You’ll Use to Make Rainbow Pumpkin Patch Window Suncatcher
Gathering materials for this DIY can be part of the experience itself, allowing you to be intentional about what you choose.
- Clear contact paper (this will be your canvas)
- Colored tissue paper in various fall colors (think reds, oranges, yellows)
- Scissors (for cutting shapes)
- Black construction paper (for enhancing the design)
- A pencil or marker (for tracing shapes)
- A ruler (to ensure symmetrical designs)
- Optional: embellishments like glitter or stickers for added creativity
These materials are typically easy to find at craft stores or even in your home supplies. They invite personalization, and you can choose to use whatever colors resonate with you and your space.
Step-by-Step Directions
Start by preparing your workspace. Lay out all the materials to make the process flow smoothly. Enjoy the peaceful ambiance of your space as you begin.
Using the ruler, measure and cut a rectangular piece of clear contact paper to your desired size, approximately 12×8 inches.
Next, brainstorm pumpkin shapes you’d like to include. Sketch these shapes lightly on the black construction paper using a pencil.
Cut out your pumpkin shapes. As you cut, appreciate the feel of the paper as it bends and yields to your scissors.
Now, take your colored tissue paper and tear it into small pieces. The tactile experience of ripping paper can be quite satisfying.
Start layering the tissue paper pieces on one side of the clear contact paper. You might arrange them in overlapping layers for a richer texture.
Once you are satisfied with the appearance, gently press your black pumpkin cutouts onto the tissue-covered side.
Seal your work by carefully placing another piece of clear contact paper over the top, ensuring there are no air bubbles trapped inside.
Trim any excess paper around the edges, then hang your suncatcher in a window that receives sunlight.
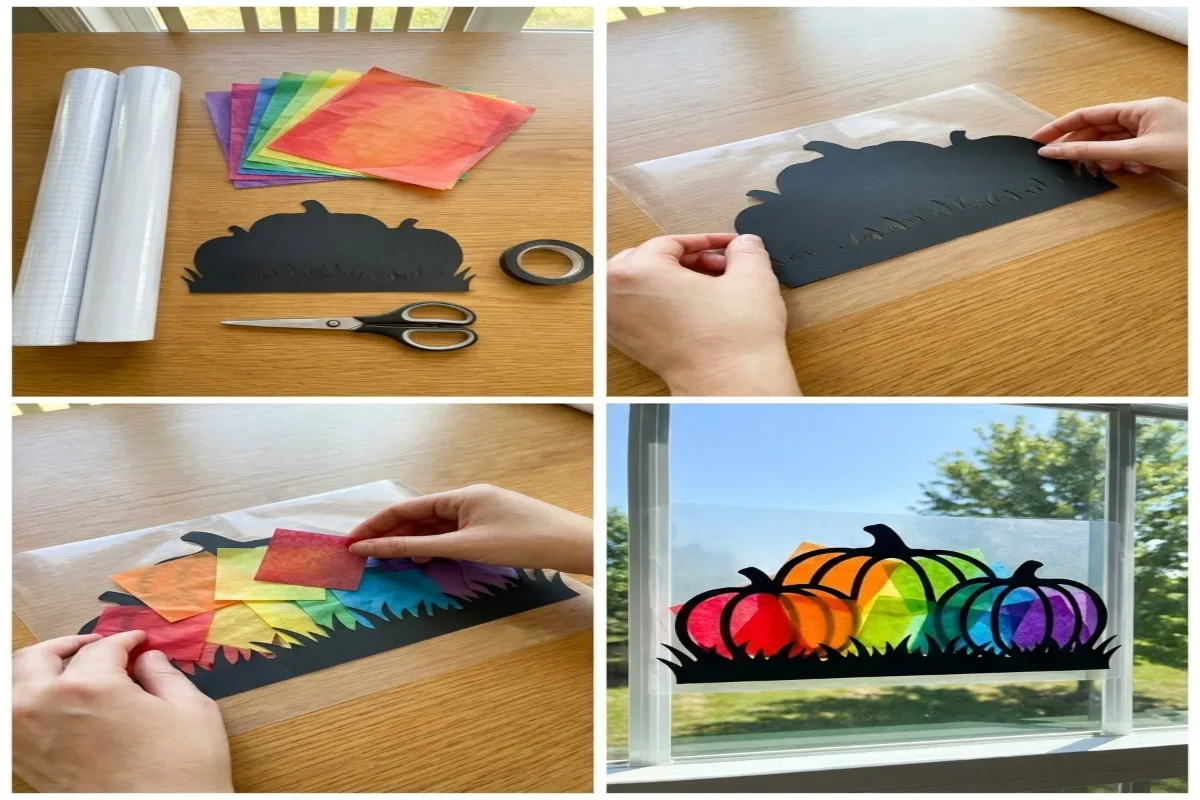
Enjoying the Finished Piece
Once your Rainbow Pumpkin Patch Window Suncatcher is complete, you can enjoy watching how sunlight dances through the colors, creating a warm, inviting atmosphere in your home. These vibrant suncatchers can be used not just as decor for the fall season but also as simple joys that bring a little light into every day. They can easily become a part of your cozy routine, reminding you of the beauty in small moments. For anyone interested in further expanding their crafting repertoire, you might also like to explore how to make a Rainbow Pencil Suncatcher.
Making This DIY Last
To ensure your Rainbow Pumpkin Patch Window Suncatcher withstands the test of time, gently clean it with a soft cloth and mild soap, avoiding harsh chemicals. When it’s time to put it away, or if you wish to replace it with a new piece, store it flat in a cool, dry place, away from direct sunlight when not in use. This careful attention to your crafted piece will help maintain its vibrancy and integrity over time.
Gentle Tips & Variations
- Experiment with different shapes beyond pumpkins, like leaves or apples, for a seasonal touch.
- Consider adding a layer of clear craft glue mixed with water to give your suncatcher a glossy finish after it’s fully assembled.
- If you want to add depth, try layering various dimensions of tissue paper it can add a wonderful effect when the sunlight passes through.
- Embrace a color scheme that matches your home décor or seasonal changes for a continuous fresh look.
- Allow kids to create their shapes, enhancing their connection to the project and encouraging their creativity.
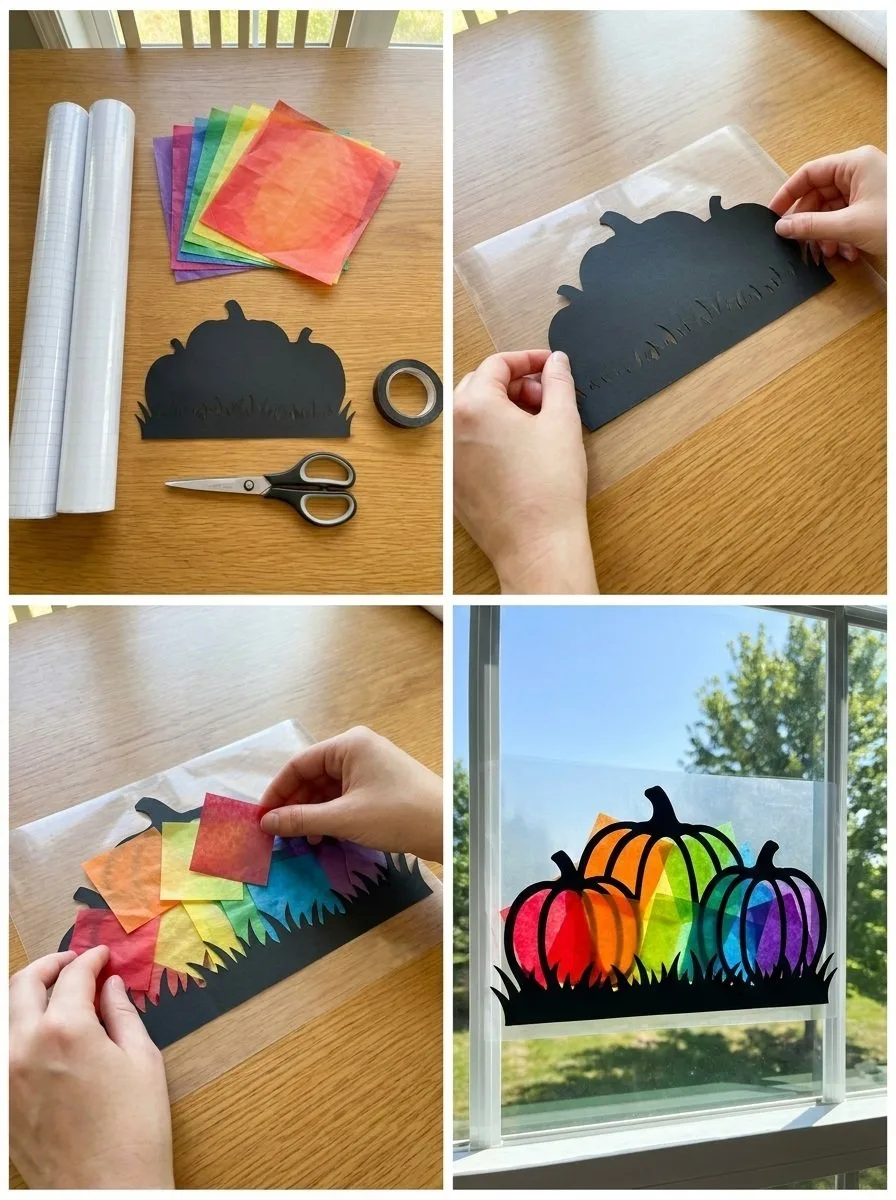
FAQs About Rainbow Pumpkin Patch Window Suncatcher
Can I use regular paper instead of tissue paper?
Yes, you can, but tissue paper allows for a more translucent effect, enhancing the colors when sunlight shines through.
How can I hang my suncatcher?
Using removable adhesive hooks or suction cup hooks are excellent methods. They won’t damage your window and are easy to remove.
A Gentle Note Before You Go
As you conclude your experience with the Rainbow Pumpkin Patch Window Suncatcher, take a moment to reflect on the joy of creation that you have fostered. This gentle activity not only brightens up your living space but also your creative spirit. Embrace the process of crafting, and let each small project cultivate your calm and creativity.
Conclusion
If you’re seeking more festive ideas, you might enjoy an Easy Pumpkin Suncatcher Craft for Halloween that can complement your new suncatcher beautifully. Additionally, for whimsical decorations, consider a Jack Skellington Sun Catcher that adds a touch of fun to your home. Engaging in these creative endeavors can bring light, joy, and mindfulness into your everyday life.
PrintRainbow Pumpkin Patch Window Suncatcher
A colorful and creative project perfect for bringing warmth into your home with a beautiful suncatcher that captures light and enhances your living space.
- Prep Time: 15 minutes
- Cook Time: 0 minutes
- Total Time: 15 minutes
- Yield: 1 suncatcher
- Category: Craft
- Method: Crafting
- Cuisine: Not Applicable
- Diet: Not Applicable
Ingredients
- Clear contact paper
- Colored tissue paper in various fall colors
- Scissors
- Black construction paper
- A pencil or marker
- A ruler
- Optional: glitter or stickers
Instructions
- Start by preparing your workspace and laying out all your materials.
- Using the ruler, measure and cut a rectangular piece of clear contact paper.
- Next, brainstorm and sketch pumpkin shapes on the black construction paper.
- Cut out your pumpkin shapes using scissors.
- Now, take the colored tissue paper and tear it into small pieces.
- Start layering the tissue paper pieces on one side of the clear contact paper.
- Once satisfied with the appearance, press your black pumpkin cutouts onto the tissue side.
- Seal your work by placing another piece of clear contact paper over the top.
- Trim any excess paper around the edges.
- Hang your suncatcher in a sunny window.
Notes
For added creativity, experiment with different shapes and consider using a glossy finish for your suncatcher.