

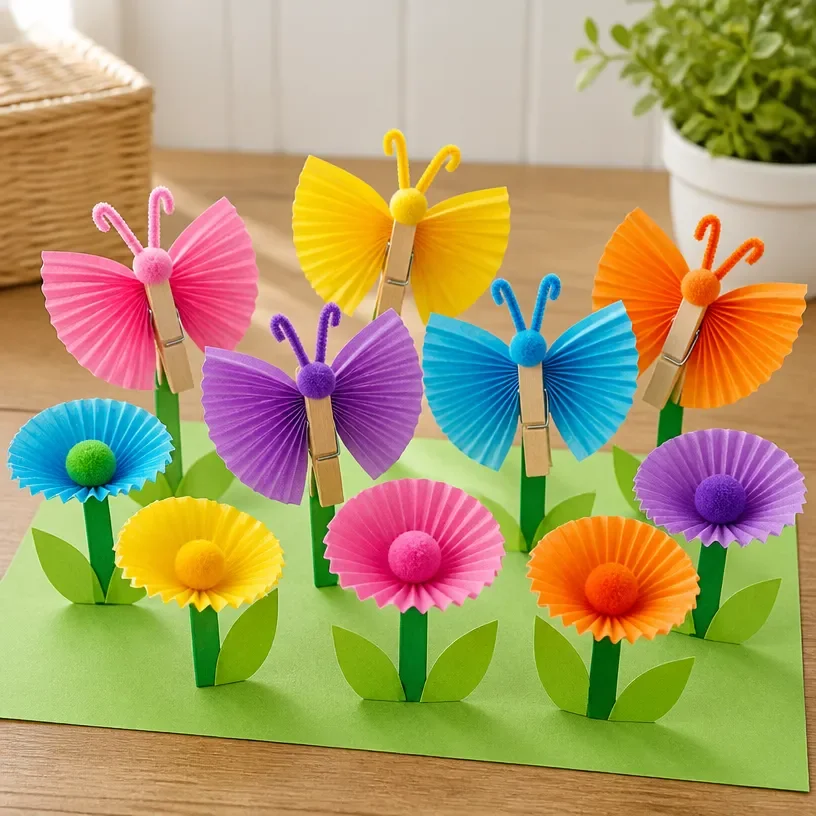
The soft rustle of leaves dancing in the breeze often signals the start of something beautiful. Imagine a quiet corner of your garden, where vibrant butterflies float among blossoms, brought to life by your loving hands. Creating a Rainbow-Themed Butterfly Garden with Cupcake-Liner Decor provides not just an enchanting space, but also a moment of calm and creativity. As you immerse yourself in this project, the gentle colors and textures evoke a sense of peace, making your garden a sanctuary of mindfulness. You may also find Cute Vintage Teacup Bird Feeder Garden Decor useful.
The Heart Behind This DIY
This Rainbow-Themed Butterfly Garden with Cupcake-Liner Decor invites a delightful fusion of color and whimsy into your outdoor space. The act of creating such a vibrant display can be incredibly grounding, as it encourages you to slow down and engage with your surroundings. Each cupcake liner transforms into something new and imaginative, reminding us that beauty can emerge from the simplest of materials. This project not only enhances your garden’s aesthetics but also cultivates a soothing environment where your mind can unwind and explore. You may also find Giant Bumblebee Garden Decor Cozy useful.
You may also find Rainbow Cupcake Liner Monster Door Garland Decor useful.
A Gentle Look at the Process
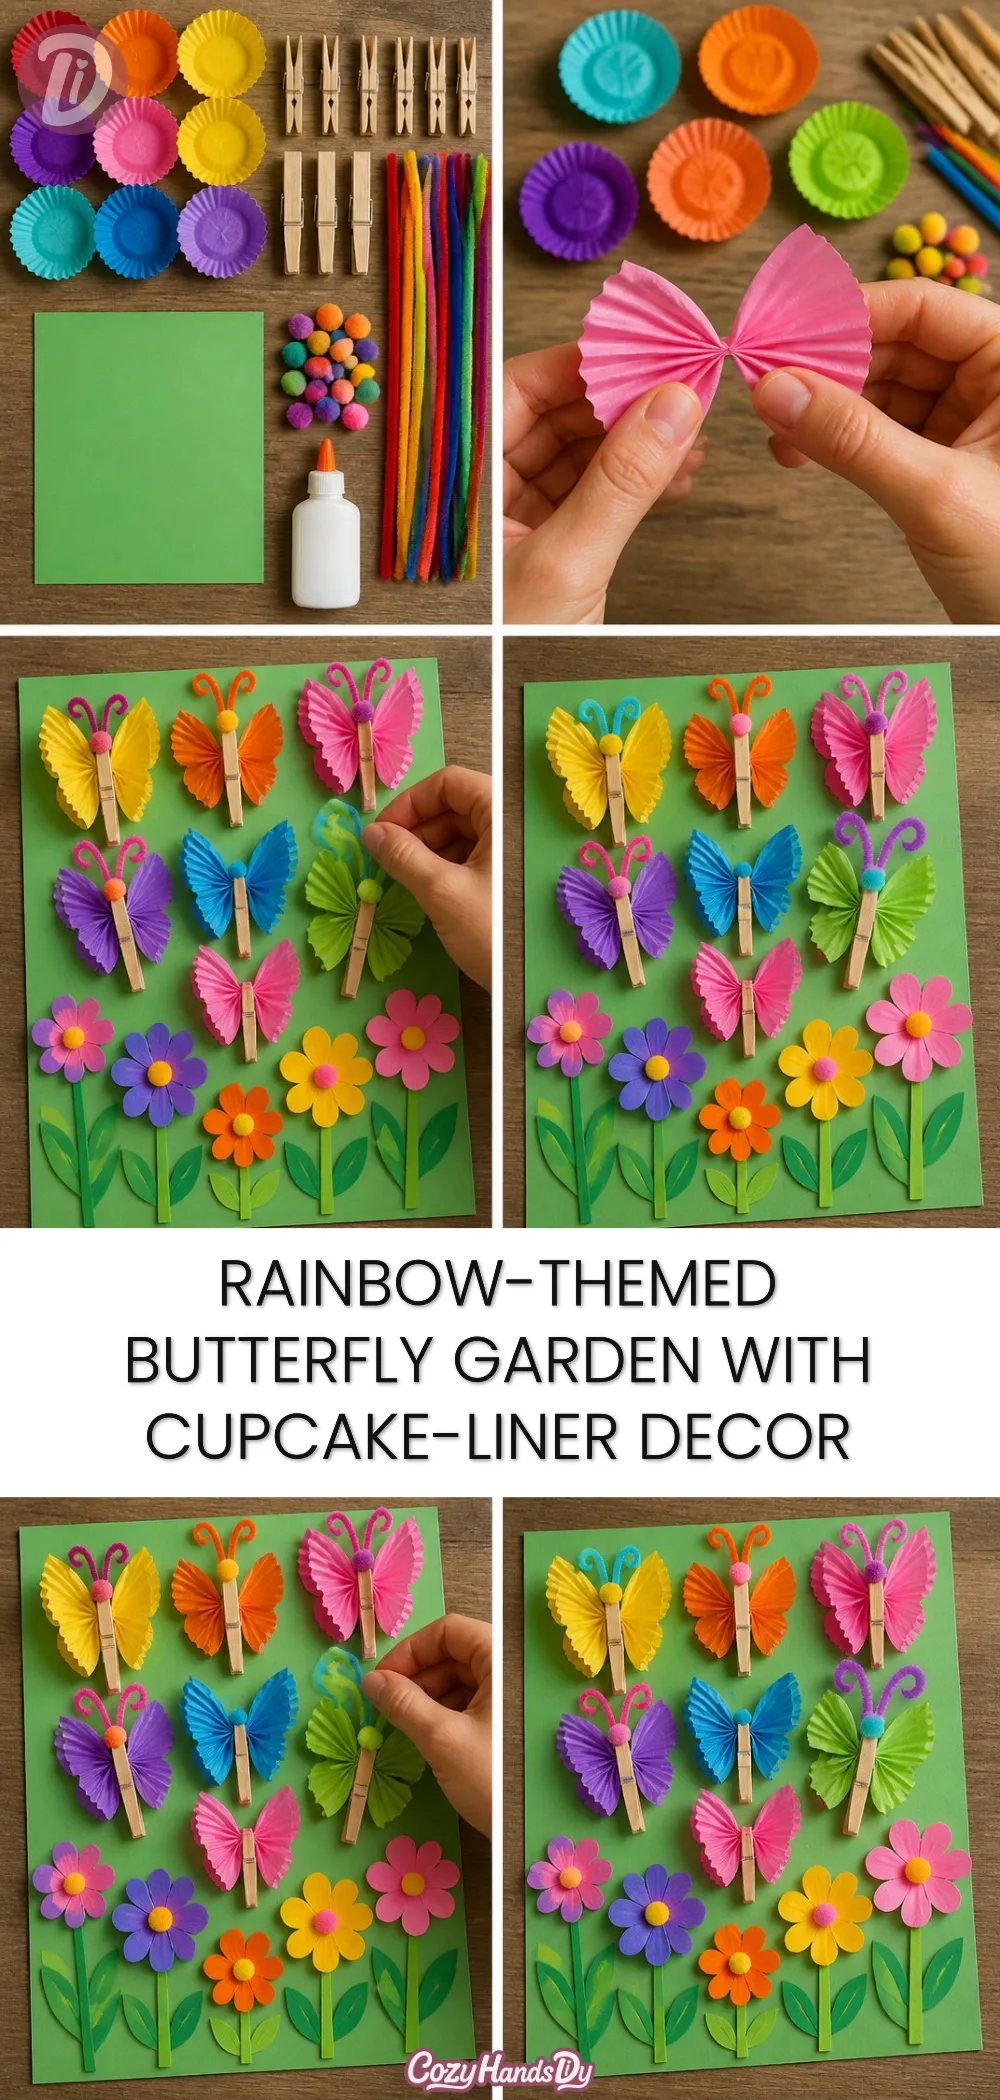
As you embark on this delightful crafting journey, envision the gentle flow of colors like a soft melody. Each step encourages a mindful presence, where the texture of cupcake liners unfolds beneath your fingers and the vibrant hues dance visually around you. The rhythmic sound of cutting and gluing serves as a soothing backdrop, immersing you in the moment as you create each butterfly. This project is not just about the end result; it is about enjoying each stage of making, allowing creativity to blossom gently.
Materials You’ll Need
Gather these supplies to start your Rainbow-Themed Butterfly Garden with Cupcake-Liner Decor:
- Colorful cupcake liners (assorted colors)
- Scissors (a pair with a comfortable grip)
- Craft glue or a glue gun (ensure adult supervision if using a hot glue gun)
- Thin wire or pipe cleaners (to create butterfly antennas)
- Wooden skewers or popsicle sticks (for stability)
- Green floral tape (optional, to wrap the skewers)
- Small stones or pebbles (to anchor the decos in the garden)
These materials are easy to find and can often be sourced from your local craft store or online.
Step-by-Step Directions
Prepare the Cupcake Liners: Start by flattening each colorful cupcake liner gently. This will make it easier to shape your butterflies later.
Cut the Wings: Fold the flattened liners in half. Use scissors to cut a graceful wing shape, crafting them into designs that appeal to you.
Create the Body: Take a small piece of the same or a contrasting cupcake liner and fold it into a cylinder for the butterfly body.
Unite Them: Using plenty of glue, attach the body piece at the center of the wings. Hold it for a moment to ensure it adheres well, bringing your butterfly to life.
Add Antennas: Cut two short lengths of wire or pipe cleaner, bending them into a V-shape. Glue these to the top of the body, gently adjusting them for a perfect placement.
Secure on Skewers: Carefully insert a wooden skewer or popsicle stick into the base of your butterfly. This will be used to stick into the ground later.
Decorate the Garden: Find a serene spot in your garden and secure the butterflies into the soil. You may wish to add small stones around them to mark their lovely new path.
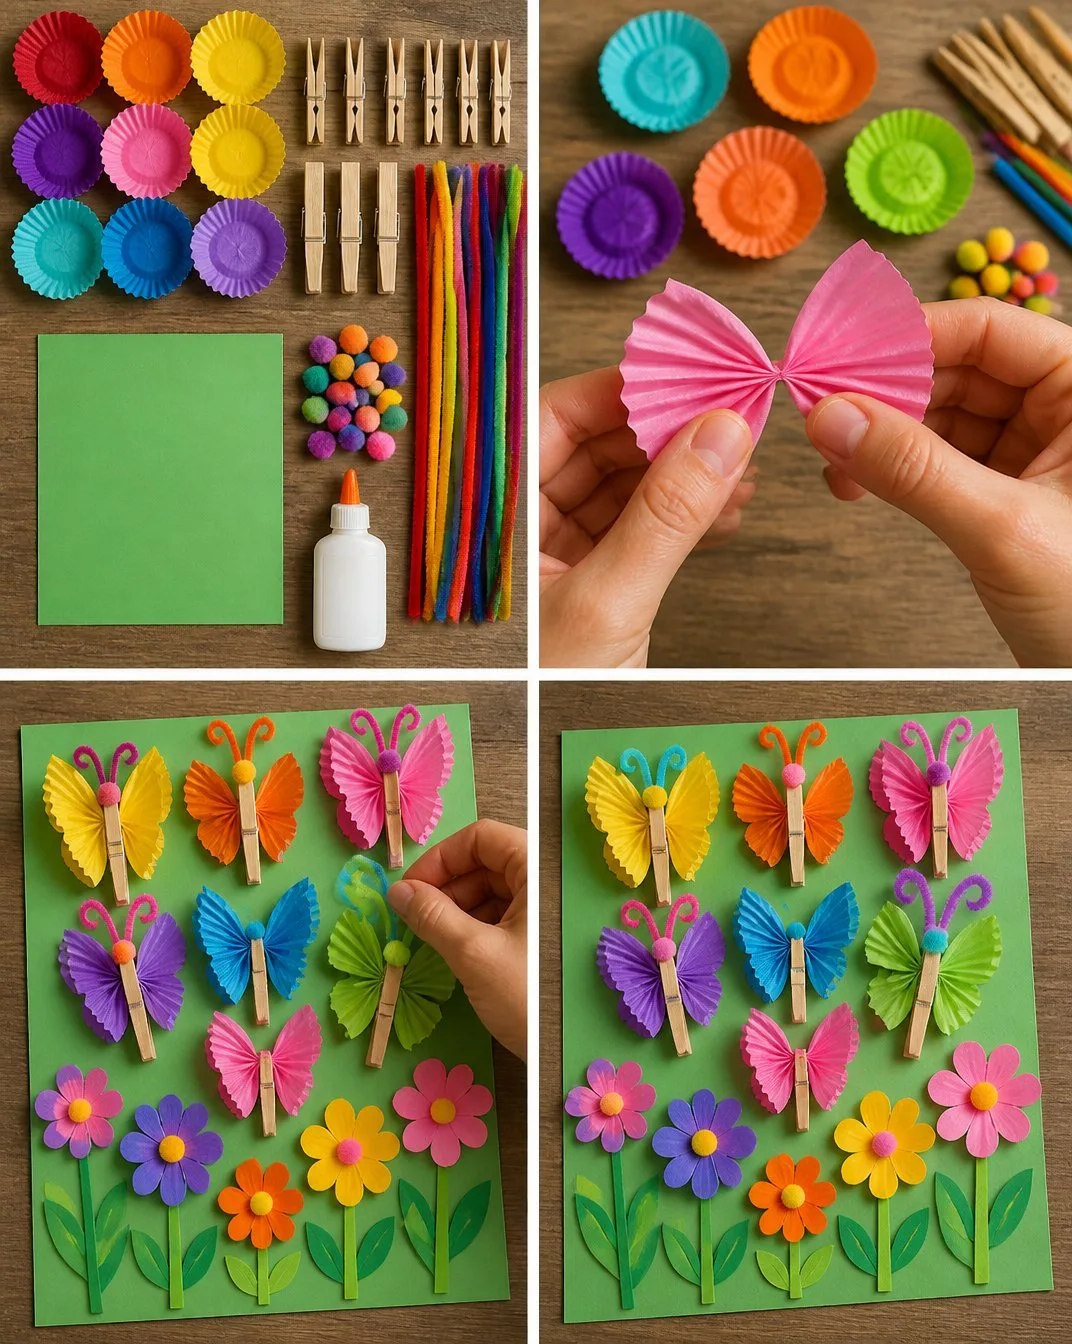
Enjoying the Finished Piece
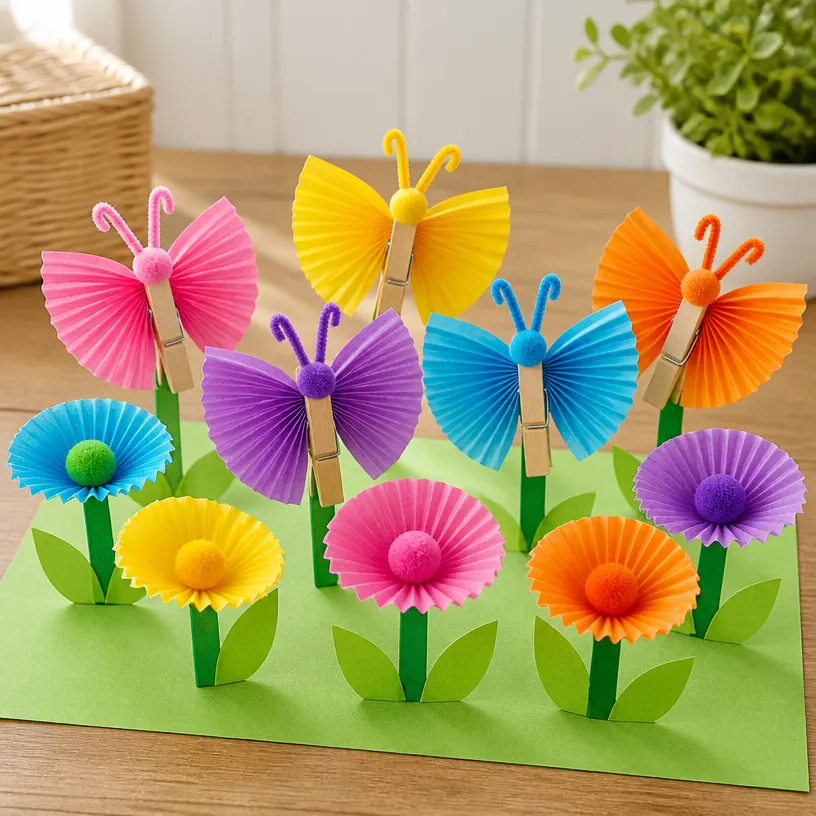
Once your Rainbow-Themed Butterfly Garden is complete, step back and admire your calming creation. The vibrant colors of the butterflies fluttering among the flowers create a joyful, enchanting atmosphere. Each time you stroll through your garden, pause to appreciate how the pieces come together, inviting real butterflies to visit and bask in the sunshine. This calming space is perfect for quiet moments of reflection, storytelling, or simply reconnecting with nature.
Keeping It for Later
To preserve the beauty of your butterfly garden, gently take down the cupcake adornments at the end of the season. Store them in a dry, cool place, allowing them to maintain their vibrant colors for next year’s blooming. If you wish to welcome new visitors, consider repurposing the decor by changing their placements or adding fresh liners in alternative colors for seasonal variations.
Gentle Tips & Variations
- Mix Textures: Consider adding different materials such as fabric or paper to expand your butterflies’ textures, enhancing their visual interest.
- Personalize: Write gentle words or affirmations on small flags to accompany your butterflies, adding a meaningful touch to your garden.
- Groupings: Experiment with clustering butterflies in phases; different sizes and shapes can create a delightful 3D effect in your space.
- Themed Decorations: Incorporate similar DIYs, like a marble snail garden decor, to add even more whimsical charm to your garden.
FAQs About Rainbow-Themed Butterfly Garden with Cupcake-Liner Decor
What if I don’t have cupcake liners?
You can easily substitute with colorful paper or cardstock, cutting them into wing shapes that resemble butterflies.
Where should I place my garden decor?
Choose a location that gets plenty of light but also offers some shade during the hottest parts of the day. This will keep the area cozy and inviting.
How can I maintain the decor throughout the seasons?
Using weather-proof glue can help the butterflies withstand wind and rain. Bring them indoors during harsh weather to extend their lifespan.
Conclusion
Creating a Rainbow-Themed Butterfly Garden not only beautifies your outdoor space but also nurtures mindfulness and creativity within you. As you explore delightful treats for your garden, a recipe for Funfetti Cupcakes from The Cake Blog could serve as a sweet complement. Similarly, consider adding whimsical touches such as the 47PCS Unicorn Cake Topper with Rainbow Butterflies to your celebrations. Embrace the joy of crafting with your hands, allowing each moment to fill you with calm.
PrintRainbow-Themed Butterfly Garden with Cupcake-Liner Decor
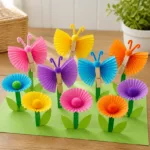
Create a vibrant and whimsical butterfly garden using colorful cupcake liners.
- Prep Time: 15 minutes
- Cook Time: 0 minutes
- Total Time: 15 minutes
- Yield: Create as many butterflies as desired
- Category: Gardening
- Method: Crafting
- Cuisine: N/A
- Diet: N/A
Ingredients
- Colorful cupcake liners (assorted colors)
- Scissors (a pair with a comfortable grip)
- Craft glue or a glue gun (ensure adult supervision if using a hot glue gun)
- Thin wire or pipe cleaners (to create butterfly antennas)
- Wooden skewers or popsicle sticks (for stability)
- Green floral tape (optional, to wrap the skewers)
- Small stones or pebbles (to anchor the decor in the garden)
Instructions
- Prepare the cupcake liners: Start by flattening each colorful cupcake liner gently.
- Cut the wings: Fold the flattened liners in half and cut a graceful wing shape.
- Create the body: Fold a small piece of the same or a contrasting cupcake liner into a cylinder.
- Unite them: Attach the body piece at the center of the wings with glue.
- Add antennas: Cut two lengths of wire or pipe cleaner and glue them to the top of the body.
- Secure on skewers: Insert a wooden skewer or popsicle stick into the base of your butterfly.
- Decorate the garden: Find a spot and secure the butterflies into the soil, adding small stones around them if desired.
Notes
Use weather-proof glue to withstand outdoor conditions.