

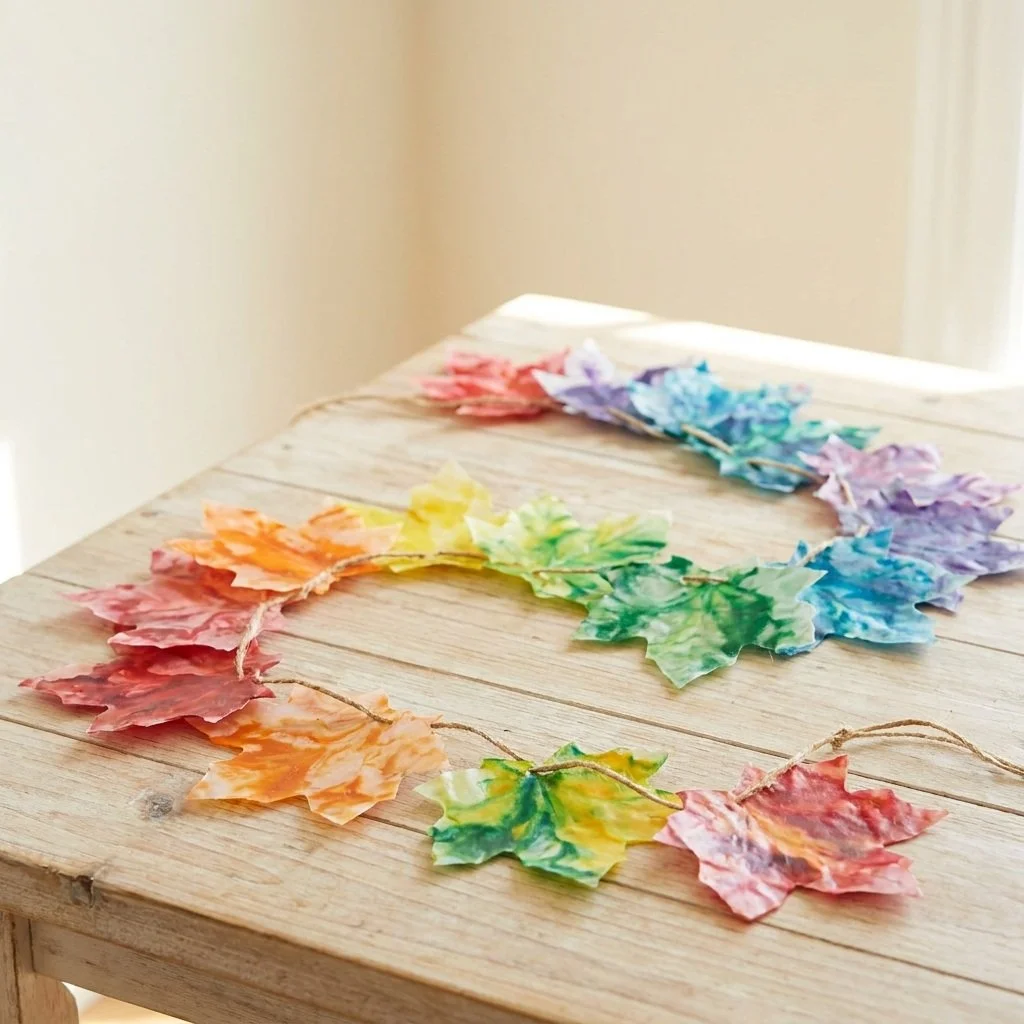
The sun peeks through a tapestry of swirling autumn leaves, casting gentle hues onto the ground. As you gather the vibrant textures of fall, the colors invite your imagination to shift into a more playful, creative space. Crafting a Melted-Crayon Rainbow Fall Leaf Garland creates an opportunity to tap into that tranquil feeling. This project not only brightens your space but offers a calming rhythm to the making process itself. You may also find Colorful Rainbow Ghost Window Suncatcher Garland For Kids useful.
Why Make This Melted-Crayon Rainbow Fall Leaf Garland
Crafting this garland is more than just a visual delight; it’s about connecting with the season and embracing the warmth it brings. Each color choice allows you to express your unique personality and the emotions tied to this time of year. As you look at the glowing leaves, they can serve as symbols of change and transition, gently reminding us to appreciate the present moment. Creating this piece can help you slow down, focus, and enjoy a meditative crafting session. Moreover, you’ll feel the soft warmth of melted crayons and the ease of transforming them into something beautiful. If you’re looking for other sensory-rich projects, consider exploring the rainbow coffee filter ghost garland as a lovely alternative.
A Gentle Look at the Process
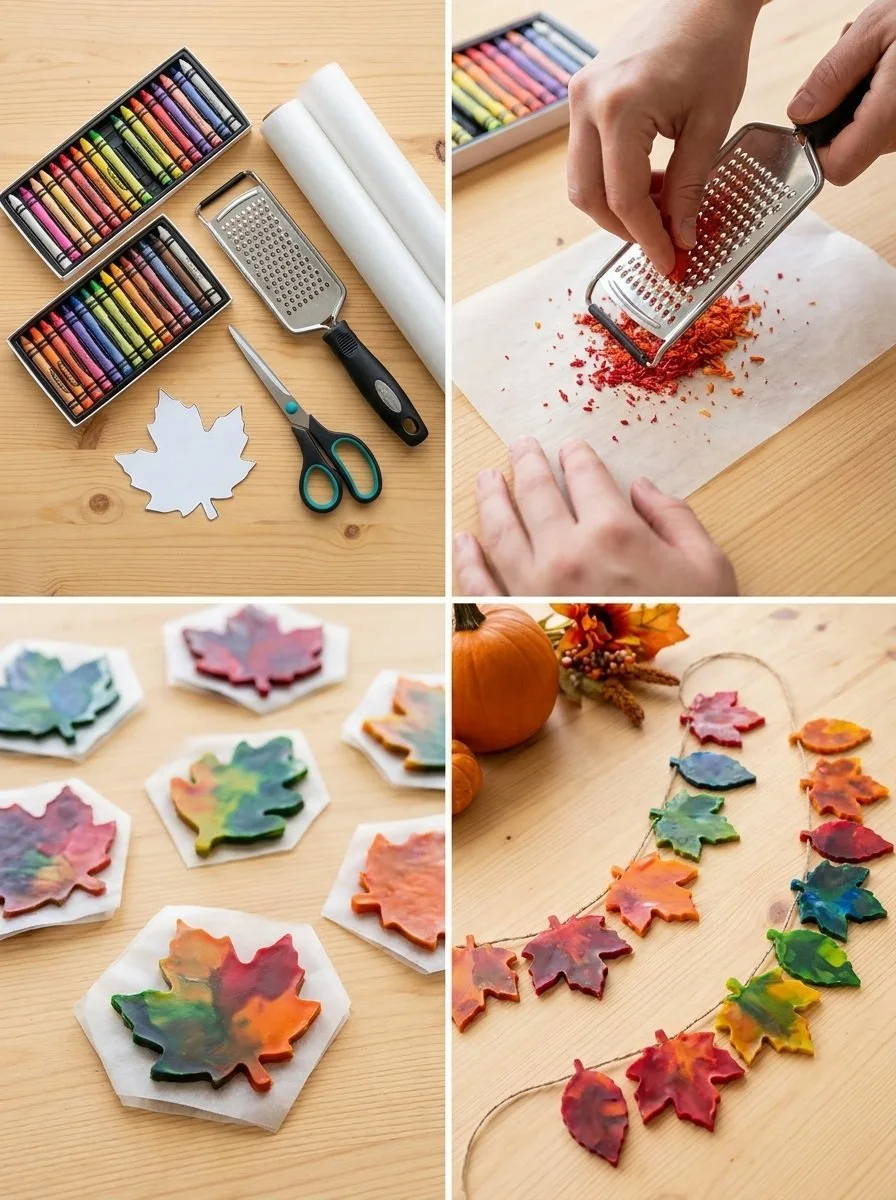
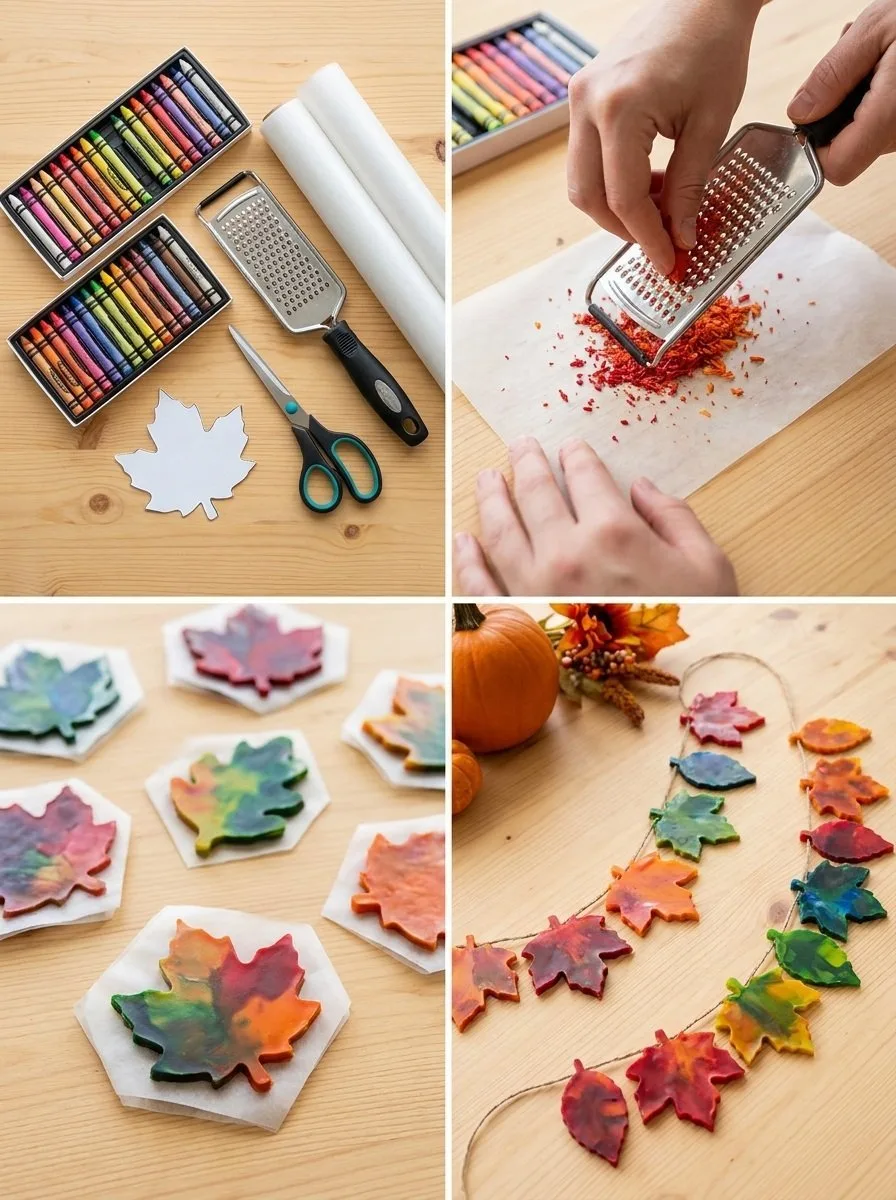
Creating your garland is a straightforward journey filled with satisfying textures and vibrant colors. Envision the crisp sounds of crayons lightly bursting, filling your workspace with warmth and excitement. As you melt the crayons together, the drips and swirls become a dance of color, resembling the leaves that flutter around you outdoors. There’s a gentle rhythm in the process, from the way you prepare your materials to watching the crayons transform against the heat. This portion of the project serves as an invitation to lean into the experience fully. You may also find Melted Crayon Rainbow Haunted House Suncatcher useful.
Materials You’ll Need
Gathering materials promotes a sense of anticipation. You’ll find most of these items easy to access:
- Crayons (variety of colors)
- Wax paper
- An iron or heat source (parent or adult supervision required)
- Scissors
- Optional: String or ribbon for hanging
- Optional: Hole punch for attaching your leaves
When you gather these materials, think about each one contributing to the final creation, much like each leaf on a tree plays a role in its beauty.
Step-by-Step Directions
Preheat and prepare your workspace by laying down some old newspaper or a protective cloth. Ensure you have good ventilation while working with melted crayons.
Remove the wrappers from the crayons, revealing their colorful cores. Sort them into desired color palettes based on what feels right to you.
Cut two pieces of wax paper to your desired size. Ideally, these should be large enough to hold the melted crayon layers but manageable overall.
Layer the crayons between the two pieces of wax paper. You might choose to create patterns or simply blend the colors randomly.
Cover the wax paper with another piece of newspaper to protect your surfaces. Carefully apply heat using the warm iron. Move the iron in gentle, circular motions. Listen to the subtle sounds as the crayons begin melting.
Once the crayons have melted, remove the iron and allow the wax paper to cool. The crayon colors should now be spread and merged into beautiful designs.
Cut out leaf shapes from the cooled wax paper. You can use templates or simply freehand your designs.
Punch holes in the leaves if you plan to string them together later. This step adds a personal touch as you think about how they will be displayed.
String the leaves onto your desired hanging material. Consider using a gentle pattern for a flowing effect.
After completing these steps, step back and admire your colorful creation!
Using Melted-Crayon Rainbow Fall Leaf Garland in Everyday Life
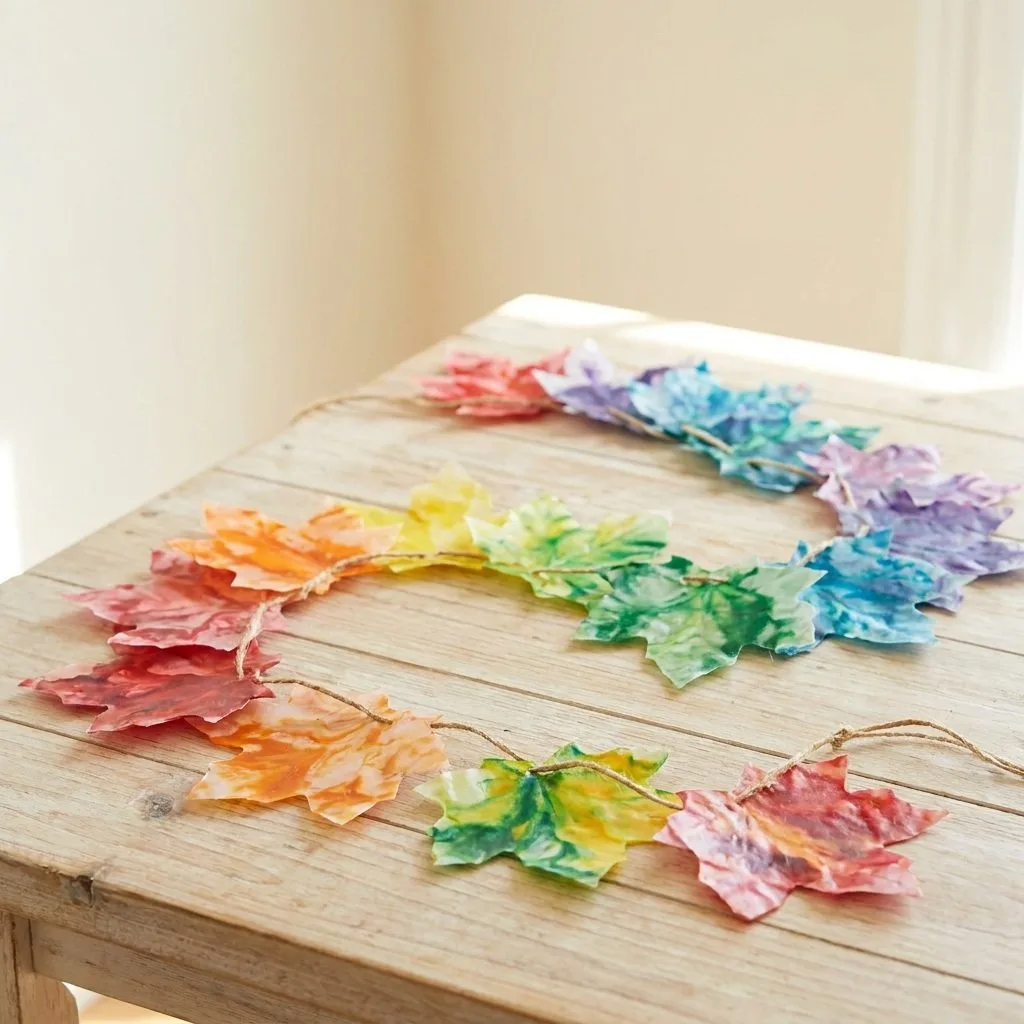
Once finished, your Melted-Crayon Rainbow Fall Leaf Garland serves as a bright reminder of your creative journey. You can adorn your home with these vibrant leaves, hanging them in windows or across a mantel. Their radiant colors will capture the sunlight beautifully, inviting warmth and joy into your space. The garland also creates a gentle atmosphere during gatherings, evoking feelings of connection and sharing with loved ones. For more decoration ideas, consider the delightful rainbow crystal leaf suncatcher to complement your crafty décor.
How to Store or Reuse Melted-Crayon Rainbow Fall Leaf Garland
Caring for your garland can be as simple as gently storing it when not in use. Consider rolling it up carefully and placing it in a protective container. This preserves the vibrancy of the colors and keeps the leaves intact for future use. If you desire to keep it as a seasonal piece, simply bring it out with the change of seasons as a delightful reminder of the creativity you poured into it.
Small Ways to Make It Your Own
The beauty of crafting lies in its versatility. Here are some gentle invitations to personalize your project even further:
Experiment with colors: Consider using non-traditional crayon colors to give unique personalities to your leaves. The unexpected combinations can lead to delightful surprises.
Mix shapes: Try cutting out different shapes beyond leaves; stars or simple circles can also add diversity to the garland.
Add additional elements: Consider incorporating glitter or other natural materials like small twigs intertwined with your garland for added texture.
Leave small messages: Write simple affirmations or autumn-inspired thoughts on the leaves before hanging them up for a personal touch.
FAQs About Melted-Crayon Rainbow Fall Leaf Garland
How long does the melted crayon last?
The melted crayon can maintain its vibrant color for a long time, especially if properly stored. Keep your garland out of direct sunlight to prevent fading.
Can I use other wax types?
Using other types of wax may alter the result, but crayon wax is specifically designed for this purpose, so it’s best to stick with crayons for this project.
What if I don’t have an iron?
If an iron is unavailable, consider using a hairdryer on a low setting, being careful to monitor the melting process closely.
Conclusion
Creating a Melted-Crayon Rainbow Fall Leaf Garland offers not just a beautiful piece of art but also a meditative crafting experience. For more ideas on using melted crayons in art projects, check out melted crayon art techniques or learn about other simple crafts at Clumsy Crafter. Embrace the journey of crafting, allowing it to bring you peace, connection, and inspiration.
PrintMelted-Crayon Rainbow Fall Leaf Garland
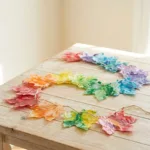
A colorful and creative project using melted crayons to craft a vibrant fall leaf garland, perfect for decorating your home during autumn.
- Prep Time: 15 minutes
- Cook Time: 10 minutes
- Total Time: 25 minutes
- Yield: 1 garland
- Category: Craft
- Method: Crafting
- Cuisine: N/A
- Diet: N/A
Ingredients
- Crayons (variety of colors)
- Wax paper
- An iron or heat source (parent or adult supervision required)
- Scissors
- Optional: String or ribbon for hanging
- Optional: Hole punch for attaching your leaves
Instructions
- Preheat and prepare your workspace by laying down some old newspaper or a protective cloth.
- Remove the wrappers from the crayons, revealing their colorful cores.
- Cut two pieces of wax paper to your desired size.
- Layer the crayons between the two pieces of wax paper.
- Cover the wax paper with another piece of newspaper.
- Carefully apply heat using the warm iron.
- Once the crayons have melted, remove the iron and allow the wax paper to cool.
- Cut out leaf shapes from the cooled wax paper.
- Punch holes in the leaves if you plan to string them together later.
- String the leaves onto your desired hanging material.
- After completing these steps, step back and admire your colorful creation!
Notes
Consider experimenting with different colors and shapes to personalize your garland further.