

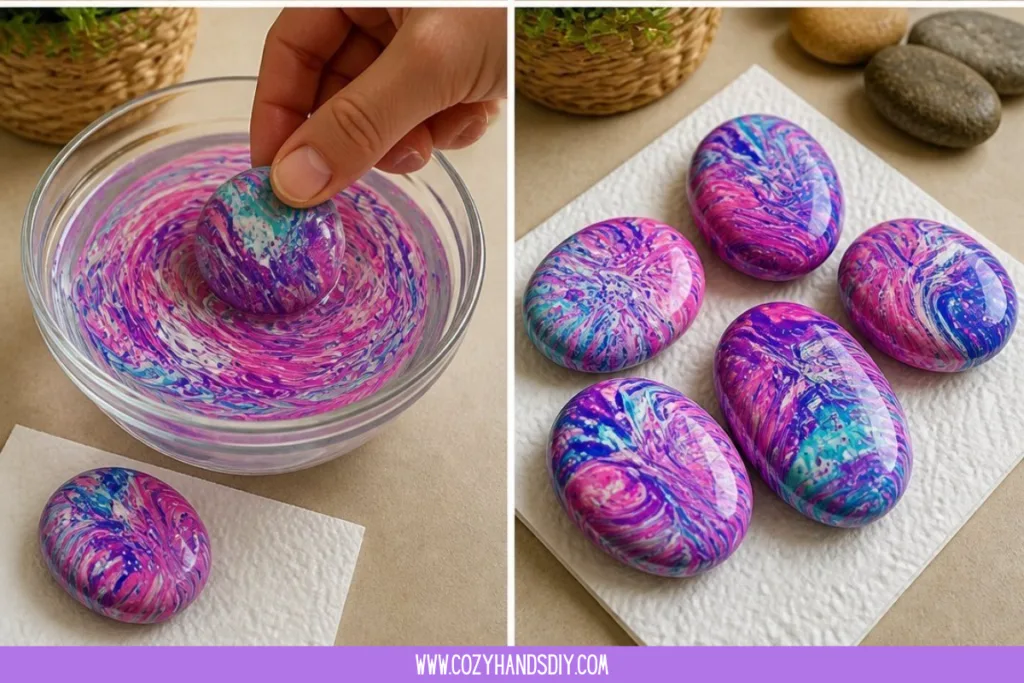
There’s something wonderfully satisfying about turning an ordinary smooth stone into a tiny piece of colorful art. These Magic Swirl Stones use a simple water-marbling technique to create flowing ribbons of color across the surface of river rocks.
Instead of painting the design with a brush, drops of nail polish float on the surface of water. When you carefully dip a stone through the floating colors, the marbled pattern transfers onto it. The fun part is that no two stones come out exactly alike.
Choose two or three colors you love, protect your work surface, and enjoy experimenting with different swirls and combinations.
If you enjoy watching colors move and blend, you may also like our Magic Bottle With Swirls.
Why You’ll Love These Magic Swirl Stones
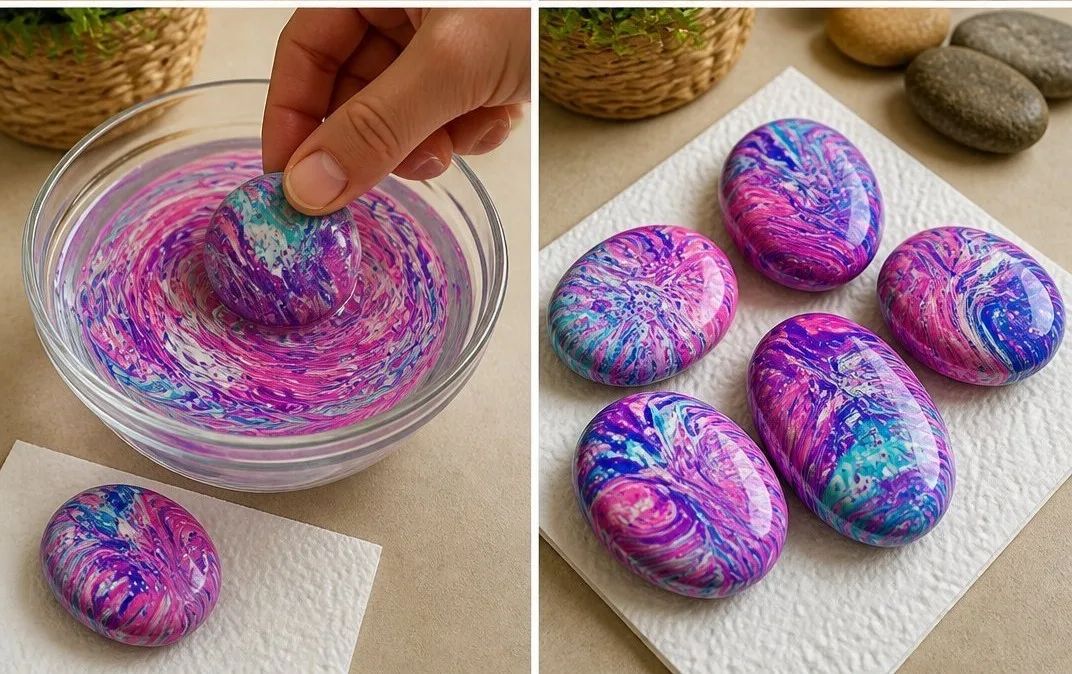
These little marbled stones are simple, colorful, and wonderfully unpredictable.
The water does much of the creative work for you. A few drops of color can stretch into wispy lines, rings, and swirls before transferring onto the stone.
They’re especially fun because:
- Every stone develops a different pattern.
- You can experiment with endless color combinations.
- Smooth stones are inexpensive and easy to find.
- The finished pieces make pretty little decorations or keepsakes.
- You don’t need to be skilled at painting to create an interesting design.
The technique is sometimes called water marbling or nail polish marbling.
Before You Begin
This version of Magic Swirl Stones uses nail polish rather than acrylic craft paint.
Nail polish has strong fumes and isn’t appropriate for young children to use independently. Make this project in a well-ventilated area, protect your work surface, and keep nail polish and remover away from flames and heat.
Use an old or disposable container for the water. Do not reuse it for preparing or serving food afterward.
If you’re crafting with younger children, an acrylic-paint rock project is a better choice.
Materials You’ll Need
Gather everything before you start because nail polish begins setting fairly quickly once it touches the water.
You’ll need:
- Smooth river stones
- 2–4 colors of nail polish
- Room-temperature water
- An old or disposable bowl or container
- Toothpicks or wooden skewers
- Paper towels or scrap cardboard
- Disposable gloves, if desired
- Clear craft sealer, optional
- Nail polish remover for adult cleanup, if needed
Choose stones with relatively smooth, clean surfaces. Pale stones can make bright colors particularly noticeable, but you can experiment with any stones you have.
Step-by-Step Directions
1. Clean the Stones
Wash your stones with soap and water to remove dirt, dust, and oils.
Rinse them thoroughly and allow them to dry completely before marbling. Nail polish won’t adhere as well to a wet or dirty surface.
2. Prepare Your Workspace
Cover your table with paper, cardboard, or another protective material.
Fill an old or disposable container with room-temperature water. You need enough water to comfortably lower the surface of your stone through the floating polish.
Open a window or work in another well-ventilated location.
Have your stones and nail polish ready before moving to the next step.
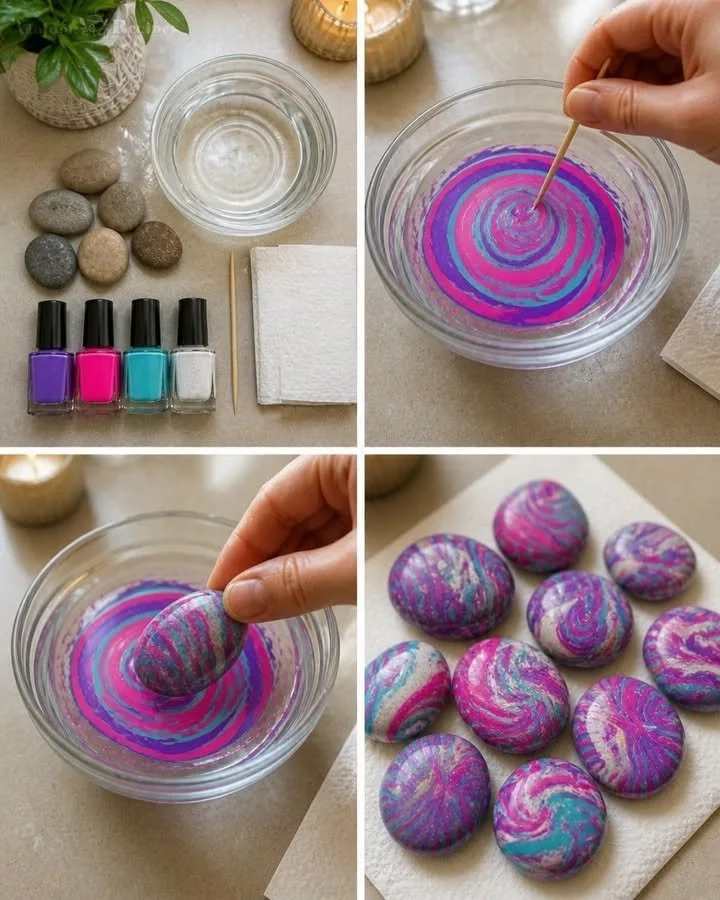
3. Add Nail Polish to the Water
Choose two or three nail polish colors.
Hold the first bottle close to the water’s surface and gently add a drop. It should spread across the surface.
Add several drops of your other colors, working fairly quickly.
You don’t need much polish. Start with just a few drops and experiment.
4. Create the Swirl
Use the tip of a toothpick or wooden skewer to gently drag through the floating colors.
Make only a few movements.
You can pull outward for wispy patterns, move through several colors for curved lines, or lightly swirl them together.
Avoid stirring aggressively. You’re creating a thin pattern floating on top of the water rather than mixing the polish into the water.
5. Dip the Stone
Hold a clean, dry stone securely.
Carefully lower the side you want decorated through the floating nail-polish design.
As the stone passes through the surface, the thin film of polish transfers onto it and creates the marbled pattern.
Lift the stone out carefully.
Don’t worry if your first stone isn’t perfect. Water marbling is experimental, and slightly irregular patterns are part of its charm.
6. Remove Leftover Polish
Before making another stone, use a toothpick or skewer to collect leftover polish floating on the water.
This gives you a cleaner surface for your next color combination.
Add fresh drops of nail polish and repeat the process for each stone.
7. Let the Stones Dry
Place the finished stones on paper towels, scrap cardboard, or another protected surface.
Leave them untouched until the nail polish has completely dried and hardened.
Drying time can vary depending on how much polish transferred to the stone, so don’t rush this step.
8. Seal the Finished Stones
Once completely dry, you can leave your stones as they are or apply a compatible clear craft sealer for additional protection.
Follow the manufacturer’s directions for the sealer, including ventilation and drying recommendations.
Allow everything to cure completely before handling or displaying your stones.
What If the Nail Polish Doesn’t Spread?
Water marbling can take a little experimentation.
If the nail polish immediately sinks instead of spreading, try another polish or move the bottle closer to the surface before releasing the drop.
If the polish becomes sticky before you dip the stone, you may simply be working too slowly. Remove the old film and start again with fresh polish.
Room-temperature water generally gives you a good starting point.
Different nail polish formulas also behave differently, so don’t be surprised if one color spreads beautifully while another doesn’t.
Color Combination Ideas
This project becomes especially fun when you experiment with palettes.
Try:
- Pink + purple + white
- Turquoise + blue + white
- Lavender + pink + silver
- Blue + purple + teal
- Red + pink + white
- Black + white + metallic gold
- Pastel pink + lavender + pale blue
Two or three colors are usually enough to create an interesting marble effect without making the pattern overly busy.
Enjoying Your Finished Magic Swirl Stones
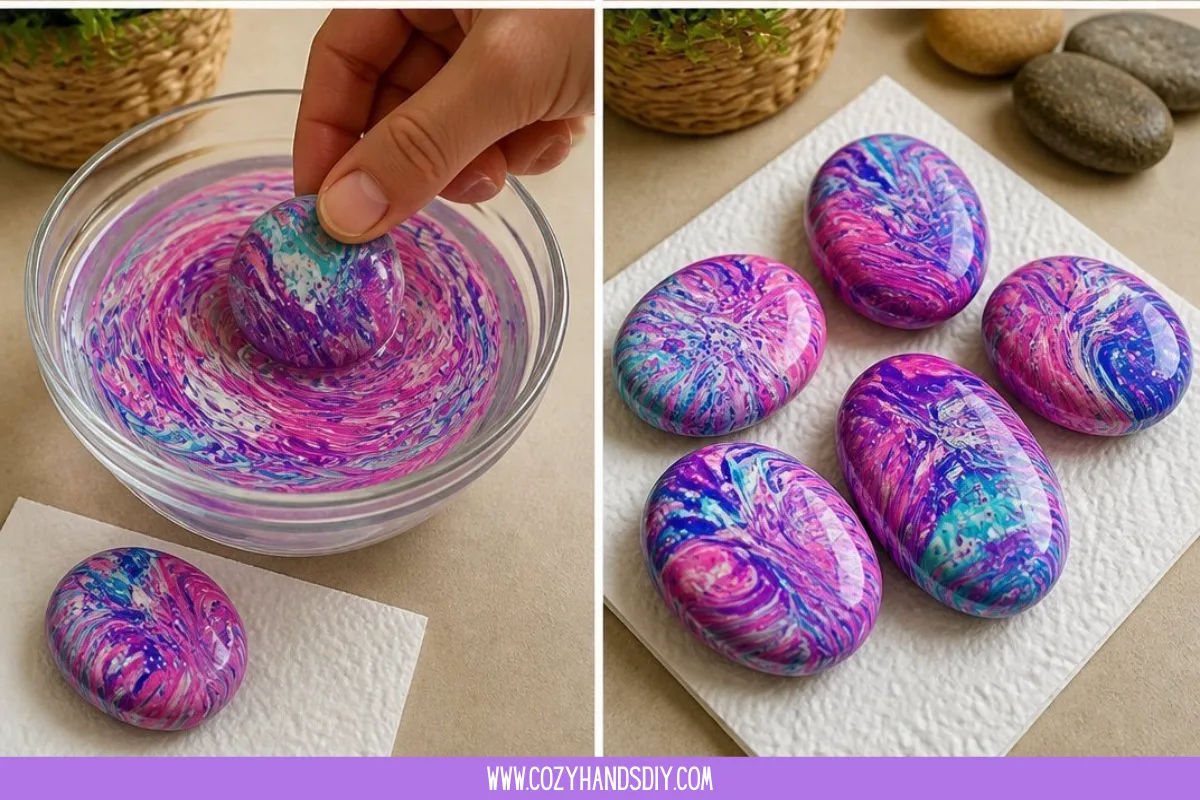
Once they’re completely dry, your marbled stones can become small decorative accents around the house.
Arrange several together in a little dish, display them on a shelf, place them beside a houseplant, or use them as colorful additions to a craft-room display.
They can also make sweet handmade keepsakes. Because every dip produces a slightly different pattern, each finished stone feels one-of-a-kind.
For another colorful project, try our Magic Color Swirl Activity.
Gentle Tips & Variations
- Start with two colors. It’s easier to see how the technique works before experimenting with larger palettes.
- Work quickly. Nail polish can begin setting soon after reaching the water.
- Don’t over-swirl. A few gentle passes with a toothpick usually create a prettier pattern than vigorous stirring.
- Try different stone shapes. Flat stones provide a broad canvas, while small rounded stones create interesting curved patterns.
- Experiment with metallic polish. A small amount of silver or gold can add beautiful detail.
- Make a coordinated collection. Use the same three colors across several stones while changing the swirl each time.
- Protect your table. Nail polish can damage or stain some surfaces.
- Use a craft-only container. Don’t reuse the marbling bowl for food.
Important Safety Notes
Because this project uses nail polish, a few precautions are important.
- Work in a well-ventilated area.
- Keep nail polish and remover away from heat, sparks, and open flames.
- Protect tables and other surfaces before beginning.
- Don’t use kitchen containers that will later return to food preparation.
- Don’t pour leftover nail polish directly into a household drain.
- Follow the disposal instructions for the products you’re using.
- Adults should handle the nail polish when crafting around young children.
- Follow the manufacturer’s instructions for any clear sealer you use.
For a child-focused rock craft, choose a project designed around washable or appropriate non-toxic craft paints instead.
FAQs About Magic Swirl Stones
What kind of stones work best?
Is this the same as painting rocks with acrylic paint? Why is my nail polish sinking? Do I need to use a toothpick? Do the stones need to be sealed? Can children make these? Why doesn’t my stone look exactly like the one in the photo?
What kind of stones work best?
Smooth, clean river stones work particularly well because the nail-polish film can transfer across their relatively even surfaces. Flat stones are especially easy to handle when you’re learning the technique.
Is this the same as painting rocks with acrylic paint?
No. These stones use a water-marbling technique with nail polish. The colors float on water and transfer onto the stone when it is dipped through the pattern.
Traditional painted rocks use acrylic or craft paint applied directly with brushes or other tools.
Why is my nail polish sinking?
Some nail polishes simply work better for water marbling than others. Try holding the brush closer to the water before releasing the drop, use room-temperature water, and experiment with another polish if necessary.
Do I need to use a toothpick?
Not necessarily. You can dip a stone through naturally spreading drops, but gently dragging a toothpick through the colors gives you more control over the marble pattern.
Do the stones need to be sealed?
Sealing is optional for decorative indoor stones, but a compatible clear craft sealer can provide additional protection. Always make sure the nail polish is completely dry first and follow the sealer manufacturer’s directions.
Can children make these?
Because this version uses nail polish and involves fumes and chemical products, it’s better treated as an adult or appropriately supervised older-child/teen craft. For younger children, choose a rock-painting activity using age-appropriate craft materials instead.
Why doesn’t my stone look exactly like the one in the photo?
That’s part of water marbling. The polish spreads differently every time depending on the colors, polish formula, water, timing, and dipping motion.
Rather than creating identical stones, expect each one to have its own swirls and patterns.
Final Thoughts
Magic Swirl Stones are a lovely example of how an ordinary object can become something completely different with a little experimentation.
Watching drops of nail polish spread across the water and then seeing that pattern transfer onto a stone is the most satisfying part of the project. Some dips will produce delicate wisps, others bold bands of color, and occasionally you’ll get a combination you couldn’t have planned.
Start with a few inexpensive stones and two or three colors. Once you understand how your nail polishes behave on the water, experiment with new combinations and swirling patterns.
And remember: there’s no need for every stone to look perfect or identical. The unpredictable marbling is exactly what makes each Magic Swirl Stone unique.
PrintMagic Swirl Stones
Create colorful marbled river stones using a simple water-marbling technique with nail polish. Each dip creates a unique swirling pattern.
- Prep Time: 10 minutes
- Total Time: 30 minutes
- Yield: Multiple stones
- Category: Craft
- Method: Water Marbling
- Cuisine: N/A
- Diet: N/A
Ingredients
- Smooth river stones
- 2–4 colors of nail polish
- Room-temperature water
- Old or disposable bowl or container
- Toothpicks or wooden skewers
- Paper towels or scrap cardboard
- Disposable gloves, optional
- Clear craft sealer, optional
Instructions
1. Wash the river stones with soap and water, then let them dry completely.
2. Protect your work surface and fill an old or disposable container with room-temperature water. Work in a well-ventilated area.
3. Hold the nail polish brush close to the water and add a few drops of your first color onto the surface. Add drops of 1–3 additional colors.
4. Working quickly, gently drag a toothpick or wooden skewer through the floating colors a few times to create a marbled pattern. Do not over-mix.
5. Carefully lower the side of the clean, dry stone that you want decorated through the floating nail-polish pattern. The thin film of polish will transfer onto the stone.
6. Lift the stone out carefully and place it on paper towels or scrap cardboard to dry.
7. Use a toothpick or skewer to collect leftover polish from the water before adding fresh colors for the next stone.
8. Let the stones dry completely. If desired, finish them with a compatible clear craft sealer according to the manufacturer’s directions.
Notes
Water marbling works best when you move quickly because nail polish begins setting soon after it touches the water. Different nail polish formulas may spread differently, so experiment with a few colors.
Work in a well-ventilated area and keep nail polish and remover away from heat, sparks, and open flames. Use a craft-only or disposable container that will not be reused for food. Adult supervision is recommended when crafting around children.