


I hold a warm paper-mache egg in both hands and feel the tiny ridges where the glue dried last night. Light from the window slips across the curved surface, and the first flecks of paint catch like whispers. Making How to Make DIY Dragon Eggs invites that slow attention, a small ritual of texture and color that tucks me into the present. My fingers remember the cool smoothness of wet clay and the soft click of tiny scales pressed into place.
Why How to Make DIY Dragon Eggs Feels Comforting to Create
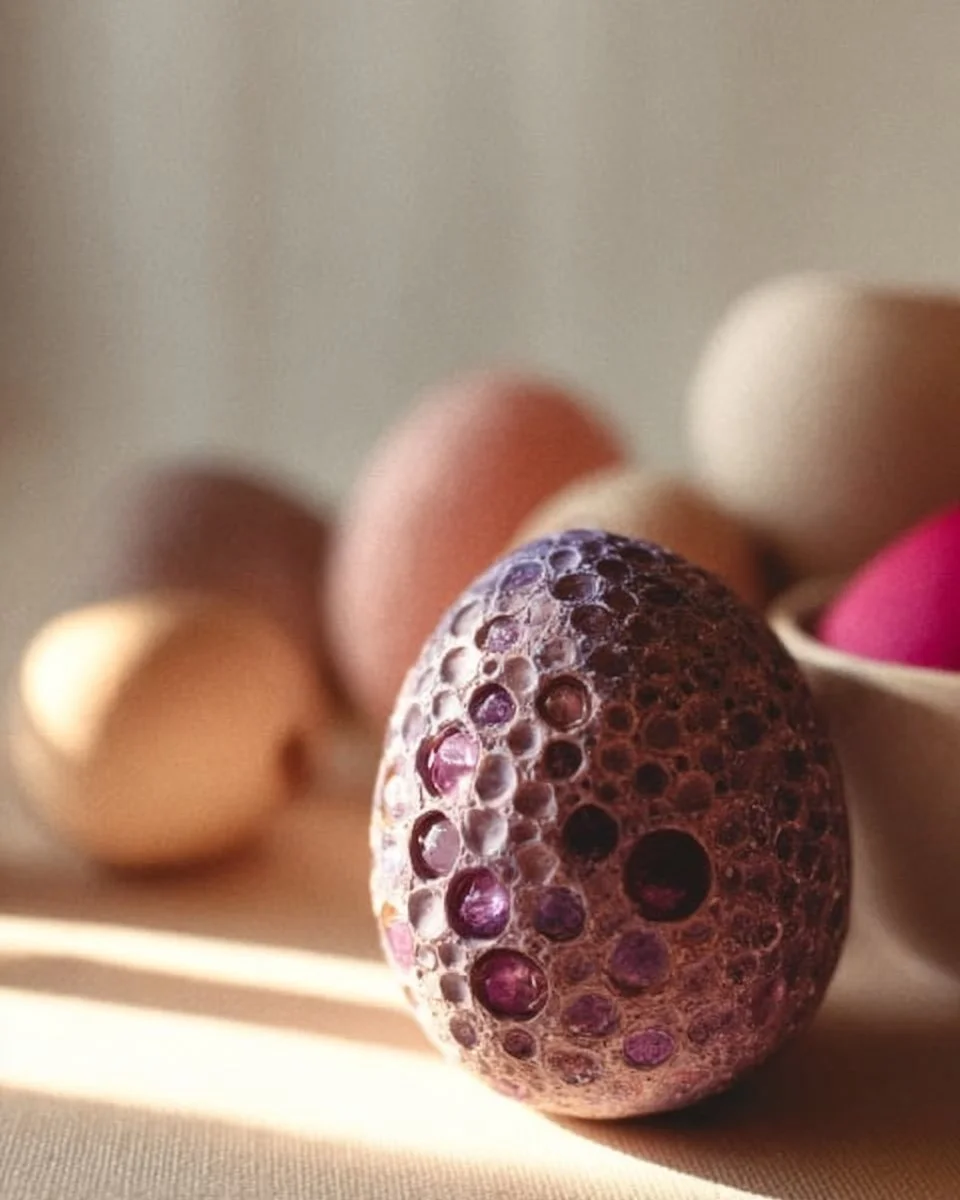
This project works like a gentle breath. You move slowly, layer by layer, and watch a plain shape become something strangely alive. The textures invite touch. The paints invite small decisions. That steady, mindful rhythm calms the nervous part of the brain that likes to hurry, and it warms the part that enjoys making things beautiful.
When I make dragon eggs, I notice simple comforts: the quiet scrape of a craft knife, the smell of acrylic paint, a soft bowl of warm tea nearby. These moments feel like small rituals. If you enjoyed the patience of slow experiments like my baking soda growing tree project, you will find the same kind of gentle focus here in How to Make DIY Dragon Eggs. See the tree project for another slow craft.
The Flow of Making How to Make DIY Dragon Eggs
Before you pick up tools, imagine the flow. You form the base, add texture, let it dry, then color and finish. The work moves between hands-on shaping and quiet waiting. You press scales into the surface with a light thumb, or you arrange sequins and let them nestle in. Each small action changes the whole.
Listen for tiny sounds. A bead of glue pops when it cools. Soft sanding makes a whisper. The rhythm helps you keep pace. If you enjoy watching crystals bloom or petals form from salt solutions, you will like the way this project rewards gentle repetition and quiet observation, much like my crystal growing flower post. Try that project for another sensory moment.
Materials You’ll Need
- Plastic or papier-mache eggs (easy to find at craft stores)
- Air-dry clay or polymer clay (air-dry is gentler and low-heat; polymer clay bakes hard)
- Craft glue or strong tacky glue (for attaching scales; PVA works well for papier-mache)
- Acrylic paints in deep jewel tones and metallics (blue, green, bronze, gold)
- Small tools: a dull knife, toothpicks, and a soft paintbrush (small sizes help with details)
- Fine sandpaper (optional; for smoothing once dry)
- Clear matte or satin sealer (protects finish; water-based sprays are simple and low-odor)
- Small scale options: sequins, beads, cut circles of foil, or hand-cut clay scales (substitute-friendly)
- A shallow palette or dish for mixing paint and glue (easy to clean)
- A soft cloth for wiping hands and tools
I choose air-dry clay most days because it feels cool and pliable in the hands. It dries into a slightly textured finish that picks up paint beautifully. Polymer clay gives a smoother, ceramic-like scale, but it needs an oven and more care. Choose the material that fits your comfort level.
Step-by-Step Directions
Make your base egg ready.
Lightly sand any rough spots on the plastic or papier-mache shell. Wipe away dust with a soft cloth. Hold the egg and breathe into the rhythm.Prepare small scale shapes.
Roll tiny balls of air-dry clay, then flatten them into small oval scales with your thumb. For a faster method, cut small circles from foil or use sequins.Attach the first row of scales.
Start at the base of the egg. Apply a thin line of glue, press each scale gently so it slightly overlaps the previous one. The touch should be firm but calm.Continue upward in layers.
Work in rows that overlap like roof tiles. Pause between rows, feel the changing texture. The egg will begin to look armored and quiet.Fill the top with smaller scales.
As you reach the tip, switch to smaller scales or trim clay pieces so they sit closely and create a tapered look. That small change makes a big difference in the silhouette.Let the piece dry fully.
Place the egg on a soft pad to rest. Drying can take overnight for air-dry clay. Use this quiet time for tea or a short walk.Sand and refine any edges.
When dry, gently sand any rough seams. Use a soft motion and listen to the faint grit. Wipe clean.Apply a base coat of paint.
Paint the whole egg with a dark, rich base color. I like deep green or midnight blue. The base color sets the mood and helps metallics pop later.Dry between coats.
Let each thin coat dry. Thin layers keep brush marks soft and even. This step rewards patience.Add highlights and metallics.
Dry-brush a metallic paint lightly over the scales. Use a small amount and sweep across the raised edges. The metal will catch the light and make each scale feel like it glows.Seal the egg.
Spray or brush on a clear sealer. Choose matte or satin to keep the tactile feel. Let it cure according to the product directions.Add final accents.
Glue a bead for an eye or paint tiny flecks of color to suggest depth. Set the egg in a small nest or bowl and notice how it shifts the light.
Each step teaches something about timing. I often work on two eggs at once so one can dry while I sculpt the other. That spacing keeps the pace gentle.
Enjoying the Finished Piece

A finished dragon egg feels like a small treasure. Display it on a shelf where the light can skim the textures. Place it in a shallow wooden bowl with dried moss, or tuck it into a glass cloche for a quiet vignette. The metallic highlights catch the morning light and the tactile scales invite a steady, curious touch.
I have set eggs on a windowsill and watched them change through the day. In soft afternoon light they seem warm and alive; under lamplight they look more mysterious. Try moving one around your home and notice how it alters the room. This act of placing and observing becomes part of the making ritual, a gentle way to keep calm and present.
How to Store or Reuse How to Make DIY Dragon Eggs
Keep your eggs in a dry place away from direct sunlight to preserve colors. Wrap delicate pieces in soft tissue or bubble wrap if you store them in a box. If an egg chips, you can often repair the area with a small dab of glue and a matching touch of paint.
If you used air-dry clay, you can reuse leftover scraps by sealing them in a small airtight bag to prevent hardening. For polymer clay leftovers, keep them sealed in a cool drawer and knead them before the next use. If you plan to resurface an old egg, sand lightly and add a fresh base coat before reapplying highlights.
I keep a small tray with a couple of eggs and a tiny hand brush near my favorite reading chair. Sometimes I pick one up and run a finger along the scales while I read. That small habit helps me slow down.
Gentle Tips & Variations
Invite texture with found objects.
Press small shells, seeds, or fibers into the clay for natural marks. The variety makes each egg feel like a tiny landscape.Try a crackle finish for age.
Paint a thin white or light base, then add a darker color on top and use a crackle medium for an antique look. This makes the egg feel like an artifact.Use mixed media scales.
Mix sequins, foil circles, and clay. The contrast between soft clay and bright metal adds interest and surprises when you touch it.Make a nest of meaning.
Set eggs in a bowl of sand, moss, or lavender. The scent and texture deepen the sensory experience and invite slow moments.Take your time with color.
Build color slowly with glazes and thin washes. Layering keeps the surface lively and avoids heavy brush marks.
These are not rules. They are gentle invitations to try small shifts and see what delights you.
What I’ve Learned While Making This
I learned to slow down. Small, repetitive actions calm my hands and mind. I also learned to trust imperfections. A slightly uneven scale or a tiny paint smudge becomes a story in the object.
Another lesson came from material choices. Air-dry clay absorbs paint and keeps a cozy matte feel. Polymer clay gives a sharp, jewel-like finish. Glue types matter. A PVA glue works well for porous surfaces like papier-mache, while a stronger craft glue or epoxy gives better hold for heavy beads or metal.
Safety mattered too. I worked in a well-ventilated area when using sprays. I keep sharp tools away from small children and store polymer clay away from food areas. These small precautions help the making stay calm and safe.
FAQs About How to Make DIY Dragon Eggs
Can children help with this project?
Yes, with supervision. Children can press scales, paint, and arrange nests. Keep sharp tools and strong adhesives out of reach. For young hands, use sequins, paper circles, or puff paint for safe texture.
What if I do not want to use clay?
You can use glued sequins, layered fabric, or cut aluminum foil circles. Each choice gives a different feel. I often use paper circles for a soft, papery shell that still looks detailed.
How do I make the metallic parts look natural and not too shiny?
Use dry brushing or dilute metallic paint with a bit of water. Sweep lightly across raised edges. A little goes a long way. Finish with a satin sealer to mellow the shine.
Will my eggs be fragile?
That depends on materials. Plastic and papier-mache bases are light and sturdy when finished. Air-dry clay has some brittleness at thin edges, while polymer clay cures harder. Handle gently and store carefully.
Can I make tiny dragon eggs for jewelry or ornaments?
Yes. Scale the steps down and choose light materials. Use small jump rings or a setting to hang them. Keep the weight light by using paper or thin clay.
A Gentle Note Before You Go
Sit with the finished piece for a moment. Notice the cool or warm weight in your palm. Let the textures speak to you. This project is less about perfection and more about the small, steady acts that return you to yourself. Take photos if you like, but also tuck an egg away somewhere you can discover it again on a quiet day.
Concluding these pages does not end the making. Each egg invites another. Each texture teaches patience. If you want ideas for other simple, sensory-rich projects to pair with your crafting sessions, I have shared more calming experiments and tactile crafts in other posts. Try a few and see which rhythms fit your hands and your quiet.
Conclusion
If you would like a different approach with a bit more fantasy detail, the tutorial on How to Make a Magical Harry Potter Inspired Dragon Egg offers a vivid, themed take that pairs well with home displays. For a child-friendly method with lots of simple steps and imagination, the guide DIY Dragon Eggs * ages 2+ – Raising Dragons gives clear ideas and safe variations for little hands.
PrintHow to Make DIY Dragon Eggs

Create enchanting dragon eggs using paper-mache or air-dry clay through layering techniques, paint, and personal touches for a magical decor piece.
- Prep Time: 30 minutes
- Cook Time: 0 minutes
- Total Time: 30 minutes
- Yield: 1 dragon egg
- Category: Craft
- Method: Crafting
- Cuisine: Artisan
- Diet: N/A
Ingredients
- Plastic or papier-mache eggs
- Air-dry clay or polymer clay
- Craft glue or strong tacky glue
- Acrylic paints in deep jewel tones and metallics
- Small tools: dull knife, toothpicks, soft paintbrush
- Fine sandpaper (optional)
- Clear matte or satin sealer
- Small scale options: sequins, beads, cut circles of foil, or hand-cut clay scales
- A shallow palette or dish for mixing paint and glue
- A soft cloth for wiping hands and tools
Instructions
- Make your base egg ready.
- Prepare small scale shapes.
- Attach the first row of scales.
- Continue upward in layers.
- Fill the top with smaller scales.
- Let the piece dry fully.
- Sand and refine any edges.
- Apply a base coat of paint.
- Dry between coats.
- Add highlights and metallics.
- Seal the egg.
- Add final accents.
Notes
This project allows for creative variation with different materials and techniques. Keep in mind the drying and setting times for the best results.