

A small bowl of warm water sits on the table and the air smells faintly of baking soda. My hands move slowly as I stir, feeling the solution warm under my fingertips through the glass. I shape a tiny tree from pipe cleaners and tape it to a pebble, then lower it into the bowl and wait. The quiet that follows feels like a small meditation. This Baking Soda Growing Tree asks me to slow down, to notice the way crystals begin like snow and catch the light.
The Quiet Joy of Making Baking Soda Growing Tree

Making a Baking Soda Growing Tree invites a gentle, sensory kind of attention. The work focuses on subtle shifts: the small clink of glass, a smooth curve of wire, the soft fog that rises from very warm water. These moments ask you to breathe and stay near the hands-on process.
This project fits into slow afternoons or quiet mornings. It gives a clear, tactile task and a small reward that feels a little magical when the crystals bloom. You finish with something that looks delicate and fractal, and the memory of making it stays soft and warm. I use this craft when I want a calm, mindful break and a little tabletop wonder.
I keep a simple note about materials and results in a small journal. That quiet record helps me remember the temperature, color, and timing that worked, and it makes each try feel like a good experiment rather than a test.
The Flow of Making Baking Soda Growing Tree
The flow feels gentle and steady. You mix, shape, dip, and wait. Each action has a soft rhythm that soothes rather than rushes.
You move from the coarse grit of dry baking soda to the smooth shine of a saturated solution. You shape the tree slowly, twisting tiny branches with your fingers. When you place the tree in the dish, you step back and listen to the room. There is a small hush as the solution cools and the first crystals begin to form.
If you like, you can read more background and variations in this baking soda crystal growing tree guide that I return to when I want fresh ideas. The page offers friendly encouragement and small details I often try.
The process keeps you present. It asks for attention to temperature, patience for evaporation, and care when you lift the tree out to admire the tiny mineral gardens forming along each branch.
Materials You’ll Need
- Baking soda (sodium bicarbonate), plain and dry
- Warm water (hot water from the tap, used carefully)
- A clear glass or shallow dish (easy to see growth)
- Pipe cleaners or cardboard cut into a small tree shape
- Small pebble or clothespin to anchor the tree
- Food coloring (optional, for soft tinted crystals)
- A teaspoon and a stirring stick
- Paper towel and small tray for gentle drying
- Measuring cup (optional, for consistency)
Notes: Most of these items come from around the house. Use pipe cleaners for a flexible tree shape, or cut cardboard for a flat silhouette. If you want more background on similar projects, the short notes on materials for a baking soda growing tree have useful ideas for substitutes and simple tips.
I favor a clear dish because watching the solution change helps me learn. A shallow dish gives a steady surface for crystals to base on, and a glass dish lets light come through the growing structure.
Step-by-Step Directions
- Prepare your workspace and hands.
Keep a clean surface and a paper towel. Pour a small cup of warm water into your glass and have the baking soda ready. Warm water helps the baking soda dissolve more fully. - Shape your tree base.
Twist pipe cleaners into a small tree or cut a cardboard tree. Anchor it with a pebble or clip so it stands upright. The base should sit in the dish without wobbling. - Measure and stir the baking soda.
Add one teaspoon of baking soda at a time to the warm water and stir slowly. Notice the way the powder dissolves and the solution looks clearer with each stir. - Make a saturated solution.
Keep adding small amounts of baking soda until the mixture stops dissolving and a tiny residue appears. That tells you the water holds as much baking soda as it can. Warm water will hold more. - Add gentle color if you like.
Drop one drop of food coloring into the solution and stir once. The soft tint moves through the liquid like a quiet watercolor. - Place the tree in the dish.
Set the tree gently into the solution so its branches are just above the water line or slightly touching. If you touch the solution with the tree, do so slowly so you do not splash. - Find a calm spot to watch.
Move the dish to a place with steady, mild air and indirect light. Avoid fans and direct sunlight because strong air currents speed evaporation unevenly. - Wait and observe small changes.
Check after two to four hours for tiny crystal seeds on the tree or the dish rim. The first crystals may look like frost or tiny beads. Look for sparkle and texture rather than dramatic size at first. - Let the crystals grow slowly.
Allow the tree to sit undisturbed for 24 to 48 hours. As water evaporates, baking soda will reorganize into crystalline shapes. The slow pace encourages finer, more delicate crystals. - Lift and dry the tree gently.
When you like the growth, lift the tree out and set it on a paper towel. Pat lightly if needed and allow it to dry fully in a quiet place. The crystals will harden as the last moisture evaporates. - Display or photograph.
Once dry, move your tree to a protected surface. Use a soft light to show how the crystals catch the rays. If you want to repeat the process, you can reuse the base. - Clean up safely.
Dispose of the used solution down the sink with extra water, or pour it into a plant pot if your soil tolerates mild alkalinity. Wipe the dish and surfaces gently.
I learned that patience matters more than perfect measurements. When I rushed and used very hot water or a fan, the crystals grew unevenly and felt brittle. When I relaxed and let the solution cool slowly, the growth felt softer and more stable. Keep hands steady and use warm, not boiling, water to stay safe.
Using Baking Soda Growing Tree in Everyday Life

Place your finished tree where you can return to it. A small shelf, a windowsill with indirect light, or a bedside table gives you a place to check the delicate textures each day.
You can use the tree as a seasonal accent. It looks quiet and wintry in pale tones, and it can feel like a miniature garden when tinted with soft colors. The piece invites a short ritual: a gentle touch to move it, a slow look to notice tiny crystal edges, a small photograph to capture a new angle.
If you like, explore more ways to arrange and pair these pieces with other simple crafts by seeing different baking soda growing trees I have made. Mixing a few small trees together creates a quiet vignette that feels like a tiny, calm landscape.
Use your tree as a prompt for mindfulness. Each viewing can be an invitation to breathe and notice texture, light, and small changes. The object encourages slow attention rather than quick consumption.
How to Store or Reuse Baking Soda Growing Tree
Crystals are delicate. Store your tree in a low-humidity place in a small box or under a glass cloche to protect it from dust and bumps. If you plan to keep it longer, add a layer of soft tissue paper at the base.
You can reuse the tree base. If the crystals crumble or you want a fresh look, dissolve the crystals in warm water and clean the base. Dry it thoroughly and try the process again. A pipe cleaner base will hold up to several tries.
If you want to preserve a shape for years, consider mounting the tree on a small block and covering it with a clear resin. Do this with care and in a well-ventilated area, following resin safety guidance.
When crystals lose shine over time, gently dust them with a soft brush rather than washing. Water can dissolve and change their texture. Treat these pieces as fragile keepsakes.
Small Ways to Make It Your Own

- Try different base materials.
Use twigs, small branches, or flat cardboard silhouettes instead of pipe cleaners. Each material gives a different crystal pattern and weight. - Play with subtle color.
Add one drop of food coloring to the solution for a muted tone. Pastels work best for a soft look. Avoid heavy dyes which can stain the dish. - Vary the temperature gently.
Warmer water dissolves more baking soda and can speed growth a bit. Cooler water encourages slower, finer crystals. Choose the pace you prefer. - Use scent as a quiet companion.
Place a small dish of dried lavender nearby rather than adding scent to the solution. The smell helps create a calm setting for watching the growth without affecting the crystals. - Keep a small notebook for notes.
Write the water temperature and how long you wait. These small records teach you what works for your space and your hands.
These ideas are invitations rather than rules. Try one or two at a time and notice how each change shifts the feeling of making.
FAQs About Baking Soda Growing Tree
Will the crystals form overnight?
Sometimes you will see tiny crystals within a few hours, but full growth usually takes 24 to 48 hours. Patience rewards you with more structured and stable crystals.
Are the crystals safe to touch?
The crystals are not toxic, but they are fragile and can flake. Wash hands after handling and keep them away from young children and pets who might put things in their mouths.
Why did my tree not grow any crystals?
Common reasons include water that was too hot or too cold, not enough baking soda to reach saturation, or the tree base not contacting the solution. Try again with slightly warmer water and add baking soda until the mixture just begins to leave a small residue.
Can I use other salts instead of baking soda?
Yes. Salt, sugar, or alum produce different crystal shapes. Each material responds to temperature and evaporation in its own way. Baking soda creates a soft, powdery crystalline texture that I find calming.
How do I speed up growth?
Gentle increases in temperature or placing the dish in a dry, warm room helps evaporation. But faster growth often means coarser crystals. If you want finer structure, choose a slower pace.
A Quiet Closing Thought
This project gives you a small space to practice gentle attention. There is no perfect outcome. Each tree teaches you something: about timing, about texture, about how small changes in the water or the light shift the result. The steady act of waiting, noticing, and caring feels like a tidy little ritual. Keep it calm, enjoy the tactile steps, and return to the work when you need a soft, sensory pause.
Conclusion
For a clear, science-focused look at crystal growth that complements this craft, you might enjoy the detailed experiment notes at Growing Crystals Experiment | ARM & HAMMER Baking Soda Project.
If you find yourself inspired by the idea of trees and care for living plants, this practical guide on tree care can offer useful context: How do I care for apple trees on a property I just purchased?.
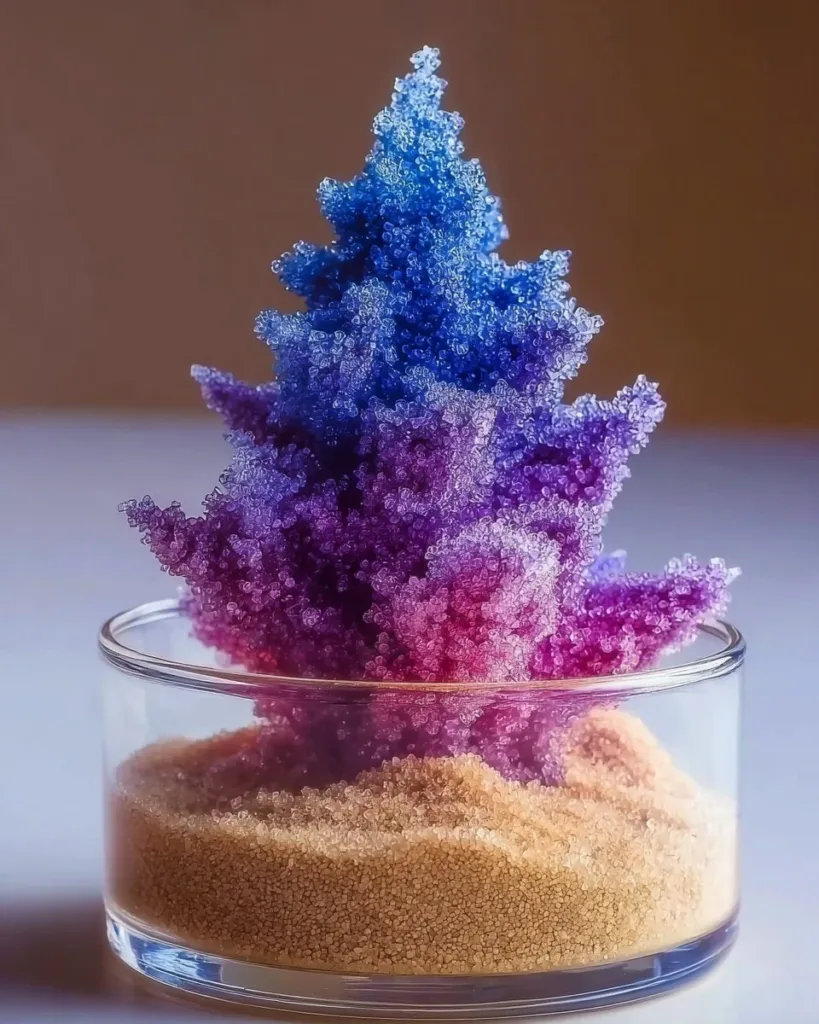
Baking Soda Growing Tree

A soothing craft project that allows you to grow delicate crystal formations on a pipe cleaner tree using baking soda and warm water.
- Prep Time: 15 minutes
- Cook Time: 0 minutes
- Total Time: 48 hours
- Yield: 1 tree
- Category: Craft
- Method: Crafting
- Cuisine: N/A
- Diet: N/A
Ingredients
- Baking soda (sodium bicarbonate), plain and dry
- Warm water (hot water from the tap, used carefully)
- A clear glass or shallow dish (easy to see growth)
- Pipe cleaners or cardboard cut into a small tree shape
- Small pebble or clothespin to anchor the tree
- Food coloring (optional, for soft tinted crystals)
- A teaspoon and a stirring stick
- Paper towel and small tray for gentle drying
- Measuring cup (optional, for consistency)
Instructions
- Prepare your workspace and hands.
- Shape your tree base.
- Measure and stir the baking soda.
- Make a saturated solution.
- Add gentle color if you like.
- Place the tree in the dish.
- Find a calm spot to watch.
- Wait and observe small changes.
- Let the crystals grow slowly.
- Lift and dry the tree gently.
- Display or photograph.
- Clean up safely.
Notes
Use pipe cleaners for a flexible tree shape or cut cardboard for a flat silhouette. Store the tree in a low-humidity place in a small box or under a glass cloche to protect it from dust.