

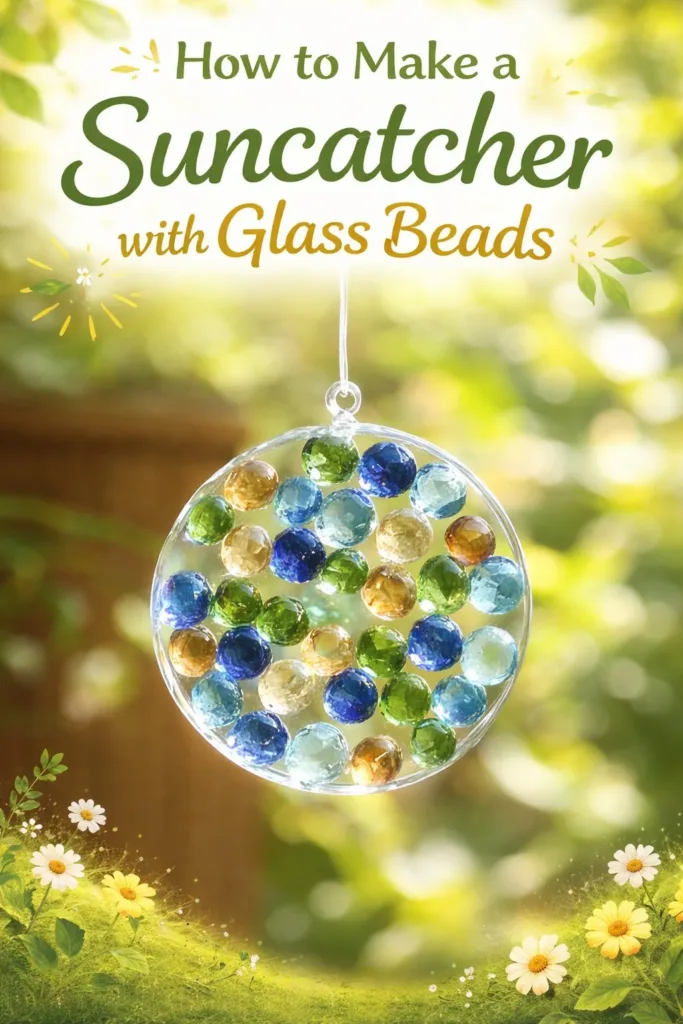
I set a small tray of glass beads on the windowsill and watched the light while I breathed slowly. Each bead sat like a tiny planet, cool and smooth between my fingers, and the sun threaded color through the glass. This quiet moment began my experiment with How to Make a Suncatcher with Glass Beads, an easy ritual that asks for soft attention and gentle hands.
Why How to Make a Suncatcher with Glass Beads Feels Comforting to Create

Making a suncatcher with glass beads gives you time to slow down and notice small changes in light and texture. The act of choosing beads, feeling their weight, and tuning the wire or thread to fit them invites you into one small, deliberate task. That focus reduces the rush of the day into something small and manageable.
The materials themselves bring calm. Glass beads feel cool and dense in the palm. When sunlight moves across the beads, they throw tiny shards of color on the wall. The sound of beads clicking softly into place carries a steady, quiet rhythm. These sensory moments add up and help you feel grounded.
I sometimes pair this project with a warm cup of tea and a few deep breaths. The process rewards patience. You cannot hurry the light or make the beads shine sooner, but you can sit with them and notice how the tones shift. If you like other slow suncatcher ideas, you might enjoy our guide to DIY bioplastic suncatchers for a soft, natural take on catching light.
A Gentle Look at the Process
Before you begin, picture a soft rhythm: selecting, threading, tightening, pausing. The whole project moves slowly, like knitting one simple stitch at a time. You will choose beads by color and texture, thread them in a sequence that feels pleasing to your eye, and finish with a secure loop for hanging. Each movement stays small and controlled.
You will listen to the beads. The tiny click they make when they nest together tells you when the pattern feels right. If you feel unsure about color choices, lay beads out on a fabric scrap and let the combination sit while you breathe. This small pause often helps decisions become clearer without pressure.
If you enjoy colorful projects that use different materials, try exploring our blue crayon suncatcher ideas for a different feel and color story at blue crayon suncatchers. That method emphasizes melted wax and bold swaths of light, and it pairs well with bead work when you want to mix textures.
Materials You’ll Need
- Glass beads in various sizes and colors (easy to find at craft shops)
- Strong nylon beading thread or flexible jewelry wire (thread for softer drape, wire for structure)
- Small embroidery needle if you use thread (optional)
- Necklace clasp or small metal ring for the top loop (optional)
- Scissors or wire cutters (sharp and clean)
- Round-nose pliers if using wire (for neat loops)
- Small bead tray or shallow dish to organize colors (helps you see the palette)
- Clear fishing line for invisible hang, or a thin ribbon for a cozier look
- A small piece of felt or cloth to work on (keeps beads from rolling away)
- A towel or soft mat to protect your table (practical and gentle)
If you want a floral touch, try pairing bead colors with pressed petals in our guide to bioplastic suncatchers with flowers. That link gives ideas on pairing natural shapes with translucent surfaces.
Step-by-Step Directions
-
Choose your bead palette and lay the beads on a soft cloth.
Take three slow breaths and notice which colors draw you in.
Arrange them in loose rows until the mix feels right. -
Cut your thread or wire to length and leave extra for tying.
A 20 to 30 inch length gives room to work and a tail for knots.
If you use wire, add a few inches for creating a hanging loop. -
Secure one end with a temporary knot or a small bead stopper.
This holds the beads in place as you work.
If you use wire, bend a small loop with pliers to stop slipping. -
Thread beads in your chosen order, one at a time.
Notice the click as each bead settles into place.
Pause now and then to shift the arrangement if something feels off. -
Test the curve or pattern by holding the piece to the light.
Step back and let your eyes relax for a few seconds.
Adjust the bead order if the light reveals a stronger balance. -
Finish the end with a secure knot or crimp bead.
Pull the thread tight and trim excess gently.
For wire, make a neat loop with round-nose pliers and tuck wire ends. -
Add a hanging loop or clasp so the piece can rest in sunlight.
Choose ribbon for softness or fishing line for near-invisibility.
Make sure the loop stays centered when the suncatcher hangs. -
Hang your suncatcher near a sunny window and watch the light.
Leave it for a few hours to see how the colors move across your room.
If any beads shift, gently re-tighten the thread or wire. -
Enjoy small adjustments over time.
You may choose to add beads or change spacing later.
This piece can evolve slowly with your changing taste.
Where This DIY Fits Into a Calm Routine


Hang a bead suncatcher where morning sun enters and give yourself a brief ritual around it. I place mine near the kitchen shelf where I do simple morning tasks. As the sun moves, the small colors shift and remind me to breathe and slow down between chores.
When you feel restless, step closer and run a finger along the beads. The cool, smooth surface gives a tiny sensory pause. If you keep a small journal, position the suncatcher within view and write for five quiet minutes each day while light plays on the page. The practice does not require long stretches of time. Even two minutes of watching shifting light can reset your mood.
This DIY also fits well into family-making time. Children can help choose bead patterns and learn about order and repetition. Make a group session where everyone lays out beads on their own cloth square and then threads them slowly. You will see hands move in unison and hear soft conversations about color and texture. If you like combining techniques, consider creating complementary pieces with pressed flowers in a different medium, like those shown in our bioplastic suncatchers recipe for other tactile experiments.
Caring for Your Finished DIY
Keep your suncatcher away from places where it might tangle in a breeze or strike a hard surface. A gentle, slow-moving breeze makes beads glint; a strong gust can pull knots loose. If you use thread, check knots every few months and re-tie if they feel slack.
To clean, dust with a soft cloth or brush. If beads need more cleaning, wipe them with a lightly damp cloth and dry them right away. Avoid harsh chemicals and heavy scrubbing that could dull the glass finish or damage metal components.
If a bead breaks, remove any sharp fragments carefully with gloves and replace the bead. Store spare beads and a short length of wire or thread in a small jar with your suncatcher for easy repairs. This small care habit keeps your piece alive and maintains its cozy presence.
If you travel with your suncatcher or store it seasonally, wrap it in soft cloth and lay it flat to protect the beads and loops. Label the wrapping so you can return to the suncatcher gently when you want it again.
Gentle Tips & Variations
- Invite texture: Add a few faceted beads to catch more light. They add sparkle but keep the overall rhythm calm.
- Try asymmetry: Don’t feel obliged to make both sides mirror each other. A slightly unbalanced pattern often feels more organic and comfortable.
- Mix metals and neutrals: Small metal spacers add contrast without violence. They warm the palette and help beads sit neatly on thread.
- Use natural light as a guide: Look at your window at different times of day and choose bead placement based on morning and afternoon light.
- Create a set: Make several small suncatchers that hang together at different heights. The group will create a gentle chorus of color across the wall.
Each of these variations invites small experiments rather than a complete redesign. Try one at a time and let each change settle in before you decide on the next.
FAQs About How to Make a Suncatcher with Glass Beads:
Q: Which beads work best for beginners?
A: Glass seed beads and slightly larger round beads feel easiest to handle. They slip onto thread smoothly and feel satisfying to touch. Start with a simple color palette so you can focus on rhythm rather than choices.
Q: Do I need special tools for wire work?
A: You only need round-nose pliers and wire cutters for neat loops and clean ends. If you prefer soft thread, use an embroidery needle to help pass beads. Work on a soft cloth to keep beads from rolling away.
Q: How do I hang the suncatcher so it catches the best light?
A: Hang it where morning or afternoon sun reaches the glass directly. South- or east-facing windows usually give a gentle, steady light. Use a suction hook or a small nail placed at a comfortable height so you can pause and look easily.
Q: Can I combine glass beads with other materials safely?
A: Yes. You can mix in small wooden beads, metal spacers, or crystals. Keep heavier items lower in the design to avoid straining the top knot or loop. Test the strength of your thread or wire when adding weight.
Q: Is this project child-friendly?
A: Children can participate with supervision. Use larger beads for small hands and avoid tiny beads for very young children. Keep sharp tools like wire cutters and pliers out of reach. Encourage gentle handling and make it a shared, slow activity.
A Gentle Note Before You Go
When you finish a suncatcher, sit with it briefly and notice how it changes the light in your room. Small handmade objects hold the time you spent making them. They do more than decorate; they remind you that care can live in tiny things.
If you ever feel uncertain while making, slow your breathing, return a bead to the tray, and give yourself permission to step away. Creativity breathes when you let it rest. Carry this piece somewhere that brings small daily joy and remember that every adjustment you make teaches you something about color, balance, and patience.
Conclusion
If you want a step-by-step alternative with clear photos for inspiration, Golden Age Beads offers a detailed guide on How to Make a Beaded Suncatcher that pairs well with the gentle approach here. For another simple set of ideas that combine glass beads with easy hanging methods, see the collection at DIY Suncatchers with Glass Beads.
Thank you for sharing a few quiet moments with this small project. I hope the light it brings into your space feels warm and steady.
PrintHow to Make a Suncatcher with Glass Beads

A calming DIY project for creating beautiful suncatchers using colorful glass beads, perfect for adding charm to your home.
- Prep Time: 10 minutes
- Cook Time: 30 minutes
- Total Time: 40 minutes
- Yield: 1 suncatcher
- Category: Craft
- Method: Crafting
- Cuisine: N/A
- Diet: N/A
Ingredients
- Glass beads in various sizes and colors
- Strong nylon beading thread or flexible jewelry wire
- Small embroidery needle (optional)
- Necklace clasp or small metal ring (optional)
- Scissors or wire cutters
- Round-nose pliers (if using wire)
- Small bead tray or shallow dish
- Clear fishing line or thin ribbon
- A small piece of felt or cloth
- A towel or soft mat
Instructions
- Choose your bead palette and lay the beads on a soft cloth.
- Take three slow breaths and notice which colors draw you in.
- Arrange them in loose rows until the mix feels right.
- Cut your thread or wire to length, leaving extra for tying.
- Secure one end with a temporary knot or a small bead stopper.
- Thread beads in your chosen order, one at a time.
- Test the curve or pattern by holding the piece to the light.
- Finish the end with a secure knot or crimp bead.
- Add a hanging loop or clasp for the suncatcher.
- Hang the suncatcher near a sunny window and watch the light.
- Enjoy small adjustments over time, adding beads or changing spacing as desired.
Notes
Keep your suncatcher away from areas where it might tangle or break. Clean gently with a soft cloth and check knots regularly.