

A cool touch of glass, a soft clink as a jar settles, and the wet sugar syrup reflecting morning light like a tiny pool of colored glass this is the quiet moment that begins a Rainbow Sugar Crystal Eruption. I tuck a warm jar between both hands and feel the lingering heat, the sticky scent of sugar, and the slow promise that today something small and bright will grow.
It is the kind of project that asks only for patient attention, a gentle stir, and the pleasure of watching color and texture move together. If you like a slightly faster bloom, I keep a related variation in my notes at growing rainbow sugar crystal eruption recipe that blends the same quiet making with a little extra speed.
Why Rainbow Sugar Crystal Eruption Feels Comforting to Create

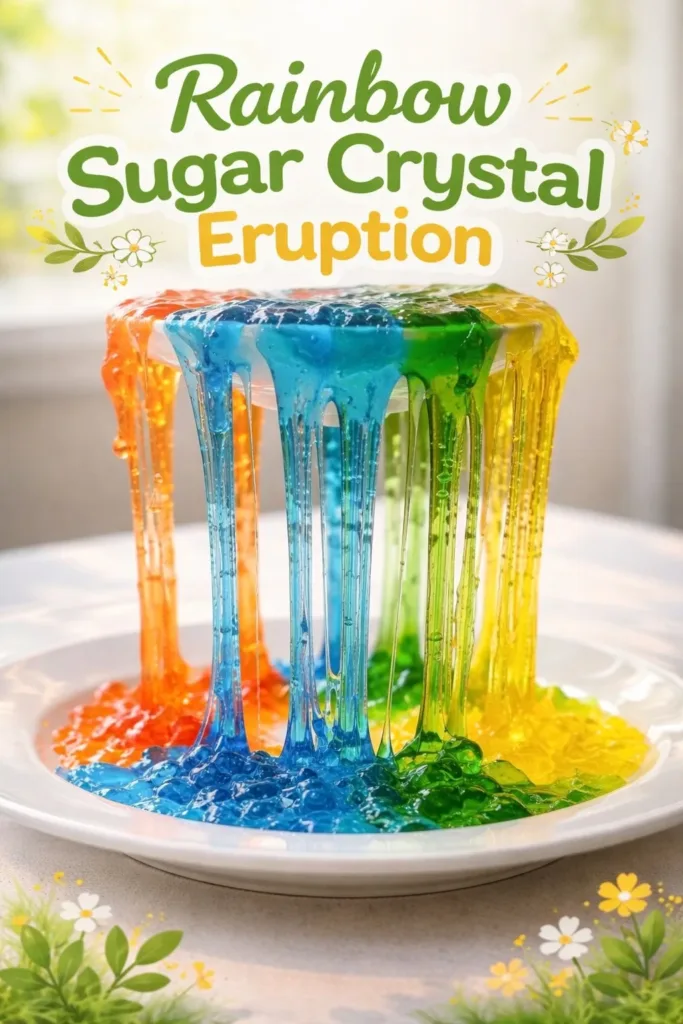
Make and watch. That simple cycle lives at the heart of a Rainbow Sugar Crystal Eruption. You prepare, wait, and then witness a small, joyful change. The process slows rhythm and rewards attention. You hear the soft hiss of boiling water meet sugar. You see syrup turn glossy and then cool to a clear, jewel-like surface. Later, tiny crystal points catch the light like frost.
This project ties sensory cues to calm habits. Measuring sugar by hand invites focused breathing. Stirring with a wooden spoon feels warm and steady in the palm. Watching crystals form over hours or days trains patience without pressure. The eruption moment when fizz lifts sugar and color outward gives a playful release that feels safe and wondrous.
The Rainbow Sugar Crystal Eruption blends gentle science and sensory play. It helps me pause and care for small things. It helps me remember that slow processes can finish in bright, playful gestures.
The Flow of Making Rainbow Sugar Crystal Eruption
Before we get into materials, picture the flow. You dissolve and color. You build a seed, suspend it with care, and pour the syrup like a thin, reflective sheet. Then you wait, checking quietly for tiny crystals like fresh snow. Finally, you prompt an eruption with fizz and watch the crystals tumble and scatter in slow, colorful motion.
Move slowly when you heat the sugar. The sound shifts from tiny pops to a subdued, steady bubble. The syrup glistens as it cools. The act of waiting becomes part of the practice. If you prefer a quicker pace, I describe a faster approach in a clear, hands-on guide at rapid growing rainbow sugar crystal eruption that keeps the same gentle feel.
This flow keeps the work sensory and intentional. It invites a place to breathe, a place to notice small changes. That rhythm is more than craft. It becomes a slow, steady conversation between your hands and the materials.
Materials You’ll Need
- Granulated sugar (easy to find)
- Water (tap water works)
- Saucepan (for gentle heating)
- Glass jars or mason jars (clear, heat-safe)
- Wooden stirring spoon (smooth and warm in the hand)
- Food coloring or liquid watercolor (several colors; optional: natural dyes)
- String or clean cotton thread (for seed crystals)
- Pencil or chopstick (to suspend the string)
- Clothespins or tape (to hold the pencil)
- Baking soda (for the eruption fizz)
- Vinegar (white or apple cider; colored vinegar adds drama)
- Small tray or baking sheet (to catch spills)
- Tweezers or small tongs (for careful placement of crystals)
- Measuring cups and spoons (simple accuracy helps)
- Optional: pipe cleaners shaped into spirals, glitter for sparkle, or essential oils for a faint scent
Step-by-Step Directions
Notes: Many of these materials are household staples. You can substitute glass jars for cups that tolerate warm liquid. Food coloring is optional if you prefer a gentle, almost pastel effect from natural dyes. I like cotton thread for its subtle texture; pipe cleaners create fun sculptural seed shapes.
- Measure and warm the solution.
Warm the water gently in a saucepan until it moves like a slow current.
Stir in sugar a little at a time until the solution looks syrupy and clear. - Add color as the syrup cools slightly.
Stir in a few drops of food coloring for each jar to make separate tones.
Let the syrup cool until it still feels warm but will not scald. - Prepare the jars and seeds.
Tie a short piece of string to a pencil or shape a pipe cleaner into a small coil.
Suspend the string in the jar so the seed hangs without touching the glass walls. - Pour the colored syrup.
Slowly pour the warm syrup into each jar, filling to cover the suspended seed.
Set the jars on a flat, steady surface and cover lightly with cloth or lid. - Wait and watch with gentle checks.
Keep jars in a cool, undisturbed place for 24 to 72 hours.
Look for tiny crystals forming like early frost along the string or pipe cleaner. - Encourage fuller crystals if desired.
If growth feels slow, carefully remove a small seed and dip it into concentrated syrup, returning it to the jar.
Small adjustments and soft patience help the crystals grow fuller over time. - Prepare the eruption area.
Place jars on a tray for the eruption stage to catch colorful drips.
Sprinkle a thin layer of baking soda across the top of the crystals or in a small mound nearby. - Color and pour the vinegar.
Mix vinegar with a drop of food coloring for a bright pour.
Pour slowly onto the baking soda and watch the fizz lift and scatter colored crystals outward. - Observe the movement and textures.
Notice the sound of fizz, the travel of tiny crystals, and the way light catches the shattered pieces.
Breathe slowly and take time to enjoy this playful release. - Clean and reflect.
When the fizz settles, move the jars to dry and consider how the eruption changed the crystal shapes.
Wipe hands and tools with warm water and store gently.

Safety notes: Always supervise heating steps. Handle warm jars with care and use oven mitts if needed. Keep small parts away from young children when not supervised. Vinegar and baking soda are generally safe but can sting eyes; keep a gentle distance and avoid splashes.
Enjoying the Finished Piece
A finished Rainbow Sugar Crystal Eruption holds both display and memory. You can leave a cooled jar on a sunny windowsill and watch colors shift as light passes through the crystals. Crystals catch dust easily, so treat displays as temporary treasures rather than permanent decor. I like to place a finished jar on a small plate or tray beneath a lamp; the sparkle becomes a quiet, moving light.
These pieces also make gentle table centerpieces for small gatherings. Set one jar in a shallow bowl and invite a slow smile. If you prefer a more tactile keepsake, pull the crystal-coated pipe cleaner free when it is dry and use it as a sparkly bookmark or a tiny sculpture to rest on a shelf.
If you want to follow a recipe that marries this eruption idea with baking soda and bright, storybook shapes, I include a decorative approach at baking soda rainbow crystal forest recipe that leans into displayable forest forms.
How to Store or Reuse Rainbow Sugar Crystal Eruption
Storing these creations requires both care and acceptance. Sugar crystals respond to humidity. In damp air they soften and lose their sharp sparkle. If you want to keep a finished crystal longer:
- Place finished crystals in an airtight container with a small packet of desiccant or a jar of dry rice nearby to reduce moisture.
- Keep them in a cool, dry place out of direct sunlight to avoid color fading.
- For jar displays, close the lid once the piece is fully dry and store on a shelf.
Reusing crystals has gentle possibilities. Crystals that break during eruption can become part of a mosaic jar or glued to a wooden frame as a small, decorative panel. If sugar seems sticky or damp, you can allow the piece to dry fully, then brush off excess sugar with a soft paintbrush and repurpose the remaining fragments in a craft collage.
If a jar feels sticky or grows a film, it’s time to compost or dissolve the sugar in warm water to clean. Treat these objects as ephemeral friends: lovely for a season, worth enjoying while they last.
Gentle Tips & Variations

- Invite scent softly: Add a drop of vanilla or lemon extract to the warm syrup for a faint, comforting scent that stays subtle. Use sparingly so aromas do not overwhelm the scene.
- Try layered colors: Pour one color, allow a thin skin to form, then add another color for soft bands of color inside the crystals. This creates gentle stripes when light passes through.
- Make tiny forests: Use pipe cleaners twisted into tree shapes as seeds. They form small crystal forests that look delightedly otherworldly.
- Use natural dyes: For a calmer palette, try hibiscus tea, beet juice, or turmeric for pinks and golds. Natural dyes create softer, more muted crystal tones.
- Speed it safely: If you want faster crystal growth, try a concentrated syrup at higher sugar ratios, but remember this requires careful heating and adult help. I discuss faster methods in an alternate walk-through at baking soda rainbow crystal forest where timing and texture receive special attention.
Treat these as invitations. Try one tip at a time. Notice what each change does to texture, light, and sound.
FAQs About Rainbow Sugar Crystal Eruption
How long does it take to grow noticeable crystals?
Expect tiny crystals in 24 hours and fuller growth over several days. Growth depends on temperature and how saturated your sugar solution is. Cooler, stable spots encourage delicate, well-formed crystals.
Is this safe for kids?
This activity is child-friendly when adults handle the hot syrup and supervise the eruption. Small bits of crystal and materials like food coloring can be a choking risk for very young children. Keep an eye on kids and use safe containers.
Why did my crystals turn cloudy?
Cloudiness can come from impurities or rapid cooling. Using clean jars, filtered water if your tap water is hard, and gentle cooling helps keep crystals clear. Slight clouding still looks lovely and adds character.
Can I reuse the syrup or crystals?
You can dissolve and reuse sugar from a jar by adding warm water and filtering, but doing so may alter color intensity. Crystals that remain clean and dry can be used as decorative bits in collages or mosaics.
What makes the eruption fizz?
Baking soda and vinegar react to create carbon dioxide gas. The fizz lifts and scatters sugar crystals. Colorful vinegar or a gently poured solution turns the eruption into a slow, sensory display.
A Gentle Note Before You Go
Sit with the memory of the warm jar for a moment. Notice what you learned about patience, about small adjustments, and about the way color and texture respond when you slow your movements. This craft asks you to pay quiet attention. It gives you gentle rewards: tiny crystals, a sound like distant rain, a bright scattering of color.
If you keep this project for a season, you will find it returns a kind of domestic calm. You can repeat it with small changes and watch how different temperatures and colors shape the outcome. Making space for this kind of slow, sensory practice can feel like laying a soft path through a busy day.
Conclusion
If you want a clear, kid-friendly science perspective on growing sugar crystals, see the step-by-step explanation at Grow Dazzling Sugar Crystals: A Sweet Science Experiment for Kids which pairs gentle explanation with playful photos. For another creative take that blends eruption fun with colorful craft instructions, the guide at Rainbow Sugar Eruption – The Buzzy B offers helpful ideas and variations you might enjoy.
PrintRainbow Sugar Crystal Eruption

A captivating project that combines gentle science and sensory play, resulting in beautiful sugar crystals.
- Prep Time: 15 minutes
- Cook Time: 15 minutes
- Total Time: 48-72 hours
- Yield: Several jars of crystals
- Category: Craft
- Method: Crafting
- Cuisine: N/A
- Diet: N/A
Ingredients
- Granulated sugar
- Water
- Food coloring or liquid watercolor (optional)
- String or clean cotton thread
- Pencil or chopstick
- Clothespins or tape
- Baking soda
- Vinegar (white or apple cider)
- Small tray or baking sheet
- Tweezers or small tongs
- Measuring cups and spoons
Instructions
- Measure and warm the solution.
- Stir in sugar gradually until the solution looks syrupy and clear.
- Add food coloring as the syrup cools slightly.
- Prepare the jars and seeds by suspending the string in the jar.
- Pour the warm syrup into each jar to cover the seed.
- Wait for 24 to 72 hours for crystals to form.
- Encourage fuller crystals if desired with small adjustments.
- Prepare the eruption area with baking soda.
- Color the vinegar and mix with food coloring.
- Observe the movement and textures as the eruption occurs.
- Clean and reflect on the process.
Notes
Many materials are household staples, and substitutes can be used as needed. Patience is key in the process of watching the crystals grow.