

The sunlight casts a warm glow through the windows, creating a tranquil space filled with colors. By creating DIY marbled crayon suncatchers that melt into vibrant swirling patterns, we can enhance this light, transforming everyday moments into something magical. This craft invites you to embrace the simple joy of creating, allowing the gentle layers of color to reflect and dance through your home. It’s a colorful and satisfying craft that encourages mindfulness and presence. Save this DIY! You may also find Colorful Baking Soda And Vinegar Reaction useful.
The Heart Behind This DIY
Engaging in a creative project like making marbled crayon suncatchers is an invitation to slow down in our busy lives. Each swirl of color represents a moment, encouraging us to focus on the act of creation. The tactile experience of handling warm, soft crayon pieces provides a sensory relief that many find grounding. This craft not only brightens up your windows but also brightens your mood, making it a wonderful way to explore your artistic side. As you work through the steps, you may also want to explore other calming crafts like DIY colorful foam that turns into calm, which offers additional sensory experiences.

A Gentle Look at the Process
As you begin making your marbled crayon suncatchers, you’ll notice the comforting rhythm of the process. The gentle sound of crayons being grated, the warmth of the melted wax, and the sight of the colors swirling together create a meditative atmosphere. Each step invites you to immerse yourself in the sensory experience. It’s about enjoying the flow of creativity, from selecting your colors to watching them meld into a beautiful design. Like other enjoyable projects, there is something pleasing about transforming standard materials into something magnificent and complex. You may also find Diy Cotton Candy Glow Jars useful.
Materials You’ll Need
To create your DIY marbled crayon suncatchers, gather these materials:
- Crayons (variety of colors)
- Baking dish or mold (silicone is best for easy removal)
- Parchment paper
- Oven
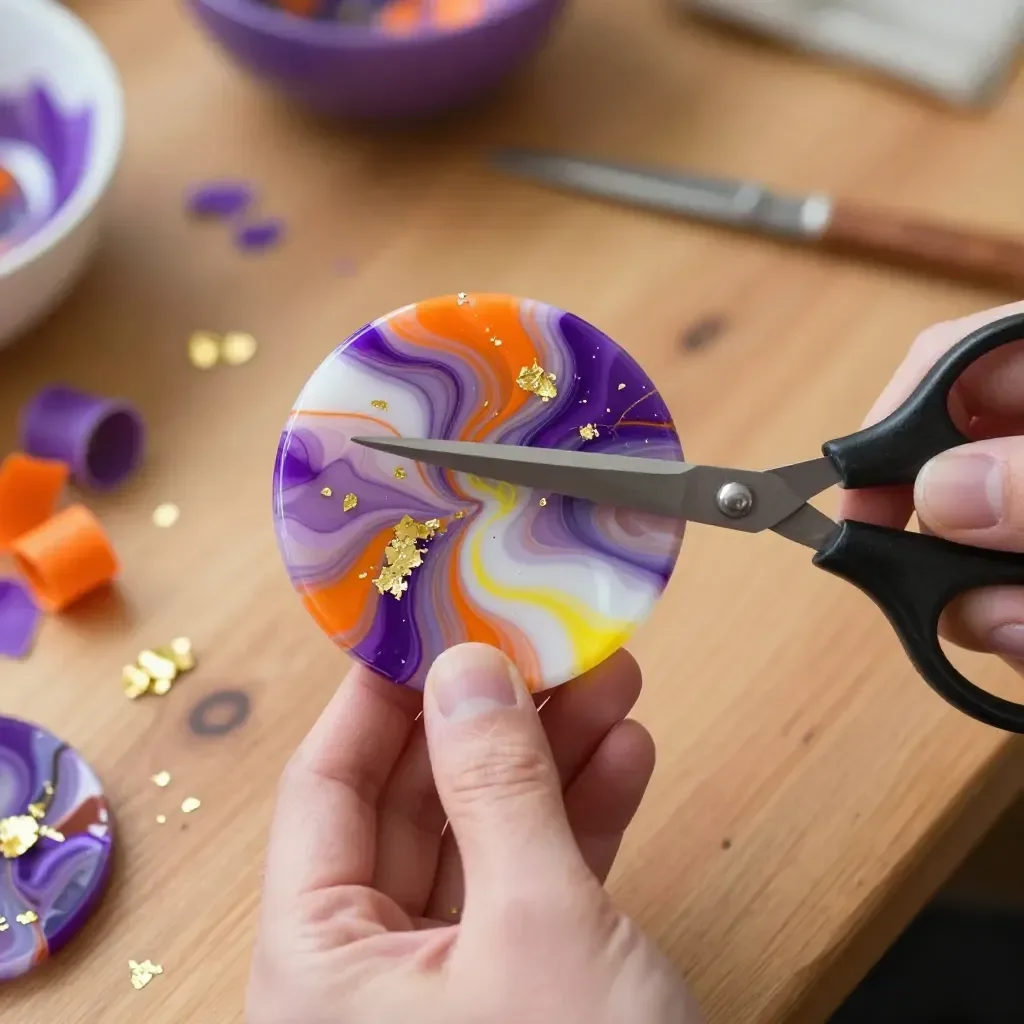
- Scissors or a craft knife
- String or fishing line for hanging
- Optional: wax paper to catch spills
Each of these materials is easy to find in your home or local store. The crayon colors you choose will directly influence the vibrancy of your piece, making it a crucial part of the process.
Step-by-Step Directions
- Preheat your oven to 200°F (about 93°C), creating a soft warmth that will melt the crayons without burning them.
- While the oven preheats, unwrap the crayons and break them into smaller pieces. Let the texture of the crayon be more delicate in your fingers, allowing you to feel their shape slip smoothly between your palms.
- Arrange the broken crayon pieces in your baking dish or mold. Feel free to layer different colors and create your own gradient.
- Line the baking dish with parchment paper to make clean-up easier and to allow the suncatchers to gleam with a smooth finish.
- Once the oven is ready, place the baking dish inside and watch as the crayons gradually melt. This step is where the real magic happens, as colors begin to blend and swirl together beautifully.
- Remove the dish from the oven once the crayons have completely melted, which usually takes about 10-15 minutes. Admire the vibrant colors swirling within the dish, evoking a sense of excitement as you wait for it to cool.
- Allow the melted crayons to cool completely, which may take an hour. You may enjoy this waiting period by reflecting on your progress or planning your next cozy creativity session.
- Once cooled, gently remove the suncatchers from the mold. If you used parchment paper, they should pop out easily without any mess.
- Cut a length of string or fishing line and attach it to the top of each suncatcher for hanging. The gentle sway of your art piece as it catches the light adds an interactive element to your creation.
- Hang your suncatchers in a sunny window and enjoy as they come to life, casting colorful shadows around the room.

Enjoying the Finished Piece
The beauty of your DIY marbled crayon suncatchers extends beyond their creation; these tools of light can elevate your space. When sunlight hits them, the vibrant colors reflect and refract, creating an enchanting display around the room. They become a calming focal point, encouraging mindfulness and sparking joy whenever you catch a glimpse of the graceful dance of colors. Before you dive deeper into crafting, you might also explore the idea of making green crayon raindrop suncatchers for a thematic addition to your colorful collection.
Keeping It for Later
If you wish to store or transition these suncatchers into other spaces, they are quite durable. Simply keep them in a cool, dry place away from direct sunlight when not in use. If they start to accumulate dust, a gentle wipe with a soft cloth will restore their beauty. You can even repurpose them for other craft projects; for example, trimming them into smaller pieces and embedding them in resin or creating colorful bookmarks.
Gentle Tips & Variations
- Experiment with different melting techniques: Try varying the baking temperatures to create different textures in your finished piece, giving it surprises with each creation.
- Use leftover crayon bits for other crafts: These remnants can be used in other projects, such as mixing them into homemade candles or giving them a second life in new designs.
- Decorate your suncatchers further by adding glitter or sequins before melting them—this will create a sparkly surprise in your finished piece.
- Consider using less common color combinations for a unique look. Explore how different hues blend and present in your suncatcher.
- Host a crafting afternoon with friends or family, allowing for shared creativity and relaxation, adding a layer of warmth to your experience.

FAQs About DIY marbled crayon suncatchers melt into vibrant swirling patterns that glow beautifully in sunlight ✨ A colorful and satisfying craft. Save this DIY!
Q: Can I use any type of crayon for this project?
Yes, most crayons work well, but avoid using crayons that do not melt easily, such as glitter crayons or those made with unusual wax blends.
Q: How do I clean my baking dish after use?
After cooling, soak the baking dish in warm soapy water for a while, and use a soft cloth or sponge to gently scrub away remaining wax.
Q: What other creative projects can I do with melted crayons?
You can explore projects like DIY colorful foam or make wax melts, which can be a delightful addition to your cozy spaces.
Conclusion
Creating DIY marbled crayon suncatchers not only brings vibrant colors into your life but also fosters mindfulness and calm throughout the process. Engaging in this craft can be one of the small, soothing rituals that brighten your days. For more melted crayon fun, check out Melted Crayon Crafts: Easy DIY Fun for Creative Kids. Additionally, if you want to explore another stimulating activity, consider Easy DIY Stained Glass Art: Create Vibrant Designs with Glue & Paint! for your next creative escape. Embrace the beauty of craft, and find serenity in every moment spent creating.
PrintDIY Marbled Crayon Suncatchers

Create vibrant marbled suncatchers using melted crayons for colorful decor.
- Prep Time: 15 minutes
- Cook Time: 15 minutes
- Total Time: 60 minutes
- Yield: 4 suncatchers
- Category: Craft
- Method: Baking
- Cuisine: N/A
- Diet: N/A
Ingredients
- Crayons (variety of colors)
- Baking dish or mold (silicone recommended)
- Parchment paper
- Oven
- Scissors or craft knife
- String or fishing line for hanging
- Optional: wax paper for clean-up
Instructions
- Preheat your oven to 200°F (about 93°C).
- Unwrap the crayons and break them into smaller pieces.
- Arrange the broken crayon pieces in your baking dish or mold.
- Line the baking dish with parchment paper for easy removal.
- Place the baking dish in the oven and watch the crayons melt.
- Remove the dish from the oven once the crayons are fully melted (takes about 10-15 minutes).
- Allow the melted crayons to cool completely (around 1 hour).
- Gently remove the suncatchers from the mold.
- Attach string or fishing line to hang the suncatchers.
- Hang your suncatchers in a sunny window and enjoy!
Notes
Experiment with different melting techniques and color combinations for unique designs.