

Creating art often opens a door to tranquility. Imagine sitting with your child, the table softly covered with materials, sunlight dancing across vibrant colors. The gentle whisper of brushes on paper merges with laughter and shared moments. This calm atmosphere surrounds the DIY Flowers Salt Painting for Kids, a project that not only engages young hands but also nurtures creativity and mindfulness. Feeling the grains of salt between fingers and witnessing the way colors blend creates a sensory-rich experience, making it a perfect way to connect with your child in a meaningful way.
The Heart Behind This DIY

When you step into the world of DIY Flowers Salt Painting, you stumble upon a whimsical blend of texture and color. Making this art is about more than just aesthetics; it’s a meditative process that encourages focus and presence. As children sprinkle salt and paint with care, they learn to slow down and observe the transforming beauty of their creations.
The tactile experience of working with salt creates a unique contrast to the smoothness of watercolor paint. Watching the paint travel along the salt’s surface mesmerizes and calms busy minds. Each touch is an invitation to breathe, to notice, and to enjoy the present moment. In a world that often rushes by too quickly, this DIY offers a gentle reminder to engage our senses.
A Gentle Look at the Process
Before diving into materials and steps, envision the flow of this project. Imagine the soft sound of salt pouring and the gentle brush strokes as colors dance across a canvas. Imagine watching the salt absorb vibrant hues, creating stunning patterns.
The process itself feels almost like a calming ritual. It invites you and your child to share thoughts, stories, and laughter. This not only builds a connection but also fosters creativity. Each step can be taken at a leisurely pace, immersing you both in a colorful world where the only goal is to create.
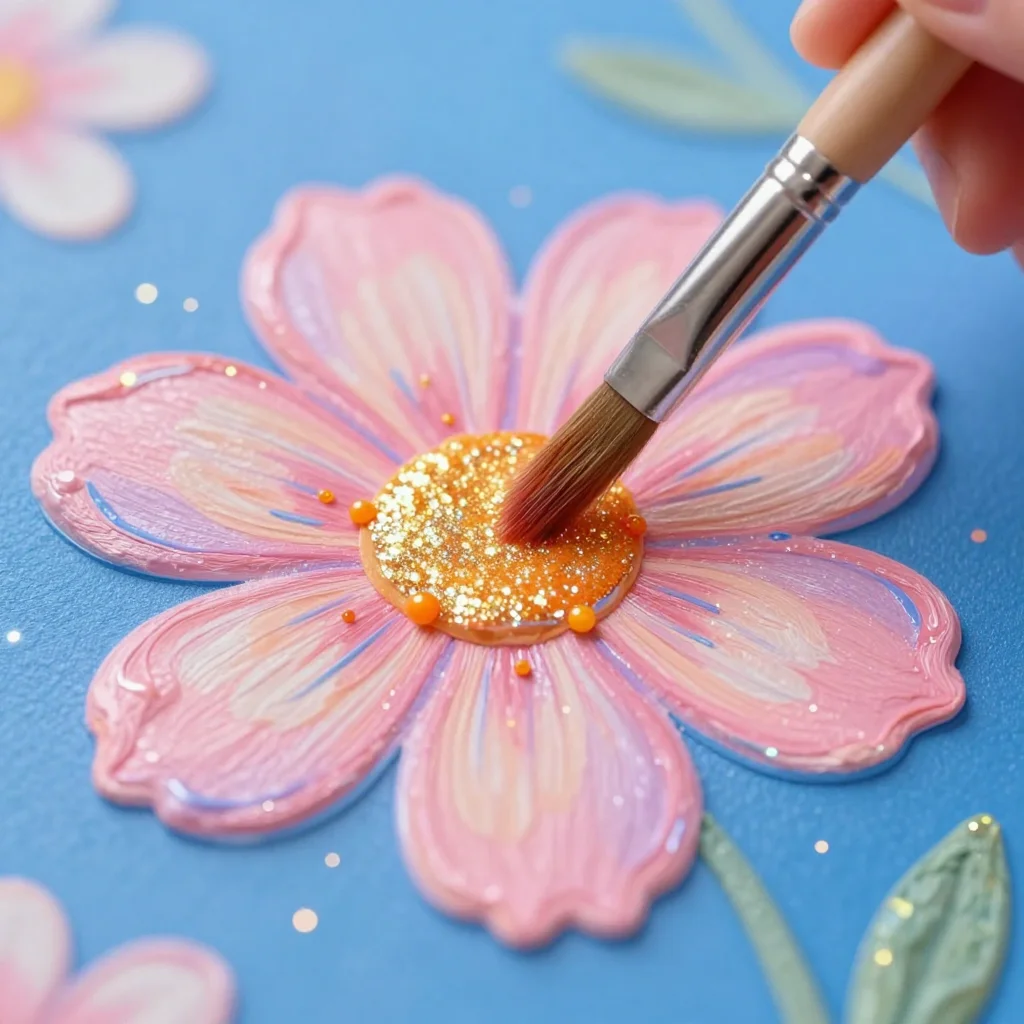
What You’ll Use to Make DIY Flowers Salt Painting for Kids
Gathering materials for this project is simple and invites creativity to begin as soon as you collect them. You probably have many of these items at home. Here’s a cozy list:
- White school glue (easy to find)
- Table salt (optional, but it gives texture)
- Watercolor paints (substitute-friendly with food coloring)
- Plain paper (like watercolor or heavy paper)
- Small paintbrushes (smooth bristles work best)
- Shallow container (for pouring salt)
- Optional: a small cup for mixing colors
These materials invite creative exploration. Each item contributes to the short, tactile journey that this DIY embodies.
Step-by-Step Directions

- Begin by drawing flower shapes on the paper using white school glue. Encourage your child to use their imagination, creating flowers of all shapes and sizes.
- Gently sprinkle salt over the glued areas while they are still wet. This process is delightful, as the salt dances across the glue, transforming the paper into a textured landscape.
- Once the salt covers the glue, carefully shake off the excess back into the container. This moment allows for thoughtful attention to detail; relish in watching the salt cling to the glue.
- Prepare your paint by adding a few drops of watercolor paint into a small cup. If you want to create unique colors, mix them together. The colors can be as bright or pastel as you wish.
- Using small paintbrushes, touch the paint to the salt-covered glue. Watch as the paint seeps into the salt, creating beautiful blooms. Encourage your child to explore blending and layering colors.
- Allow the artwork to dry completely. Watching this transformation can feel so satisfying, as colors deepen and the texture of the salt stands out.
Enjoying the Finished Piece
The beauty of the DIY Flowers Salt Painting extends beyond the moments of creation. Once finished, the artwork becomes a cherished display in your home. You can hang it on the wall or place it on a shelf, where sunlight can catch its vibrant colors.
These paintings can brighten a room and serve as a lovely reminder of cozy, creative moments spent together. They can also inspire conversations about nature, colors, and imaginative stories behind each flower. Creating and enjoying the final piece fosters a sense of shared accomplishment and joy.
How to Store or Reuse DIY Flowers Salt Painting for Kids
If you’ve created a collection of salt paintings, consider how to keep them safe. Store them flat in a portfolio or a sturdy envelope to avoid damage. If you want to showcase them, consider framing some in simple frames to keep them looking fresh and vibrant.
When it comes to reuse, you can get creative! Paint over dried salt projects with different colors or even utilize the flowers as inspiration for a new artwork. This encourages continuous exploration and allows your child to see the art not just as a finished product, but as part of a larger creative journey.
Gentle Tips & Variations

- Try various themes for your paintings, like underwater scenes or landscapes with sunshine. Each theme allows for different colors and shapes, cultivating imaginative thinking.
- Experiment with different types of salt. Coarse salt creates a totally different texture than fine salt. This variation can add another layer of exploration.
- Integrate other art forms, like using crayons to outline the flowers before applying glue and salt. This can enhance the tactile experience and promote even more creativity.
- Encourage your child to tell a story about their flowers. This narrative can be woven into everyday conversations, reinforcing language skills while celebrating their creativity.
- Invite friends over for a collaborative art session. Sharing this project creates a warm atmosphere and strengthens community bonds through creativity.
FAQs About DIY Flowers Salt Painting for Kids
What age is this project suitable for?
Can I make this project outdoors? How do I prevent my flowers from fading over time? Can I use other types of paint besides watercolors? What do I do if I don’t have all the materials?
What age is this project suitable for?
This DIY is wonderful for early elementary school children, typically around ages five to ten. Adult supervision can guide the process while children embrace their creativity.
Can I make this project outdoors?
Creating outdoors can be delightful. Just ensure the workspace is clean and that you have a flat surface. The natural light can make colors pop more vividly.
How do I prevent my flowers from fading over time?
To keep the colors vibrant, display the paintings away from direct sunlight. If you’re looking to preserve artworks long-term, consider applying a clear sealant.
Can I use other types of paint besides watercolors?
Yes! While watercolors create beautiful effects, acrylic or even food coloring can work as substitutes. Each type will provide a unique finish, encouraging exploration.
What do I do if I don’t have all the materials?
Be gentle with yourself in the process. Feel free to use rice or sugar instead of salt; both can create lovely art. Adapt materials based on what you have, and let creativity shine through improvisation.
Conclusion
Embracing creativity through DIY Flowers Salt Painting brings calm and connection into your home. This process invites you and your child to cherish each moment together, as textures and colors blend, whispering the joy of creation. Such projects enrich lives, offering an intentional way to enjoy art-making. If you are curious about more options to explore with salt painting, you might find inspiration in the Salt Painting Process Art for Kids or try out the Salt Painting Flowers Art Project. These ideas promise to continue nurturing the gentle art of making together. Embrace each moment with your little ones and enjoy every soft brush stroke and colorful bloom.
PrintDIY Flowers Salt Painting for Kids

A fun and calming DIY art project that combines salt and watercolor paints to create beautiful flower designs with children.
- Prep Time: 10 minutes
- Cook Time: 0 minutes
- Total Time: 30 minutes
- Yield: 1 artwork
- Category: Arts & Crafts
- Method: Crafting
- Cuisine: N/A
- Diet: N/A
Ingredients
- White school glue
- Table salt (optional)
- Watercolor paints (or food coloring)
- Plain paper (like watercolor or heavy paper)
- Small paintbrushes
- Shallow container (for holding salt)
- Optional: small cup for mixing colors
Instructions
- Begin by drawing flower shapes on the paper using white school glue.
- Gently sprinkle salt over the glued areas while they are still wet.
- Once the salt covers the glue, carefully shake off the excess back into the container.
- Prepare your paint by adding drops of watercolor into a small cup.
- Using small paintbrushes, touch the paint to the salt-covered glue.
- Allow the artwork to dry completely.
Notes
This project is great for enhancing creativity and mindfulness in children. Adult supervision is recommended.