

A small table by a sunlit window holds a quiet pile of shapes. I press a warm, slightly tacky circle between my fingers and feel the gentle give, the faint scent of gelatin and lemon, and the soft sound of plastic settling as it cools. Making DIY Bioplastic Suncatchers – Nature’s Window Art brings that slow, tactile comfort: the patient stirring, the cool press of leaves, the glow when light passes through. If you like, you can revisit the original project notes as you work for extra ideas and photos at the project page.
The Quiet Joy of Making DIY Bioplastic Suncatchers – Nature’s Window Art

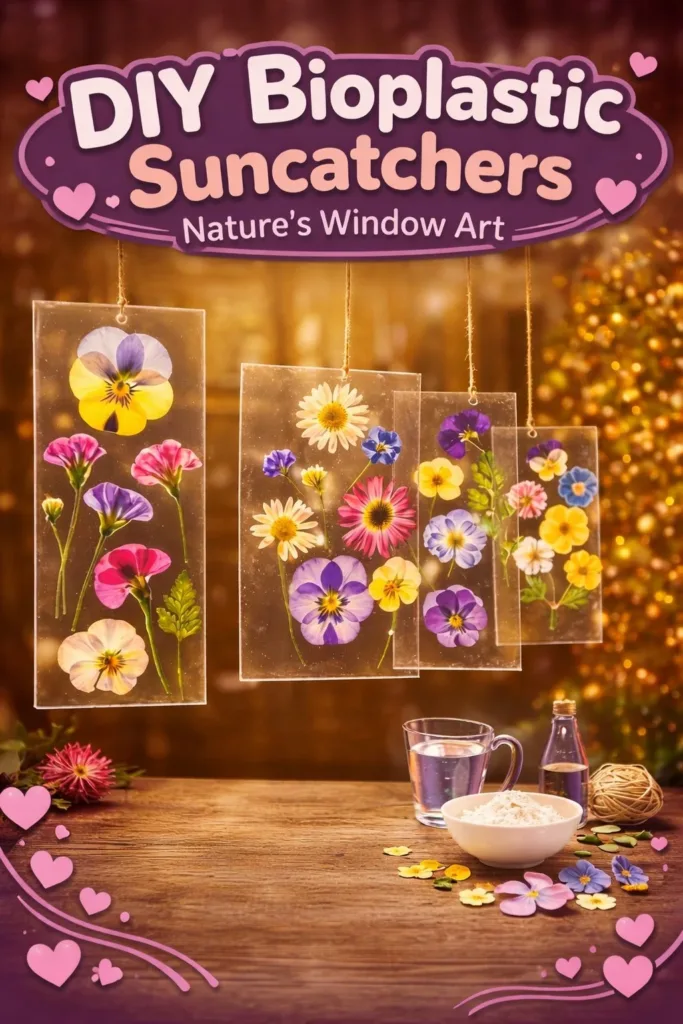
There is a small and steady pleasure in watching a clear, handmade film change as it dries. The liquid mix becomes a soft sheet. Tiny bubbles settle. Bits of petals and grasses float like small islands. The act slows your hands and softens your breath.
This DIY helps you step away from lists and into a simple, rhythmical task. You measure slowly, stir with a wooden spoon, breathe as steam rises, and press objects into a warm surface. The light passing through your finished pieces highlights color, texture, transparency, and shadow in a very gentle way. That quiet, changing light invites you to sit nearby and notice small things.
I bring this project to the table when I want to make something that holds a memory an afternoon walk in the grass, a pressed petal from a neighbor’s garden, a small branch that smelled like rain. It feels honest and small, not perfect. The material is forgiving. You can rework edges, trim shapes, and layer pieces until they feel right. That makes the project kind to beginners and soothing to return to on a slow afternoon.
The Flow of Making DIY Bioplastic Suncatchers – Nature’s Window Art
Before we gather our tools, imagine the gentle rhythm of the making. You heat and stir. You watch the mix turn clear and glossy. You pour a small pool and then smooth it like a pond. You lay a leaf or a scrap of tissue paper and press, listening to a faint wet whisper as the surface meets the object.
The process moves in short, calm acts. Each act has a small finish: a cooled edge, a trimmed curve, a drying hour. That rhythm helps you stay present. You can pause between stages to wash a bowl, make tea, or simply step outside and notice the light.
There is a quiet science behind what happens. Gelatin and glycerin form a flexible film as the water evaporates. The gelatin proteins link together and the glycerin keeps the result soft. The outcome is a translucent, slightly bendable sheet that captures embedded items with warmth and clarity. Knowing that helps you make gentle choices about how thin to spread the mix and how long to let pieces cure.
I often play a soft playlist while I work. The sound helps set a slow pace. It is not necessary, but it makes the motion of stirring and pouring feel smoother. If you prefer pure silence, that works beautifully too. The project adapts to your pace.
Materials You’ll Need
- Gelatin powder (unflavored), easy to find in grocery stores
- Glycerin, available at pharmacies or craft shops (optional, but helps softness)
- Distilled water, clear and free of scent
- A small saucepan, clean and steady
- Wooden spoon or silicone spatula, warm to the touch when stirring
- Baking sheet or tray lined with parchment paper, smooth surface for pouring
- Cookie cutters or a sharp craft knife, for shaping once dry
- Natural items for embedding: pressed flowers, thin leaves, small grasses (fully dry)
- Food coloring or watercolor pigments (optional), a few drops for subtle color
- Small paintbrush or pipette, for placing color or water drops
- Scissors and tweezers, for gentle placement of tiny items
- A fine mesh strainer (optional), to remove bubbles before pouring
- Heavy books or a small rolling pin wrapped in cloth, for gentle flattening
- A shallow dish for mixing and measuring spoons, simple, calm tools
Notes: glycerin is optional but helpful for flexibility. Pressed botanical bits must be dry to avoid trapping moisture. You can substitute cornstarch-thickened glue in other projects, but gelatin creates a natural, biodegradable film that feels different to the touch.
Step-by-Step Directions
- Measure and mix the basics.
Warm 2 tablespoons of distilled water in a small saucepan, then sprinkle 1 tablespoon of gelatin over the surface. Let it bloom for a few minutes until the granules swell and soften. This step feels slow and patient, like waiting for a tea to steep. - Heat gently while stirring.
Place the pan on low heat and stir steadily until the gelatin dissolves. Add 1 teaspoon glycerin if you want a softer sheet. Keep the motion slow; the sound and movement calm the mind. - Add color if you like.
If you choose color, mix a single drop of food coloring or a tiny bit of watercolor into the warm liquid. Stir until it blends into a soft, translucent tint. A little goes a long way; the change is subtle and gentle. - Strain to smooth the surface.
Pour the warm mix through a fine mesh strainer into a heat-safe measuring cup. This removes bubbles and ensures a clear film. The liquid looks glossy and calm as it falls. - Prepare your pressing surface.
Line a baking sheet with parchment paper and flatten it until it lies smooth. The texture of the paper will show faintly in the finished piece; that adds charm. - Pour slowly and thin.
Pour a small pool of the gelatin mix onto the paper. Spread it slowly with a spatula until it reaches a thickness like a thin coin. Work with soft, even strokes so the surface stays smooth. - Lay in your nature bits.
Using tweezers, place dried petals, leaves, or grasses on the wet surface. Press them down gently with the back of the spatula or a clean brush handle. Notice how the textures nestle into the film without tearing. - Remove bubbles with soft taps.
If tiny bubbles rise, tap the tray gently on the table or use a small needle to lift them away. The motion is small and steady; you will find it calming. - Let pieces dry slowly.
Allow the sheets to dry in a warm, airy spot for several hours or overnight. Avoid direct sun or a hot radiator; slow drying reduces curling. The wait invites quiet observation: peek at the way light begins to travel through. - Test for flexibility.
When the surface feels dry to the touch, lift a corner to see if it holds. If it still feels tacky, give it more time. A fully cured suncatcher bends slightly but does not stick to your fingers. - Cut into shapes.
Use cookie cutters or a sharp knife to trim shapes. Work on a soft surface and trim slowly; the edges smooth with each careful pass. If you want a hole for hanging, pierce it now while the material is dry. - Finish edges and hang.
If edges feel rough, gently buff them with fine sandpaper or trim again with scissors. Thread thin string or fishing line through the hole. Hang near a window and listen as light changes throughout the day.
Bringing DIY Bioplastic Suncatchers – Nature’s Window Art Into Your Space

A finished suncatcher will change a room without asking for attention. It gathers light and scatters it into soft color and shadow. Hang one in a small window above plants, and the light will play across leaves. Place a few by a bedside window to greet the morning with a small, warm glow.
I like to group pieces by tone. A set of warm-hued petals looks like a miniature sun when the light passes through. Cool greens and blues carry a quiet, watery feel. Try placing a single suncatcher above a kitchen sink for a gentle focal point during routine tasks. The simple presence of handmade color steadies the day.
These suncatchers also nestle into gift-giving. Wrap one in a small box with a pressed note. The recipient will feel the gentle care of your hands and the memory of the items used. You may write a line about where the flowers came from or when you found a special leaf.
If you want more variations on color and pattern, try the playful ideas in my colorful recipe guide and other follow-up projects at the colorful suncatchers page. Exploring different hues and inclusions helps you discover what light and texture you love most.
How to Store or Reuse DIY Bioplastic Suncatchers – Nature’s Window Art
Keep these pieces flat and away from heat when you store them. A shallow box with tissue paper layers works well. Lay each piece on a sheet of smooth paper and cover it with another sheet to prevent sticking. Weight the box lightly so pieces do not curl.
If a piece bends a little, you can gently press it between two flat books wrapped in clean cloth for a day. Avoid steam or heat to flatten; that can warp the film. If tiny dust gathers on a surface, wipe with a dry, soft cloth rather than water. The material is most comfortable with gentle care.
You can repurpose fragments. Small scraps work well as layered collage pieces on cards or inside clear resin jewelry when you feel like experimenting. I sometimes cut narrow strips and use them as bookmarks; they catch light while remaining practical.
If a piece shows signs of wear over time, consider letting it live out its life outdoors in a sheltered spot or recycling pieces into art journals. The material is more biodegradable than many plastics, yet it still needs thoughtful disposal. Treat it kindly, like a small crafted object.
Calm Customization Ideas

- Add scent with caution: try a tiny brush of diluted essential oil on the back of the piece. Test on a scrap first to ensure it does not stain. This can make your suncatcher a small fragrant memory.
- Layer translucent paper: insert thin tissue or rice paper beneath leaves for extra depth. The gentle layering changes how light travels and brings more subtle color.
- Stitch a border: once dry, sew a simple running stitch around the edge with embroidery thread. The stitch anchors the piece and makes a tactile frame.
- Combine sizes: make one large circle and several small ones to hang at different heights. The variety invites a slow, playful rhythm in the window.
- Press personal items: incorporate tiny handwritten phrases on tissue paper, then seal them inside. The resulting piece holds a memory in a way that feels quiet and private.
These ideas are invitations. You may try one or none. The most soothing choice is the one that feels right in your hands.
FAQs About DIY Bioplastic Suncatchers – Nature’s Window Art
Will the bioplastic melt if it gets warm in the sun?
The film softens at higher heat but will not quickly melt in normal window light. Avoid placing suncatchers on hot window sills that receive intense afternoon sun. If you live in a hot climate, choose a morning light spot or a shaded window to preserve shape and color.
Can children help with this project?
Yes, with supervision. Children can press dry leaves, choose colors, and help place bits onto the surface. Keep them away from the heated pan and hot liquid. The calm tasks allow little hands to be part of the making safely.
How long do they take to dry?
Drying time depends on thickness and room humidity. Thin pieces will dry in a few hours; thicker ones may need overnight. Low humidity and gentle air flow help. Be patient and check at regular, gentle intervals.
Are there vegan alternatives to gelatin?
Gelatin is animal-derived. If you prefer plant-based options, explore agar-agar or other seaweed-based films. They require different proportions and a bit more experimenting. Try a small test batch to learn their behavior before committing to a large project.
What if my suncatcher tears when I lift it?
Tears often happen when the piece dries unevenly or when botanical bits trap moisture. Trim torn edges into new shapes and embrace the imperfect. Small repairs with thin strips of fresh film or a gentle sewing stitch can mend them into new forms.
A Gentle Note Before You Go
I hope the quiet of this project finds you when you need it most. Making DIY Bioplastic Suncatchers – Nature’s Window Art asks for small, repetitive motions and patient pauses. Each stage offers a tiny ritual: bloom the gelatin, stir until clear, press a leaf into soft warmth, watch the light move through. These acts calm the hands and slow the mind.
When you hang a finished suncatcher, take a quiet moment to notice how it changes through the day. Keep a small notebook nearby to jot a memory or feeling that the piece evokes. Over time, a window filled with handmade light becomes a map of small, calm moments.
If you enjoy exploring different approaches to this craft, I have shared more experiments and second versions that may spark ideas for textures, layers, and playful color combinations at another guide and a compact, homemade take at a homemade craft version. These pages hold gentle notes from my own trials, like how thin petals behave differently than thick leaves and which colors glow most in morning light.
Conclusion
If you want a step-by-step recipe that explores gelatin as a crafting material in a similar way, see this thoughtful resource on DIY Bioplastic Suncatchers: Craft With Nature & Gelatin for a clear walkthrough and tips on proportions: DIY Bioplastic Suncatchers: Craft With Nature & Gelatin.
For inspiration using recycled items and natural finds, this simple guide shows playful ways to incorporate found textures into window art and family projects: Nature Suncatchers Made With Recycled Items – Little Pine Learners.
Thank you for sitting with this project. May your hands find a calm rhythm and your windows catch many soft lights.
PrintDIY Bioplastic Suncatchers – Nature’s Window Art

Create beautiful and eco-friendly bioplastic suncatchers using gelatin, glycerin, and natural items to catch and scatter light.
- Prep Time: 15 minutes
- Cook Time: 120 minutes
- Total Time: 135 minutes
- Yield: 4 suncatchers
- Category: Crafting
- Method: Crafting
- Cuisine: N/A
- Diet: Vegan
Ingredients
- 2 tablespoons distilled water
- 1 tablespoon unflavored gelatin powder
- 1 teaspoon glycerin (optional)
- Natural items for embedding: pressed flowers, thin leaves, small grasses (fully dry)
- Food coloring or watercolor pigments (optional)
- Parchment paper
- Cookie cutters or a sharp craft knife
- Fine mesh strainer (optional)
- Heavy books or a small rolling pin wrapped in cloth
- A shallow dish for mixing
- Scissors and tweezers
Instructions
- Warm the distilled water in a small saucepan, then sprinkle gelatin over it. Let it bloom for a few minutes.
- On low heat, stir gently until the gelatin dissolves. Add glycerin if desired.
- If using color, mix a drop of food coloring or watercolor into the warm liquid and stir.
- Strain the warm mix through a fine mesh strainer into a heat-safe measuring cup.
- Line a baking sheet with parchment paper, ensuring it is smooth.
- Pour a small pool of gelatin mixture onto the paper and spread it thinly.
- Using tweezers, place your dried nature bits onto the wet surface.
- If bubbles form, tap the tray gently to remove them.
- Let the sheets dry slowly in a warm, airy spot, avoiding direct sunlight.
- Once dry, trim shapes with cookie cutters or a knife, and punch holes if needed for hanging.
- Buff rough edges if necessary and attach string for hanging.
Notes
Glycerin is optional but helps improve flexibility. Ensure all botanical bits are dry to prevent moisture trapping.