

Creating a crystal geode egg feels like capturing a soft moment of wonder. As your hands work with the delicate textures of materials and the vibrant colors of the crystals, a calm sense of focus settles in. You can hear the quiet rustle of your supplies, feel the coolness of the egg shapes, and see the shimmering hues as they come together. Each part of the process invites a deeper breath, a moment of reflection, a little piece of joy found in creativity.
Why Make This Crystal Geode Eggs

Making crystal geode eggs offers more than a fun craft. It creates a mindful space where focus turns inward, helping you connect with the present. As you craft, gentle movements soothe your mind. The act of shaping and coloring becomes a tranquil ritual. The anticipation of revealing the final masterpiece adds joy to the journey.
Everyone craves moments of calm in a fast-paced world. Crafting these lovely eggs provides pockets of peace. The vibrant crystals, cool to touch and smooth in appearance, cultivate a sense of warmth and comfort as you plan each layer. Creating them becomes a sensory experience, keeping you grounded as colors and textures evolve before your eyes.
In this project, emotion and creativity intertwine, and the joy of making becomes a soothing balm. Each egg holds a bit of your spirit, turning a simple act of creation into a nurturing moment that feels substantial.
The Flow of Making Crystal Geode Eggs
Before gathering your materials, imagine how this process will unfold. Each step invites movement, from stirring together colors for the crystals to layering them gently inside the eggs. The sight of vibrant hues, the sound of crackling crystals, and the warm embrace of glue or paint create a rhythm that flows together like a soft melody.
As you slide your fingers across the smooth surfaces of the eggs, you engage with every element and embrace a slow pace. Each brush stroke and sprinkle of crystals opens up a world of creativity, where distractions fade away. This gentle flow offers a pause from the outside world and encourages you to savor every moment as you craft.
Materials You’ll Need
Here is a simple list of supplies to gather. Each material plays a role in creating your crystal geode eggs, making it all come together harmoniously.
- Egg-shaped objects (plastic eggs work well)
- Epsom salt or sugar (for crystal formation)
- Water
- Food coloring (choose your favorite colors)
- White glue (like school glue or craft glue, easy to find)
- Small bowls for mixing
- Paintbrush (to apply glue)
- Container for drying
- Paper towels (for clean-up)
Feel free to substitute materials as needed. If you prefer, you can use glitter instead of Epsom salt for a different sparkle.
Step-by-Step Directions

-
Start by preparing your workspace. Lay out paper towels to catch any drips and create a clean area to work.
-
Take your egg-shaped object and give it a light coat of white glue. The glue will help the crystals adhere as you apply them.
-
In a small bowl, mix Epsom salt or sugar with a few drops of food coloring. Stir gently to create a colorful mixture.
-
Sprinkle your colored crystals evenly over the egg, ensuring you cover all areas. Allow your creativity to guide the design, playing with colors and patterns.
-
Repeat this process on each egg, mixing different colors and layers. Let your imagination lead the way as you experiment with various combinations.
-
Set the eggs aside in a container to dry completely. This may take a couple of hours, so use this time to relax or enjoy another creative pursuit.
-
Once dry, you can lightly brush off any excess crystals to reveal the stunning patterns beneath.
-
Consider adding extra touches with paints or markers, enhancing the beauty and individuality of each egg.
Enjoying the Finished Piece
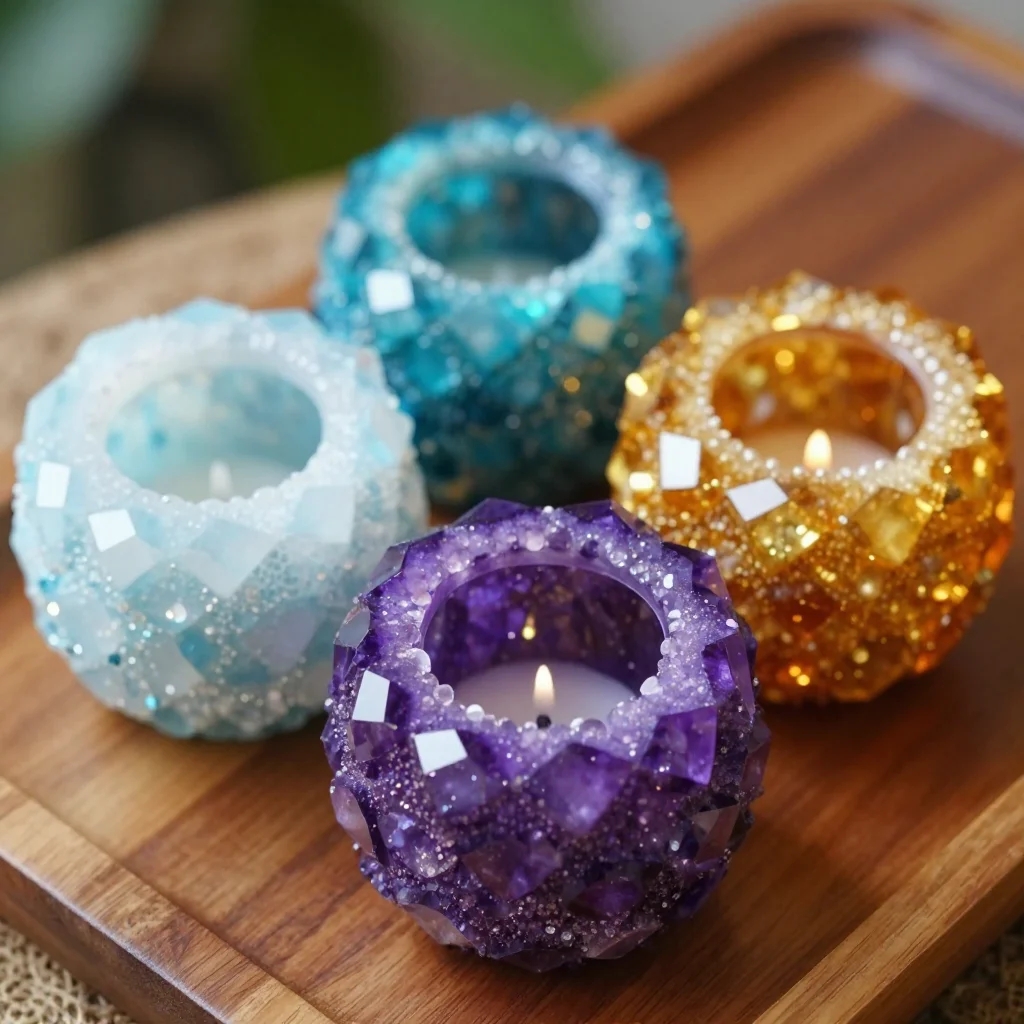
Making crystal geode eggs offers a satisfying end result, perfect for using in various ways. You can display them as colorful home decor, bringing a touch of nature indoors. Their vibrant colors catch the light beautifully, creating shimmering reflections in your space.
These eggs can also be used as table centerpieces during gatherings. Each one tells a story, a whisper of your time spent creating. Alternatively, consider them as thoughtful gifts for friends or family. Each egg embodies your moments of calm and creativity, making them meaningful tokens of love and warmth.
Making This DIY Last
To store your crystal geode eggs properly, keep them in a cool, dry place away from direct sunlight. They can be put in a decorative box or displayed individually on shelves. If you want to reuse them for another crafting session, try gently brushing off the crystals and starting anew with different colors or designs.
Occasionally, check on their condition to ensure they remain vibrant. Their strength lies in your gentle care, and they will continue to shine as long as you keep their environment loving.
Gentle Tips & Variations

Consider these invitations to make the project your own:
- Experiment with different shapes. Instead of traditional eggs, try making geode shapes in various forms like hearts or stars.
- Use metallic paints or shimmer dust for an extra layer of sparkle.
- Incorporate natural elements like small stones or dried flowers into the design to create a more textured effect.
- Share the experience by inviting friends or family to join in. Team crafting can bring joy and deepen connections as you share creative moments together.
FAQs About Crystal Geode Eggs
What is the best way to clean up after making crystal geode eggs?
Start by gently brushing any leftover crystals into a small container. You can dampen a cloth to wipe surfaces clean, ensuring your workspace remains tidy for your next crafting adventure.
Can I use other types of glue for this project?
Yes, you can use craft glues like Mod Podge or hot glue. Just ensure they are suitable for the materials you’re working with, allowing for a secure hold.
How long does it take for the crystals to dry?
Typically, allowing the eggs to dry for about two hours is ideal. However, if you’ve added multiple layers, you may wish to wait longer for complete drying.
What if I want to create a more intricate design?
Feel free to layer colors, add textures, and even use small tools to create patterns in the glue or crystals. Your creativity can lead to wonderfully unique pieces.
Do the crystal eggs have any special meaning?
Crystal geode eggs echo the beauty of nature. They symbolize nurturing, creativity, and the beauty that can arise from patience. Each one represents the calm moments spent crafting.
Conclusion
As you wrap up your journey with crystal geode eggs, take a moment to appreciate the time you spent creating. Each piece reflects your unique spirit and creativity, inviting you to pause and enjoy the fruits of your labor.
If you’re eager to explore similar crafts, you might find inspiration in other articles on making crystal geode eggs or consider expanding your skills with a project from Instructables.
Let this project remind you to slow down and cherish the little moments of creativity. Let each moment of crafting be as fulfilling as the gorgeous finished pieces.
PrintCrystal Geode Eggs

Create stunning crystal geode eggs using simple materials for a mindful crafting experience.
- Prep Time: 15 minutes
- Cook Time: 120 minutes
- Total Time: 135 minutes
- Yield: 4 eggs
- Category: Craft
- Method: Crafting
- Cuisine: N/A
- Diet: N/A
Ingredients
- Egg-shaped objects (plastic eggs work well)
- Epsom salt or sugar (for crystal formation)
- Water
- Food coloring (choose your favorite colors)
- White glue (like school glue or craft glue, easy to find)
- Small bowls for mixing
- Paintbrush (to apply glue)
- Container for drying
- Paper towels (for clean-up)
Instructions
- Start by preparing your workspace. Lay out paper towels to catch any drips and create a clean area to work.
- Take your egg-shaped object and give it a light coat of white glue.
- In a small bowl, mix Epsom salt or sugar with a few drops of food coloring. Stir gently to create a colorful mixture.
- Sprinkle your colored crystals evenly over the egg, ensuring you cover all areas.
- Repeat this process on each egg, mixing different colors and layers.
- Set the eggs aside in a container to dry completely.
- Once dry, you can lightly brush off any excess crystals to reveal the stunning patterns beneath.
- Consider adding extra touches with paints or markers, enhancing the beauty and individuality of each egg.
Notes
Feel free to substitute materials as needed. You can use glitter instead of Epsom salt for a different sparkle.