

A light, cool hush sits on the table as I set out the twigs and a shallow dish. The small roughness of a branch meets my fingertips, the soft clink of glass jars, the warm breath of water as I stir, and the faint white shimmer of baking soda slipping into solution. I picture a tiny Crystal Forest rising from these simple parts, each spike catching the sun like a memory.
Crystal Forest has become a quiet ritual for me, a way to slow down, breathe, and notice texture, temperature, and the small miracles of crystals arriving one by one. For another playful take on color and pattern, I sometimes revisit our baking soda rainbow crystal forest post for soft ideas on dyeing and light.
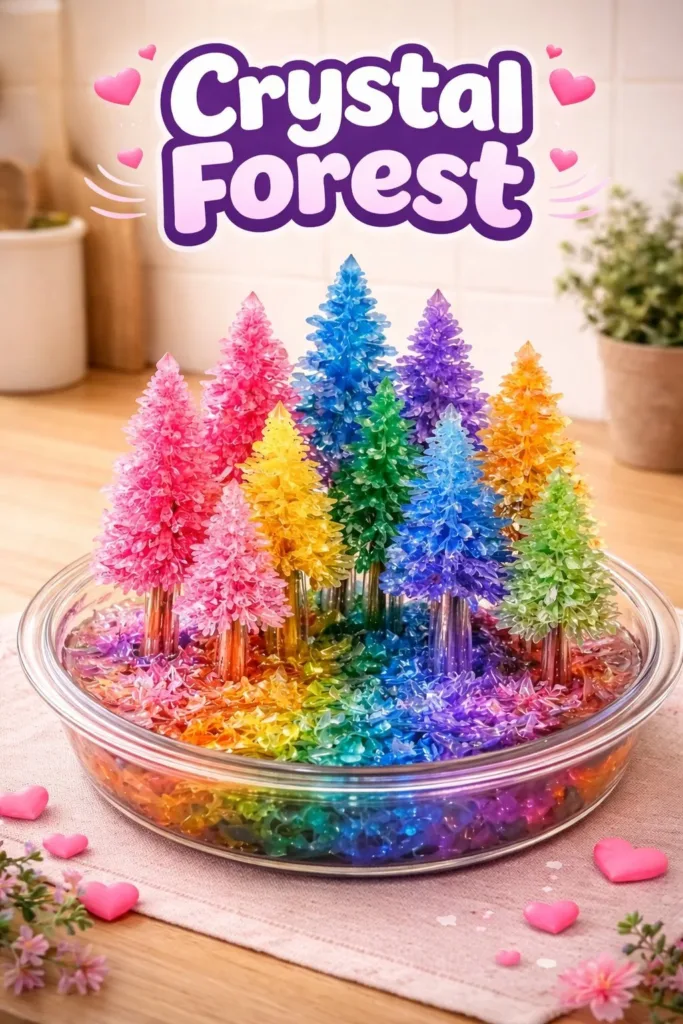
The Quiet Joy of Making Crystal Forest

This project comforts because it asks for gentle attention rather than speed. You mix, set, and wait. You watch as clear solutions change to tiny, sparkled forms. The hush of waiting becomes part of the craft. When I make a Crystal Forest on a rainy afternoon, the room feels like a small laboratory of calm. The crystals grow along twigs or cardboard, and I notice how the temperature of the water changes the pace, how a slow drip makes a taller point, how a heavy clump looks like a tiny snowy bush.
Making this craft helps people slow down because it uses rhythm and sensory cues. The soft scrape of a spoon in a jar, the cool rim of a bowl, the bright spot of color where dye meets water, and the minute sound of crystals settling all fill the hands with small, steady tasks. The result gives a quiet pleasure. You end up with a small group of crystalline shapes you can touch gently, place on a windowsill, or keep as a soft reminder to pause.
The Flow of Making Crystal Forest
Before you begin, imagine a slow, steady movement. You will heat water, stir powder until the grains disappear, place bases into the solution, and then move to a waiting place. The process flows from the warm, active step of mixing to the patient, quiet step of watching.
You will feel the warmth of a cup in your hand and the light tug of a twig when you set it into solution. You will hear small, soft clicks as crystals form and settle. The visual rhythm will shift slowly: cloudy silver threads appear, then harden into clear points. It helps to move calmly through each part. If you have made baking soda crystal trees before, you will recognize the familiar hush of growth. For a different shape or scale, try ideas from our baking soda crystal growing tree page for inspiration on structure and balance.
Materials You’ll Need
- Baking soda, plain sodium bicarbonate, easy to find
- Hot water, near boiling helps dissolve the baking soda
- Clear jars or shallow dishes, for mixing and holding your bases
- Twigs, cardboard shapes, or floral foam for the forest bases
- Food coloring or liquid watercolor, optional for gentle color
- Small tray or baking sheet to protect your surface
- Tongs or chopsticks, optional for careful placement
- Gloves, optional if you prefer not to handle sticky mix
- Paper towels and a cloth for tidy hands and spills
- Masking tape or string, optional to secure shapes
I suggest these items because they keep the project safe and simple. Baking soda dissolves readily in hot water and then reappears as crystals when the liquid cools or evaporates. Twigs and cardboard give the crystals something to grow on. If you want a fuller look, try a technique like the one described in our baking soda crystal growing trees post for ideas on building layered branches. Keep hot water out of reach of children and pets while you work.
Step-by-Step Directions

- Prepare your space and base.
Set a tray on the table and arrange twigs or shapes upright.
Keep paper towels nearby to catch drips and protect the surface. - Heat water and measure baking soda.
Warm water until it feels hot but not dangerously boiling.
Slowly stir in baking soda until it will not dissolve anymore. - Add gentle color if you like.
Drop one or two drops of food coloring into the mixture.
Stir slowly to spread the color without making bubbles. - Place your base into the solution.
Hold a twig or shape and lower it into the jar so crystals can cling.
Leave part of the base above the liquid to catch light as crystals grow. - Find a quiet waiting spot.
Move your jars to a place with steady air and soft light.
Avoid open windows or fans that blow dust into the solution. - Watch for the first signs of growth.
Look for tiny sparkles and thin threads forming overnight.
Note how the crystals prefer the edges and join into clusters. - Let the crystals develop slowly.
Allow 24 to 48 hours for good growth, checking gently now and then.
If needed, refill gently with more solution to encourage growth. - Remove and dry with care.
Lift bases slowly and let excess liquid drip back into the jar.
Pat dry with a paper towel and let air finish the drying. - Arrange and enjoy your forest.
Place your finished pieces on a plate, near a window, or in a glass dome.
Take slow breaths and notice how the light moves through the crystals. - Clean up thoughtfully.
Dispose of leftover solution down the sink with plenty of water.
Wipe your workspace and store leftover supplies in a dry place.
Bringing Crystal Forest Into Your Space
When you bring your Crystal Forest into the room, place it in a quiet corner or a windowsill that receives soft light. The tiny facets on each crystal catch the sun in gentle ways. A row of small pieces on a mantel adds a hint of frost to your space. On a bedside table, a single twig with crystals can act like a little focus point for breathing in the evening.
I like to pair mine with natural materials. A small plate of river stones, a linen cloth, or a low candle nearby helps the crystals feel part of a calm vignette. If you have children, set the crystals out of reach or in a shallow cloche so they stay safe. Crystals can also make sweet table centerpieces for a quiet meal. When you pass by, let your fingers hover near them, and take a moment to notice texture and light.
How to Store or Reuse Crystal Forest
Store finished pieces in a dry, stable place to keep the crystals intact.
If you need to move them, use a small box lined with soft paper.
Avoid humid rooms because moisture can soften the crystals over time.

You can reuse some parts. Gently sweep crystals off recyclable cardboard and reuse the twigs if they still feel sturdy. If crystals crumble or show dust, refresh them by placing the base back into a new baking soda solution to grow a new layer. Note that repeated cycles may change the look and size of the crystals, which can also be a lovely, lived-in texture.
For long-term keepsakes, consider casting your favorite twig with clear resin or sealing the base in a shallow glass dome. This step preserves the look but removes the soft, ephemeral quality of live crystals. Choose what matters most to you: the memory of growth, or a lasting object that reminds you of a calm afternoon.
Gentle Tips & Variations
- Invite soft color slowly.
Add one drop of food color to the solution. More color makes no better result, and sometimes light shades show crystal shapes more clearly. - Try different bases for contrast.
Use thin paper shapes for delicate crystals or thicker twigs for bolder growth. Natural textures change how crystals cling. - Build a small village.
Make several small pieces instead of one large one. Grouped items catch light in different ways and offer more to explore with your eyes. - Use a slow evaporation spot.
A warm windowsill in gentle sun encourages steady growth. Avoid direct heat that makes growth too fast and less structured. - Make a tiny story.
Place a small ceramic animal or a miniature house among your crystals to make a quiet scene. This idea invites a soft, imaginative layer to the sensory calm.
If you want a focused experiment, try growing a heart-shaped piece using ideas from our baking soda crystal heart growth guide. It shows how small changes in shape and solution can shift how crystals collect and form.
FAQs About Crystal Forest
u003cstrongu003eHow long does it take for crystals to form?u003c/strongu003e
u003cpu003eYou will see tiny crystals within hours, and fuller growth after a day or two. I often wait 48 hours for the look I like. Slower growth often gives clearer, more defined crystals.u003c/pu003e
u003cstrongu003eIs baking soda safe to use?u003c/strongu003e
u003cpu003eYes. Baking soda is a gentle household ingredient. It can irritate eyes or skin in large amounts, so keep it away from the face and do not ingest solutions. Rinse hands after handling and keep the work area tidy.u003c/pu003e
u003cstrongu003eCan I change the color later?u003c/strongu003e
u003cpu003eYou can. If you want richer color, place the finished piece into a fresh, lightly colored solution. The new crystals will layer over the old. This process changes the look gradually.u003c/pu003e
u003cstrongu003eWhat do I do if crystals fall apart?u003c/strongu003e
u003cpu003eCrystals can be fragile. If they crumble, gather the solids and try a new growth cycle. I keep a small box for fragile pieces that might inspire a new project. Sometimes crumbled bits become glittering accents in other crafts.u003c/pu003e
u003cstrongu003eCan children help make Crystal Forest?u003c/strongu003e
u003cpu003eYes, with supervision. Children can stir solutions and place twigs under careful guidance. Keep hot water and small parts away from very young children. I like to give older kids a small tray and a spoon and invite them to notice color and texture as the solution changes.u003c/pu003e
A Gentle Note Before You Go
Sit with your finished Crystal Forest for a moment. Let your hands rest near the base and take a slow breath. Notice how the light finds the crystals and how your attention softens. Making something that grows reminds us of patient change and small rewards. If you return to this craft again, you will find new rhythms and details each time.
Conclusion
If you want a different kind of Crystal Forest, you can read the official trail description for inspiration in pattern and form at Crystal Forest Trail (U.S. National Park Service), which offers a natural example of layered shapes and textures. For a photo-led account and thoughts on how nature frames small formations, consider the personal reflections in Hiking the Crystal Forest Trail in Petrified Forest National Park, which pairs images with quiet observation.
May your hands stay gentle, your space stay calm, and your Crystal Forest remind you that slow, simple making brings a soft, steady joy.
PrintCrystal Forest

A calm craft project to create beautiful baking soda crystals on twigs or cardboard shapes, encouraging mindfulness and slow making.
- Prep Time: 15 minutes
- Cook Time: 0 minutes
- Total Time: 45 minutes
- Yield: 1 Crystal Forest
- Category: Craft
- Method: Crafting
- Cuisine: N/A
- Diet: N/A
Ingredients
- Baking soda
- Hot water
- Clear jars or shallow dishes
- Twigs, cardboard shapes, or floral foam
- Food coloring or liquid watercolor (optional)
- Small tray or baking sheet
- Tongs or chopsticks (optional)
- Gloves (optional)
- Paper towels and a cloth
- Masking tape or string (optional)
Instructions
- Prepare your space and base. Set a tray on the table and arrange twigs or shapes upright. Keep paper towels nearby to catch drips and protect the surface.
- Heat water and measure baking soda. Warm water until it feels hot but not dangerously boiling. Slowly stir in baking soda until it will not dissolve anymore.
- Add gentle color if you like. Drop one or two drops of food coloring into the mixture. Stir slowly to spread the color without making bubbles.
- Place your base into the solution. Hold a twig or shape and lower it into the jar so crystals can cling. Leave part of the base above the liquid to catch light as crystals grow.
- Find a quiet waiting spot. Move your jars to a place with steady air and soft light. Avoid open windows or fans that blow dust into the solution.
- Watch for the first signs of growth. Look for tiny sparkles and thin threads forming overnight. Note how the crystals prefer the edges and join into clusters.
- Let the crystals develop slowly. Allow 24 to 48 hours for good growth, checking gently now and then. If needed, refill gently with more solution to encourage growth.
- Remove and dry with care. Lift bases slowly and let excess liquid drip back into the jar. Pat dry with a paper towel and let air finish the drying.
- Arrange and enjoy your forest. Place your finished pieces on a plate, near a window, or in a glass dome. Take slow breaths and notice how the light moves through the crystals.
- Clean up thoughtfully. Dispose of leftover solution down the sink with plenty of water. Wipe your workspace and store leftover supplies in a dry place.
Notes
Keep hot water out of reach of children and pets while you work. Store finished pieces in a dry, stable place to keep the crystals intact.