

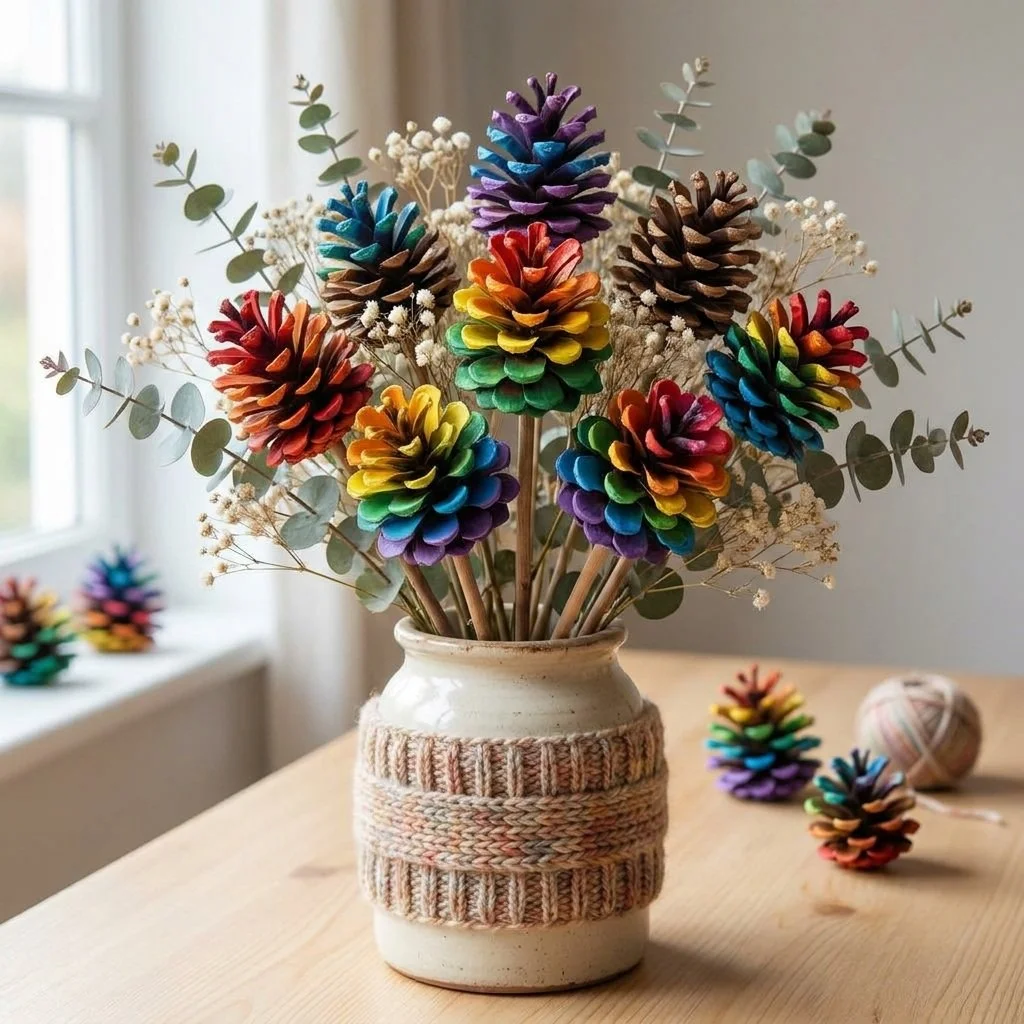
Creating a Colorful Rainbow Pinecone Bouquet invites us into a world of gentle textures and vibrant hues. The sensation of holding a freshly painted pine cone, warm from the day’s sun, combined with the soft rustle of color against the crisp air can fill our hearts with light. As we immerse ourselves in this sensory experience, we can transform simple materials into a joyful piece that celebrates the beauty of nature and creativity. You may also find Colorful Rainbow Pencil Flower Bouquet Back To School useful.
The Quiet Joy of Making Colorful Rainbow Pinecone Bouquet
The act of crafting a Colorful Rainbow Pinecone Bouquet brings a sense of tranquility. It allows us to slow down and connect with the materials in an intentional way. Rubbing our fingers over the smooth, painted surfaces of the pine cones can be quite soothing, grounding us in the present moment. This DIY encourages a mindful practice, transforming both the space around us and our inner state as we focus on the beautiful colors and the process of creation. You may also find Coffee Filter Rainbow Apple Bouquet useful.
A Gentle Look at the Process
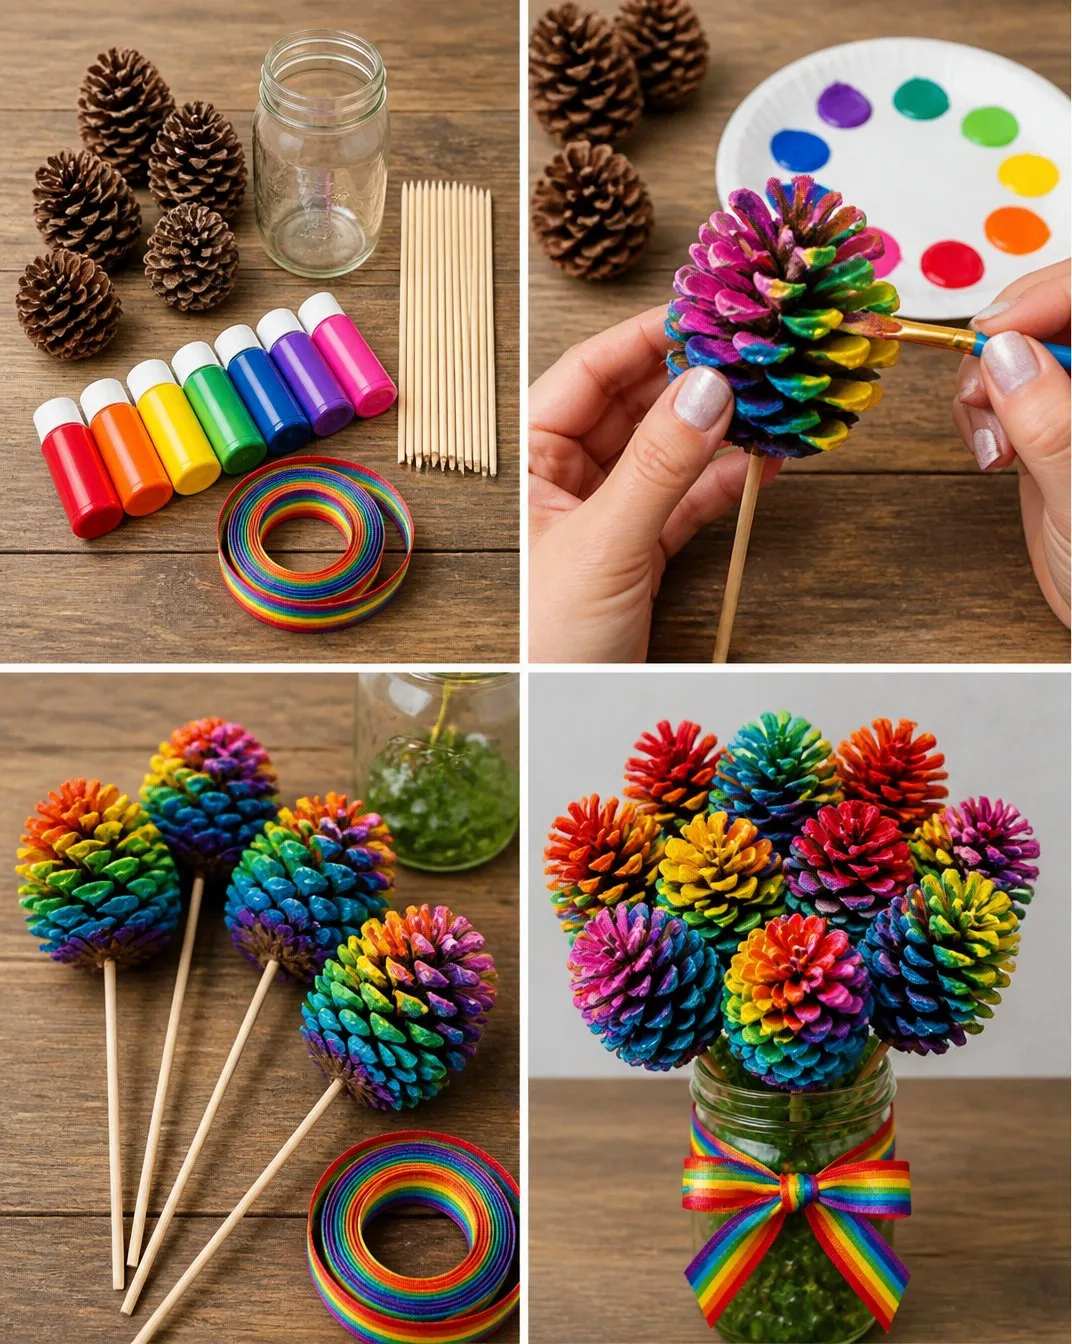
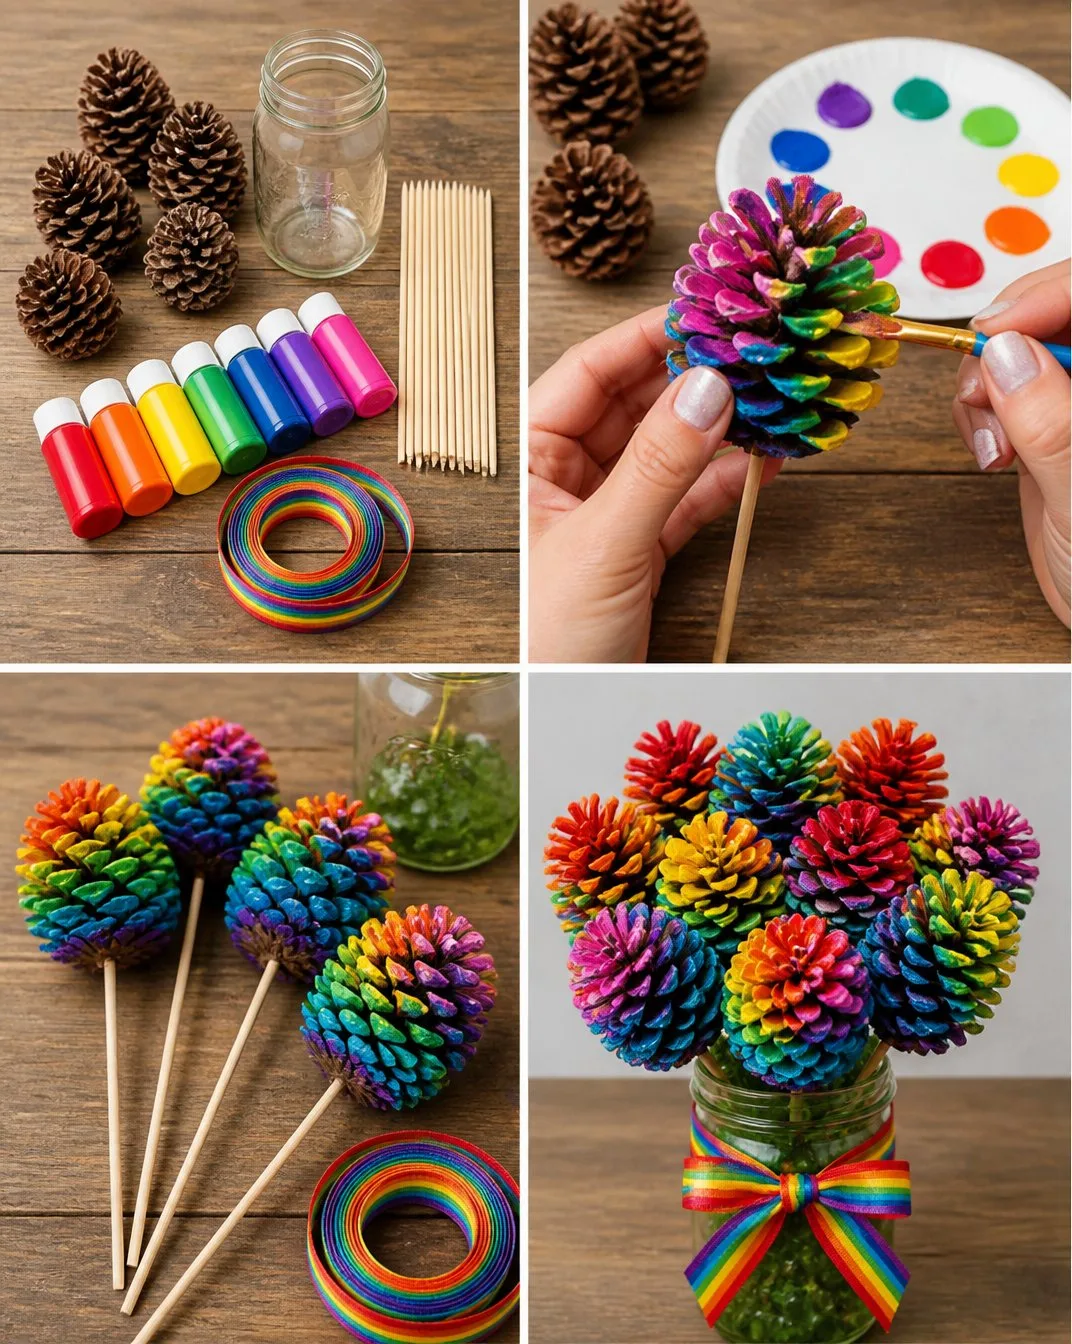
As you prepare to create your bouquet, visualize the soft movements that come with assembling your materials. The sound of paintbrushes gliding through vibrant colors or the click of pine cones plinking together offers a rhythmic comfort. Each step unfolds calmly, allowing for a gentle flow as you arrange your unique creation. Embrace the tactile experiences throughout the process, appreciating each stroke and every shade as they inspire your artistic expression. You may also find Colorful Cupcake Liner Witch Flower Bouquet useful.
Materials You’ll Need
Gathering materials is a joyful part of crafting. For this Colorful Rainbow Pinecone Bouquet, you will need: You may also find Colorful Rainbow Ghost Window Suncatcher Garland For Kids useful.
- Pine cones (easy to find outdoors)
- Acrylic paints in various colors
- Paintbrushes (with different sizes for detail work)
- Optional glitter for added sparkle
- A vase or container (to hold your bouquet)
- Scissors (to trim stems if necessary)
- Green floral tape (to arrange the bouquet)
Before you begin, consider having some extra materials on hand for any creative impulses that might arise.
Step-by-Step Directions
Start by collecting your pine cones. Rinse them gently if they are dirty and allow them to dry completely. The textured surface of the pine cones will help paint adhere more easily.
Choose a palette of colors that speaks to you. Dip your brush into the acrylic paint and apply the colors to each pine cone. Allow each coat to dry before adding additional layers or different colors for a more vibrant effect.
Once the paint is dry, consider adding a touch of glitter. Apply a little glue to selected areas of the pine cones and sprinkle glitter over the glue. Shake off the excess and let dry.
Prepare your vase or container. You might want to line the bottom with soft greenery or fabric for a cozy touch.
To form the bouquet, start inserting the pine cones into the green floral tape, which will help hold them in place. Arrange them to your liking, mixing colors and sizes for visual interest.
Once satisfied with your arrangement, place the bouquet into your prepared vase. Step back and admire your work; notice the colors blending harmoniously together.
Enjoying the Finished Piece
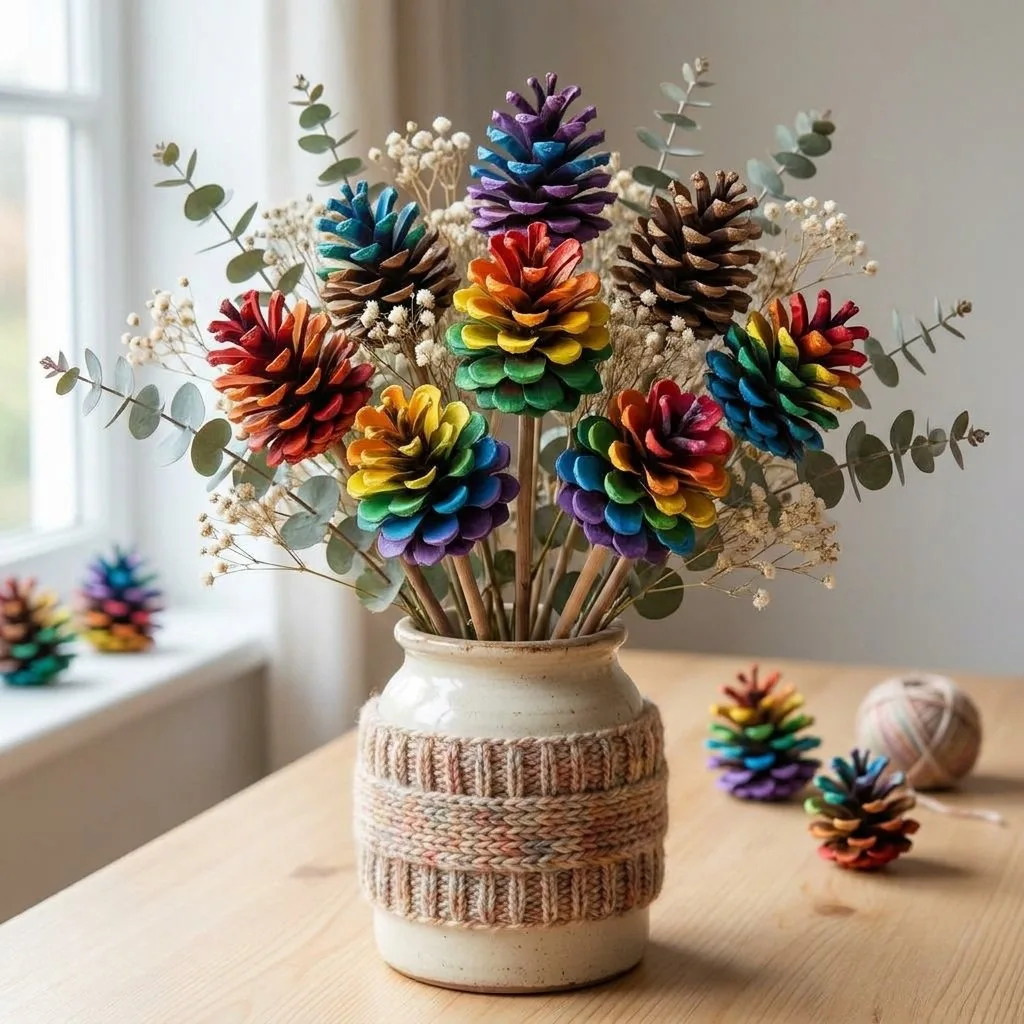
Your Colorful Rainbow Pinecone Bouquet can brighten up any space. Place it on a table, a windowsill, or a shelf where it can catch the light and spark joy. Each pine cone holds the energy of your creative process, offering a gentle reminder to embrace color and creativity in everyday life. The visual rhythm of the bouquet can bring warmth and happiness to your home, reflecting your unique artistic expression.
Keeping It for Later
To prolong the life of your bouquet, store it in a cool, dry place away from direct sunlight, which can fade the colors over time. If you wish to reuse the materials for future projects, gently remove the pine cones from the arrangement. They can be repainted or repurposed in new creations, such as a colorful centerpiece or festive decorations throughout the year.
Gentle Tips & Variations
- Explore your own color combinations by layering different hues on each pine cone for a personalized touch.
- Consider using natural elements, such as twigs or dried flowers, to complement your bouquet.
- Go beyond pine cones by including other natural items, like acorns or leaves, to enhance the bouquet further.
- Try adding scent to your bouquet by incorporating dried herbs or essential oils into the arrangement.
- Invite family or friends to join in the crafting process, making it a communal experience of creativity and connection.
FAQs About Colorful Rainbow Pinecone Bouquet
Can I use different types of paint for this project?
While acrylic paints work best for vibrant colors and durability, you can experiment with other types of non-toxic paints you may have on hand.
How long will the painted pine cones last?
With proper care, your pine cones can last for several months, but they may show some wear over time, especially if kept in a sunny spot.
Are there alternative materials I could use?
Absolutely! You can substitute pine cones with other natural materials like branches or even large seeds, depending on what inspires you.
How do I clean up after painting?
Use soap and water to clean your brushes and any spilled paint while it is still wet. Once dry, acrylic paint can be harder to remove.
Conclusion
Crafting a Colorful Rainbow Pinecone Bouquet not only fosters creativity; it also offers a calming, grounding experience. Each colorful cone is more than just a decoration; it becomes a story of joyful moments spent in the act of creation. For further inspiration on working with natural materials, you might explore how to make pine cone flowers or check out additional ideas for pinecone flowers. Embrace the practice of mindful crafting, letting it guide you to a more peaceful, present state.
PrintColorful Rainbow Pinecone Bouquet

A joyful and calming DIY project creating a vibrant bouquet using painted pine cones and natural materials.
- Prep Time: 30 minutes
- Cook Time: 0 minutes
- Total Time: 30 minutes
- Yield: 1 bouquet
- Category: Craft
- Method: DIY
- Cuisine: N/A
- Diet: N/A
Ingredients
- Pine cones (easy to find outdoors)
- Acrylic paints in various colors
- Paintbrushes (with different sizes for detail work)
- Optional glitter for added sparkle
- A vase or container (to hold your bouquet)
- Scissors (to trim stems if necessary)
- Green floral tape (to arrange the bouquet)
Instructions
- Start by collecting your pine cones. Rinse them gently if they are dirty and allow them to dry completely.
- Choose a palette of colors that speaks to you. Dip your brush into the acrylic paint and apply the colors to each pine cone.
- Once the paint is dry, consider adding a touch of glitter. Apply a little glue to selected areas and sprinkle glitter over the glue.
- Prepare your vase or container by lining the bottom with soft greenery or fabric.
- To form the bouquet, start inserting the pine cones into the green floral tape.
- Once satisfied with your arrangement, place the bouquet into your prepared vase.
Notes
Explore your own color combinations and consider using other natural elements to complement your bouquet.