

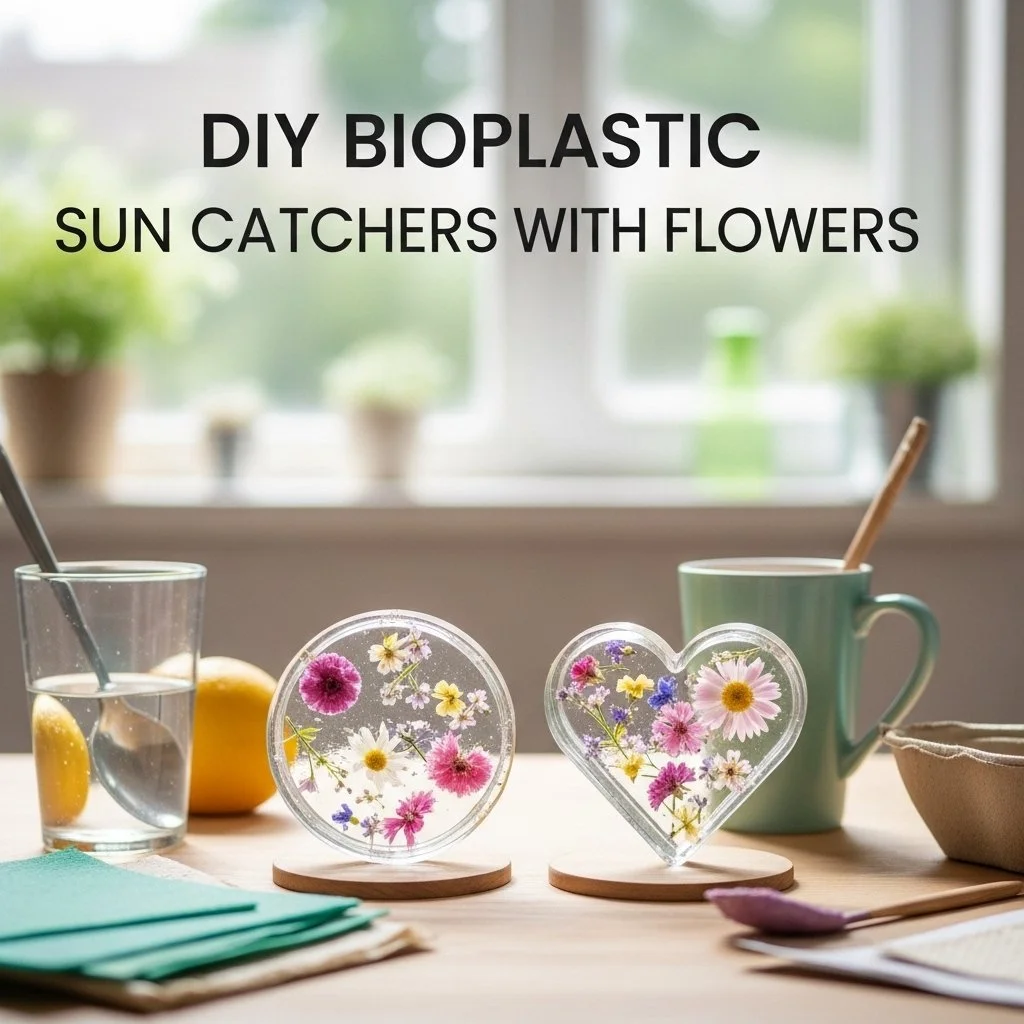
A warm sliver of sunlight falls across my workspace and turns a pressed petal into a tiny, glowing jewel. I breathe in the faint green scent of clovers and rose leaves. My fingers know the quiet rhythm: measure, stir, press, wait. Beautiful Bioplastic Suncatchers with Natural Flowers live in that gentle rhythm. They ask only for a slow touch and a soft patience, and they repay you with a suspended, translucent memory that moves with light.
The Quiet Joy of Making Beautiful Bioplastic Suncatchers with Natural Flowers

This project holds a quiet joy because it slows my hands and sharpens my gaze. Working with bioplastic brings a tactile hush: the liquid mix feels warm and slightly syrupy, the film peels with a soft, satisfying snap, and dried petals keep their fragile veins like tiny maps. I make these suncatchers when I want to notice small details, to turn a single moment of bright flower or curled leaf into something that catches and keeps light.
I have shared this practice with friends and children around the kitchen table. We sit with small bowls of blossoms, sip tea, and press blooms into circles that will hang in a window. The process asks for patience, which gifts us a few unhurried minutes. If you want more background on where this idea began and other creative ways to work with bioplastic, you might enjoy the deeper project notes on my page about the DIY bioplastic suncatchers with flowers project. Learn more about this project.
The materials encourage curiosity and low-stakes experimentation. You do not need to be exact to make something beautiful. The film captures the shape and life of each petal. When sunlight passes through, the colors soften and glow. The result feels handcrafted, warm, and honest.
A Gentle Look at the Process
Before you gather materials, picture the flow. You will heat a simple mixture until it turns clear and glossy. You will stir gently, watching as the mixture shifts from clouded to glassy. You will pour a thin pool, place a bloom, and wait. The waiting offers a soft rhythm: check the edges, notice how the color changes, let the film sit until it peels away without sticking.
The motions feel small and calm. Stirring moves from the wrist, not the elbow. Pouring becomes a slow ribbon rather than a rush. Pressing flowers into the surface feels like tucking a letter into an envelope. The film keeps its shape as it cools, and the peel releases with a whisper. If you like, you can extend the gentle rhythm by pressing multiple sheets and layering their colors.
When you prepare this project, remember that it rewards attention. I learned to time the cooling by touch and sight. When the mixture no longer beads up and looks glossy, it spreads thinly and smoothly across the spoon. Early attempts taught me to go slowly when peeling. That small care saved many petals from tearing.
If you prefer a step-by-step recipe to consult side by side while you work, I keep a more technical walkthrough with measurements and temperature notes on the recipe page. Find the full recipe here.
Materials You’ll Need
- Cornstarch, plain and simple (easy to find)
- Glycerin, food-grade (keeps the bioplastic flexible)
- Distilled white vinegar or lemon juice (helps dissolve and bind)
- Water, filtered if possible
- Small stainless steel saucepan (nonreactive)
- Wooden or heatproof silicone spoon (smooth for stirring)
- Measuring spoons and a teaspoon (accuracy helps, but small variations work)
- Parchment paper or silicone baking mats (nonstick surface)
- Flat glass or ceramic plate (cooling surface)
- Fresh or dried small flowers and leaves (petals tend to work best)
- Small cookie cutters or round molds (optional, for consistent shapes)
- Scissors and tweezers (for trimming and placing petals)
- A shallow tray or drying rack (for moving pieces)
- String, embroidery thread, or thin ribbon (for hanging)
- Small hole punch or sharp needle (to make a hanging hole after drying)
- Paper towels and a soft cloth (for gentle cleanup)
When I began this craft, I used what I had on hand. You may substitute lemon juice for vinegar and use a glass plate instead of a ceramic one. I recommend glycerin because it keeps the suncatcher supple and reduces brittleness as it ages. If you want to try playful variations, I outline colorful approaches on another page where I test pigments and patterns. Explore color ideas and variations.
Safety note: Heat the mixture gently and keep children at a calm distance during the cooking step. The mixture gets hot and can splatter. A calm, supervised space protects hands and keeps the experience soothing.
Step-by-Step Directions
-
Prepare your workspace and flowers.
Lay parchment paper on a flat plate or mat. Trim petals and leaves into small pieces. Arrange them nearby so you can reach them without rushing. -
Measure and mix the base ingredients.
Combine two teaspoons cornstarch with one teaspoon glycerin and one teaspoon vinegar in a small bowl. Add two tablespoons water and stir until smooth. The texture should feel like thin syrup. -
Warm the mixture slowly on low heat.
Transfer to a small saucepan and heat gently, stirring every 10 seconds. Watch as the mixture turns from cloudy to glossy. Keep the flame low to avoid boiling. -
Stir until the mixture thickens and clears.
You will feel a change under the spoon: the mix becomes tacky and elastic. When it looks translucent and slightly shiny, remove the pan from heat. -
Let the mixture cool for a moment.
Hold the pan for ten to fifteen seconds away from direct air. The surface will calm and the movement inside will slow. This keeps the liquid from frying tiny petals when you pour. -
Pour a thin circle onto the prepared surface.
Use the back of the spoon to spread a small, even pool no larger than the palm of your hand. Aim for a thickness like a credit card. A thinner film dries faster and becomes more transparent. -
Place petals and leaves with tweezers.
Gently lower each petal onto the liquid. Press lightly with a fingertip or the rounded back of a spoon to flatten the petal so it sits flush and does not trap air pockets. -
Smooth the edges and remove excess.
If the film spreads unevenly, nudge the edges back with the spoon. Dab any excess liquid with a corner of parchment. Keep the shape gentle and round. -
Let the piece rest and cool fully.
Allow the suncatcher to sit undisturbed until it feels cool to the touch. This may take 20 to 60 minutes depending on thickness and humidity. The waiting invites quiet and observation. -
Peel the film away slowly.
Slide a fingernail under one edge and lift slowly. If the film tears, let it rest longer. If it peels cleanly, you will hear a soft snap and feel a silky texture. -
Trim and make a hole for hanging.
Use small scissors to tidy edges, then pierce gently with a needle or hole punch near the top. Avoid placing the hole too close to the edge to prevent tearing. -
Add a thread and hang to dry further.
Thread a ribbon, string, or embroidery floss and hang the suncatcher in indirect sunlight to finish drying. Rotate or move to a dry spot if humidity lingers. -
Enjoy and make more.
Repeat with different flowers and layers. Each pass becomes a small experiment in color and translucence. I often make several at once and hang them like a flotilla of soft light.
These steps grew from small mistakes. Once, I hurried the cooling and the piece stuck to my finger. Now I let each piece sit quietly until it gives me a cool nudge. That pause preserves the petal details and prevents jagged edges.
Enjoying the Finished Piece


These suncatchers feel like tiny windows into a season. Hang them where morning light drifts in and watch color gather in pools. A single blossom often becomes a focal point when suspended in warm glassy plastic. The edges take on a slight glow, and veins in petals deepen like faint maps.
Use them to mark time. I hang one by the kitchen sink to catch the low light of late afternoon. Another sits near a bedside window where it greets the soft gray of morning. Children love to hold them up and tilt them, watching colors shift. I keep a handful rolled in tissue and give them as small tokens with a note.
You may layer two thin pieces together for a faint collage. When I press a translucent leaf over a bright petal, the colors mix like watercolor. These layers do not glue permanently unless you warm them again, so you can play with combinations before you commit.
I find that the way a suncatcher hangs matters to its feeling. A single, steady thread creates a calm vertical, while several smaller pieces clustered on a ring make a lively, drifting mobile. Choose what soothes you: a slow, steady presence or a light, moving cluster.
For those curious about the broader practice of bioplastic craft and other finished displays, you can read more about different project ideas and how they evolve on the general bioplastic suncatchers page. See more ways to enjoy bioplastic suncatchers.
Keeping It for Later
Bioplastic suncatchers last best when they avoid prolonged exposure to water and direct heat. They handle light well, but intense sun for many hours may cause slight fading over months. I treat them like delicate paper: gentle, deliberate, and away from rough handling.
Store pieces flat between sheets of parchment or unprinted tissue paper. Lay them in a shallow box so they do not bend. If you want to reuse a piece later, keep it away from sticky adhesives and oily surfaces. The bioplastic can attract dust, so a soft, dry cloth or a gentle puff of air will clear it.
If a suncatcher becomes slightly brittle over time, rubbing a tiny dab of food-safe oil onto the edges can restore a softer feel. Test first on a corner. I prefer light natural oils, applied with a cotton swab and allowed to absorb for an hour. Avoid strong solvents or detergents.
When a piece breaks, consider cutting fragments and using them in mosaics or as decorative insets on cards. I once saved fragments in a small jar and glued them into a tiny frame that now sits on a shelf. They keep memories without needing to stay whole.
If you plan to give suncatchers as gifts, tuck them into an envelope lined with tissue and include a short note about care. A little instruction helps the recipient enjoy the piece without worry.
Gentle Tips & Variations
-
Invite texture by mixing tiny bits of pressed seeds.
Try sunflower or poppy seeds for a grainy, natural sprinkle. Add them sparingly so the film still lays flat and keeps its transparency. -
Make layered collages slowly.
Create two thin films and stack them with a tiny gap of air in between. Use a small clothespin on the edge during assembly so you can shift placement before final hanging. -
Use color carefully and gently.
If you want permanent color, a single drop of food coloring mixes into the base. Start with a small amount and increase slowly. Natural pigments from beet or spinach juice work nicely but expect a softer, more organic palette. -
Try different mold shapes for consistent pieces.
Cookie cutters make neat circles and stars. Press the mix into the cutter and lift it off the mat slowly after cooling. This helps when you want a group of similar pieces for a garland. -
Practice with dried petals first.
Dried petals sit flatter and release moisture more evenly. Fresh petals create more vivid color but can add moisture that needs longer drying time.
These invitations grew from small adjustments I learned over repeated afternoons. Each tip keeps the process relaxed, not prescriptive. You will find a personal rhythm with time.
FAQs About Beautiful Bioplastic Suncatchers with Natural Flowers
Q: Will this recipe work with any kind of flower?
A: Many small petals work beautifully. Thicker blooms like roses need thin slicing and longer drying. Start with violets, pansies, clover, or daisy petals for consistent results. If a petal feels very wet, press it between paper towels before placing it.
Q: Are the materials safe for home use with children?
A: Yes, but adult supervision matters. Heat the mixture yourself and let it cool until safe before allowing small hands to decorate. Use food-grade glycerin and avoid ingestion. Keep a calm, steady setup and clear rules for the hot stage to maintain a soothing experience.
Q: How long do suncatchers take to dry fully?
A: Thin pieces often cure in 20 to 60 minutes. Humidity or thicker films can take several hours or a full day. Patience here improves the finish. If the piece feels tacky, leave it longer in a dry spot.
Q: Can I use synthetic flowers or plastic leaves?
A: The beauty of natural flowers lies in their delicate veins and texture. Synthetic pieces do not behave the same and may not bond or may melt under heat. Reserve plastics for experiments and test small samples first.
Q: What if a petal turns dark or brown?
A: Some petals oxidize slightly when heated. To reduce this, use low heat and press very thinly. Dried petals usually keep their color better. Accepting slight color changes can also become part of this craft’s charm.
A Gentle Note Before You Go
When I finish a tray of suncatchers, I sit for a few minutes and hold one up to the light. I watch a tiny vein glow like a river. The act of making becomes an offering to quietness. Each suncatcher keeps a small season inside it, a private sun to visit when I need a soft lift.
This craft does not demand perfection. It invites presence. Let your fingers remember small motions. Let the waiting become a center. When you give a piece away, you share a moment of slow attention. That feeling stays with both of you.
Conclusion
For a thoughtful tutorial with step-by-step photos and reflections, see this helpful guide on crafting botanical bioplastic suncatchers. Botanical Bioplastic Sun Catchers – Wineberry Woods
If you want a more science-forward explanation of how bioplastics form and why ingredients like glycerin and starch behave the way they do, this educational post explains the chemistry in a friendly way. DIY Bioplastics! – Educational Innovations Blog
Thank you for making with me. I hope your hands find calm in the small motions and that your windows glow a little brighter with preserved petals.
PrintBeautiful Bioplastic Suncatchers with Natural Flowers

Create stunning suncatchers using bioplastic and natural flowers for a delightful and creative project.
- Prep Time: 15 minutes
- Cook Time: 30 minutes
- Total Time: 45 minutes
- Yield: 4 suncatchers
- Category: Craft
- Method: DIY
- Cuisine: N/A
- Diet: N/A
Ingredients
- Cornstarch, plain and simple
- Glycerin, food-grade
- Distilled white vinegar or lemon juice
- Water, filtered if possible
- Small stainless steel saucepan
- Wooden or heatproof silicone spoon
- Measuring spoons and a teaspoon
- Parchment paper or silicone baking mats
- Flat glass or ceramic plate
- Fresh or dried small flowers and leaves
- Small cookie cutters or round molds
- Scissors and tweezers
- A shallow tray or drying rack
- String, embroidery thread, or thin ribbon
- Small hole punch or sharp needle
- Paper towels and a soft cloth
Instructions
- Prepare your workspace and flowers.
- Measure and mix the base ingredients.
- Warm the mixture slowly on low heat.
- Stir until the mixture thickens and clears.
- Let the mixture cool for a moment.
- Pour a thin circle onto the prepared surface.
- Place petals and leaves with tweezers.
- Smooth the edges and remove excess.
- Let the piece rest and cool fully.
- Peel the film away slowly.
- Trim and make a hole for hanging.
- Add a thread and hang to dry further.
- Enjoy and make more.
Notes
Be patient during the cooling process to avoid tearing the petals. Use a calm, supervised space when heating the mixture, especially around children.