

The warm, pale light of an afternoon catches floating sparkles in a shallow dish, and for a quiet moment you watch tiny crystalline branches form, slow and sure. You feel the cool glass under your fingertips and breathe with the soft, steady rhythm of the solution settling into itself. This small act coaxing a Baking Soda Growing Tree into being asks only patience and attention, and it gifts a little calm with every crystal that catches the light. If you are returning to this project, or just beginning, the Baking Soda Growing Tree guide on our site can be a gentle companion as you gather your supplies and settle into the work.
Why Baking Soda Growing Tree Feels Comforting to Create

There is something very slow and kind about watching crystals grow. The process invites you to slow your hands and watch a small change over time. The texture of the paste, the soft hiss as you pour warm water, and the faint, almost neutral scent of baking soda combine into a calm, sensory rhythm.
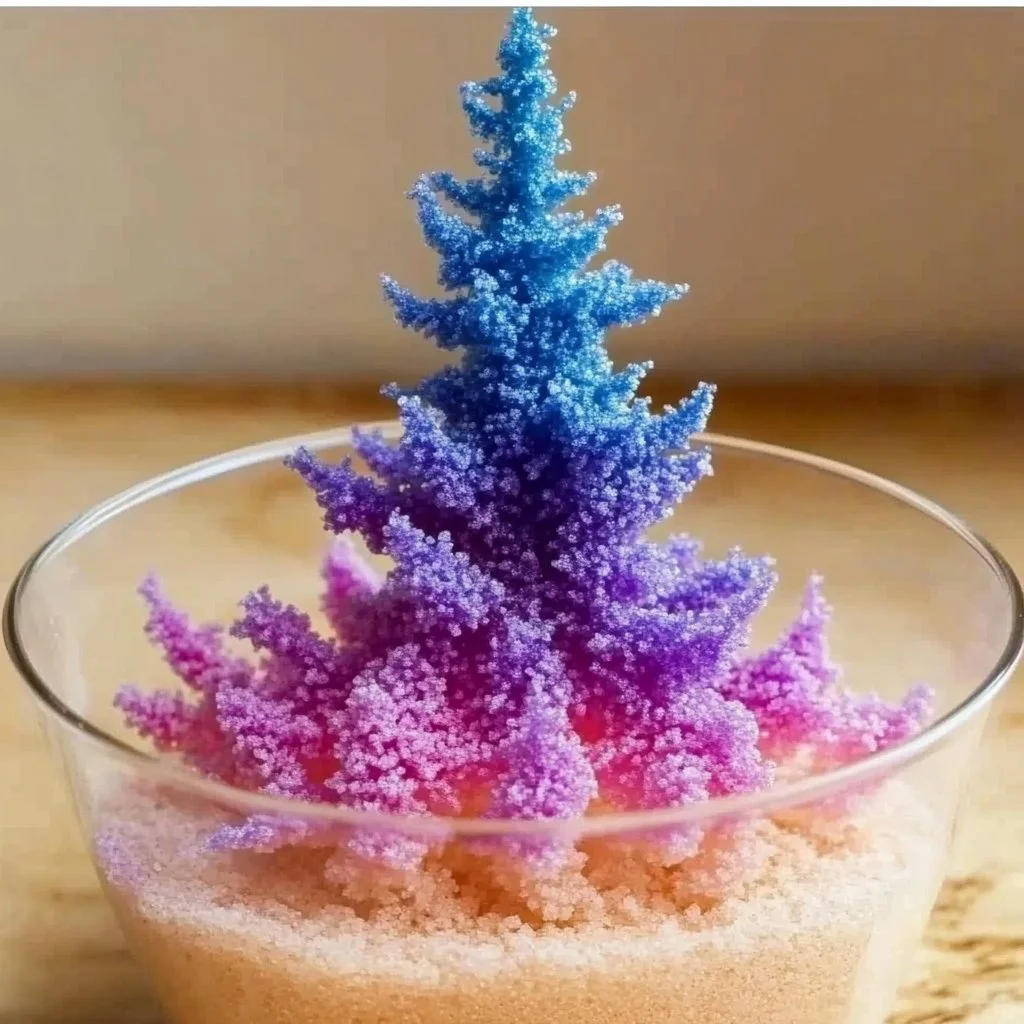
Making this project feels comforting because it is low-stakes and tactile. You do not need exact measurements to feel success. You can hold the glass and feel the temperature change. The little branches that form look like miniature winter trees or tiny coral, and each one holds the memory of a gentle, patient hour.
This craft gives space to notice small things: a crystal catching the light, the way the solution becomes slightly glossy, or how the spoon warms in your hand. It folds a quiet routine into a surface of making. If you like, you can also explore variations and photo your result, or keep a small bowl on a shelf to remind yourself that small, slow changes are meaningful.
A Gentle Look at the Process
The process moves slowly, like a simple recipe for calm. You dissolve baking soda into warm water, mix until the solution sits clear and soft, and then build a small tree form in a shallow container. You let crystals find their way to one another as the solution cools and becomes saturated. The movement is gentle: stirring, pouring, placing, and then waiting.
You will notice sounds and textures along the way. The soft clink of glass, the whisper of a spoon, the silky feel of wet paste. Each small motion creates a tiny ritual that helps you focus and be present. If you want to revisit variations or similar projects, this crystal growing tree exploration shows other gentle approaches that pair well with what you will do here.
Materials You’ll Need
- Baking soda (sodium bicarbonate), easy to find at grocery stores.
- Warm water, from a kettle or tap, comfortably warm to the touch.
- Table salt, optional can change the look and speed of crystals.
- A shallow glass dish or small jar, smooth and clean.
- A small glass or plastic cup for mixing.
- A spoon for stirring, smooth and steady.
- Pipe cleaners or a small twig to form the tree shape, optional.
- A small tray or towel to protect surfaces, helpful and tidy.
- Food coloring or liquid watercolor, optional for soft color.
- Tweezers or a toothpick for gentle adjustments.
- Clear workspace with soft light, to watch the crystals form.
When possible, choose materials that feel pleasant in your hands. Glass lets you watch the growth. Pipe cleaners bend smoothly and hold shape. Salt and color are optional and forgiving. If you want alternatives, a wooden twig can make a very natural-looking tree. For more ideas and supplies, see this collection of simple growing tree variations at our site: different crystal tree ideas.
Step-by-Step Directions
- Prepare a calm space and gather all materials.
Keep the surface clean and lay a towel down.
Light a soft lamp or choose a window seat. - Warm the water to a comfortable heat.
It should feel pleasantly warm on your wrist.
Avoid boiling; gentle warmth helps dissolve baking soda. - Measure and pour baking soda into the mixing cup.
Start with about two to three tablespoons for a cup of water.
Feel the fine texture as it slips from the spoon. - Slowly add warm water and stir to dissolve.
Stir in steady circles until the solution looks clear.
The sound of stirring is quietly rhythmic. - Add a pinch of salt or a drop of color if desired.
Salt can encourage more rapid crystal growth.
Color tints the crystals without changing the calm feel. - Shape your tree in the shallow dish or jar.
Twist pipe cleaners into a small tree or nestle a twig in the center.
Anchor it gently so the base sits in the solution. - Pour the baking soda solution around the base.
Pour slowly so the tree stays upright and the base is bathed.
You will see the liquid settle with a glossy surface. - Wait and watch for initial crystals to form.
Small sparkles often appear along the branches or base.
Check every 15–30 minutes with soft attention. - Make gentle adjustments with tweezers if needed.
Move stray pipe cleaner tips or re-center the twig slowly.
Avoid disturbing the whole dish once crystals start. - Let the piece sit undisturbed for several hours.
Crystals continue to grow as the solution cools and evaporates.
The longer you leave it, the more intricate the formations. - Remove and let dry, or keep in the dish to observe longer.
If you lift the tree, hold it over a towel and pat gently.
Once dry, crystals often harden into a fragile, lovely structure. - Notice what happened and record a small note.
Write the time, temperature, and anything you changed.
This helps you remember what created your favorite textures.
Enjoying the Finished Piece

When the crystals settle into place, you have a small, quiet object that carries the story of a slow hour. Place the tree on a shelf where light can skim the edges. In morning or evening light, the crystals catch it and throw tiny, delicate reflections. You might keep it near a window or beside a stack of favorite books.
Use the piece as a tactile reminder to breathe and pause. Rest your fingers gently on the base and notice the texture. If you made colored crystals, the hues can bring a soft joy to a corner of the room. If you prefer, photograph it against soft fabric to remember the details. The finished piece pairs well with small bowls of dried herbs, a cup of warm tea, or a linen cloth to make a quiet vignette.
If you gift a small crystal tree, include a note about the slow process so the recipient knows how it formed and how delicate it is. These pieces feel especially comforting in spaces kept simple and calm, where their fragile geometry can be noticed without rush.
How to Store or Reuse Baking Soda Growing Tree
Crystal trees are fragile and respond to humidity and handling, so think gently when storing them. If you want to keep a single piece for display, store it in a dry, low-humidity spot away from direct sunlight. Shield it behind glass or in a small display box if you handle it often.
If you plan to reuse the base or experiment again, dissolve the old crystals gently in warm water and pour them away. The new solution will use the same materials and allow you to start again with a slightly different rhythm. Pipe cleaner trees tend to dissolve more slowly and can sometimes be reused a few times before they wear thin.
For longer-term storage, place the piece inside a small box lined with tissue paper. Keep the box in a stable temperature area. If you live in a humid climate, add a small desiccant packet to the box to protect the crystals. Always label a box with the date and any notes on how the piece was made so you can recall the making moment later.
Gentle Tips & Variations
- Invite color softly. Add one or two drops of food coloring to the mixing cup for subtle tinted crystals. This is an easy, forgiving way to personalize the piece.
- Try salt blends. A small amount of table salt changes the way crystals arrange. Use less salt for slower growth and more for faster, textured formations.
- Use natural twigs. A small dried twig creates an organic silhouette. It feels good to hold and often yields a natural, wood-and-crystal contrast. For more step-by-step ideas on mixing and matching techniques, visit our gentle recipe page: how to make the baking soda growing tree recipe.
- Layer small displays. Create several tiny trees at once in shallow dishes and arrange them as a little winter scene or tabletop forest.
- Keep a slow journal. Note times, water temperature, and small changes you try. Over a few projects you notice patterns and gentle improvements.

What I’ve Learned While Making This
I learned that the slow parts of a project often give the most pleasure. The first time I made a crystal tree I felt impatient to see results, and then the first tiny glint caught me by surprise. I sat with a cup of tea and watched as more formed. It became a small meditation.
I found that warm water that is not too hot dissolves the baking soda more evenly. Pipe cleaners give quick structure and allow you to make a more whimsical shape, while twigs yield a natural and steadier silhouette. Salting the mix lightly increases texture but also makes the surface more brittle, so handle pieces with extra care.
I also learned to accept imperfect results. Crystals will grow differently each time. Sometimes they look feathery and delicate, and sometimes they form tighter clusters. Both are beautiful. The project rewards curiosity and small changes rather than precise measurements, which keeps it approachable.
FAQs About Baking Soda Growing Tree:
Is it safe to do this with children present?
Yes, with supervision. The mixture involves warm water and household baking soda. Keep younger children from tasting the solution and guide them to help with safe tasks like stirring and placing the tree. Use a stable surface and a towel to manage spills.
How long does it take to see crystals?
You may see tiny crystals within 15 to 30 minutes, but full growth often takes several hours. Letting the piece sit overnight usually yields more intricate formations. Patience is part of the charm.
Can I reuse the solution or the base?
You can reuse a base like a pipe cleaner a few times by allowing it to dry and then dissolving old crystals in warm water. The solution itself loses potency as crystals form, so make a fresh batch for best results. Reusing allows gentle experimentation without waste.
Why did my crystals look powdery instead of sparkly?
Powdery crystals can come from too much agitation or adding a lot of salt. Try a smoother pour and fewer additives for clearer formations. Also allow the solution to settle and cool slowly.
Can I make larger trees?
Yes, but larger pieces require more solution and a sturdier base. A twig with a small anchor stone at the bottom helps keep taller trees upright. Work slowly and be mindful of balance as crystals add weight.
A Gentle Note Before You Go
Before you tidy up the last spoon and fold your towel, take a moment to sit with what you made. Notice the small details that comfort you: a tiny glittering branch, the way light pools on a crystal face, or the memory of warm water in your hands. Making is as much about those sensory moments as it is about the finished object.
If you return to this practice, you may find your rhythm shifts. Some days you will watch more closely; other days you will make and leave it to grow while you read or breathe. Both ways are right. The Baking Soda Growing Tree is a little invitation to slow down and savor quiet change.
Conclusion
If you enjoy exploring crystal growth with a trusted source, the Growing Crystals Experiment | ARM & HAMMER Baking Soda Project offers further experiments that pair well with this gentle project. For those who are curious about caring for small living or planted projects nearby, the University of Maine extension article How do I care for apple trees on a property I just purchased? shares calming, practical guidance that may inspire other slow, thoughtful activities to keep beside your crystal-making ritual.
Warm hands and soft light as you make.
PrintBaking Soda Growing Tree

Create a calming crystal tree using baking soda and warm water, inviting mindfulness and patience in the crafting process.
- Prep Time: 15 minutes
- Cook Time: 240 minutes
- Total Time: 255 minutes
- Yield: 1 crystal tree
- Category: Craft
- Method: Crafting
- Cuisine: N/A
- Diet: N/A
Ingredients
- Baking soda (sodium bicarbonate)
- Warm water
- Table salt (optional)
- A shallow glass dish or small jar
- A small glass or plastic cup for mixing
- A spoon for stirring
- Pipe cleaners or a small twig (optional)
- Food coloring or liquid watercolor (optional)
- Tweezers or a toothpick (optional)
Instructions
- Prepare a calm space and gather all materials.
- Warm the water to a comfortable heat.
- Measure and pour baking soda into the mixing cup.
- Slowly add warm water and stir to dissolve.
- Add a pinch of salt or a drop of food coloring if desired.
- Shape your tree in the shallow dish or jar.
- Pour the baking soda solution around the base.
- Wait and watch for initial crystals to form.
- Make gentle adjustments with tweezers if needed.
- Let the piece sit undisturbed for several hours.
- Remove and let dry, or keep in the dish to observe longer.
- Notice what happened and record a small note.
Notes
Crystals’ growth can vary; experimenting encourages learning. Keep a gentle journal to note observations.