

I press a cool, speckled shell between my fingers and listen to the soft fizz that wakes the air. Tiny bubbles gather at the rim of the cup, carrying bright color up and out. Rainbow Fizz Egg Art asks me to slow down, breathe with each little pop, and notice the warmth of light on the table and the fine grit of baking soda at my fingertips. This small, sensory-making moment feels like a private ritual, one I can return to on quiet mornings or gentle afternoons. For a similar slow-play craft that grows sparkling shapes, I often look back at the rainbow crystal heart project that taught me to love patient making through careful steps.
The Quiet Joy of Making Rainbow Fizz Egg Art

This craft centers on small, calm moments. Each fizz offers a soft sound that asks you to pause. Each color spreads in its own way. When you work slowly, you notice textures: the dry grit of baking soda, the smooth curve of a shell, the cool shock of vinegar on skin if you are not careful. The act of painting dye into a shell cavity and watching it bloom with effervescent color feels like a tiny ceremony.
Making this project helps people slow down. You move in short, thoughtful gestures. You repeat stirring, pouring, and tending. That repetition settles the mind. The craft fits into cozy routines, like making tea, reading a book by a lamp, or tending a house plant. It comforts because it asks for focus without pressure. You cannot rush the fizz. You listen. You watch. That simple attention brings calm.
When I make Rainbow Fizz Egg Art with friends or children, I notice how it invites soft conversation. People point out how a color pools at a shell lip or how a bubble draws a perfect circle. These small pleasures invite connection. They also teach patience. I learned that leaving a fizz to finish on its own often yields the sweetest patterns, not rushing to manipulate the foam. The project rewards a quiet hand and an opened mind.
A Gentle Look at the Process
I like to breathe with the rhythm of the project: fill, dye, mix, wait. The work moves from one sensory note to the next. First you hold the empty shell like a fragile moon, cool and light. Then you stir baking soda and color, feeling the powder break under your spoon. You add vinegar and you watch active chemistry bloom into sound and color.
The process plays like a short ritual. You measure with soft focus. You pour with steady hands. You tend a bowl as if you care for a tiny garden. The fizz fades. The colors settle. You lift the shell and study the tiny, crinkled crust that forms where foam once reached. Each step gives you a moment to return to your breath and notice small things.
If you like projects that bloom slowly or that pair well with quiet music, this one fits. It also links pleasantly to other playful, slow crafts. If you have tried rainbow crystal recipes, this fizzing version builds on that same love of color and patient making; you may enjoy the recipe notes and ideas in this calm guide to a baking soda crystal forest I keep in my project notes.
Materials You’ll Need
- Clean, emptied eggshells (easy to make or buy; very fragile)
- Baking soda (plain, common; this creates the base and reacts with vinegar)
- White vinegar (household vinegar; reacts to make the fizz)
- Food coloring or liquid watercolors (small bottles; choose gentle colors)
- Small cups or bowls (for mixing; shallow helps you watch the fizz)
- A pipette, eyedropper, or straw (for adding vinegar slowly; optional)
- A spoon or small spatula (for gentle mixing)
- A tray or baking sheet lined with paper towels (catches spills)
- Small paint brushes (to paint color into shells if you like)
- Gloves (optional; helpful if you have sensitive skin)
- A small funnel or paper guide (optional; helps pour baking soda into shells)
- A damp cloth for quick clean up (these fizzes can leave streaks)
I like to keep materials within reach in small trays. That simple habit keeps my hands calm and my attention on the work. For more on how baking soda behaves in hands-on crafts, I often revisit the growth experiments I learned from the crystal heart notes about baking soda crystal growth that show slow changes well. Those experiments taught me to respect drying time and to work with patience rather than against it.
Step-by-Step Directions
Clean and prepare your shells. Gently rinse empty eggshells and let them air dry on a towel.
Hold them like fragile seeds. The shell should feel smooth and cool.Fill each shell with a small spoon of baking soda. Tap gently so the powder settles without packing it too hard.
The texture should feel slightly grainy under your touch.Add a drop or two of food coloring into the baking soda in each shell.
Use different colors for a rainbow effect. Notice how a single drop sinks slowly.Place the filled shells on a tray lined with paper towels.
The towels catch overflow and keep your table calm and dry.Pour a small amount of vinegar into a shallow bowl or fill a pipette for slow release.
Smell the sharp vinegar briefly, and work in a well-ventilated space.Slowly add vinegar to the baking soda in one shell using the pipette or spoon.
Watch the fizz rise. Listen to the tiny pops and let your breath fall into their rhythm.If a color floods too fast, pause and breathe for a count of three.
You can use a brush to guide color as it settles into textured patterns.Let the fizz run its course. When bubbling slows, lift the shell and study the dried, crusted pattern.
The surface will often show delicate ridges where foam once rose.For layered effects, let the first fizz dry a little, then refill and add a second color.
This step gives depth. Work slowly and give each layer quiet time to change.Clean your workspace gently. Wipe spills with a damp cloth and air out any vinegar scent.
Treat your craft table with the same care you used for the shells.
Each step invites a small pause. I recommend you move with gentle hands and keep a soft awareness of the sounds and textures. When I work, I light a low candle or make a cup of warm tea to hold in my non-crafting hand. Those small comforts help me stay present.
Bringing Rainbow Fizz Egg Art Into Your Space


Once you finish a set of fizzed shells, you can display them in many calm ways. Nest them in a shallow wooden bowl with soft moss. Arrange them on a plate beside a stack of favorite books. Place one by a morning window where light can catch the tiny, crusted patterns.
I like to line a tray with neutral fabric and space shells out like gentle moons. The shells hold subtle, matte color when dry. They look best when not crowded. Give each shell room to breathe so light plays across its surface. In a small glass cloche, they read like a tiny seasonal reliquary that invites longer, slower attention.
You can also use them in mindful play. Pause and lift a shell, letting its weight remind you of the present. Practice a short breathing pattern: inhale for three counts as you look at the color, exhale and imagine the bubble sound fading into quiet. These small rituals help the craft move from activity into a restful habit.
If you explore further and want to layer this idea into other crystal projects, the little rainbow crystals you can grow from baking soda pair nicely with fizzed shells. I sometimes set a shell beside a teeny cluster of rainbow crystals to create a small display that reads like a tiny landscape; you can find more about those crystals and how they sparkle here in a short photo guide.
Caring for Your Finished DIY
Treat these shells like small keepsakes. The crusted surface can flake if you handle it roughly. Store them on a soft cloth or in a shallow box with padding between pieces.
Keep them away from moisture. A damp environment can soften the baking soda crust and dull colors. A dry shelf or a glass-fronted cabinet works well for display. If dust collects, use a soft brush to sweep gently. Avoid running water over a finished shell; water can dissolve the fragile surface.
If a piece breaks, you can repurpose fragments into a new display or glue a shard to cardstock to create a tiny framed study. This project invites reuse and gentle repair rather than waste. I like to keep a small jar of broken shells to sprinkle over a planter or to press into clay pieces for added texture.
If you plan to store shells long term, place a small packet of silica gel nearby to keep the air dry. Label a box with the date and a short note about the colors used. These small records become lovely prompts later, reminding you of the hands-on moments and the way colors mixed that day.
What I’ve Learned While Making This
I learned many small lessons. First, less is more with vinegar. A slow drop produces more painterly color and softer patterns than dumping too much at once. The fizz wants to breathe; you do not need to force it.
Second, the size of the shell changes how a color pools. A deeper cavity holds more fizz and makes bolder marks. A shallower shell produces thin, veined textures. When I handsort eggshells by size before starting, I feel calmer and more in tune with how each will behave.
Third, the first layer often looks different from the last. Let the first fizz dry. Return later for a second touch. That waiting transforms the piece into something layered and lived in.
I also learned to respect safety. Vinegar and color can stain skin and cloth. I wear gloves when I want tidy hands and wash skin with soap afterward. I keep young children at a small distance when pouring vinegar, though they love to watch the fizz. For supervised children, I let them add color and watch while an adult controls the vinegar. These small rules create a safe, calm space for everyone.
I often invite friends to bring one shell each to a casual craft day. We sit in quiet company, each attentive to our small bowl of fizz. We exchange notes about color choices and laugh softly at unexpected blooms. Those afternoons taught me that quiet company deepens making. The craft keeps its calm even when shared.
FAQs About Rainbow Fizz Egg Art
Q: Will the fizzing make a big mess?
A: The fizz stays mostly inside and just beyond the shell rim. Use a tray and paper towels to catch overflow. A damp cloth cleans most marks quickly.
Q: Are the finished shells fragile?
A: Yes. They remain delicate. Handle them gently and store them on soft fabric to protect the crusted surface.
Q: Can kids safely make these?
A: Yes, with supervision. Let children add color and watch from a safe distance while an adult adds vinegar. Offer gloves for sensitive hands and keep surfaces covered.
Q: What if I want brighter colors?
A: Use concentrated liquid watercolors or add a drop more food coloring. Work in small doses to avoid overwhelming the baking soda reaction.
Q: Can I preserve the pieces long term?
A: Store them dry, out of direct sunlight. Use silica gel in storage boxes and avoid humidity. A light spray of clear matte sealant can help, but test first on a spare shell.
A Gentle Note Before You Go
When I put away my mixing bowls, I notice the tiny stains they carry like badges of a calm afternoon. The work leaves a soft residue of color and memory. Rainbow Fizz Egg Art invites you to make those small traces with intention. It asks you to slow down and to find pleasure in tiny chemistry, in the crackle of foam, in the gentle weight of a shell.
Take your time when you begin. Prepare your tray and your cup of tea. Let the sound of fizz become part of your breathing. Whether you make one shell or a dozen, let the project serve as a brief retreat. Let it remind you that the quiet, repeated acts of hands can steady the mind and fill a space with gentle color.
Conclusion
If you want a quick step-by-step visual for fizzing eggs, I sometimes refer to a simple fizzing egg tutorial that captures the basic motion and delight. For ideas on seasonal displays and gentle egg traditions, I find the seasonal notes at a thoughtful Easter egg feature helpful for inspiration.
PrintRainbow Fizz Egg Art

A calming craft project that combines baking soda, vinegar, and food coloring to create colorful, fizzing egg shells.
- Prep Time: 10 minutes
- Cook Time: 0 minutes
- Total Time: 10 minutes
- Yield: Multiple shells
- Category: Craft
- Method: Crafting
- Cuisine: N/A
- Diet: N/A
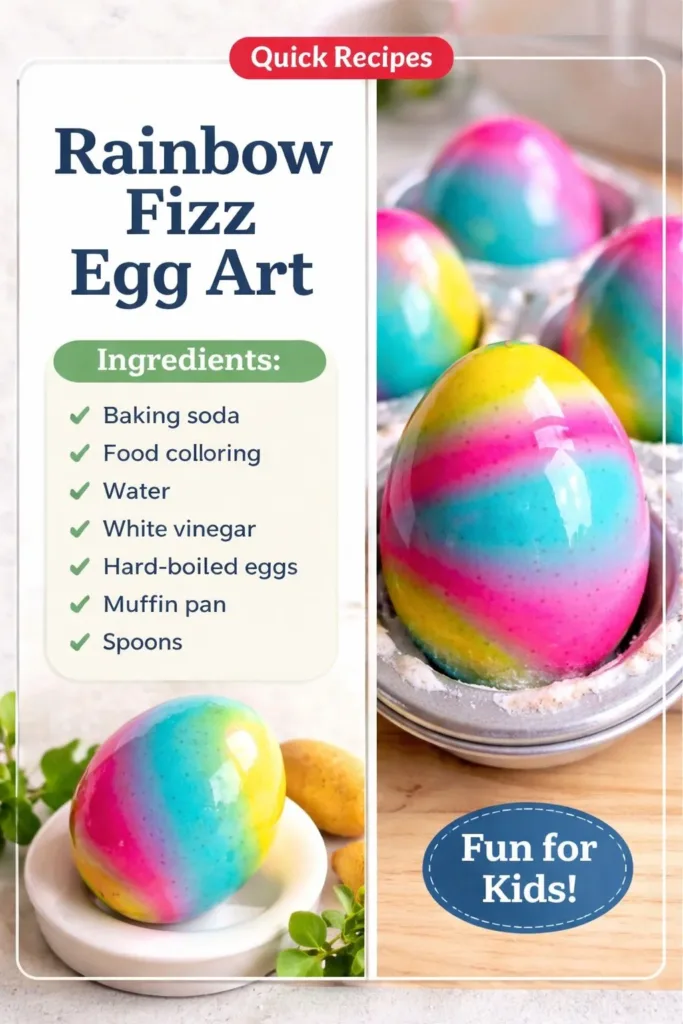
Ingredients
- Clean, emptied eggshells
- Baking soda
- White vinegar
- Food coloring or liquid watercolors
- Small cups or bowls
- A pipette, eyedropper, or straw (optional)
- A spoon or small spatula
- A tray or baking sheet lined with paper towels
- Small paint brushes (optional)
- Gloves (optional)
- A small funnel or paper guide (optional)
- A damp cloth for clean up
Instructions
- Clean and prepare your shells.
- Fill each shell with a small spoon of baking soda.
- Add a drop or two of food coloring into the baking soda in each shell.
- Place the filled shells on a tray lined with paper towels.
- Pour a small amount of vinegar into a shallow bowl.
- Slowly add vinegar to the baking soda in one shell using the pipette or spoon.
- If a color floods too fast, pause and breathe for a count of three.
- Let the fizz run its course.
- For layered effects, let the first fizz dry a little, then refill and add a second color.
- Clean your workspace gently.
Notes
Recommended for quiet afternoons and mindful making. Ideal for children with adult supervision.