

A thin pool of warm color shines on my table. I tilt the little cup and watch a swirl of blue and yellow fold into itself, the liquid moving slow and smooth. That soft, slow motion feels like a little meditation. Making DIY Bioplastic Suncatchers with Colorful Swirls invites that hush. If you want to try a slightly different color approach, you might enjoy our colorful bioplastic suncatchers recipe which explores bright layers and gentle mixing.
The Quiet Joy of Making DIY Bioplastic Suncatchers with Colorful Swirls

There is a calm in watching translucent sheets take shape. The work asks you to move slowly, to feel the warm bowl, to listen to the soft hiss as bubbles settle. You use simple motions. You stir, pour, and watch. Each small action brings attention back to the present moment.
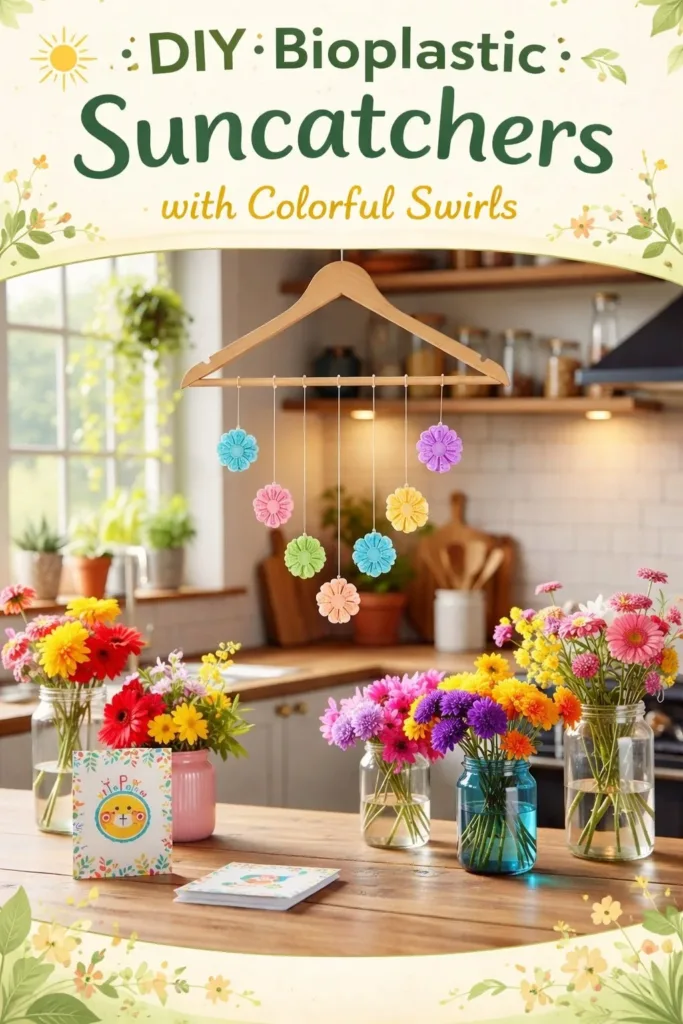
These suncatchers catch light in a way that feels personal. Sun moves through the film and brings small color notes into a room. That shifting light makes the work feel alive and gentle. You do not chase perfection. You welcome the unexpected curves and tiny bubbles. The small imperfections become part of the story.
Creating these suncatchers helps readers slow down. The steps repeat like a soft rhythm. The materials respond to touch and heat in honest ways. This project blends craft and quiet. It gives you a simple result that brightens a window and holds a memory of your hands.
A Gentle Look at the Process
Before you start, imagine a little routine of soft actions. You warm water and dissolve gelatin. You add a touch of glycerin to keep the film flexible. You drop in a few colors and swirl them gently. You pour thin circles of the mixture and let them dry into glossy, flexible shapes.
The process focuses on movement, texture, and sight. You feel the bowl warm under your hands. You see the liquid gloss change as it cools. You hear the faint scrape of a spoon against glass. The visual rhythm of pouring and waiting gives the work its calm pace.
If you want to add pressed flowers or small leaves, plan the placement while the film still feels tacky. I learned that placing items too early makes them sink and look blurred. If you want to explore floral details, our piece with pressed blooms shows one way to balance color and shape in a gentle way through placement and timing. See a floral approach in our guide to bioplastic suncatchers with flowers for ideas and a calm method of adding nature.
Materials You’ll Need
- Gelatin powder, plain or unflavored (easy to find)
- Glycerin, food grade if possible (helps keep the sheet flexible)
- Warm water
- Food coloring or liquid watercolors (small amounts go a long way)
- Small glass bowls and a spoon for mixing
- Nonstick baking paper or silicone mats (for smooth release)
- Cookie cutters or small rings for shapes (optional)
- Straw or skewer for making holes for hanging (simple and safe)
- Small brushes or droppers for adding color (optional)
- Tweezers for placing small decorations like petals (optional)
- A flat, dust-free place to let the suncatchers dry
Note: you can substitute gelatin with agar powder for a vegetarian option, though drying time and flexibility differ. If you try agar, expect a slightly firmer texture and longer drying. I like to keep a spare bowl for testing so I can feel the texture before I pour.
For another mix and temperature guide you can compare with a second method in our post about recipe variations. See a slightly different technique in this variation on bioplastic suncatchers.
Step-by-Step Directions
- Measure and heat the water.
Warm one cup of water until it feels comfortably hot but not boiling.
Pour into a glass bowl that you can hold with both hands and set nearby. - Add gelatin slowly.
Sprinkle two tablespoons of gelatin over the warm water.
Stir with a gentle, steady motion until the powder softens and no dry bits remain. - Stir in glycerin.
Add one teaspoon of glycerin and stir until fully mixed.
Glycerin helps the final sheet stay soft instead of cracking. - Test a small drop.
Take a tiny drop on a spoon and let it cool to skin temperature.
This test helps you sense the thickness before you color or pour. - Prepare your work surface.
Lay nonstick paper or a silicone mat on a flat tray.
Place cookie cutters or shape guides where you plan to pour. - Mix color in separate small bowls.
Put a tiny drop of food coloring into a few separate bowls with a spoonful of the gelatin mix.
Using separate colors lets you control intensity and swirl gently. - Pour the base film.
Pour a thin circle of the plain gelatin mix onto the paper to make a base.
Work slowly. The base keeps bright colors from sinking through. - Add color drops.
Drop small amounts of the colored mixes onto the base, close to but not touching the center.
Let the colors sit and spread a little before you move them. - Create swirls with a skewer.
Gently drag a skewer through a few drops to make soft, flowing swirls.
Keep the motion slow and calm to avoid mixing colors into mud. - Make a hole for hanging.
While the film still feels warm and soft, press a straw gently through the edge where you want a hole.
Hold steady and lift the straw straight out to leave a clean opening. - Add tiny decorations.
If you place petals or glitter, use tweezers and press lightly onto the sticky surface.
Work slowly so each item settles without trapping air beneath it. - Let the pieces dry.
Move the tray to a flat, dust-free spot and leave the pieces to dry for 24 to 48 hours.
Check them gently after a day. They should lift easily when firm. - Peel and trim.
When the sheets feel firm and slightly bendable, peel them from the paper.
Trim edges with scissors for a tidy finish. - Soften in hands if needed.
If a piece feels stiff, hold it between your palms for a moment. Your warmth will soften it.
That slight flexibility helps the suncatcher hang without breaking. - Hang and enjoy.
Thread a simple string or ribbon through the hole and hang near a sunny window.
Watch the way light moves through the colors and enjoy the calm pause it creates.
Using DIY Bioplastic Suncatchers in Everyday Life

These suncatchers add a small, personal glow to a room. I often hang one near my kitchen sink where morning light meets a slow cup of tea. The motion of the sun across the film gives the day a gentle rhythm.
You can use them in many places. Hang a string of small pieces across a narrow window for a soft curtain of color. Clip one to a houseplant stake to catch light among leaves. Tie a single suncatcher to a gift tag for a quiet, handmade touch.
I keep a few in a bedroom window where the late light makes the colors deepen. The suncatchers do not make a loud statement. They offer small, shifting notes of color and a reminder of the calm making time.
If you enjoy exploring different ways to display hand made light catchers, you can find a collection of other ideas and pictures in our gallery of projects. See more display inspirations in a collection of suncatcher ideas.
Making This DIY Last

These films hold up well if you handle them gently. They last longer when you keep them away from heat and moisture. Store a few spare pieces flat between sheets of nonstick paper to avoid sticking.
Keep them out of direct rain or humid bathrooms. Water will soften these sheets because gelatin and glycerin absorb moisture. If a piece becomes too soft, let it dry flat again in a warm, dry spot and avoid bending it until it firms.
Bioplastic suncatchers work best as delicate decor. They can fade slowly over time if you place them in intense, all-day sun. Rotate pieces so each one enjoys a few hours of light and then rest. This rotation helps preserve color and form.
If a piece cracks at the edge, trim the rough area with scissors and smooth the edge by holding it briefly in your warm palms. The small repair will keep it pleasant to look at and safe to hang.
Calm Customization Ideas
Try these gentle variations as invitations to play rather than rules to follow.
- Layer thin colors.
Pour a pale base, let it firm slightly, then add a second, bolder layer for depth. This method creates a soft shadow where the layers meet. - Use powdered natural pigments.
If you prefer earthier tones, try powdered beet or spinach extracts sparingly. They give a muted, cozy palette that ages beautifully. - Add texture with fabric scraps.
Press a tiny square of fine fabric into the film while it is still tacky to leave a subtle texture. Choose cotton or silk for a soft impression. - Make a mixed-media garland.
Combine bioplastic pieces with wooden beads and small shells on a cord. The natural materials balance the glossy film and create a tactile string to move with the breeze. - Try a translucent paint wash.
Once a piece dries fully, you can paint a soft wash of acrylic or diluted tempera on the back to intensify a color. Test first on a small piece to check adhesion.
These ideas let you explore without pressure. Each suggestion helps you lean into the sensory part of the work. I often pick one variation at a time and leave the rest as a quiet experiment for another day.
FAQs About DIY Bioplastic Suncatchers with Colorful Swirls
Are these suncatchers safe for kids to make?
Yes, with supervision. Children can measure and stir under adult guidance. Keep hot liquids handled only by adults and let kids add colors and place decorations when the mix cools slightly.
Will they melt in hot weather?
They can soften in very warm conditions because gelatin and glycerin respond to heat. Keep suncatchers out of direct, intense heat and away from car dashboards or other hot spots.
Can I make these vegan?
You can try agar as a plant-based substitute. Expect different texture and drying time. Agar produces a firmer sheet and may need more glycerin or longer drying.
How do I prevent colors from turning muddy?
Use small amounts of strong color and give each drop space to spread. Swirl gently and avoid overmixing. Working with fewer colors per piece helps keep the hues clear.
Are they waterproof?
Not fully. These pieces resist a light splash but will absorb water and soften if submerged. Treat them as decorative, not as outdoor ornaments meant to withstand rain.
A Gentle Note Before You Go
Feel the small satisfaction of making something that catches light and invites a pause. The process rewards slow attention and tender handling. When you hang a suncatcher you made, you bring a soft, personal glow into a room that reminds you of the quiet time you spent making it.
Take your time with each step. Notice the warm bowl, the slow swirl of color, and the quiet wait as the sheets dry. These moments hold more than craft. They hold space for being present with your hands and your senses.
Conclusion
If you want a clear, science-friendly how to, the How To Make A Bioplastic Suncatcher – Chemistry for Kids article gives a helpful explanation of the materials and why they form films. For a different window-brightening method that uses glue, you can find more creative options in this guide to DIY Glue Suncatchers – Easy Ways to Brighten Your Windows!
Thank you for sharing a quiet making moment. I hope your next small swirl of color feels soft and steady, and that the finished suncatcher returns a little light to your day.
PrintDIY Bioplastic Suncatchers with Colorful Swirls

Create beautiful and colorful DIY bioplastic suncatchers that catch light and bring a personal glow to your space.
- Prep Time: 10 minutes
- Cook Time: 0 minutes
- Total Time: 24 hours
- Yield: 4-6 suncatchers
- Category: Craft
- Method: Mixing
- Cuisine: N/A
- Diet: Vegan (if using agar)
Ingredients
- 1 cup warm water
- 2 tablespoons gelatin powder (plain or unflavored)
- 1 teaspoon glycerin (food grade if possible)
- Food coloring or liquid watercolors
- Nonstick baking paper or silicone mats
- Small glass bowls
- Spoon for mixing
- Cookie cutters or small rings for shapes (optional)
- S straw or skewer for making holes (optional)
- Small brushes or droppers for adding color (optional)
- Tweezers for placing small decorations (optional)
- A flat, dust-free space to dry the suncatchers
Instructions
- Measure and heat the water.
- Add gelatin slowly.
- Stir in glycerin.
- Test a small drop.
- Prepare your work surface.
- Mix color in separate small bowls.
- Pour the base film.
- Add color drops.
- Create swirls with a skewer.
- Make a hole for hanging.
- Add tiny decorations.
- Let the pieces dry.
- Peel and trim.
- Soften in hands if needed.
- Hang and enjoy.
Notes
You can substitute gelatin with agar powder for a vegetarian option, though drying time and flexibility differ. Handle gently to ensure longevity.