

A narrow strip of sunlight warms the wooden table as you press a petal into soft, warm bioplastic. The petal gives a faint, papery sigh. You feel the slight stick of the bioplastic as it cools into a smooth, glasslike sheet. This quiet moment, shaping a Beautiful Bioplastic Suncatcher with Natural Flowers, sits like a small ritual that asks you to slow down and notice color, texture, and light.
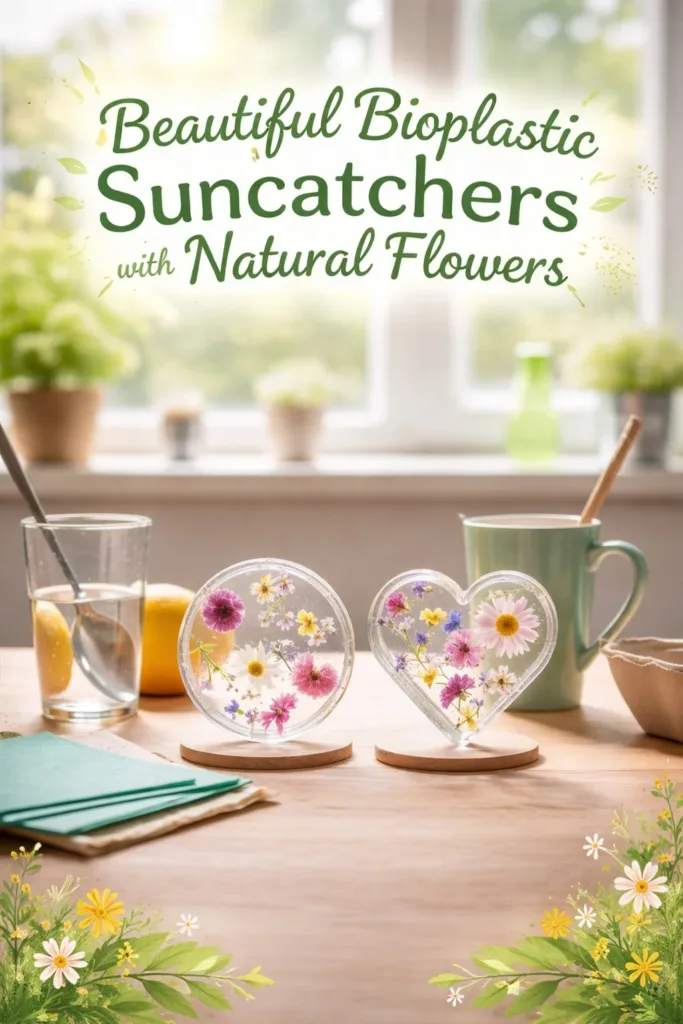
The Quiet Joy of Making Beautiful Bioplastic Suncatchers with Natural Flowers

There is something kindly about catching light instead of chasing it. Making a Beautiful Bioplastic Suncatcher with Natural Flowers gives you time to look closely at the little things. A crinkled daisy, a translucent fern, or a freckled leaf becomes a tiny landscape when pressed between warm, pliable bioplastic.
Working this way brings gentle focus. Your hands move with soft loops and small presses. Your eyes track color and negative space. The project asks for slow choices more than fast answers. That pace quiets the mind. It invites a deeper kind of noticing.
I often make these on gray afternoons. The sun slips between clouds and the suncatcher catches a sliver of light and turns the room warm. The craft pairs texture with light. The bioplastic feels like warm gelatin at first, then cools to a thin clear sheet that catches every vein and petal edge. That change in touch tells you the work is moving forward. You do not have to hurry.
Making these suncatchers supports a calm habit. You can use the same materials again and again. You can make one for a window, a gift, or just to hold in your hands. If you want to learn more about a simple step list, this short guide offers a kind next step with a gentle recipe and a warm approach to the craft in the full tutorial on our site at bioplastic suncatchers with flowers tutorial.
The Flow of Making Beautiful Bioplastic Suncatchers with Natural Flowers
Before you begin, picture each part of the process as a small movement. You will gather items, soften the bioplastic, arrange flowers, press, cool, and then admire. Each movement has a texture and a tempo.
The mix of warm and cool matters. The bioplastic warms and becomes tender under your fingers. The flowers sit crisp and dry at first, then nestle into the soft surface. When the sheet cools, it traps a mapped impression of each petal and leaf. You will feel slight resistance as you press, a tiny sound like a soft cluck, and a cooling that leaves the sheet smooth and slightly cool to the touch.
I learned to pause between arranging and pressing. That pause lets the pieces settle and gives you a moment to notice balance and negative space. If you like a paler look, space the flowers farther apart. If you prefer a dense, garden effect, let them overlap a little. The method is forgiving. If something moves when you press, you can lift and gently nudge it back into place before the plastic cools.
If you enjoy following a tested recipe, you may want to compare approaches. Some makers use different heating times or cut shapes while the sheet is still warm. You can explore those variations in the detailed recipe notes we keep for color and thickness at simple recipe and notes.
Materials You’ll Need
- Bioplastic sheets or a home bioplastic mixture, thin and flexible (easy to find online or make at home)
- Fresh or dried small flowers and leaves, pressed or flat (fresh petals work well when thin; dried flowers give a flatter look)
- Parchment paper or silicone baking mat (prevents sticking)
- A smooth roller or a flat wooden spoon for gentle pressing (optional)
- Scissors for trimming edges and shapes (sharp, safe)
- A heat source such as a low-temp oven, dehydrator, or double boiler if using a home-made bioplastic recipe (follow safety guidance)
- A flat, heatproof tray for cooling (a ceramic plate works)
- Fine needle or awl for making a hanging hole once the piece cools
- Cotton twine or thin ribbon for hanging (optional)
- Clear craft sealant or a gentle varnish if you want extra durability (optional)
- Towels and a small tray to keep your work area tidy (substitute with any absorbent cloth you like)
- A timer and a thermometer if you like precise heat and time control (optional)
If you prefer a fully ready-to-use option, you can choose pre-made bioplastic sheets that melt and smooth at low temperature. If you enjoy mixing your own, keep the recipe simple and test a small piece first.
Step-by-Step Directions
- Prepare your workspace and gather your flowers.
Set a clean surface and lay out your parchment paper. Arrange petals and leaves nearby so you can move calmly. - Flatten flowers if they are fresh.
Press them between sheets of paper for a short while, or use small weights for a few minutes. Flattening helps them sit flush in the bioplastic. - Warm the bioplastic gently.
If you use sheets, place them in a low-temp oven or use a warm water bath until they soften. Watch the texture; it should become pliable without bubbling. - Lay a softened sheet on parchment.
Work on a cool surface with a steady hand. Place the softened sheet where you can reach it without stretching. - Arrange your flowers on the warm sheet.
Place the petals and leaves with intention. Use tweezers for tiny pieces and move slowly so nothing folds. - Gently press the plant pieces into the bioplastic.
Use your fingers, a roller, or a spoon to press evenly. Feel the soft give under your palm and listen for the tiny settling sound. - Smooth any edges and trim if desired.
While the sheet still has warmth, trim to your chosen shape. Use sharp scissors for a clean edge. - Allow the piece to cool completely.
Move it to a flat, cool tray and let it rest until it hardens and feels glasslike. This cooling gives the clear finish a crisp look. - Make a small hanging hole with a fine needle.
Once fully cool, make a tiny hole where you want to hang it. Be gentle; a slow push works better than force. - Thread twine and hang in a window, or seal for added protection.
Knot your twine and find a quiet spot for the light to work through the flowers. If you want extra durability, apply a thin coat of clear sealant following the product instructions.
Each step asks you to move with care. If something feels rushed, pause. Small rests often make the work look and feel better.
Enjoying the Finished Piece


A finished suncatcher brings a soft sense of ceremony to a small corner of the home. Hang one in a kitchen window and watch how a single petal throws color onto a tabletop in late afternoon. Suspend another near a reading chair so the light plays over your lap as you turn pages.
You can also hold a piece against the light and tilt it slowly. Notice the way veins in leaves become map lines. See how tiny imperfections in petals look like handwriting. These are the things that make each piece uniquely yours.
I sometimes rest one suncatcher on a shelf, leaning against a small jar of stones. It becomes a quiet still life. When guests come, it opens a short invitation to slow down and notice. If you enjoy experimenting, try pairing a suncatcher with a matchbook of scents. A whispered lavender sachet nearby deepens the calm and makes the moment whole.
For more playful color ideas, you might enjoy other variations and creative palettes in our gallery of inspiration at colorful bioplastic suncatchers ideas.
Caring for Your Finished DIY
Treat these suncatchers like delicate glass. They handle light well but dislike extreme heat and direct sunlight for very long periods, which can fade some flower colors over time. Rotate placement now and then so the sheet ages evenly.
To clean, wipe gently with a soft, slightly damp cloth. Avoid scrubbing or soaking. If you used a sealant, check its instructions; some sealants handle water better than others. Keep them away from sharp edges or heavy knocks.
Store flat in a cool, dry drawer if you plan to keep them for the off-season. Layer between sheets of tissue paper to protect edges. If you will reuse the bioplastic for a new cast, consider testing a small piece first, because once mixed and set, homemade bioplastic can change texture with repeated heating.
If a piece develops a hairline curl at the edge, warm it gently and press it flat again on parchment. A very low oven or a warm plate with light pressure often smooths the edge. Be calm when you fix things. Small imperfections become part of the story.
Gentle Tips & Variations
- Invite color slowly
Try a very small amount of natural dye or powdered pigment mixed into homemade bioplastic for a soft wash of color. Use a tiny pinch and test on a scrap piece first. This keeps the look gentle and adds depth without overworking the material. - Layer for depth
Create a layered suncatcher by pressing one thin sheet, allowing it to cool, then bonding a second softened sheet on top with another bloom between. This adds dimension and a feeling of space. - Try trim shapes
Instead of freeform edges, cut your cooled pieces into circles, leaves, or simple geometric shapes. A small scalloped edge can look like a lace outline against the sun. - Mix textures
Include tiny sprigs of dried grass or thin seed pods for a natural textural contrast. They catch light differently and add subtle tactile interest. - Gift with intention
Wrap a suncatcher in recycled tissue, tuck a note about where you found the flowers, and share a small care tip. A bit of context turns a pretty object into a personal story.
These are invitations, not rules. Let the materials suggest the way forward.
What I’ve Learned While Making This
Working with bioplastic taught me to slow my pace and pay soft attention. The material asks you to notice temperature and timing. I learned that small experiments matter. A pinch less heat or a moment longer of cooling changes the final clarity.
I also learned to trust my senses. If something looks cloudy, it may need a few extra minutes to settle. If a petal turns a shade darker than expected, that depth can be beautiful. I found that being tidy makes the process more calm. A small tray for scraps and a cloth for hands keeps distraction low.
When new makers ask me about safety, I say two things. First, handle heat sources with respect. Use a mitt and a stable tray, and keep children at a safe distance during heating. Second, choose food-safe or non-toxic sealants if you plan to hang pieces in places where they might touch food prep areas. These choices protect you and your work.
FAQs About Beautiful Bioplastic Suncatchers with Natural Flowers
Will fresh flowers work, or do they need to be dried?
Fresh flowers can work if they are thin and you flatten them first. Pressing them briefly helps remove moisture and keeps them from puckering. Dried flowers give a flatter result and often last longer in the piece.
Is bioplastic safe to work with at home?
Many bioplastic recipes use simple, food-safe ingredients and low heat. Always follow a trusted recipe and monitor temperature. If you use a store-bought sheet, check the maker’s safety notes. Ventilate your space and avoid very high heat to prevent unwanted fumes.
How long will the colors last?
Natural pigments fade slowly with long exposure to direct sun. Rotate pieces occasionally and use shaded light for display when you want to preserve color longer. Using a UV-resistant sealant can add a little protection, but natural materials will change with time.
Can I make large pieces or are there size limits?
You can scale up gently, but larger sheets need more careful temperature control and longer cooling times. Start small, then try medium sizes once you feel confident. Large pieces may warp if cooling is uneven, so cool them on a flat surface.
Can children help with this craft?
Children can join in on safe steps like arranging petals and trimming cool pieces. Keep them away from the heated stages and supervise closely. This practice makes the project a shared, sensory experience without exposing little hands to heat.
Conclusion
I find it comforting to think of these suncatchers as little slow windows. They ask you to watch a petal, feel a sheet warm in your palm, and wait for the moment when light turns something ordinary into a small treasure. If you want to read a thoughtful, step-by-step example from another maker who explores botanical casts, try this guide to Botanical Bioplastic Sun Catchers – Wineberry Woods for inspiration and gentle technique notes. For an accessible look at the science and classroom-friendly recipes behind bioplastics, this resource offers clear explanations and experiments at DIY Bioplastics! – Educational Innovations Blog.
When you finish a suncatcher, pause with it for a moment. Turn it in your hand. Notice the lines where the leaf veins meet the light. Place it in a window that feels quiet. Let it be a small reminder that making slowly gives you time to see simple beauty.
PrintBeautiful Bioplastic Suncatchers with Natural Flowers

Learn to create charming suncatchers using bioplastic and natural flowers, bringing light and color into your space while enjoying a mindful craft experience.
- Prep Time: 15 minutes
- Cook Time: 30 minutes
- Total Time: 45 minutes
- Yield: 1 suncatcher
- Category: Craft
- Method: Crafting
- Cuisine: N/A
- Diet: N/A
Ingredients
- Bioplastic sheets or homemade bioplastic mixture
- Fresh or dried small flowers and leaves
- Parchment paper or silicone baking mat
- A smooth roller or flat wooden spoon (optional)
- Scissors (sharp, safe)
- Heat source (low-temp oven, dehydrator, or double boiler)
- A flat, heatproof tray
- Fine needle or awl
- Cotton twine or thin ribbon (optional)
- Clear craft sealant or gentle varnish (optional)
- Towels and a small tray for tidy workspace
- Timer and thermometer (optional)
Instructions
- Prepare your workspace and gather your flowers.
- Flatten flowers if they are fresh.
- Warm the bioplastic gently.
- Lay a softened sheet on parchment.
- Arrange your flowers on the warm sheet.
- Gently press the plant pieces into the bioplastic.
- Smooth any edges and trim if desired.
- Allow the piece to cool completely.
- Make a small hanging hole with a fine needle.
- Thread twine and hang in a window, or seal for added protection.
Notes
Handle heat sources with care. Use non-toxic materials if hanging near food prep areas. Rotate placements to maintain colors and prevent fading.