

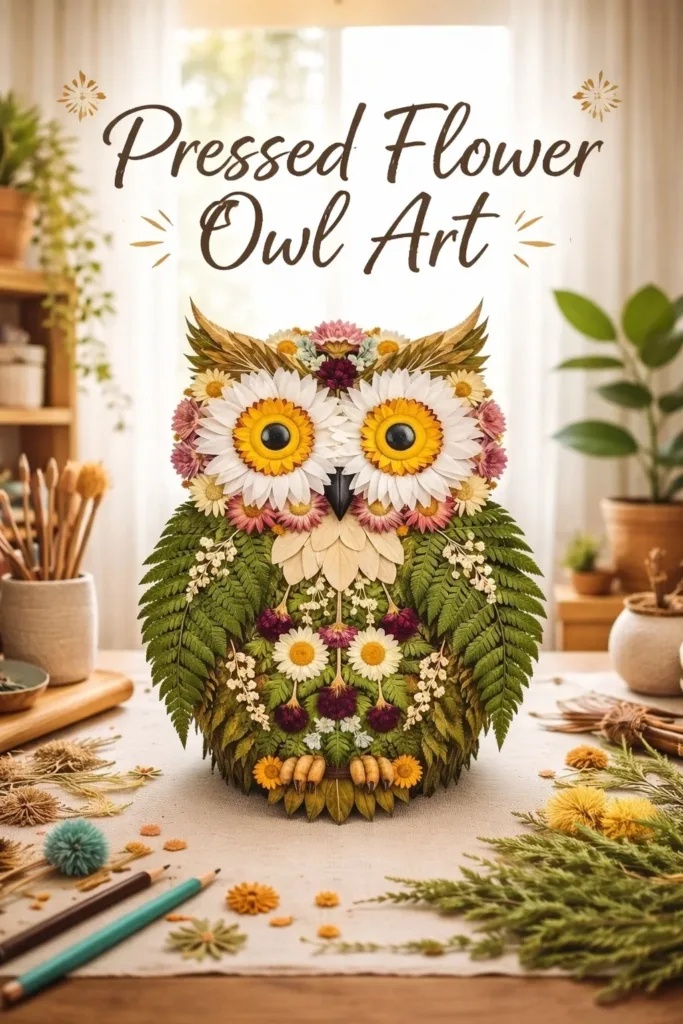
The sunlight on my work table feels like a soft promise. I place a tiny daisy between two sheets of paper and feel the paper give, the petals whisper thin. As I press each bloom, I imagine the owl I will make, splayed wings formed from petals and a face of tiny leaves. This Pressed Flower Owl Art asks only for slow hands and patient breathing, and the small ceremony of arranging nature into a gentle, lasting image calms me in the simplest way. If you have tried making pressed blooms before, you might like the method in my cornstarch bioplastic pressed flowers recipe which shares similar slow, sensory steps.
The Quiet Joy of Making Pressed Flower Owl Art

This project gives you small, steady tasks that invite full attention. You will touch soft petals, hear the faint crinkle of dried leaves, and see color settle into paper. Each motion repeats and slows you down, like walking with soft shoes on moss. The owl shape offers a gentle constraint that feels comforting. It guides your choices without taking away freedom.
When you arrange a petal for a wing, you notice its curve. You adjust a tiny seedpod for an eye and feel pride at the careful placement. The whole task trains your focus in a kind, nurturing way. The result sits quietly on a shelf or wall and returns that calm to you whenever you look at it.
This art also connects you to season and memory. A pressed flower holds a day’s light and keeps it soft. That quiet permanence matters when you want something meaningful and not loud. The process and the finished piece both remind you how small, slow acts can feel like care.
A Gentle Look at the Process
Before you begin, imagine the movements you will make: the soft pat of petals into place, the small press of tweezers, the rhythmic folding of paper. The work moves slowly and repeats in a pleasing rhythm. You lay out petals, step back, then add another—each choice echoes the last.
You will feel textures change as you work. Fresh petals yield a bit, then dry into matte, delicate planes. Leaves change from soft to crisp and make a low, dry sound when moved. These sensations keep you present. If you enjoy making botanical items with alternative mediums, you may find the steps similar to what I describe in the cornstarch bioplastic pressed flowers post, where I talk about preserving color and shape slowly.
I like to take breaks between small steps. I set the owl base aside for five minutes, breathe, and return with a quiet eye. That pause helps choices become clearer and keeps the session gentle rather than hurried.
Materials You’ll Need
- Paper or lightweight watercolor paper, 1 sheet (easy to find)
- A collection of pressed flowers and leaves, assorted sizes (homegrown or collected)
- Tweezers with a fine tip (helps place tiny petals)
- Clear craft glue or archival adhesive, small bottle (substitute: glue pen for more control)
- Pencil for light sketching of the owl shape (optional)
- Scissors for trimming petals or leaves (sharp and small)
- Wax paper or baking paper to protect your surface (simple and cheap)
- Picture frame or card backing for display, size of your choice
- Small weights or books to flatten the finished piece while dry (gentle pressure works best)
- Cotton gloves (optional; helps prevent oils from skin transferring to petals)
Each item supports a calm workflow. A fine-tip tweezer gives control without fuss. A soft pencil mark helps you avoid overthinking where things go. The glue should be archival if you want the art to last; it helps keep petals from darkening over time.
Step-by-Step Directions
-
Prepare a clean, quiet surface and lay wax paper beneath your working paper.
Take a deep breath and sort your pressed flowers by size and color. -
Lightly sketch an owl outline with a soft pencil.
Keep the lines faint; they are a gentle guide, not a rule. -
Start with the owl body: place larger petals or leaf shapes for the torso.
Use tweezers to lower each piece slowly and adjust until it feels balanced. -
Build the wings by layering thin petals outward from the body.
Notice how the edges overlap and let small gaps add texture. -
Form the face with small round petals or seedpods for eyes and a tiny triangle for a beak.
Work calmly; the face often gives the piece its personality. -
Add small accent petals around the head for a feathery effect.
Step back every few pieces to see the whole shape and take a breath. -
Once you like the arrangement, lift each piece carefully, add a small dot of adhesive, and press the petal back down.
Press gently with a fingertip or the back of tweezers for a few seconds. -
Let the glued piece dry under a flat weight for 12 to 24 hours.
This keeps petals flat and prevents lifting; check it after a gentle touch. -
Trim any stray edges and mount the finished art into a frame or onto a card backing.
Seal the frame gently to reduce light and dust exposure. -
Place the finished owl in a calm spot where you can enjoy it regularly.
Avoid direct sun to keep colors from fading quickly.
Each step invites a small pause. I often hum a quiet tune while I work, not to fill silence but to keep my hands steady. I learned from practice that less glue gives a lighter, more natural look. A thin line of adhesive under the center of a petal holds it without darkening the edges.
Where This DIY Fits Into a Calm Routine


Add this practice into a slow hour before bed or a quiet morning ritual. The ritual of gathering and pressing flowers can begin weeks earlier, when you collect petals, press them, and store them gently. Then, on a chosen afternoon, lay the pieces out and let the process unfold.
You can pair this project with a cup of warm tea and a soft playlist. The low clink of a teaspoon and the paper’s whisper become part of the craft’s soundscape. Keep a small basket for scraps and a notebook to record which flowers keep their color best. I keep a list beside my workspace so I know which blooms and leaves stay vibrant after pressing.
If you garden, this project becomes a way to preserve a season. If you walk and forage, it becomes a quiet record of the places you visit. The owl shape stands as a calm reminder of time spent tending to small things.
Caring for Your Finished DIY
Treat your pressed flower owl gently to keep it lasting and lovely. Keep it out of direct sunlight and away from humid rooms like bathrooms. A frame with glass helps protect dust and keeps the petals safe from curious hands or pets.
If you use a shadow box, add a small card of silica gel in the back to control moisture. Avoid adhesive tapes on the petals themselves; they can darken and damage the blooms over time. When you need to clean the frame, wipe the glass from the outside only and avoid pressing on the petals.
When I display mine, I pick a place where I pause often—a narrow wall by the kitchen window, a cozy shelf near my reading chair. Each time I glance at it, I remember the slow rhythm that made it and feel a little calmer.
Gentle Tips & Variations
- Invite a color theme: choose only blues and whites or warm ambers and reds for a cohesive look.
- Try different base papers: watercolor paper holds glue well and gives a soft, textured background.
- Mix mediums lightly: add a small ink sketch around the wings or use a thin gold pen for a touch of warmth.
- Use tiny bits of pressed fern for a feathery texture in place of petals.
- Make a small series: create a set of three mini owls and group them in one frame for a cozy cluster.
These suggestions are invitations. If a choice feels heavy, set it aside. I learned to let the petals lead; sometimes the smallest leaf makes the most honest feather.
FAQs About Pressed Flower Owl Art
Q: Can I use fresh flowers for this project?
A: Fresh flowers need to dry and press first. If you try to glue them while fresh, they will lose shape and darken. Press them for a week or more between paper and weight until they feel dry and slightly crisp.
Q: How can I keep the colors from fading?
A: Keep framed pieces out of direct sunlight and consider glass with UV protection. Lighter, thinner petals can fade faster than dense ones. Using archival glue and acid-free paper also helps preserve color.
Q: What if a petal breaks while I place it?
A: Let the break become a design choice. Smaller pieces can form texture. If you need a full shape, glue the torn piece down gently and layer another tiny petal over the join.
Q: Is this safe for children to help with?
A: Yes, with supervision. Give children blunt scissors, non-toxic glue, and larger petals to practice with. Keep tweezers and sharp tools out of reach. The work invites focus and fine motor practice in a gentle way.
Q: Can I sell pieces I make?
A: You can sell pieces you create, but be honest about materials and care. Consider framing them professionally for buyers and offer care instructions so the art stays lovely.
A Gentle Note Before You Go
This small project rewards patience and a gentle eye. The time you spend placing each petal becomes a quiet gift to yourself. If a piece does not look the way you first pictured it, trust that imperfection often brings warmth and character. The owl will gather stories over time, not just dust.
Let the process be your focus rather than perfection. Sit with a warm drink, invite soft light, and let the rhythm of touch and choice steady you. Each finished owl becomes a small archive of a day, a bloom, and a mindful moment you gave to making.
Conclusion
Thank you for sharing this slow, quiet making space. If you want to see other artistic owls and botanical designs for inspiration, this Floral owl print, Pressed flower owl – Remedy Design Shop shows how different artists use pressed blooms. To read an uplifting creative story about a maker who finds small ways to grow her craft, take a look at Rising Stars: Meet Krystal Barrett – OrlandoVoyager which celebrates gentle creativity and its quiet rewards.
PrintPressed Flower Owl Art

Create a beautiful pressed flower owl art piece with collected petals and leaves, focusing on slow and mindful crafting.
- Prep Time: 10 minutes
- Cook Time: 1440 minutes
- Total Time: 1450 minutes
- Yield: 1 owl art piece
- Category: Crafts
- Method: Crafting
- Cuisine: N/A
- Diet: N/A
Ingredients
- 1 sheet of paper or lightweight watercolor paper
- Assorted pressed flowers and leaves
- Fine-tip tweezers
- Small bottle of clear craft glue or archival adhesive
- Pencil for light sketching (optional)
- Sharp small scissors
- Wax paper or baking paper
- Picture frame or card backing
- Small weights or books
- Cotton gloves (optional)
Instructions
- Prepare a clean, quiet surface and lay wax paper beneath your working paper.
- Take a deep breath and sort your pressed flowers by size and color.
- Lightly sketch an owl outline with a soft pencil.
- Start with the owl body: place larger petals or leaf shapes for the torso.
- Build the wings by layering thin petals outward from the body.
- Form the face with small round petals or seedpods for eyes and a tiny triangle for a beak.
- Add small accent petals around the head for a feathery effect.
- Once you like the arrangement, lift each piece carefully, add a small dot of adhesive, and press the petal back down.
- Let the glued piece dry under a flat weight for 12 to 24 hours.
- Trim any stray edges and mount the finished art into a frame or onto a card backing.
- Place the finished owl in a calm spot where you can enjoy it regularly.
Notes
This project can be a meditative practice, inviting focus and calm. Remember to be gentle with the finished piece to maintain its beauty.