

A soft spill of light rests on the work table as I hold a tiny glass heart between my fingers. It feels cool and smooth, with a weight that asks me to slow down. Making Crystal Hearts invites that small pause, a quiet ritual of watching sparkle form and listening for the faint whisper of crystals settling into place.
Why Crystal Hearts Feels Comforting to Create

Crystal Hearts ask for calm attention more than speed. You mix, you wait, and you watch subtle change. The method brings a gentle rhythm to the room. The slow bloom of crystals mirrors the breath, and that takes the making from task to meditation.
When the solution begins to clear and crystals gather, you notice tiny textures: grainy edges, glossy facets, and the way light fractures through a new surface. Those sensory moments help me settle. The process supports quiet focus and small, sensory rewards, which is why this project fits so well with mindful crafting.
Sometimes I return to this activity when the day feels noisy. I set a small saucer of crystals by the window and let sunlight sift through. The sight calms me. If you want ideas for other crystal projects, our detailed Crystal Hearts project page shares similar methods and inspirations.
The Flow of Making Crystal Hearts
The first part of the process moves in broad, warm gestures. You pour, stir, and notice steam or a light scent from the solution. Those movements feel domestic and familiar.
Then the work shifts into stillness. You place forms or shapes into the mixture and leave them to become. The quiet waiting fills with small sounds and sensory details. The surface of the solution may tremble with a passing breeze. The rim of the jar may feel cool under your palm.
I like to place a soft cloth under my jars, and I set a timer that will not hurry me. Moving from hands-on stirring to peaceful waiting creates a lilting rhythm. If you want a different guide or a variant on growing colored crystals, our step-through for pink shapes shows a similar flow with gentle color notes at Growing Crystal Pink Hearts.
Materials You’ll Need
- Borax powder or another crystal-growing agent (easy to find at many stores)
- Hot water (just off-boil)
- Small glass jars or heatproof bowls
- Heart-shaped pipe cleaners or small cookie cutters (optional)
- String or thin twine for suspending shapes
- A wooden skewer or pencil to rest the string across a jar
- Tweezers for gentle handling (optional, but helpful when crystals are delicate)
- Food coloring or fabric dye for optional tint (subtle color works best)
- A soft towel to protect surfaces and absorb drips
Notes: Borax is a common choice because it dissolves well in hot water and encourages visible crystal formation. If you prefer a different chemistry, you can explore alternative recipes like baking soda crystal trees for a softer effect at Baking Soda Crystal Growing Tree. Choose materials that feel safe and familiar to you.
Step-by-Step Directions
- Prepare a calm workspace and set out a soft towel.
Keep water nearby and good ventilation.
Heat water until very warm but not actively boiling. - Measure borax and stir into the hot water slowly.
Use about three tablespoons per cup, adjusting as needed.
Stir until the powder mostly dissolves and the solution looks clear. - Shape your hearts with pipe cleaners or use cookie cutters.
Form gentle curves and press connections so they hold.
If you use metal cutters, place them on a small tray first. - Tie a length of string to each heart for suspending.
Use a knot that feels secure but easy to remove later.
Leave enough string to rest across the jar rim. - Pour the hot borax solution into jars so they are half full.
Pour slowly to avoid splashing and sudden steam.
The glass should feel warm but manageable. - Suspend the hearts in the jars without touching the sides.
Rest the string on a skewer or pencil balanced across the jar top.
Make sure the heart hangs freely in the center of the solution. - Cover the jars with a soft cloth to keep dust out.
Leave them somewhere still and undisturbed.
You will start to see tiny crystals form within a few hours. - Check periodically with calm, patient curiosity.
Lift the cloth and watch how crystals gather at edges.
If you see the start of formation, avoid jarring the jar. - When crystals reach the size you like, remove the hearts carefully.
Use tweezers if needed and allow excess solution to drip back.
Gently blot with a soft towel and let the hearts dry on a rack. - Rinse the finished hearts with cool water to remove residue.
Pat dry and set them on a cloth to finish drying completely.
Handle them slowly; newly formed crystals can chip if dropped. - Consider sealing the hearts with a light spray of clear sealant.
This step helps preserve fragile crystals and reduce shedding.
Test on a small piece first to be sure the look stays gentle. - Take a moment to label the date and note any color or scent.
These small notes help you remember what changed and what felt good.
This makes future experiments more mindful and less guesswork.
Bringing Crystal Hearts Into Your Space

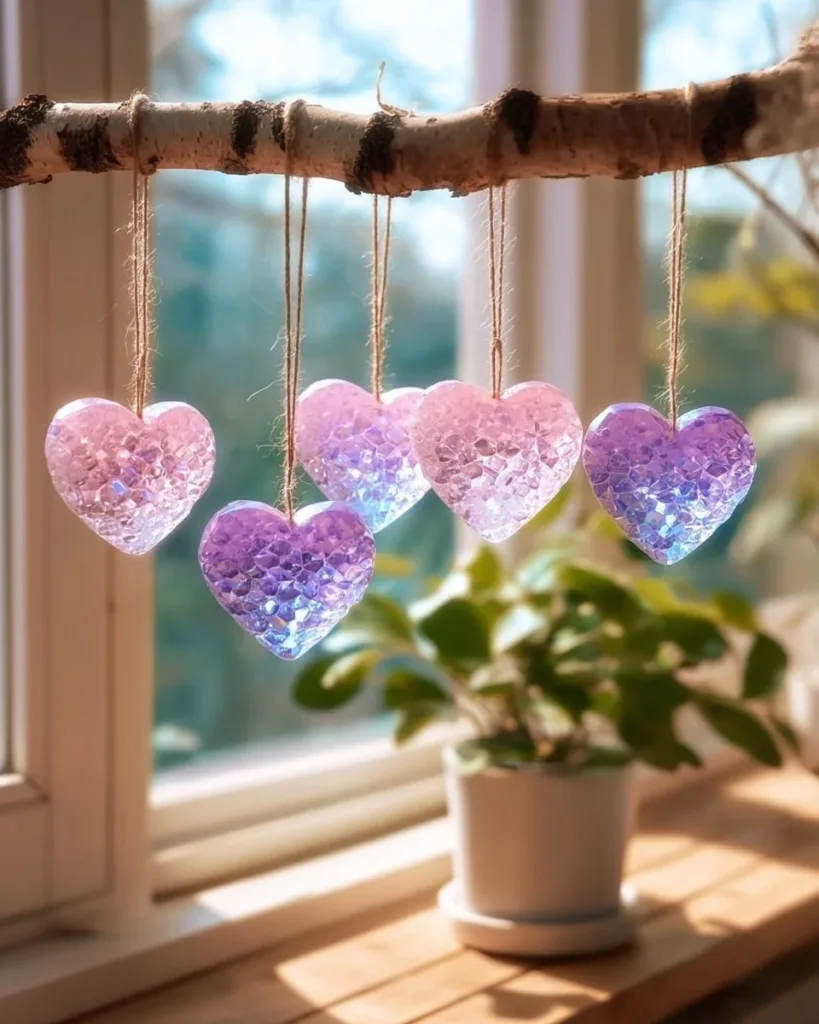
Crystal Hearts appear delicate and purposeful when placed where light can pass through them. Hang one near a sunny window and notice how the facets catch late afternoon light. Lay a few on a bedside table and breathe with them as the room grows quiet.
You can use them as little gifts tucked into a handwritten note, or as quiet anchors on a mantel. Grouping hearts in pairs or small clusters creates a soft composition. If you prefer mobile display, string several hearts along a narrow ribbon and hang them so they move in a gentle breeze.
I once placed a single heart on the kitchen sill. Every time I washed dishes, I glanced at that small, crystalline bloom and felt my shoulders relax. Objects made by hand often carry a different kind of presence, and these hearts reward gentle, recurring glances.
Keeping It for Later
Store Crystal Hearts in a small box lined with tissue or between soft layers of cloth.
Avoid cramped boxes where edges could rub and dislodge crystals.
Keep them in dry places because humidity can soften some crystal formations.

If you want to reuse a mold or pipe cleaner frame for a new heart, gently brush off loose crystals first.
Soak the frame briefly in warm water to release stubborn bits, then let it dry.
Some frames, like pipe cleaners, will degrade after a few uses, so have extras on hand.
For longer-term preservation, consider a display under glass.
A small cloche or shadow box protects the pieces from dust and curious hands.
Labeling the display with the date and a few words about why you made it helps the object carry memory.
If you plan to gift or mail a heart, cushion it with shredded paper and secure it with padding.
Crystals like stillness, so package them to avoid vibration and impact.
A simple note explaining the making process adds warmth and reduces worry for the recipient.
What I’ve Learned While Making This
Allow imperfections to be part of the beauty.
Each crystal grows its own tiny language of ridges and facets.
I used to expect perfect symmetry, and now I wait for surprise instead.
I also learned to trust slow processes.
When the solution cools too quickly or the jar moves, the crystals look rough and sparse.
Consistent warmth and stillness help them form with clearer edges.
Safety matters. I wear light gloves when I handle the hot solution and keep it away from small children and pets.
Borax is useful and effective, but it needs respect. If you prefer to avoid it, try alternative recipes like our baking soda crystal trees for a softer chemistry at Baking Soda Crystal Growing Trees.
Finally, make space for the pause.
I place a kettle on to heat water, then sit with a cup while the solution cools.
Those small rituals deepen the experience and keep the making gentle, not rushed.
Gentle Tips & Variations
- Invite color softly: Add a drop of food coloring for pale, watery hues.
Keep color light to preserve crystal clarity. - Try different shapes: Use small plastic or glass forms as bases.
Crystals will take on the general shape but develop their own surface textures. - Layer textures: After the first growth, let the heart dry and then re-submerge for a secondary bloom.
This creates a richer, layered surface that holds light differently. - Make tiny gift sets: Mount a few small hearts on a recycled card and wrap them in tissue.
Add a brief note about how they were made. - Slow the process with cooler water to produce finer, denser crystals.
Warmer solutions tend to create larger but sparser crystals.
Each tip is an invitation rather than a rule. Try one and notice how it shifts the sensory feel of the finished piece.
FAQs About Crystal Hearts
Are these crystals safe to handle?
Handle them with care. When fully dry and sealed they feel stable, but loose fragments can flake.
Keep them away from children who might put small pieces in their mouths.
How long does crystal growth take?
You will see initial formation within a few hours.
For fuller coverage you may need to wait 12 to 48 hours.
The exact time varies with temperature and concentration.
Can I dye the crystals bright colors?
You can add dye, but bright colors sometimes mask the delicate crystalline light.
I prefer pale washes for a softer, more luminous look.
Can I reuse the solution to grow more hearts?
You can sometimes use the leftover solution once, but its effectiveness decreases.
Fresh, hot solution gives more predictable results.
What happens if my crystals crack or fall off?
Crystals can chip if bumped. If pieces fall, you can re-melt and re-grow on the same frame or conserve the fragments in a shadow box.
Treat breakage as part of the object’s living history.
A Gentle Note Before You Go
Take a final breath and notice how your hands remember the small curves and cool glass.
The act of making Crystal Hearts offers more than an object.
It gives a slow, repeatable ritual that invites attention to subtle textures, quiet light, and patient time.
If you would like to explore other crystal experiments that pair well with this making practice, I find these two resources thoughtfully useful in understanding the science and options available. The classic Borax method is well described in the Borax Crystal Hearts Experiment, which explains the simple chemistry behind the crystallization. For ready-made shapes and inspiration you might consider browsing ideas like those found at Crystal Hearts – Amazon.com.
Conclusion
I hope this guide helps you approach Crystal Hearts with a calm hand and curious breath.
Make room for surprise and treat each piece as a gentle reminder that making can be slow, satisfying, and quietly beautiful.
When you make, listen for small changes, notice how light moves, and let the process itself be the reward.
Crystal Hearts

A mindful crafting project to create beautiful crystal hearts, promoting calm and focus.
- Prep Time: 15 minutes
- Cook Time: 45 minutes
- Total Time: 60 minutes
- Yield: 4-6 hearts
- Category: Craft
- Method: Crafting
- Cuisine: N/A
- Diet: N/A
Ingredients
- Borax powder (or another crystal-growing agent)
- Hot water (just off-boil)
- Small glass jars or heatproof bowls
- Heart-shaped pipe cleaners or small cookie cutters (optional)
- String or thin twine for suspending shapes
- A wooden skewer or pencil to rest the string across a jar
- Tweezers for gentle handling (optional)
- Food coloring or fabric dye for optional tint
- A soft towel to protect surfaces and absorb drips
Instructions
- Prepare a calm workspace and set out a soft towel.
- Keep water nearby and ensure good ventilation.
- Heat water until very warm but not actively boiling.
- Measure borax and stir into the hot water slowly (about three tablespoons per cup).
- Shape your hearts with pipe cleaners or cookie cutters.
- Tie a length of string to each heart for suspending.
- Pour the hot borax solution into jars until they are half full.
- Suspend the hearts in the jars without touching the sides.
- Cover the jars with a soft cloth to keep dust out.
- Check periodically and watch how crystals gather.
- When crystals reach the desired size, remove the hearts carefully.
- Rinse the finished hearts with cool water to remove residue.
- Optionally seal the hearts with a light spray of clear sealant.
- Label the date and note any color or scent.
Notes
Borax dissolves well and encourages visible crystal formation. Handle with care, especially around children and pets. Consider alternative recipes if preferred.