

There’s something wondrous about the simple act of squeezing a homemade bouncing ball in your hand. The soft, pliable texture yields under gentle pressure, inviting you to notice its coolness. When you let go, it springs back, light glinting off its surface as it dances on the floor, sending ripples of joy through the air. This tactile experience, accompanied by the rhythmic sound of the ball hitting the ground, creates a small moment of delight. Homemade bouncing balls embody not just the joy of playful creation, but also an opportunity to engage fully with sensory details, inviting calmness into our busy lives.
Why Make This Homemade Bouncing Balls

Creating your own bouncing balls offers more than just a fun activity; it provides an escape into mindfulness. The process of blending materials, rolling them into shape, and witnessing their transformation brings a unique satisfaction. Each touch engages your hands, reminding you to be present.
As you gather your materials and begin to craft, you slow down, leaving behind the rush of daily distractions. The soft squish of the mixture in your palms creates a rhythm, grounding you in the moment. Crafting these balls feels cozy and intimate, inviting you to embrace the warmth of creativity. You experience a connection to the simple joys of life, making it not just a craft but a way to cultivate mindfulness and serenity.
The Flow of Making Homemade Bouncing Balls
Before diving into this delightful project, it’s helpful to envision the steps. You will begin with simple ingredients, each chosen for their role in creating a bouncy ball that is a joy to hold and throw. The mix of textures and sounds during the crafting process will engage your senses deeply. You’ll notice the sticky feeling as you blend and mold, followed by the satisfying firmness as the balls take their shape.
From measuring to rolling, each part of the process has a gentle rhythm. You’ll find your movements flowing, as if dancing in a quiet space filled with creativity. The bright colors and soft materials invite exploration, creating an atmosphere that feels safe and welcoming.
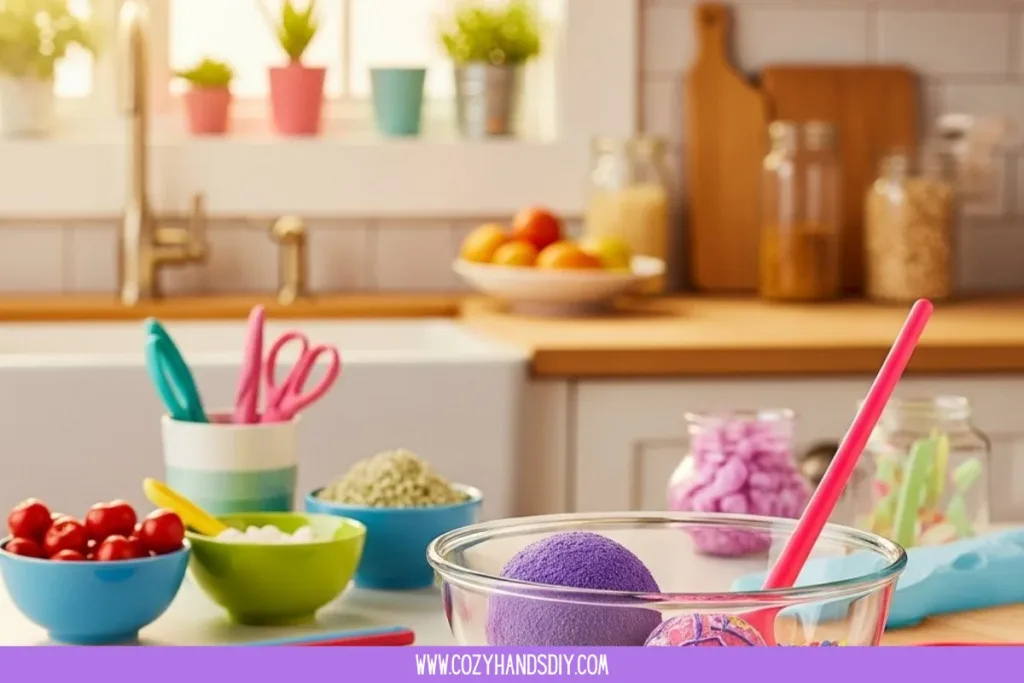
Materials You’ll Need

Here are the simple supplies needed to create your homemade bouncing balls:
- 1 cup of glue (white school glue works well)
- 1 cup of liquid starch (available in the laundry aisle)
- Food coloring (optional for vibrant colors)
- Cornstarch or flour (for a textured finish)
- Mixing bowl (sturdy and easy to clean)
- Spoon or spatula (to mix ingredients)
- Measuring cups (for accurate quantities)
- Wax paper or a silicone mat (to prevent sticking)
These materials are easily found, often already in your home or at a nearby store. They blend together harmoniously, forming the bouncing balls. The only need for special attention may be when choosing the liquid starch, ensuring it is suitable for your crafting needs.
Step-by-Step Directions
- Begin by measuring one cup of white glue into your mixing bowl. Enjoy the smooth, cool texture as it glides into the bowl.
- Add one cup of liquid starch to the glue. You will notice a slight shift in texture as it combines, becoming thick and gelatinous.
- If you wish to introduce color, add a few drops of food coloring. Start with one drop and mix thoroughly, watching the color bloom through the mixture.
- Gently sprinkle in a tablespoon of cornstarch or flour, stirring carefully. This step enhances the texture and creates a pleasing resilience.
- As the mixture begins to come together and feels less sticky, use your hands to knead and roll it into a ball shape. The sensation of the mixture warming under your fingers is comforting.
- Continue to knead until the ball feels firm, yet still soft. If it feels too sticky, sprinkle a little more cornstarch or flour as you work.
- Once you have a smooth ball, set it on a piece of wax paper or a silicone mat to rest for about one hour. This allows it to firm up even more.
- After it has set, give it a gentle bounce. Notice the way it feels in your hand and the way it springs back.
Using Homemade Bouncing Balls in Everyday Life

Once your homemade bouncing balls are ready, they can become a delightful addition to your day. Playfully tossing them around can spark joy, encouraging you to indulge in moments of lightheartedness.
You might choose to keep them in a cozy corner of your home, inviting spontaneous play and laughter. They can serve as a wonderful way to engage children in creative play, promoting movement and interaction. Bouncing balls also make delightful stress-relievers. When you need a moment to step away from the rush, squeezing or tossing these handmade treasures provides a grounding experience.
Integrating these balls into your routines can open up opportunities for mindfulness. Maybe you take one during your daily walk, allowing it to bounce alongside you, guiding your pace. Feel the vibrant energy they bring to simple interactions, whether with family, friends, or even just yourself.
Caring for Your Finished DIY
As with any little treasure you create, thoughtful care will help your homemade bouncing balls last longer. Store them in a cool, dry place, free from excess heat that could distort their shape over time. You can keep them in a cloth bag or a soft container to prevent any accidental squishing.
If they begin to lose their bounce, consider re-kneading them gently. This will help restore their shape and feel, just as warm hands can bring a little life back into any creation. When you give them the care they need, these little balls not only remain a source of fun but also a reminder of the joy found in gentle crafting.
Small Ways to Make It Your Own
Expanding on the basic recipe can lead to even more enjoyment. Here are some gentle invitations to inspire your creativity:
- Experiment with different colors by mixing various food colorings. This can create swirls or vibrant designs that make each ball unique.
- Try adding essential oils like lavender or citrus to the mixture for an aromatic experience that calms your senses.
- For added texture, consider incorporating glitter or sand into the mix. This can give your balls a sparkly or gritty feel, letting your creativity shine.
- Explore the idea of making smaller or larger balls. Adjust the mixture quantities as needed to find the perfect size for your creations.
- Consider customizing the color scheme for special occasions, such as holidays or family celebrations.
These variations can offer new delight during the crafting process, keeping each experience fresh and engaging. As you make adjustments, remember to savor the process as much as the outcome.
Discover More Sensory Play Ideas
If this activity sparked curiosity or calm, explore our full collection of sensory play ideas. These hands-on recipes are designed to engage the senses, encourage exploration, and create meaningful play moments with simple materials.
FAQs
What if my balls are too sticky or too hard?
If your balls feel sticky, you can knead in a bit more cornstarch or flour. If they are too hard, try adding a few drops of water and kneading gently until they soften.
How long do these balls last?
With proper care, your homemade bouncing balls can last for weeks or even months. Store them in a cool place to ensure they maintain their shape and bounce.
Can I use different kinds of glue or corn starch?
While white school glue and liquid starch work well, feel free to experiment with similar products. Just be mindful of the consistency, as different brands may react differently.
Are these balls safe for young children?
Supervision is key when little ones are involved. The materials are generally safe, but be sure they understand the importance of treating the balls gently.
Can I make these without food coloring?
Absolutely! The balls can be enjoyed just as much without color. The simplicity often adds to their charm.
Final Reflections on Making Homemade Bouncing Balls
Creating homemade bouncing balls is more than just a fun project. It can become a calming ritual, helping you connect with both yourself and the materials in a meaningful way. Each touch, each bounce, leads to moments of joy and relaxation, reminding you of the beauty in simple creations.
As you wrap up this cozy project, take a moment to appreciate what you’ve created. Allow yourself to enjoy them in your own time, thoughtful and grounded. Invite joy and relaxation into your everyday, letting these little balls bring a sense of playfulness and calm. When you make and use these delightful bouncy balls, you embrace creativity and mindfulness, enriching both your hands and heart.
Find Daily Cozy DIY Inspiration on Pinterest
For even more gentle DIY ideas, creative inspiration, and cozy hands-on projects, follow Cozy Hands DIY on Pinterest. We share new crafts daily, save-worthy visuals, and calming recipes you can come back to whenever you need a little creative peace.
Homemade Bouncing Balls

A delightful guide to creating homemade bouncing balls that provide joy and mindfulness through hands-on crafting.
- Prep Time: 10 minutes
- Cook Time: 60 minutes
- Total Time: 70 minutes
- Yield: 1 bouncing ball
- Category: Crafts
- Method: DIY Crafting
- Cuisine: N/A
- Diet: N/A
Ingredients
- 1 cup white school glue
- 1 cup liquid starch
- Food coloring (optional)
- 1 tablespoon cornstarch or flour
- Mixing bowl
- Spoon or spatula
- Measuring cups
- Wax paper or silicone mat
Instructions
- Measure and pour 1 cup of white glue into a mixing bowl.
- Add 1 cup of liquid starch and mix thoroughly until thick.
- If desired, add food coloring and mix to achieve the desired color.
- Sprinkle in 1 tablespoon of cornstarch or flour and stir carefully.
- Knead the mixture with your hands to form a ball shape.
- Continue kneading until the ball feels firm but still soft; add more cornstarch if too sticky.
- Place the ball on wax paper or a silicone mat and let it rest for about 1 hour.
- After resting, give the ball a gentle bounce to enjoy its springiness.
Notes
For variations, try adding essential oils or incorporate glitter for extra fun.