Flower Pendants: Preserve Delicate Floral Beauty into Wearable Art
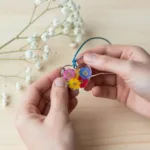
A charming DIY project to create beautiful flower pendants that encapsulate the beauty of nature in wearable art.
- Prep Time: 15 minutes
- Cook Time: 0 minutes
- Total Time: 15 minutes
- Yield: 4 pendants
- Category: Craft
- Method: Crafting
- Cuisine: N/A
- Diet: N/A
Ingredients
- Fresh flowers (your favorites or local blooms)
- A small piece of jewelry resin
- Silicone pendant molds (various shapes)
- Gloves (to keep your hands clean)
- A mixing stick (for stirring)
- A small measuring cup
- A heat gun or torch (to remove bubbles)
- Optional: Color pigments or sparkle (for customization)
Instructions
- Prepare Your Flowers: Begin by choosing and preparing your flowers. Ensure they are clean and dry, as this helps preserve their beauty within the resin.
- Arrange in Molds: Carefully place your flowers in the silicone molds, arranging them so they will be visible in the final piece.
- Mix the Resin: Following the instructions on your resin package, measure and mix the resin in a small cup.
- Pour the Resin: Slowly pour the mixed resin over the flowers in the molds, filling them just enough to cover the petals.
- Remove Air Bubbles: Use your heat gun or torch carefully over the surface to remove any air bubbles.
- Cure the Resin: Allow the resin to cure as per the instructions provided with your product.
- Demold Your Pendants: Once fully cured, gently remove the pendants from the molds.
- Attach a Bail: To wear your flower pendants, attach a bail to the top using a small jump ring or adhesive.
Notes
Feel free to explore local craft stores for supplies. Store pendants in a cool, dry place away from direct sunlight to ensure longevity.
Find it online: https://www.cozyhandsdiy.com/flower-pendants-cozy-wearable-art/