

In a quiet corner of your space, the soft light catches shimmering crystals, reflecting the gentle dance of colors. These Baking Soda Crystal Growing Trees capture the tranquil spirit of nature’s beauty, transforming simple materials into an enchanting display. As you engage with the textures and shapes, a sense of calm washes over you, inviting a moment of pause. This simple yet rewarding project beckons you to slow down, focus on your hands, and craft a little piece of magic.
The Heart Behind This DIY
Creating Baking Soda Crystal Growing Trees brings more than just a visual delight; it offers a meaningful experience. As you gather the materials, you might notice the soft weight of the baking soda in your palm or the smoothness of the water as you mix them. These touches ground you in the moment, allowing your mind to focus on the process rather than the noise of daily life.
The act of making becomes a form of meditation. With each careful step, you immerse yourself in the tactile world of DIY, creating something not just for the eyes but for the heart. Watching the crystals form day by day, you connect with the beauty of patience. It teaches you to sit back and simply enjoy the unfolding magic, reminding you that creativity can thrive in silence and contemplation.

The Flow of Making Baking Soda Crystal Growing Trees
Before you begin, envision how the gentle motions of this DIY will guide you through a calming rhythm. Picture the pouring of the baking soda, its light, powdery texture flowing smoothly between your fingers. As you prepare the mixture, listen to the soft clink of materials coming together. The simplicity of this project allows thoughts to slow, encouraging a flow where creativity flourishes. It doesn’t demand perfection; rather, it invites exploration.
Your senses will guide you as you craft your trees. You will feel the weight of the materials, sense the changes in texture as crystals form, and perhaps notice the subtle warmth as the water dissolves the baking soda. This fluid process of making works in concert with your breath, creating a gentle pace that allows for reflection and joy.
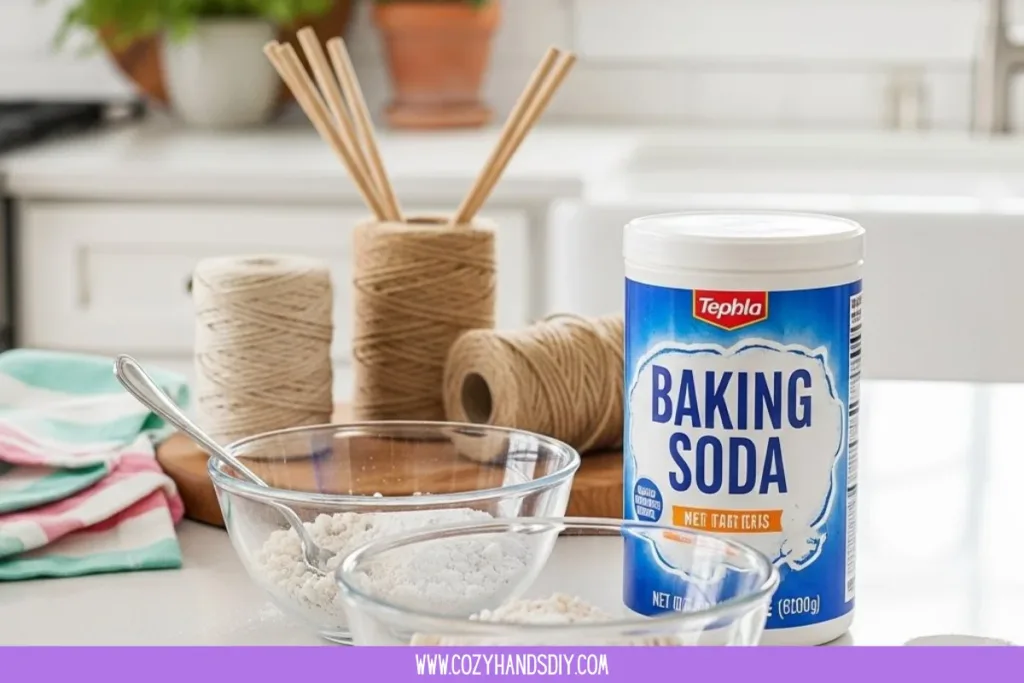
Gathering Your Materials
- Baking soda (easy to find)
- Water (tap water works well)
- A heat-safe container (like a small bowl or jar)
- A spoon for stirring (wooden or metal)
- Optional: food coloring or glitter for added visual effect
- Optional: a tray or plate to catch spills
These materials create a simple foundation for your trees. The baking soda’s texture is soft and inviting, while the clear water transforms into a canvas for your creation. If you feel adventurous, adding a touch of food coloring or glitter can infuse a bit more personality into your unique trees.
Step-by-Step Directions
The steps to make these crystal-growing trees are straightforward, allowing you to focus on the mindfulness of the craft.
- Begin by measuring two tablespoons of baking soda. Feel the powdery texture as it slips through your fingers.
- In your heat-safe container, pour in a half cup of hot water. Listen closely as it gently splashes against the sides.
- Stir the mixture slowly with your spoon, watching the baking soda dissolve. Notice the smoothness as it combines fully.
- If you choose to add color, now is the time. A few drops of food coloring can create vibrant crystals.
- Let the mixture sit undisturbed. You will not require additional movement this is a moment of patience.
- Over the next day or two, watch your trees take shape. Crystals will slowly begin to form; notice how they glisten and grow.
- As your trees develop, feel free to adjust colors or add more glitter at various stages of growth.
- When satisfied with your crystals, carefully remove them from the container. Observe their unique shapes and textures.

Bringing Baking Soda Crystal Growing Trees Into Your Space
Once your trees have formed and you’ve taken a moment to admire your handiwork, consider how they can enhance your environment. Display them on a sunny windowsill where light can accentuate their sparkle. They might bring a playful touch to a desk or a gentle charm to a child’s room.
You could create a small landscape with multiple trees, each varying in size and color. This variation invites creativity and can infuse your space with a personal touch. As you walk by your crystals, take time to appreciate the calm energy they bring you. They can serve as a delightful reminder of the joy found in simple pursuits, bringing a sense of peace to your everyday life.
Keeping It for Later
To maintain your sparkling creations, consider how you might store them thoughtfully. If you want to keep the Baking Soda Crystal Growing Trees intact, store them in a cool, dry place away from direct sunlight. This will help preserve their colors and structure.
If you wish to reuse the materials, you can gently dissolve the crystals in warm water and save the solution. A small container can hold any leftover mixture for another crafting session later. Simply allow the old mixture to cool, and when you’re ready, you can create fresh crystal trees once again, taking advantage of the earlier work.
Gentle Tips & Variations
- Consider exploring different shapes. You can make small trees, large ones, or even clusters of varying heights. Allow your imagination to guide you.
- Experiment with textures. Try using different types of salt or sugar to see how they form crystals, creating unique designs.
- Invite others to join you in this project. Sharing the experience can amplify the joy of creation.
- Decorate the trees. A gentle sprinkle of glitter can add a feeling of magic, while leaves made from paper can bring an additional layer to your display.
- Reflect on the process. After completion, take a moment to journal about your experience. Consider how it felt to watch the crystals grow and what you learned from the journey.
Explore More Mindfulness Crafts
If you enjoyed this calming project, you’ll love our full collection of mindfulness crafts. These hands-on DIY recipes are designed to slow things down, encourage focus, and turn simple materials into peaceful, creative moments you can enjoy anytime.
FAQs
What if my crystals don’t grow as expected?
Sometimes growth can be slow or vary from what you envision. This is part of the beauty of the process. If they appear too small, you might try letting them sit longer or adjusting the water ratio next time.
Can I use other colors or materials?
Yes, feel free to experiment with different types of food coloring or even natural dyes. Just keep in mind that the materials you use will affect the crystals’ appearance.
How should I clean up after the project?
The materials used are typically non-toxic and easy to clean. Simply rinse your container and utensils with warm water. If needed, a gentle scrub can remove any residue left behind.
How long will the crystals last?
With proper care, your crystal creations can last indefinitely, especially if stored appropriately. They may lose some vibrancy over time but can still hold their charm.
Can I adapt this project for kids?
Absolutely! This project provides a wonderful opportunity for children to explore science and creativity. Ensure adult supervision when handling hot water, and adjust the materials based on their age.
Baking Soda Crystal Growing Trees

Transform simple materials into stunning baking soda crystal trees, offering a rewarding and calming DIY experience.
- Prep Time: 10 minutes
- Cook Time: 2880 minutes
- Total Time: 2890 minutes
- Yield: Multiple crystal trees
- Category: DIY Craft
- Method: Crafting
- Cuisine: N/A
- Diet: N/A
Ingredients
- 2 tablespoons baking soda
- 1/2 cup hot water
- A heat-safe container (small bowl or jar)
- A spoon for stirring (wooden or metal)
- Optional: food coloring or glitter
- Optional: a tray or plate to catch spills
Instructions
- Measure 2 tablespoons of baking soda.
- In a heat-safe container, pour in 1/2 cup of hot water.
- Stir the mixture slowly with a spoon until the baking soda dissolves completely.
- If desired, add a few drops of food coloring for vibrant crystals.
- Let the mixture sit undisturbed for 1-2 days to allow crystals to form.
- Observe the growth of your crystals and adjust colors or glitter as needed.
- Once satisfied with your crystals, carefully remove them from the container and display them as desired.
Notes
Store finished trees in a cool, dry place to maintain their color and structure. Consider experimenting with different shapes and additives for unique results.
A Gentle Note Before You Go
As you reflect on your journey with Baking Soda Crystal Growing Trees, soak in the calm that arose during the process of creating. Each crystal tells a story of patience, creativity, and presence. Your hands have shaped something beautiful, an offering to both yourself and your space.
Remember, this DIY is not just about the end result; it’s about the small moments you took to slow down, savor, and enjoy the act of making. As you move forward, let the spirit of this project remind you that creation thrives in softness. Allow space for your imagination to flourish, grounding your spirit in the gentle art of making.
Find Daily Cozy DIY Inspiration on Pinterest
For even more gentle DIY ideas, creative inspiration, and cozy hands-on projects, follow Cozy Hands DIY on Pinterest. We share new crafts daily, save-worthy visuals, and calming recipes you can come back to whenever you need a little creative peace.