

Magic Window Clings invite a delicate dance of light and joy into your home. Picture the way sunlight streams through these soft, colorful creations, casting gentle reflections and shadows that transform any space. As you lean into this project, notice the textures of the materials, the smooth surfaces of the clings, and the playful way they interact with light. It creates a cozy atmosphere, radiating warmth and tranquility. Incorporating magic window clings into your environment not only brightens the room but also offers a moment to pause and appreciate the beauty around you, making the process feel slow and intentional. You can explore more about the enchanting aesthetics of window art through projects like Window Magic.
The Quiet Joy of Making Magic Window Clings
Creating magic window clings is more than just a craft; it’s a meaningful journey that invites you to slow down. The process envelops you in a cocoon of sensory experiences, focusing on the colors, the coolness of materials, and the soft sounds of your hands at work. Each step brings a sense of calm as you watch patterns and designs emerge, which can create a peaceful meditative state. This project is perfect for engaging with your creativity, reminding you to be present and connect with the materials in a tactile way. You may also find Boho Magic Wands useful.

A Gentle Look at the Process
When you start making magic window clings, it’s essential to be mindful of the rhythm of your movements. Imagine the gentle swish of paint as you apply it, the soft squish of materials under your fingers, and the satisfying moment when you peel away the finished product to reveal its design. This gentle process fosters a harmonious connection with your surroundings. The act of creating becomes a meditative experience, deepening your appreciation for the craft and the space you are transforming. You may also find Diy Bioplastic Suncatchers Natures Window Art 2 useful.
Simple Supplies for This DIY
To create your own magic window clings, gather the following materials:
- Clear plastic sheets (easy to find at craft stores)
- Window clings or special paint (substitute-friendly based on your preferences)
- Paintbrushes (various sizes for detail)
- Scissors (for cutting shapes)
- A workspace covered with newspaper or craft mat (to protect your surfaces)
These supplies will help you on your journey to crafting beautiful window art.
Step-by-Step Directions
- Begin by choosing your design. Sketch it lightly on a piece of paper.
- Place a clear plastic sheet over your design. Secure it if necessary.
- Using paint or window cling material, carefully outline your design, taking your time to enjoy the flow of the brush.
- Once the outline is set, fill in the shapes with color. Feel free to blend colors to create depth.
- Allow the materials to dry completely before carefully removing the cling from the plastic sheet.
- Test the cling by placing it on a clean window. Adjust as needed to perfect the positioning.

Enjoying the Finished Piece
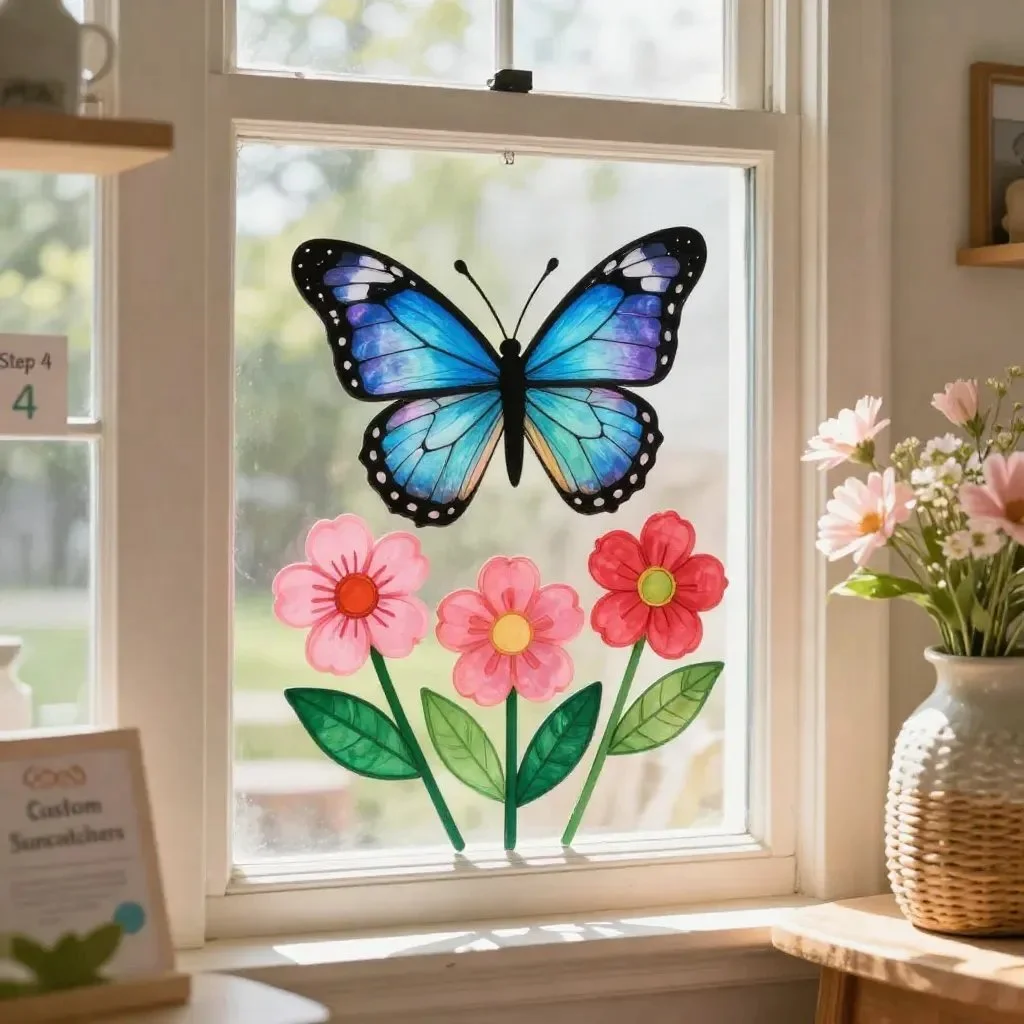
Once your magic window clings are complete, it’s time to display them. Positioning them on windows allows sunlight to filter through, illuminating the colors and designs. Take a moment to step back and appreciate your handiwork. Notice how the patterns shift with the changing light throughout the day, creating an ever-evolving display. This can bring an added layer of calm to your daily routine as you enjoy the gentle interplay of light and shadow.
Making This DIY Last
To keep your magic window clings in good condition, store them flat between sheets of parchment paper. This will protect them from dust and prevent them from losing their shape. If you wish to reuse them, peel them gently from the window. They can be washed with a gentle solution of soap and water to keep them bright and clean. Handling them carefully ensures they’ll last for many seasons of enjoyment.
Gentle Tips & Variations
- Personalize your clings by adding glitter or gems for extra sparkle, inviting a bit of whimsy.
- Experiment with layering colors to create depth—a calming process that allows for exploration.
- Consider themes based on seasons or holidays; for instance, fall leaves or winter snowflakes can bring a cozy touch to your windows.
- Invite friends or family to join you, transforming this into a communal moment of creativity.
- Don’t hesitate to create larger pieces that can become art focal points in your space.

FAQs About Magic Window Clings
Q: How long do the clings last?
A: With proper care, your magic window clings can last for multiple seasons, retaining their vibrancy and charm.
Q: Can I use any type of paint for this project?
A: While some paints may work, using window-specific paints or cling materials designed for this purpose generally yields the best results.
Q: Is it difficult to remove the clings once they’re applied?
A: No, they can be gently peeled off without damaging your windows, allowing for easy repositioning or removal.
A Gentle Note Before You Go
As you embark on making your magic window clings, take your time to enjoy each step, from gathering materials to the satisfied reflection on your finished work. Each creation is a gentle reminder of the beauty in slowing down and being present. For more inspiration on how to use window art in home decor, check out other creative projects like DIY Bioplastic Suncatchers. You can also explore variations on window decorating using products such as Magic New Vue Perforated Window Film to enhance the charm of your living space.
PrintMagic Window Clings

A delightful craft project for making colorful window clings that brighten up any space.
- Prep Time: 20 minutes
- Cook Time: 15 minutes
- Total Time: 35 minutes
- Yield: Several window clings
- Category: Craft
- Method: Crafting
- Cuisine: N/A
- Diet: N/A
Ingredients
- Clear plastic sheets
- Window clings or special paint
- Paintbrushes (various sizes)
- Scissors
- Newspaper or craft mat
Instructions
- Choose your design. Sketch it lightly on a piece of paper.
- Place a clear plastic sheet over your design. Secure it if necessary.
- Outline your design with paint or window cling material, enjoying the flow of the brush.
- Fill in the shapes with color, blending colors to create depth.
- Allow the materials to dry completely before carefully removing the cling from the plastic sheet.
- Test the cling by placing it on a clean window. Adjust as needed.
Notes
Store completed clings flat between sheets of parchment paper for longevity.