

There is a quiet magic that happens when sunlight filters through glass. It casts playful patterns and warms the air, creating tiny moments of joy that often go unnoticed. Window Magic transforms these ordinary moments into something enchanting. The delicate play of light dances across the room, inviting you to pause and appreciate the world around you. This DIY project invites you to create a serene atmosphere by enhancing your windows, allowing a cozy connection to nature and light that is both grounding and soothing.
Why Make This Window Magic

Creating Window Magic taps into something deeply restorative. It helps you focus on gentle movements and the tactile nature of materials. As you craft, you immerse yourself in a world of textures and colors. This process encourages you to slow down, engage your senses, and cultivate mindfulness. The act of layering materials, becoming aware of the sounds around you, and concentrating on the flow of your hands fosters a sense of calm. Each choice you make during the creation process becomes a chance to ground yourself, honoring the rhythm of your breath and the space you inhabit.
At its core, this DIY instills a sense of comfort. It allows you to transform your environment into a serene retreat, where each shimmering detail catches your eye and invites tranquility. The final product not only beautifies your space but also brings a piece of your creativity into the heart of your home. When sunlight filters through your creation, it serves as a reminder of your moments of stillness, a token of the beauty found in simple things.
The Flow of Making Window Magic

Before diving into the creation of Window Magic, it’s vital to envision the process as a gentle flow. This experience involves thoughtful movements and engagement with the materials. Visualize yourself selecting vibrant papers or soft fabrics, their textures inviting your touch. As you create, you will cut, layer, and assemble, all while feeling the rhythmic sounds of scissors cutting through paper or the soothing rustle of fabric.
Allow yourself to become enveloped in this sensory experience. The colors, light, and sounds will guide you, harmonizing with your intention to bring more warmth and beauty into your everyday space. Keep in mind, this journey is just as important as the finished piece. Embrace the unfolding moments and let them wash over you.
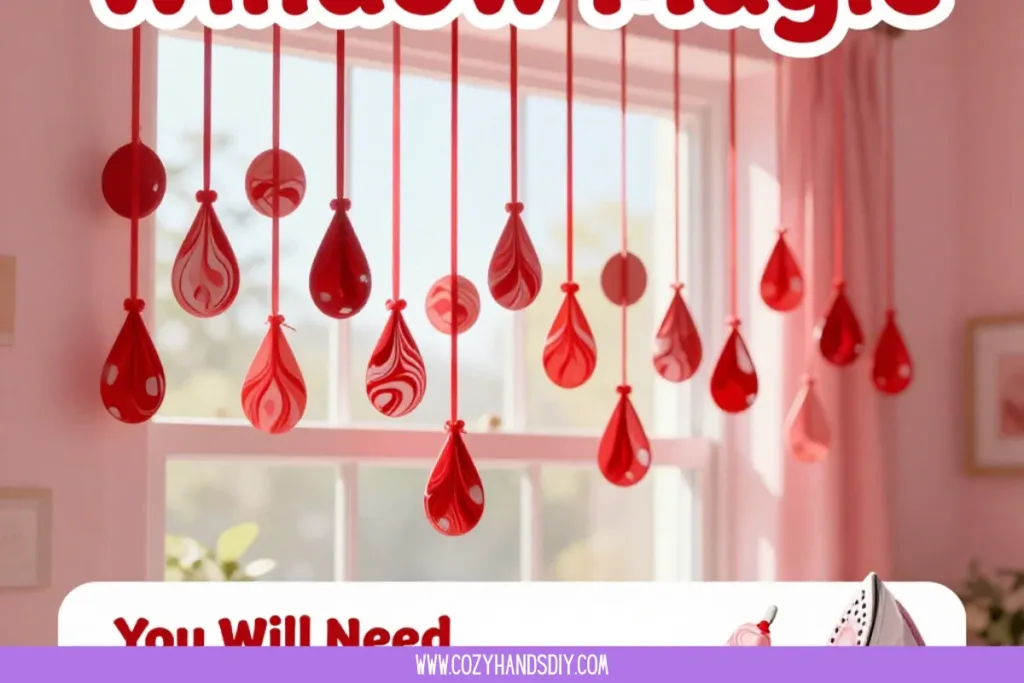
Simple Supplies for This DIY
Gathering materials can be a grounding part of the experience. Here is a gentle list of necessities to create your Window Magic:
- Colorful tissue paper or lightweight fabric (easy to find or substitute)
- Scissors (smooth, comfortable blades work best)
- Adhesive (a glue stick or craft glue works wonders)
- Clear adhesive tape (for added support)
- A small wooden or plastic frame (optional, for structure)
- String or thin ribbon (for hanging)
- Decorative elements (like nature-inspired embellishments)
As you prepare your materials, take a moment to delight in their textures and possibilities. Each item has its role in the process, waiting to be transformed into something uniquely yours.
Step-by-Step Directions
-
Prepare Your Workspace: Find a calm area where you can craft without distractions. Lay out your materials, creating a cozy atmosphere.
-
Cut Your Materials: Using your scissors, carefully cut the tissue paper or fabric into various shapes. Think of how you want the pieces to flow.
-
Arrange the Pieces: Lay your cut materials on a flat surface. Experiment with different designs, layering colors and shapes until you find a composition that pleases you.
-
Glue Your Layers Together: Once you’re satisfied with the arrangement, gently apply glue to secure each layer. Take your time, allowing the glue to dry slightly between layers.
-
Attach the String or Ribbon: If you desire to hang your creation, measure and cut a length of string or ribbon. Adhere it to the top using tape or glue, ensuring it feels secure.
-
Finishing Touches: If you’ve chosen to use a frame, carefully place your creation inside or adhere it directly to the window. Consider adding decorative elements if it feels right.
-
Hang Your Window Magic: Find the perfect spot near a window where light can filter through your creation. Enjoy watching the colors dance as sunlight shines through.
This process carries a gentle rhythm, offering you the freedom to express your creativity. Allow yourself to be present with each step, feeling the satisfaction that comes with each progression.
Enjoying the Finished Piece
Once your Window Magic is complete, the joy of its presence integrates into daily life. These creations become portals that bridge your indoor space with the outside world. As light pours through, it casts diffused glimmers, inviting you to pause and appreciate each moment of beauty.
You might choose to hang your piece in the kitchen, where the morning light can uplift your spirits. In a living room, it can spark conversation or serve as a soft focal point. Each time sunlight bathes your creation, it breathes life into the room. Watching dust specks dance in the rays can transport you to a peaceful state.
As seasons change, so can the energy of your Window Magic. Feel free to refresh the decorations or switch out colors to match the mood of the moment. This flexibility allows the piece to evolve alongside you, maintaining its relevance and warmth.
Caring for Your Finished DIY
To ensure your Window Magic stands the test of time, think about how you can gently care for it. If you’ve used delicate materials, try to keep them out of direct sunlight for extended periods to minimize fading. Dust may gather over time. A soft, dry cloth can help keep your creation looking fresh.
Should you wish to change its location, carefully detach it from the window or wall to avoid any damage. Reusing the materials or repurposing your creation in a new way can also breathe new life into it. By approaching the care of your DIY with intention, you honor the effort and love you put into making it.
Gentle Tips & Variations

Here are a few calm invitations to encourage you to personalize your Window Magic:
-
Experiment with Textures: Consider using different materials such as lace or semi-transparent fabric to create interesting textures. Layering them can add depth and dimension.
-
Incorporate Personal Items: Feel free to add meaningful items such as pressed flowers or small photographs. This personal touch can make your creation feel more special.
-
Adjust the Size: While the suggested dimensions work well, don’t hesitate to scale your project. Smaller pieces can create a delightful collection when hung together.
-
Try Seasonal Themes: Changing up your Window Magic with the seasons can be a joyful tradition. Embrace soft pastels for spring, warm tones for summer, deep hues for fall, and cooler colors for winter.
-
Invite Family In: Share this experience with loved ones. Crafting together can deepen connections and create shared memories.
Allow these suggestions to inspire your creativity rather than constrain it. Your journey is personal, and each choice you make reflects your style and intention.
FAQs About Window Magic
Can I use other materials besides tissue paper?
Absolutely! Feel free to explore different papers or fabrics. The key is to choose materials that allow light to filter through beautifully.
What if my creation doesn’t stick well?
If it doesn’t feel secure, try using a stronger adhesive, or consider adding a frame for better support. Sometimes a little extra care makes all the difference.
How can I hang my Window Magic if I don’t want to use string?
You can also use command hooks or adhesive putty on the window frame, which allows you to hang your project without damage.
Will my creation fade over time?
It can, particularly if exposed to direct sunlight. To help prevent fading, consider rotating your pieces or using UV-blocking film on your windows.
What is the best size for my Window Magic?
There is no right or wrong size. Choose dimensions that feel comfortable for your space. Trust your instincts as you design.
Conclusion
Creating your own Window Magic not only brightens your space but also brings a sense of serenity to your daily routine. As you engage in this gentle crafting experience, the process nurtures your creativity and presence, allowing you to explore the calming interplay of light and color. You might find inspiration in other projects offered at Cozy Hands DIY, such as boho magic wands or DIY bioplastic suncatchers that invite more light and joy into your life.
Take your time to enjoy each moment as you create, letting every step unfold gently, and experience the cozy beauty of your finished Window Magic.
PrintWindow Magic DIY

Create your own Window Magic to enhance your space with beautiful light and color, transforming your environment into a serene retreat.
- Prep Time: 15 minutes
- Cook Time: 0 minutes
- Total Time: 15 minutes
- Yield: 1 creation
- Category: Craft
- Method: DIY
- Cuisine: N/A
- Diet: N/A
Ingredients
- Colorful tissue paper or lightweight fabric
- Scissors
- Adhesive (glue stick or craft glue)
- Clear adhesive tape
- A small wooden or plastic frame (optional)
- String or thin ribbon
- Decorative elements (e.g. nature-inspired embellishments)
Instructions
- Prepare your workspace: Find a calm area to craft and lay out your materials.
- Cut your materials: Use scissors to cut tissue paper or fabric into various shapes.
- Arrange the pieces: Lay out your cut materials and experiment with different designs.
- Glue your layers together: Secure each layer with glue, allowing it to dry slightly.
- Attach the string or ribbon: Measure and cut a length to hang your creation, securing it with tape or glue.
- Finishing touches: Place your creation in a frame or adhere it directly to the window.
- Hang your Window Magic: Find a perfect spot near a window to enjoy the light filtering through.
Notes
Feel free to personalize your Window Magic with different textures, colors, or by incorporating personal items. Share this experience with loved ones for deeper connections.