

A single cool evening light falls on a cluster of paper petals I have just finished, and they seem to glow from within. I hold one between my fingers and feel the faint grain of the paper, the softness of the crease, the warmth of my hands. Glowing Flowers sit on the windowsill like small, patient lanterns, and making them asks me to slow down, breathe, and listen to the simple sounds of folding and tapping.
Why Glowing Flowers Feels Comforting to Create

Making Glowing Flowers invites a slow rhythm. You fold, you tuck, you shape, and you watch light move across color and form. That quiet attention feels like a small meditation for the hands.
The textures matter. Soft paper, gentle glue, a low, tactile hum when petals brush together. These sensory moments pull attention into the present. I often return to this craft after a busy day to feel steadier.
This project also teaches simple patience. Layers build slowly. The bloom appears one gentle step at a time. If you like projects that let you sit with the same small task and notice subtle changes, this one will fit well.
If you enjoy sunlit projects, you might find inspiration from the way sun catchers highlight pressed petals in bioplastic work. I learned a lot following a bioplastic suncatchers recipe that encouraged me to treat light as part of the craft. Keeping that same curiosity here helps the Glowing Flowers feel alive.
A Gentle Look at the Process
Before you gather materials, imagine slow movements. You will cut shapes, crease them, layer them. You will test how light passes through thin paper and how tiny LEDs warm the center of a bloom.
Work surfaces will carry traces of color and soft bits of paper. You will hear the crisp snap of a fold and the quiet click of a battery tucked into place. The process has a rhythm that moves from precise to playful and back again.
We use small, low-voltage lights for a safe, steady glow. Paper and translucent materials diffuse that light and make a soft halo around each petal. If you have made pressed flower suncatchers, you will recognize the patient pace; if not, this project still offers a familiar, calming flow. If you want a deeper look at materials that let light shine through natural pieces, consider the linked pressed flower ideas I return to when I want color and translucence in my work.
Materials You’ll Need
- Thin translucent paper such as vellum, tissue, or thin mulberry paper (easy to find)
- Lightweight cardstock for support pieces (optional)
- Small battery-operated LED lights, warm white or soft color (safe and low heat)
- Button cell batteries if needed for tiny LEDs (match LEDs)
- Scissors or a craft knife (sharp but simple)
- Glue that dries clear, like tacky glue or PVA (gentle hold)
- Thin wire or floral stem wire for structure (flexible)
- Small beads or sequin centers for sparkle (optional)
- Clear nail polish or a matte spray sealer for light protection (optional)
- Tweezers for delicate placement (helpful)
- Cutting mat or a safe surface for cutting (protects your table)
- Soft cloth for wiping hands and small smudges (keeps things clean)
A few notes: the LEDs I use are the tiny, low-voltage kind sold as string lights or single micro lights. They stay cool and fit inside a paper cup of petals. You can substitute different paper types to change the glow. I keep everything at hand so I can move slowly without hunting for tools.
Step-by-Step Directions
-
Choose your paper and cut petal shapes.
Cut at least five to eight petals per flower for a full look.
I prefer soft rounded petals that catch light gently. -
Gently crease each petal along the center.
Fold with a light touch so the paper keeps its shape.
This adds a subtle curve that catches the glow. -
Build a small cone or cup to hold the LED.
Use a strip of cardstock or thicker paper for a stable base.
The cup should hide the LED but let light pass through the petals. -
Secure the LED inside the cup with a dab of glue.
Press lightly and hold until the glue sets.
Keep the battery compartment easy to reach in case you need to replace power. -
Attach petals around the cup one at a time.
Overlap slightly and glue at the base so the petals flare outward.
Work in circles to make a balanced bloom. -
Add a bead or sequin to the center if you like.
This adds a small point of reflection for the light.
Use tweezers for tiny pieces to avoid smudges. -
Wrap a short length of wire as a stem if you want a standing flower.
Insert the wire into the base and twist gently to anchor it.
Cover the wire with a paper-wrapped strip for a finished look. -
Test the light and make small adjustments.
Shift petals to soften or sharpen the glow.
If one area seems too bright, add another thin layer of paper. -
Seal delicate edges with a drop of clear polish or a light spray.
Work outdoors or in a well-ventilated area.
This helps the petals hold up to gentle handling. -
Enjoy the glow and note any tweaks for next time.
Replace batteries as needed and keep spare LEDs on hand.
The more you make, the more you understand how paper and light play together.
Enjoying the Finished Piece


Glowing Flowers feel at home in quiet corners. I like to place one on a bedside table where the light is soft and the petals cast small, comforting shadows. They work well in a shallow bowl as a cluster, or tucked into a clear vase where their stems read like miniature lantern posts.
You can hang a few near a window so morning light and the LEDs mingle. I also place a single glowing bloom beside a book while I read. The light remains gentle and never competes with the calm.
If you enjoyed pressed flower projects, this craft pairs well with those ideas. I often set a glowing paper bloom next to a pressed flower on the wall, and the contrast between translucence and pressed texture feels grounding. For a fuller guide to pairing these techniques, the pressed flowers guide offers companion ideas.
How to Store or Reuse Glowing Flowers
Store your Glowing Flowers in a shallow box with soft tissue between layers.
Keep them flat if the petals are delicate to avoid crushing.
Place silica packets or a small sachet to control moisture.
If you need to reuse the LED, gently remove it from the base.
Many small LEDs come free from cheap paper without damage.
Replace paper petals if they wear, and keep a small repair kit with glue and spare paper.
To refresh the glow, swap batteries carefully and test before reassembling.
Label any boxes with color notes or the date you made each piece.
That helps you remember which combinations you liked and which ones aged best.
Gentle Tips & Variations
-
Invite texture: try mixing thin fabric with paper for petals.
Fabric lets light filter differently and adds a warm hand feel. -
Color softly: water-based inks or light watercolor on paper adds gentle pigments.
Work in thin washes so the paper keeps its translucence. -
Make a mobile: attach several small Glowing Flowers to a hoop.
They rotate and share light across the room in a slow, quiet dance. -
Keep it low: use only low-voltage LEDs and secure batteries in an accessible way.
Safety and calm go together, so test any electrical piece often. -
Nature-friendly swap: use recycled paper or cuttings from paper scraps.
This keeps the project grounded and gives new life to small material pieces.
FAQs About Glowing Flowers
Q: Will the LEDs heat the paper?
A: No, the tiny battery LEDs I recommend stay cool.
I test each LED before assembly and choose warm-white lights for a soft feel.
Q: Can I use real pressed flowers in this design?
A: You can, but pressed flowers require careful sealing.
I suggest combining pressed flowers as accents rather than the primary petal material so the light has room to diffuse.
Q: How long do batteries last in these small LEDs?
A: Battery life varies with size and use.
I find most last several evenings of low use, and I keep spare batteries on hand for a calm swap.
Q: Is this project child-friendly?
A: Yes, with supervision for cutting and handling small parts.
Children respond well to the sensory elements of folding and arranging petals under calm guidance.
Q: What if my petals tear while working?
A: Tear gently into a new shape and use a small backing piece of thin paper.
Repairs often add a unique, handmade character to the bloom.
A Quiet Closing Thought
Making Glowing Flowers asks you to slow down and be present with small movements. Each petal holds a moment: the press of scissors, the hush of glue drying, the gentle click of a battery meeting its LED. These are the moments that make the finished piece feel like it grew from attention rather than assembly.
Let your first few flowers be experiments. Try different papers, change the number of petals, and notice how light shifts when you move a bloom across a room. Keep the practice calm and forgiving. Your hands already know how to make quiet things; this project simply gives them a soft place to rest.
Conclusion
If you want to dive deeper into glowing plant ideas, the creative concept in Moonbeam Flora — Tyler Thrasher offers visual inspiration that pairs well with gentle paper and light work. For an introduction to living light projects that blur the line between craft and science, explore Glowing Plants by Light Bio for context and ideas that expand how light and life can meet.
If you decide to make Glowing Flowers, remember to move slowly, enjoy the textures, and treat each petal as its own small, luminous moment.
PrintGlowing Flowers

Create enchanting glowing flowers using paper and LED lights that provide a soft and meditative crafting experience.
- Prep Time: 30 minutes
- Cook Time: 0 minutes
- Total Time: 30 minutes
- Yield: 4 flowers
- Category: Craft
- Method: Crafting
- Cuisine: N/A
- Diet: N/A
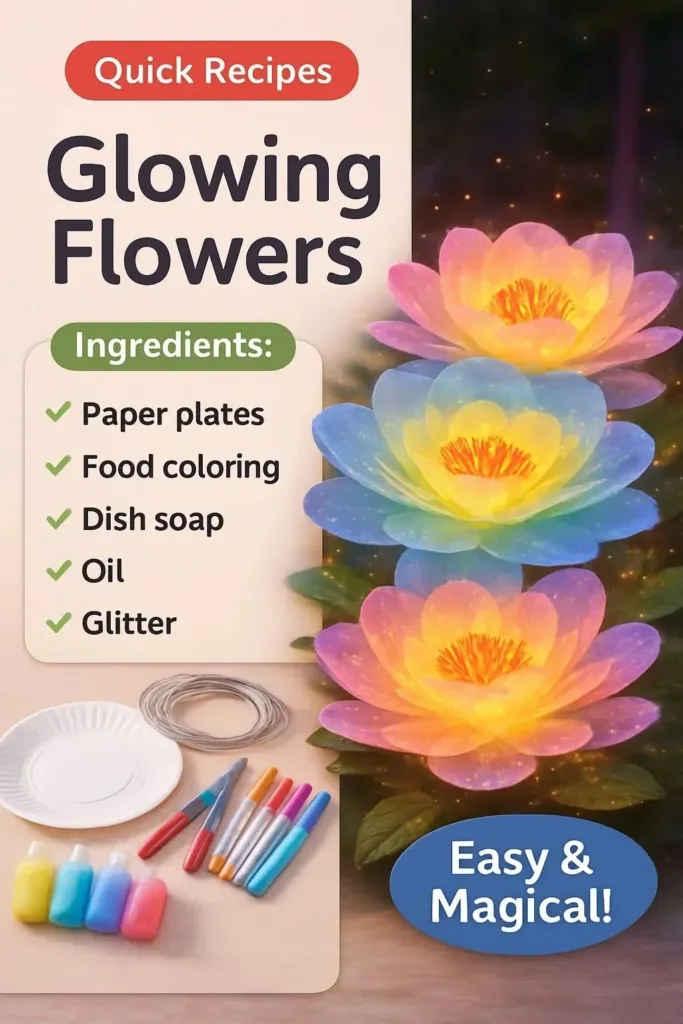
Ingredients
- Thin translucent paper (vellum, tissue, or thin mulberry paper)
- Lightweight cardstock (optional)
- Small battery-operated LED lights (warm white or soft color)
- Button cell batteries (if needed for tiny LEDs)
- Scissors or a craft knife
- Clear-drying glue (tacky glue or PVA)
- Thin wire or floral stem wire
- Small beads or sequin centers (optional)
- Clear nail polish or matte spray sealer (optional)
- Tweezers (helpful)
- Cutting mat or safe cutting surface
- Soft cloth for cleaning
Instructions
- Choose your paper and cut petal shapes.
- Cut at least five to eight petals per flower for a full look.
- Gently crease each petal along the center.
- Build a small cone or cup to hold the LED.
- Secure the LED inside the cup with a dab of glue.
- Attach petals around the cup one at a time.
- Add a bead or sequin to the center if you like.
- Wrap a short length of wire as a stem if you want a standing flower.
- Test the light and make small adjustments.
- Seal delicate edges with a drop of clear polish or light spray.
- Enjoy the glow and note any tweaks for next time.
Notes
Store Glowing Flowers in a shallow box with soft tissue between layers. Use silica packets to control moisture.