

A small bowl of warm water sits beside the table, sunlight pooling on the wooden surface. My fingers dip in and lift, watching droplets bead and fall like tiny slow moons. I bring that same gentle attention to making DIY Calm-Color Bouncy Balls, feeling the smooth give of the mixture, the soft thud when a finished ball bounces, and the quiet, satisfied smile that follows. This project asks for slow hands, clear breath, and a quiet curiosity about texture and color.
The Heart Behind This DIY

Making DIY Calm-Color Bouncy Balls slows the mind by inviting the senses in. The process asks you to pay attention to temperature, texture, and the small changes in color as ingredients meet. The tactile rhythm of rolling a soft sphere warms the palms and anchors the attention. You do not rush. You notice.
For me, mixing colors with calm intent turned a busy afternoon into a small ceremony. The mixing bowl hummed with a soft sound as I stirred. The scent stayed neutral, which let my focus sit on touch and sight. That gentle focus feels restorative. It gives the mind a place to rest and the hands a simple, satisfying task.
This craft fits neatly into a cozy routine. You can make a few while listening to a quiet playlist, or share the steps with a child and practice patient teaching. The result becomes a familiar object to hold, a bright yet serene companion in your pocket or on a shelf.
A Gentle Look at the Process
Making these bouncy balls moves in a few calm steps: measure, mix, shape, and rest. Each step offers a little sensory anchor.
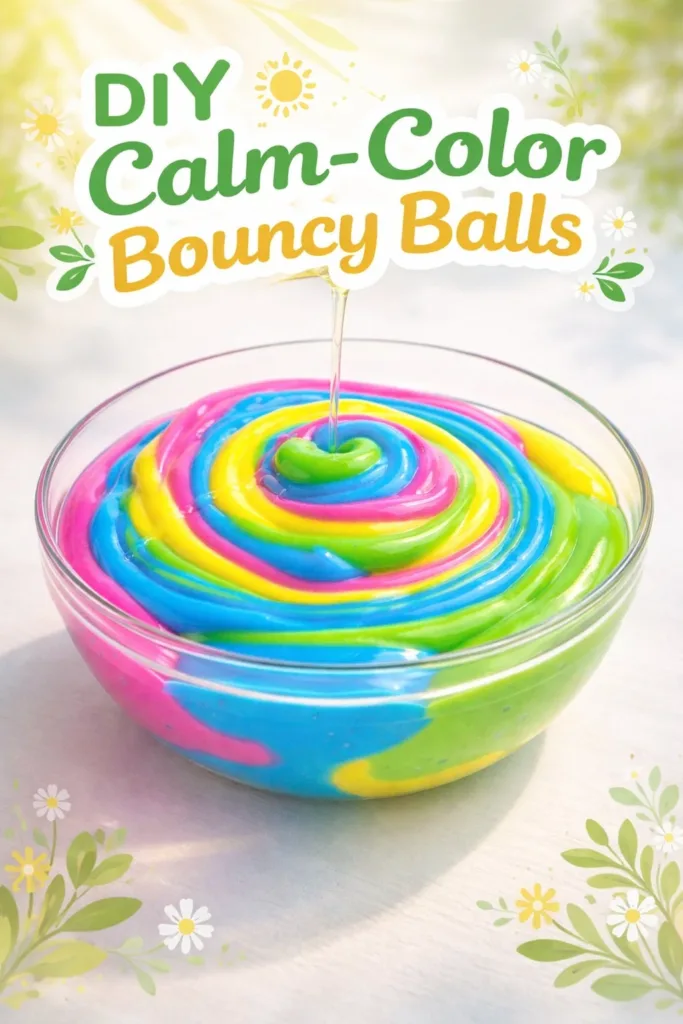
You will notice small, steady sounds: the soft scrape of a spoon, the faint plop of a droplet, the whisper of a towel as you pat a ball dry. Movement feels slow and circular as you roll the mix between your palms. Visual rhythm appears in the way pigment blooms and folds into the base — a slow watercolor that becomes solid.
Before you begin, gather everything in one place. Create a small, tidy space where you can sit, breathe, and take your time. If you have made other soft-sensory projects, this will feel familiar, much like the ideas in our cozy guides such as the magic marble bounce balls tutorial which also celebrates playful texture and calm focus.
Materials You’ll Need
- Clear or white glue (school glue works well; easy to find)
- Liquid starch or a liquid borax solution (see safety note below)
- Fine glitter or mica powder (optional, for shimmer)
- Non-toxic food coloring or liquid watercolors (a little goes far)
- Small measuring spoons and a teaspoon
- A small mixing bowl or disposable cup
- A sturdy spoon or craft stick for stirring
- A damp towel for hands and surfaces
- A shallow tray or plate for resting finished balls
- Wax paper or parchment to prevent sticking (optional)
Notes: Liquid starch and glue form the elastic base. If you prefer clear balls, choose clear glue. For soft, muted colors, dilute food coloring with a drop of water. If you like translucent sheen, add a pinch of mica powder.
A short note on color inspiration: if you enjoy pairing crafts with sunlight and layered color, you might like the experiments in our colorful DIY bioplastic suncatchers guide, which explores how pigments change in soft light.
Step-by-Step Directions
-
Pour 2 tablespoons of glue into your mixing bowl.
Take a deep, even breath. Watch the glue settle and shine in the bowl. -
Add one or two drops of food coloring or a tiny pinch of mica.
Start small. The color deepens as you mix, and you can always add slowly. -
Stir gently until the color spreads and the glue feels smooth.
Notice the sound of the spoon and the way the color folds along the surface. -
If you use glitter or mica, sprinkle a small amount now.
A little shimmer gives a soft glow when the ball catches light. -
Add 1 tablespoon of liquid starch or a teaspoon of borax solution, slowly.
Pour in a little, then pause. The mixture will begin to thicken and pull away from the bowl. -
Stir with slow, circular motions until the mixture forms a soft mass.
It will feel slightly tacky at first and then come together into a single piece. -
Use your hands to press and fold the mass, kneading gently.
The warmth of your palms helps the material become smooth and elastic. -
Roll the mass between your palms into a round shape, slow and steady.
Take quiet, even motions. Watch the surface become smoother as you roll. -
If the ball is sticky, add a few drops of starch or dust a little cornstarch on your hands.
Work small adjustments. Avoid adding too much; the ball should remain bouncy. -
Place the finished ball on wax paper to rest for 10 to 20 minutes.
This brief rest lets moisture even out and helps the surface firm to a gentle bounce. -
Test the bounce on a soft surface. Adjust firmness by kneading briefly.
If it feels too soft, a little more starch will help. If it cracks, more gentle kneading will smooth it. -
Store finished balls in a small airtight container or a fabric pouch.
Keep them away from direct sunlight and heat to preserve color and texture.
A few practical making moments from my experience: I found that rolling with slow, even pressure produced smoother surfaces. When I rushed, small cracks appeared. Letting balls rest for at least ten minutes made the bounce more consistent. Working with tiny amounts of color and glitter allowed me to create calm, muted tones rather than loud, jarring hues.
Safety note: If you choose to use borax, mix it into a properly diluted solution and supervise any children closely. Some people prefer liquid starch as a gentler, easier-to-handle alternative. Never ingest any materials, and wash hands after making.
Using DIY Calm-Color Bouncy Balls in Everyday Life


These bouncy balls find soft, simple roles in daily life. Keep a few in a small bowl on a shelf to pick up and roll between your fingers when you need a brief grounding moment. Their small, warm bounce can break a cycle of tension without disrupting a calm space.
You can use them in mindful play with a child, focusing on careful catching and gentle throws. The act becomes about shared attention rather than competition. In pockets or a soft pouch, they travel easily to a friend’s house or a quiet park.
I like to place one or two on a bedside table. The soft colors catch morning light and remind me to start the day slowly. They make kind, quiet gifts too. Tuck one into a note and it becomes a small, tactile reminder that someone thought of you and wanted to share a tiny bit of calm.
If you have explored other bouncing experiments, such as the magic marble bouncy balls, you will notice a familiar delight in the way these balls respond to motion. Each version invites different textures and finishes, and this calm-color approach keeps the experience soft and sensory.
Keeping It for Later
Good storage keeps your Calm-Color Bouncy Balls ready for gentle use. An airtight container works best to slow moisture exchange and prevent them from drying out too quickly. A small fabric pouch also works if you like a softer feel when you reach in.
Avoid leaving them in direct sunlight or near radiators. Heat will dry the balls, making them brittle or more prone to cracking. If a ball becomes too firm, knead it gently with a tiny drop of water or a pinpoint of liquid starch to restore softness.
Over time, the surface may pick up dust. Wipe with a slightly damp cloth and let them air dry on a sheet of wax paper. If a ball splits or crumbles, you can usually press the pieces together and knead to renew the shape.
If you plan to keep them for months, consider rotating them out every few weeks and giving them a gentle knead to redistribute any internal moisture. That small act renews elasticity and keeps the tactile quality pleasant.
Gentle Tips & Variations
- Try a color gradient: mix two pastel shades in halves and swirl gently. The soft marbling looks delicate and natural.
- Make tiny ones for a pocket fidget and larger ones for a hand-sized calming object. Size changes how the ball feels and how you use it.
- Swap liquid starch for a borax solution only if you understand dilution and safety. Liquid starch feels easier for many makers.
- Add a few drops of essential oil to the mixing bowl, but test lightly. A single drop of lavender can add calm, but too much scent can be distracting.
- If you like sparkle without mess, choose very fine mica powder rather than chunky glitter. It disperses smoothly and feels gentler.
Each tip invites experimentation rather than strict rules. Try one small variation at a time and notice how it changes the feeling of making.
What I’ve Learned While Making This
I learned to trust slow adjustments. Early attempts felt rushed when I added too much activator at once. I now add activator in small amounts, pausing to observe texture changes. That patience saved many batches.
I also learned that the hands remember. The first few rolls feel clumsy, but the palms quickly learn the rhythm of smoothing. The repetition becomes almost meditative.
Sharing the project with a child taught me to explain steps in a calm voice and to accept that outcomes may vary. The aim became the making, not perfection. That shift softened expectations and made the whole process more enjoyable.
Finally, I learned to keep a simple clean-up routine: a damp cloth and a small tray make the aftermath effortless. That ease keeps me coming back to make again.
FAQs About DIY Calm-Color Bouncy Balls
Q: How long do these bouncy balls last?
A: With gentle use and proper storage in an airtight container, they can last several weeks to a few months. Materials slowly lose moisture over time. Rotate and knead them occasionally to keep them lively.
Q: Are these materials safe for children?
A: This project can be family friendly with supervision. Use non-toxic glue and liquid starch as a gentler activator. Avoid borax with very young children unless an adult handles the mixing. Always wash hands after play and never let young children put the pieces in their mouths.
Q: My ball is too sticky. How do I fix it?
A: Add a tiny amount of activator or dust your hands lightly with cornstarch. Work slowly and in small increments. If you add too much, knead in a little glue to soften the texture.
Q: Can I make these without glitter or color?
A: Yes. Plain, clear, or softly tinted balls have their own quiet beauty. Keeping them simple highlights texture and motion instead of visual show.
Q: What surfaces are best for testing bounce?
A: Use a soft, solid surface like a wooden tabletop or countertop. Avoid concrete or rough stone as those can damage the ball quickly. A gentle bounce on carpet also works and feels softer in a cozy space.
Final Reflections on Making DIY Calm-Color Bouncy Balls
Sit with one finished ball in your hand and notice the small warmth your palms give it. Feel the way the surface yields and springs back. Let your breathing match the rhythm of rolling for a minute. The making of these balls invites you into a small loop of attention and care.
This project asks nothing flashy. It offers the simple pleasures of color, touch, and quiet movement. That smallness becomes its strength. You practice patience, steady hands, and gentle problem solving. You end with a tactile object that returns the calm you put into it.
Conclusion
I like to keep a small stack of soft crafts close by so I can return to the quiet pleasure of making. If you want ideas for more playful outdoor decorations that carry a similar gentle spirit, I found inspiration in DIY Outdoor Candy Land Decorations which shows how color and texture can transform a space without overwhelming it. For quality, simple supplies I trust for many projects, I often browse resources at S&S Worldwide: Arts and Crafts, Games, Party, and Sports Supplies which carries a broad selection for small-scale makers.
Thank you for sitting with this gentle project. Take your time, notice the tiny changes, and enjoy the soft rewards of hands-on making.
PrintDIY Calm-Color Bouncy Balls

A calming and creative project for making colorful, tactile bouncy balls using simple materials.
- Prep Time: 10 minutes
- Cook Time: 20 minutes
- Total Time: 30 minutes
- Yield: 4 balls
- Category: Craft
- Method: Crafting
- Cuisine: N/A
- Diet: N/A
Ingredients
- 2 tablespoons clear or white glue (school glue works well)
- 1-2 drops non-toxic food coloring or a tiny pinch of mica powder
- 1 tablespoon liquid starch or a teaspoon of borax solution
- Fine glitter (optional, for shimmer)
- Small measuring spoons
- A small mixing bowl or disposable cup
- A sturdy spoon or craft stick for stirring
- A damp towel for hands and surfaces
- A shallow tray or plate for resting finished balls
- Wax paper or parchment (optional, to prevent sticking)
Instructions
- Pour 2 tablespoons of glue into your mixing bowl.
- Take a deep, even breath. Watch the glue settle and shine in the bowl.
- Add one or two drops of food coloring or a tiny pinch of mica.
- Stir gently until the color spreads and the glue feels smooth.
- If using glitter or mica, sprinkle a small amount now.
- Add 1 tablespoon of liquid starch or a teaspoon of borax solution slowly.
- Stir with slow, circular motions until the mixture forms a soft mass.
- Use your hands to press and fold the mass, kneading gently.
- Roll the mass between your palms into a round shape, slow and steady.
- If the ball is sticky, add a few drops of starch or dust a little cornstarch on your hands.
- Place the finished ball on wax paper to rest for 10 to 20 minutes.
- Test the bounce on a soft surface. Adjust firmness by kneading briefly.
- Store finished balls in a small airtight container or a fabric pouch.
Notes
Liquid starch and glue form the elastic base. If you prefer clear balls, choose clear glue. For soft, muted colors, dilute food coloring with a drop of water. Avoid leaving them in direct sunlight or near heat sources to preserve color and texture.