

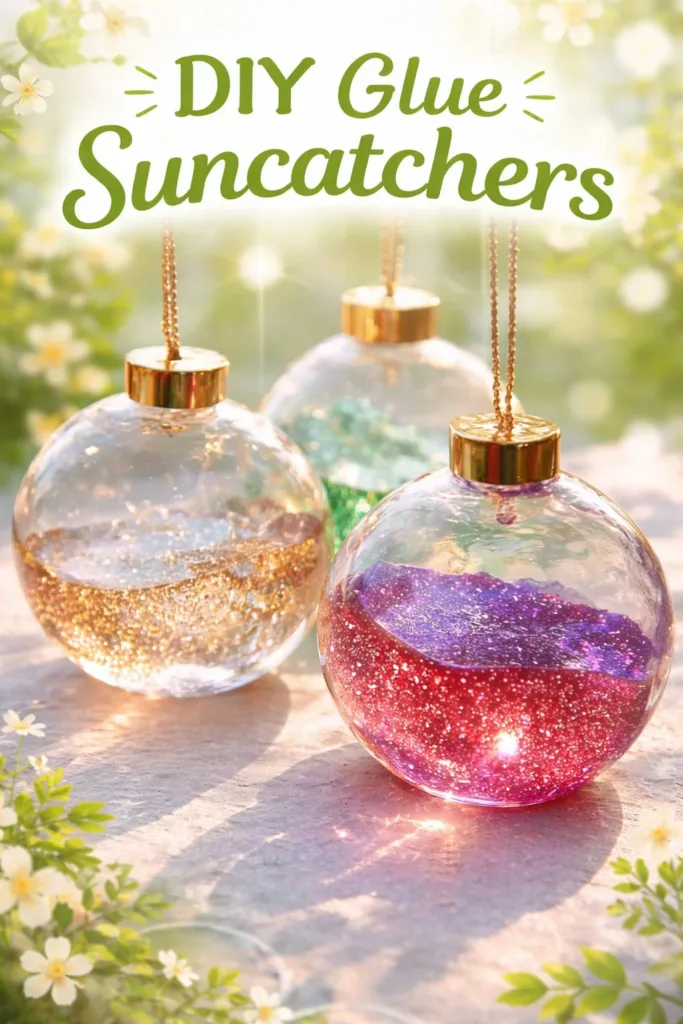
A warm pool of glue catches the light on my table. I press a fingertip into a rim of color and feel the cool, tacky give. Tiny beads of glue stretch like soft threads when I lift my brush. That quiet, hands-on rhythm is part of why I return to DIY Glue Suncatchers again and again — the slow building of color and texture, the gentle drying, the moment sunlight slips through and rewards the wait. If you want a calm, cozy project that brings light and a little ceremony into an ordinary afternoon, this is a lovely place to start. For a different take on sunlit crafts, you might also enjoy this colorful bioplastic suncatchers recipe we explored earlier.
The Quiet Joy of Making DIY Glue Suncatchers

These suncatchers invite you to slow down. You choose tiny palettes of color, feel the glue as it settles, and watch a flat, glossy surface form. The process asks for soft attention rather than speed.
Making a suncatcher becomes a gentle ritual. You rinse a brush, mix a drop of pigment, and listen to a quiet house while glue firms into clear, glass-like panes. That quiet helps with focus and brings a calm pulse to whatever day you place this craft into.
There is also a small, sensory celebration in the finished work. When afternoon light moves through the color, it shifts and seems to breathe. That change rewards patience and adds a slow, pleasing motion to a windowsill or mobile.
How This DIY Comes Together
When I make glue suncatchers, I often spread everything out on a soft towel and let materials sit at easy reach. I move slowly from mixing to pouring, letting each puddle of glue find its own shape. The glue shapes itself into gentle domes and smooth pools.
You will layer color, sometimes add bits of pressed flowers or tissue, and then wait. Drying feels satisfying. The surface loses tackiness, hardens, and becomes translucent. Fingerprints fade into the shine if you handle the edge gently.
If you want to explore other sun-capturing projects alongside this one, this follow-up post about DIY bioplastic suncatchers — part two offers different textures and methods that pair nicely with glue-based pieces.
Materials You’ll Need
- Clear craft glue (school glue or a slightly thicker clear glue; easy to find)
- Food coloring, liquid watercolors, or acrylic inks (a small bottle of each color)
- Silicone baking mat or wax paper (nonstick surface)
- Paintbrushes (soft, small round brushes feel nice)
- Disposable cups or palettes for mixing (reusable if you prefer)
- A toothpick or skewer for stirring and tiny design work
- Small scissors and tweezers (for placing delicate bits)
- Pressed flowers, tissue scraps, or glitter (optional, for texture)
- Thin string, thread, or fishing line (for hanging finished pieces)
- A straw or clear plastic pendant mold if you like shaped edges (optional)
- A tray or box to protect your work surface (gentle housekeeping helps calm the space)
- Paper towels and a small bowl of warm, soapy water for quick cleanup
I often reach for simple, substitute-friendly items. For example, if you do not have liquid watercolor, dilute a tiny drop of acrylic paint in a bit of water. When you use pressed flowers, press them well ahead of time so they lay flat and dry inside the glue.
Step-by-Step Directions
- Prepare a calm workspace and lay down a silicone mat or wax paper. Arrange your colors and tools, and take a quiet breath before you begin.
- Squeeze a puddle of clear glue onto the mat in the size you want. Use a gentle hand so the glue spreads into a soft dome.
- Mix a drop of color in a small cup with a little glue or water to make a tint. Test a tiny dot to see how strong the color appears.
- Dip a soft brush and paint the tinted glue onto the clear puddle in thin washes. Move slowly and follow the way the glue settles.
- Add tiny details with a toothpick: thin veins of color, dots, or a spiral. The tool will trace soft lines that the glue holds.
- Place pressed flowers or bits of tissue with tweezers. Lay them flat and press lightly so they sink slightly into the glue.
- If you like, add a shimmer of glitter or a second faint wash of color. Keep layers thin so drying stays even and calm.
- Let the piece sit undisturbed in a warm, dry spot. Check gently after 2 to 3 hours; full firmness may take longer depending on humidity.
- When the surface feels set but slightly flexible, trim edges with small scissors or peel the suncatcher off the mat gently.
- Thread a piece of string through a small hole or loop it around a thin edge to hang. Place it somewhere where morning or afternoon light can pass through.
These steps reflect the way my hands like to move. I pause at each moment to notice how the glue feels and how the colors open. That pause keeps the making soft and steady.
Bringing DIY Glue Suncatchers Into Your Space


Hang a suncatcher where you already enjoy light. Small panes look lovely near a kitchen window, while a cluster of tiny pieces can warm a reading nook. The light changes the look across the day, which makes a simple window feel like a living, shifting artwork.
I have a habit of placing one in a corner that catches morning sun. It casts a washed color across the table when I have tea. The sight of shifting color becomes a gentle marker of time, a small anchor when I notice it.
You can also use suncatchers as ornaments. I have tied them on low hooks along a balcony railing for summer evenings. They turn a breeze into a slow, visual lullaby. For a child’s room, hang them a little higher than reach but low enough to admire; they make calm companions for quiet play.
This craft pairs well with other projects about light and texture. If you enjoyed this glue-based method, you may find useful ideas in my post on bioplastic suncatchers and eco-friendliness, which explores ways to layer materials thoughtfully.
Caring for Your Finished DIY
Store suncatchers flat when you are not using them to help them retain shape. If you plan to pack them away for a season, wrap each piece in tissue paper and place them in a shallow box with a soft base.
When you clean the surface, use a dry microfiber cloth to remove dust. Avoid harsh chemicals or soaking, because some added materials like pressed flowers may lift. If a piece has sticky spots, blot gently with a barely damp cloth and let it air dry.
If a suncatcher becomes slightly warped, place it face up under a heavy book for a day or two. The gentle weight often helps it flatten without damage. Handle edges rather than the center to avoid fingerprints on the glossy face.
If you hang them outdoors, bring them in during rough weather. Sunlight and air can be kind, but heavy rain or strong wind can strain the string and stress delicate attachments.
Gentle Tips & Variations
- Invite color play: Try layering two complementary colors in thin washes. Let each layer set a bit before adding the next so the colors hint at one another rather than muddle.
- Add texture with thin paper: Use pieces of tissue or vellum for soft translucence. Avoid thick, wet papers that can curl.
- Use nature sparingly: Tiny petals press beautifully, but place them flat and dry. Too many bulky items create uneven drying and shallow ridges.
- Make tiny keepsakes: Pour small, coin-sized discs of glue and decorate them. They dry faster and feel intimate in the hand.
- Try shapes with molds: If you want regular edges, use a silicone pendant mold. The mold helps the glue hold a shape and gives a neat finish.
Frame these as invitations. Each suggestion nudges the project rather than sets rules. The easiest option often becomes the most satisfying.
What I’ve Learned While Making This
Over the years, I noticed a few simple truths. Thinner layers dry more evenly than thick ones. A soft brush reduces streaking. And, most reliably, patience yields better clarity.
I also learned to love small flaws. Tiny air bubbles or a faint ripple catch the eye in a warm way. They remind me that the piece grew from my hands, not a perfect machine. Those small marks hold memory and presence.
Finally, I learned to set a timer when I need a gentle nudge to step away. The timer keeps me mindful of the drying window and helps me resist the urge to fuss with wet surfaces. It keeps the process calm and steady.
FAQs About DIY Glue Suncatchers
Q: How long do glue suncatchers take to dry fully?
A: Dry time varies with humidity and thickness. Thin pieces may set in a few hours. Thicker details can take 24 to 48 hours. I check them gently and expect patience.
Q: Are these safe for kids to make?
A: Yes, with supervision. Use non-toxic school glue and child-safe scissors. Keep small items like beads or tiny petals away from very young children.
Q: Can I make large suncatchers with this method?
A: You can, but larger pieces require longer dry times and a very flat, level surface. Consider working in sections or using a mold to support edges.
Q: Will the color fade in sunlight?
A: Some pigments fade over long exposure. Liquid watercolors and acrylic inks hold okay for many indoor situations. If you expect bright, direct sun all day, rotate pieces or place them where light is softer.
Q: How do I remove bubbles during making?
A: Use a toothpick to coax tiny bubbles toward the edge, or tap the mat gently. Work slowly and let each layer settle to minimize trapped air.
A Gentle Note Before You Go
Sit with one finished suncatcher and watch how light moves through it for a few quiet minutes. Notice the small changes in hue and where shadows fall. Let the observation be a brief rest.
If you feel like returning to this practice, try a second small piece next time. Repeat the steps slowly. Over time you will find the particular motions and colors that soothe you most.
Conclusion
I hope this project brings a soft pause into your day and a little glow to your windowsill. For a different approach and more visual examples, you might enjoy this Colorful DIY Glue Suncatcher Craft on Mombrite, which shows varied ways to handle color and shape. You can also read a step-by-step variation in this DIY Suncatcher guide on A Girl and a Glue Gun for more shape and hanging ideas.
PrintDIY Glue Suncatchers

Create beautiful, colorful suncatchers using clear glue and food coloring for a calming craft experience.
- Prep Time: 15 minutes
- Cook Time: 300 minutes
- Total Time: 315 minutes
- Yield: 4-6 suncatchers
- Category: Craft
- Method: Crafting
- Cuisine: N/A
- Diet: N/A
Ingredients
- Clear craft glue (school glue or thicker clear glue)
- Food coloring, liquid watercolors, or acrylic inks
- Silicone baking mat or wax paper
- Paintbrushes (soft, small round brushes)
- Disposable cups or palettes for mixing
- A toothpick or skewer for stirring
- Small scissors and tweezers
- Pressed flowers, tissue scraps, or glitter (optional)
- Thin string, thread, or fishing line for hanging
- A straw or clear plastic pendant mold (optional)
- A tray or box to protect your work surface
- Paper towels and warm, soapy water for cleanup
Instructions
- Prepare a calm workspace by laying down a silicone mat or wax paper and arranging your colors and tools.
- Squeeze a puddle of clear glue onto the mat in your desired size.
- Mix a drop of color in a small cup with glue or water to make a tint.
- Dip a soft brush to paint the tinted glue onto the clear puddle in thin washes.
- Add tiny details with a toothpick.
- Place pressed flowers or bits of tissue carefully with tweezers.
- Add glitter or a second wash of color if desired.
- Let the piece sit undisturbed in a warm, dry spot for drying.
- Once set but flexible, trim edges with scissors or peel gently off the mat.
- Thread string for hanging in a spot where light can pass through.
Notes
Store suncatchers flat to retain shape. Clean with a dry cloth, avoid soaking and harsh chemicals.