

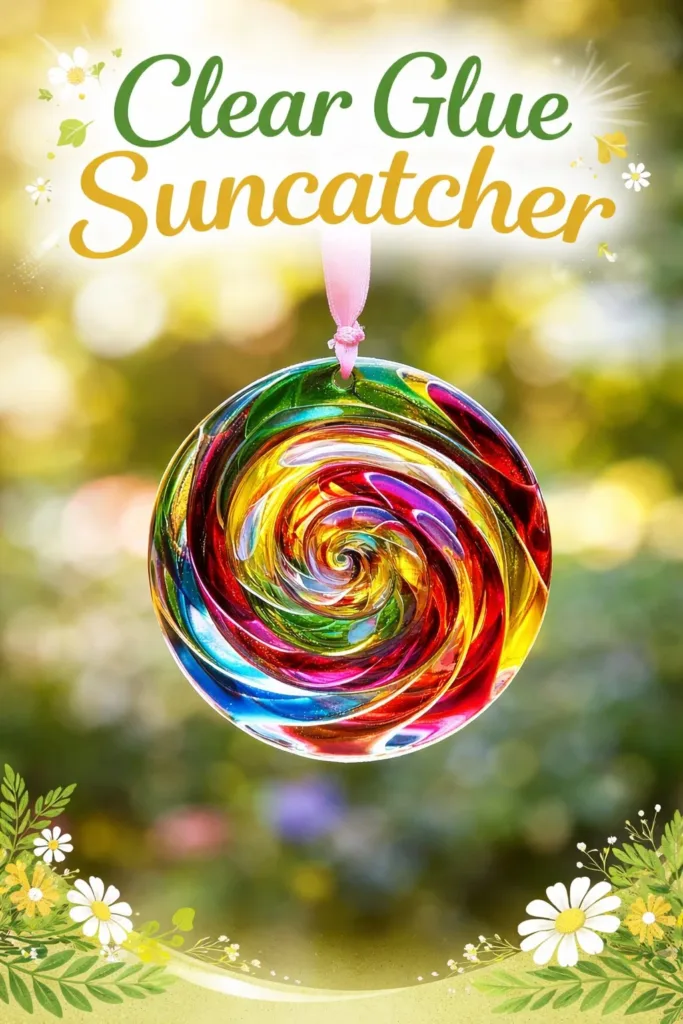
I hold the warm cup to the window and watch a small circle of sunlight catch the clear glue suncatcher I made last week. The glue pools into glassy calm, and tiny air bubbles float like slow, deliberate breaths. When I tilt it, color and light wake with a soft sound, like pages turning slowly. Making this kind of simple, tactile piece asks you to slow down, to notice the cool tack of glue on your fingertips and the quiet weight of a finished circle in your palm. If you enjoy hand-slow moments, you might also like my valentine heart suncatchers, which explore clear glue in a different, playful shape.
The Quiet Joy of Making Clear Glue Suncatcher

This project feels like a small, soft ritual. It centers you on what your hands can do and on how light can shift an ordinary glue puddle into something luminous. The Clear Glue Suncatcher asks for gentle attention. You stir, pour, and wait. You watch a surface turn from shiny to slightly firmer. That waiting becomes a useful pause. It gives your thoughts a place to rest.
The joy comes from the simplicity. You do not rush to finish. You listen for the faint sound of glue settling. You notice the temperature of the glue against your skin, the way light moves through clear beads or added pigments. These calm details bring presence. They make the craft useful not only for a pretty window piece but for quiet, restorative practice.
When I teach this to friends, they tell me the process helped them unclench. They focus on texture and the slow transformation rather than striving for perfection. The result becomes a small archive of that time: a circle that holds a particular light, a certain tilt, a memory of stillness.
A Gentle Look at the Process
Before you get the glue warm and work surface ready, imagine the whole rhythm. You mix and smooth, then place tiny elements into the wet surface. You may hear a soft plop as a bead of color lands. You will wait as the glue clears and sets. The process moves in gentle waves of small, intentional actions.
The making asks for minimal movement but careful choices. You choose color or keep it clear. You add pressed flowers, glitter, or simply let it stay open and translucent. Each choice changes how light and shadow travel through the finished piece. If you like experimenting with color using crayons, you might enjoy the feel of melting and stretching in my blue crayon suncatchers, which play with similar sensory ideas.
I recommend setting aside uninterrupted time, about an hour for the work and several hours for drying. The active part stays small. Most of the project is patient looking. That space for looking becomes part of the craft.
Materials You’ll Need
- Clear craft glue (thick, clear-drying glue, easy to find)
- Disposable shallow dishes or silicone molds (choose a shallow shape)
- Stir sticks or wooden skewers (smooth and simple)
- Food coloring or liquid watercolors (optional, a few drops)
- Small pressed flowers, sequins, or translucent beads (optional)
- Clear packing tape or wax paper (for releasing finished pieces)
- A sheet of cardboard or a protected tray (to carry the piece while it cures)
- Gloves (optional, if you prefer not to get glue on your fingers)
- A pipette or small squeeze bottle (optional, for controlled drops)
- A small brush or toothpick (for nudging elements or removing air bubbles)
Notes: Most items are substitute-friendly. If you do not have molds, you can create circles on wax paper and tape under them to help release. Pressed flowers add a soft, paper texture that glows. Liquid watercolors keep the glue clear while adding gentle tinting.
Step-by-Step Directions
-
Prepare your surface and molds. Line a tray or table with wax paper.
Keep everything near a window so you can test light as you go.
Wear gloves if you prefer a tidy tactile experience. -
Pour a small pool of clear glue into a shallow mold.
Move slowly and let the glue settle without ripples.
Notice the glossy surface and the way it catches light. -
Add a drop or two of liquid watercolor if you want color.
Use a pipette to keep drops small and delicate.
Watch the color thread through the clear glue like washed silk. -
Place pressed flowers, beads, or glitter onto the glue gently.
Use a toothpick to nudge pieces into place with soft taps.
Listen for the slight settling sound as items sink a little. -
Remove visible air bubbles with a toothpick or by tapping the mold.
Small bubbles add charm; you do not need to remove them all.
The movement of your hand calms you and smooths the surface. -
Cover with a sheet of clear packing tape for a flat finish, if desired.
Lay the tape gently to avoid trapping new air pockets.
The tape helps the surface dry shiny and smooth. -
Let the piece cure in a warm, still spot for several hours.
Avoid moving it while the glue firms up.
Notice how the gloss shifts to a softer sheen as it sets. -
Unmold carefully. Peel from the edge and lift slowly.
If the piece resists, allow more drying time.
Hold it up to the light and breathe in that small, bright moment.
Enjoying the Finished Piece


When the suncatcher hangs in the window, it gives you a slow show. Each morning light paints thin, clear color across the wall. You may notice a new reflection or a tiny shadow you did not expect. That small discovery becomes a quiet daily gift.
Hang it with a ribbon or fishing line so it can turn gently in the breeze. Even a faint rotation changes how light bends through the glue and any included elements. You can cluster a few small suncatchers together for a soft chorus of color or keep a single piece as a focused point of calm.
I like putting a suncatcher where I will meet it in a soft moment: beside a tea cup, near a reading chair, or above a sink where hands pause between tasks. Each placement frames a quiet practice. The piece returns your attention to gentle sensory cues: the warmth of sunlight, the cool glassy edge, the near-silent movement of beads.
Caring for Your Finished DIY
Clear glue suncatchers last best when you treat them with gentle care. Keep them out of direct heat and strong sunlight for long, continuous hours. Intense heat can soften the glue and change the shape over time.
Dust with a soft, dry cloth. Avoid abrasive cleaners or rubbing alcohol, which can dull the clarity. If you hang them in a humid room, allow extra time for curing before display. If small edges begin to pick up dirt, a light rinse with cool water and quick drying on a soft towel will help.
If you plan to incorporate these ideas into larger bioplastic projects, my notes on making durable pieces might help, like the methods in this bioplastic suncatchers follow-up. That work uses different materials for long-term durability but shares the same slow, sensory approach.
Gentle Tips & Variations
- Invite translucency instead of opacity. Use tiny drops of color rather than mixing it in. The result feels like color held in glass.
- Try layering. Pour a thin layer, let it firm slightly, then add another. This creates depth and slow visual movement.
- Use natural elements. Small pressed petals and thin leaves create soft textures and gentle shadows.
- Make a set to mark days. Create a small suncatcher each morning for a week and display them as a cluster to remember a week of quiet practice.
- Experiment with shapes. While circles feel soothing, gentle ovals or leaf silhouettes yield a different, cozy rhythm.
These ideas invite exploration, not pressure. Each variation asks you to notice a different small thing: how petals refract light, how thin layers hold air, how color pools at an edge.
What I learned while making these suncatchers matters as much as the finished object. I learned that mistakes often look intentional after drying. I learned that a piece made slowly, without fuss, holds a clearer sense of calm than one made with speed. I learned to trust the small breath between one step and the next.
FAQs About Clear Glue Suncatcher:
Q: Will the glue yellow over time?
A: High-quality clear craft glues stay fairly stable in regular indoor light. To reduce yellowing, avoid prolonged exposure to direct sunlight and extreme heat. Store spare pieces in a shaded, cool place while they cure.
Q: Can children help with this project?
A: Yes, with supervision. Children enjoy the tactile aspect and the slow pouring practice. Use child-safe glue options and keep small beads away from very young children. Sit beside them and share the rhythm; your presence matters more than perfection.
Q: How long does it take to fully cure?
A: Active working time stays short, but full firmness can take several hours to overnight. Thicker pieces need longer. A warm, still spot speeds the process gently.
Q: Can I make the suncatcher weatherproof?
A: Clear glue suncatchers hold up well indoors. For outdoor use, consider more durable materials like resin or bioplastic blends designed for outdoor exposure. If you want to explore other materials, you might find ideas in my colorful bioplastic suncatchers post, which explores different mixes and finishes.
Q: How do I remove bubbles without ruining the surface?
A: Use a fine toothpick or the tip of a warm metal spoon. Work gently at the surface. Some bubbles add charm. Remove only those that affect the clarity you want.
A Gentle Note Before You Go
Take a breath and hold the idea of the suncatcher like a small habit. Let it be a reason to slow your hands once a week or once a month. Make for the joy of a soft, luminous object that asks nothing of you but attention. The process helps you return to the present, one gentle movement at a time.
If you want further inspiration for similar projects or a fuller guide to glue-based suncatchers, the resources below are gentle companions. They offer extra patterns and ideas to help your making feel supported and safe.
Conclusion
For a colorful variation guide, see this thoughtful Colorful DIY Glue Suncatcher Craft on Mombrite, which highlights playful ways to arrange color and elements. If you prefer simple instructions from a long-standing glue brand, explore Elmer’s Glue Sun Catcher for clear, user-friendly steps and materials suggestions.
PrintClear Glue Suncatcher

Create a beautiful clear glue suncatcher that transforms light and color with gentle craftsmanship.
- Prep Time: 60 minutes
- Cook Time: 0 minutes
- Total Time: 360 minutes
- Yield: 1 suncatcher
- Category: Craft
- Method: Crafting
- Cuisine: N/A
- Diet: N/A
Ingredients
- Clear craft glue (thick, clear-drying glue, easy to find)
- Disposable shallow dishes or silicone molds (choose a shallow shape)
- Stir sticks or wooden skewers (smooth and simple)
- Food coloring or liquid watercolors (optional, a few drops)
- Small pressed flowers, sequins, or translucent beads (optional)
- Clear packing tape or wax paper (for releasing finished pieces)
- A sheet of cardboard or a protected tray (to carry the piece while it cures)
- Gloves (optional, if you prefer not to get glue on your fingers)
- A pipette or small squeeze bottle (optional, for controlled drops)
- A small brush or toothpick (for nudging elements or removing air bubbles)
Instructions
- Prepare your surface and molds. Line a tray or table with wax paper.
- Keep everything near a window so you can test light as you go.
- Wear gloves if you prefer a tidy tactile experience.
- Pour a small pool of clear glue into a shallow mold.
- Move slowly and let the glue settle without ripples.
- Notice the glossy surface and the way it catches light.
- Add a drop or two of liquid watercolor if you want color.
- Use a pipette to keep drops small and delicate.
- Watch the color thread through the clear glue like washed silk.
- Place pressed flowers, beads, or glitter onto the glue gently.
- Use a toothpick to nudge pieces into place with soft taps.
- Listen for the slight settling sound as items sink a little.
- Remove visible air bubbles with a toothpick or by tapping the mold.
- Cover with a sheet of clear packing tape for a flat finish, if desired.
- Let the piece cure in a warm, still spot for several hours.
- Unmold carefully. Peel from the edge and lift slowly.
- Hold it up to the light and breathe in that small, bright moment.
Notes
Most items are substitute-friendly. Pressed flowers add a soft, paper texture that glows. Liquid watercolors keep the glue clear while adding gentle tinting.