

A warm shaft of light slides across the wooden table and catches on a shard of clear bioplastic, throwing tiny rainbows onto a woolen scarf. Your fingers rest on the cool, slightly springy surface as you trace a pressed fern. The room smells faintly of boiled water and citrus from a dropped peel, and the steady simmer on the stove becomes a calm metronome. Making DIY Bioplastic Suncatchers can feel like that: a small, slow ritual that turns simple ingredients into something that gathers light and memory.
Why DIY Bioplastic Suncatchers Feels Comforting to Create

There is something very gentle about letting a thin skin of bioplastic form in the hush between other chores. You watch a spoonful of starch and glycerin soften into a glossy film, and you listen for the tiny changes in the pot as it thickens. That careful attention invites a slow breathing pattern, and the tactile rewards arrive quickly: a smooth sheet, a sunlit edge, a pressed petal that keeps its fragile veining.
Working with bioplastic connects making to the cycles of home. The materials feel familiar and approachable. The process asks only for small, steady gestures and gentle timing. For many of us, this quiet repetition helps steady a busy mind. If you enjoy color and texture, you might also like a bioplastic suncatchers variations page I often return to for new ideas and inspiration.
Creating these suncatchers becomes a kind of sensory pause. You notice the gloss of warm material, the slight tug when you peel a cool sheet away from parchment, the way pressed botanicals flatten and glow. Those small, honest sensations offer comfort while you practice being present.
A Gentle Look at the Process
Before we gather supplies, picture the flow. You will whisk a simple mixture into a glossy gel, warm it until it thickens, and spread it into a thin layer that dries into a flexible, translucent sheet. Every step moves slowly: stirring, feeling the thickening texture, smoothing the sheet with the back of a spoon.
Sounds play a supportive role. The soft hiss of bubbling water and the wooden spoon tapping the pot keep the pace calm. Visually, the process offers a gentle rhythm: clear to cloudy, gloss to matte, wet to dry. You will press delicate leaves or small scraps of colored tissue into that drying sheet, and, after a day or two, you will see sunlight travel through those tiny captured moments.
This simple flow gives room to savor each gesture. There is no rush. If you want to explore color or pattern, you can add that slowly and intentionally. If you prefer plain translucent pieces, you can enjoy the soft, natural light that passes through them.
Materials You’ll Need
- Cornstarch (easy to find; fine texture helps smooth sheets)
- White vinegar or lemon juice (small amount; helps the mixture set)
- Glycerin (keeps the bioplastic flexible; optional but recommended)
- Distilled water (for a clear finish; tap water works if filtered)
- Small saucepan (dedicated for crafting is safest)
- Wooden or heatproof spoon (smooth, comfortable to hold)
- Parchment paper (nonstick surface for drying)
- Rolling pin or spoon back (to spread the mixture thin and even)
- Cookie cutters or scissors (for shaping after drying; cookie cutters make crisp edges)
- Pressed botanicals, thin leaves, or tissue paper (for decoration; optional)
- Food coloring or mica powder (optional, use sparingly for soft color)
- Heatproof gloves or cloth (safety when handling hot mixture)
- Airtight container for storage (for finished suncatchers)
- A thermometer (optional; useful if you want to watch temperatures precisely)
- A tray or flat surface for drying (keeps sheets flat while they set)
If you are curious about environmental considerations while making and choosing materials, this short piece on eco-friendly considerations offers a gentle look at choices you can make.
Step-by-Step Directions
- Measure and combine ingredients in a small saucepan.
Use about 1 tablespoon cornstarch, 1 tablespoon distilled water, 1 teaspoon glycerin, and a few drops of vinegar. Stir to a thin slurry. The cool liquid feels silky and smooth on the spoon. - Warm the mixture gently over low heat.
Stir constantly in slow circles. The sound of the spoon on the pan becomes a soft, steady rhythm. Watch as it moves from cloudy to glossy. - Let it thicken into a gel.
After a few minutes you will see it pull away from the sides of the pan. It should coat the spoon like a clear, slightly viscous syrup. Remove from heat before it browns. - Prepare your work surface while the mixture cools a little.
Lay parchment on a flat tray. Have your botanicals or tissue ready. The cool air will feel pleasant after the warm pot. - Pour a small puddle onto parchment and spread thin.
Use the spoon back or a rolling pin to create an even, thin layer. Aim for a translucent sheet. The material should look glossy and wet. - Arrange botanicals or add color.
Press leaves or small flowers lightly into the surface. If using tissue paper, place small, torn pieces gently without pressing too hard. The texture of petals will still show through when dry. - Allow to dry in a warm, well-ventilated spot.
Drying can take 12 to 48 hours depending on thickness and humidity. The surface will shift from glossy to matte and feel firm when ready. - Peel away from the parchment carefully.
Slide a fingertip under an edge and lift slowly. The finished sheet should be flexible and slightly springy. If it feels tacky, give it more time. - Cut or punch shapes and add hanging thread.
Use cookie cutters for neat edges, or scissors for organic shapes. Attach a loop of thin cotton or thread through a hole near the top for hanging. Small, even tugs keep edges smooth. - Cure for a day if you plan to handle a lot.
Let the shapes rest for another day before regular display. This helps any residual moisture leave and the bioplastic reach its final texture.
Using DIY Bioplastic Suncatchers in Everyday Life

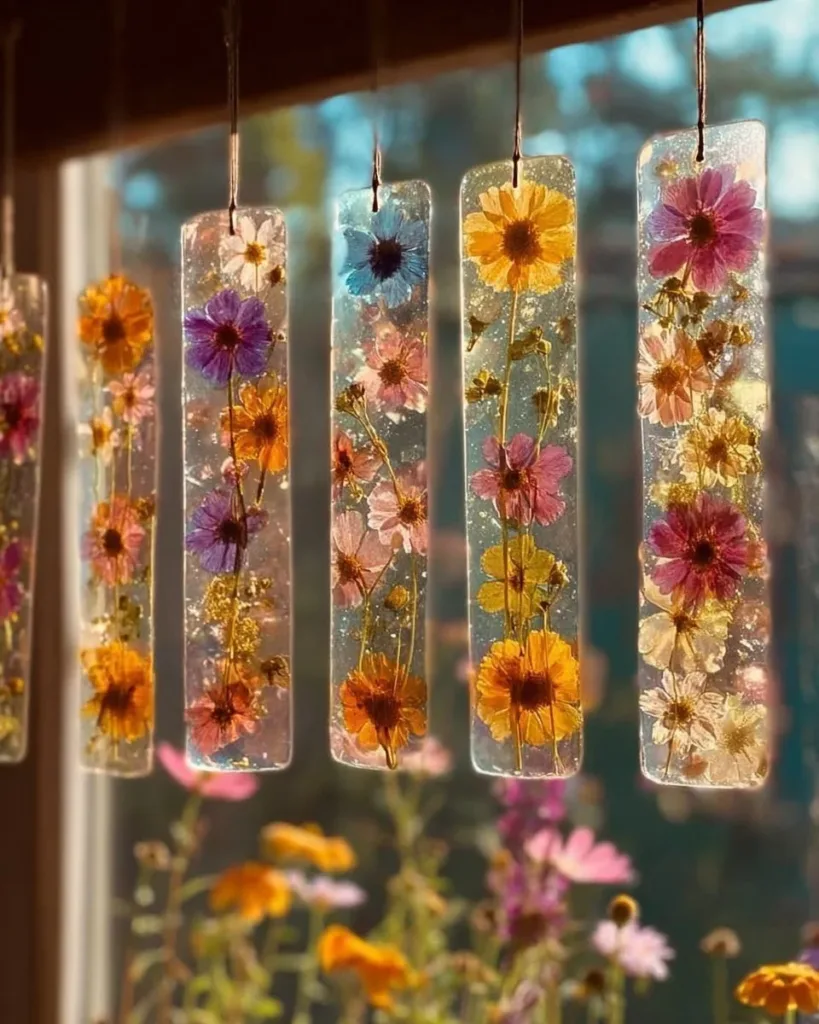
Suncatchers make small, steady magic in windows, doorways, or near a bedside lamp. Hang a few in a south-facing window and you will watch light shift through them across the day. Each piece acts like a tiny, quiet companion that marks time with color and shadow.
Place a single suncatcher above a plant or near a reading nook. The gentle shimmer and soft colors add a calm layer to a room without demanding attention. You can cluster several on a string for a mobile that moves when a breeze passes. The soft clacking of small shapes can feel soothing, like a slow, hand-tuned metronome.
If you like seasonal decorating, swap suncatchers in and out with the year. Light textures and pressed leaves suit spring and summer. Deeper, warm tones and opaque accents suit autumn. For tips on making these pieces even more mindful of the planet, explore ways to make these suncatchers even more eco friendly that I include in my longer notes.
Suncatchers also make gentle, thoughtful gifts. Wrap one in simple paper, tuck a note inside, and let the receiver know you gathered a small piece of light for them. Those exchanges often feel more meaningful than busy, elaborate presents.
Making This DIY Last

Store finished suncatchers flat if possible. Place them in an airtight container with a sheet of parchment between pieces to prevent sticking. Keep them away from prolonged direct heat; strong, prolonged sun can gradually soften them over months.
If a piece becomes slightly warped, lay it flat under a moderate weight for a day or two. If it becomes brittle, a tiny dab of glycerin rubbed onto the edge with a soft cloth can add a little flexibility. Test any touch-up on a scrap piece first.
To reuse scraps, cut small shapes from leftover pieces and string them into a garland or wind chime. Smaller bits can become lightweight confetti for craft projects or embedded into clay ornaments. Hold on to the flexible nature of bioplastic: it invites small repairs and reinvention rather than single-use disposal.
Gentle Tips & Variations
- Invite color slowly. A tiny drop of food coloring or a whisper of mica powder goes a long way. Start light and add more if needed. This keeps colors soft and luminous rather than harsh.
- Choose thin botanicals. Delicate leaves and flowers press well and dry inside the bioplastic without trapping too much moisture. If you must use a thicker petal, press it first between paper for a day to reduce moisture.
- Make texture with lace or thread. Lay a small scrap of lace or a single strand of yarn on the wet sheet. When dry, you will see a soft impression that adds a textile feel to the light.
- Experiment with translucency. Spread the mixture thinner for almost glass-like clarity. Leave it a touch thicker for a satin matte look. The difference is tactile as well as visual.
- Turn mistakes into charm. If a sheet bubbles or a petal shifts, embrace the mark. Imperfections often give character and a handmade honesty that factory-made items cannot mimic.
FAQs About DIY Bioplastic Suncatchers
Are these suncatchers safe for children to make?
Yes, with supervision. Adults should handle the heating step and pour the hot mixture. Children can press botanicals, choose shapes, and help with spreading once the mixture cools slightly. Keep safety gear nearby and remind little hands to wait until pieces cool.
Will the botanical colors stay true?
Some pigments fade over time, especially under strong sunlight. Delicate veins and shapes often remain visible even if color softens. To preserve deeper tones, keep suncatchers away from prolonged, intense midday sun.
How long do they last?
With gentle care, they can last many months to a year or more. Avoid constant direct heat or extreme humidity, and store flat when not displayed. Small repairs and occasional conditioning with glycerin can extend life.
Can I wash them?
Clean gently with a soft cloth and a little water. Avoid harsh scrubbing or strong detergents. If a piece has stubborn dust, lightly dab with a damp cloth and let air dry flat.
Are bioplastic suncatchers compostable?
Many homemade bioplastics using cornstarch are compostable in home compost systems, though additives like glycerin and colors can affect breakdown. If composting is a priority, use minimal or natural additives and check local composting guidelines.
A Gentle Note Before You Go
Take a moment to breathe in the calm you carried into this project. The slow rhythm of stirring, the soft tug of a leaf settling into a cooling sheet, and the tiny rainbows that follow are small practices of attention and care. Whether you make one suncatcher or a small constellation, each piece holds a quiet memory of a mindful afternoon. There are many ways to learn more about the chemistry and variation behind these little translucent treasures; two thoughtful resources that complement this guide include a friendly tutorial on making a bioplastic suncatcher and a botanical-focused exploration that celebrates pressed plants.
Conclusion
If you want a clear, step-focused tutorial that explains the basic chemistry behind the process, I recommend this step-by-step guide from Chemistry for Kids on how to make a bioplastic suncatcher which pairs simple instructions with safe kid-friendly science. For inspiration that leans into botanical beauty and composition, the Botanical Bioplastic Sun Catchers project at Wineberry Woods offers lovely examples of plant-driven designs and thoughtful presentation.
Thank you for carving these quiet moments into your day. May the light you gather feel soft, steady, and full of small, handmade joy.
PrintDIY Bioplastic Suncatchers

Create beautiful DIY suncatchers using simple materials like cornstarch and glycerin. This gentle process allows you to capture light and nature in a unique way.
- Prep Time: 15 minutes
- Cook Time: 15 minutes
- Total Time: 30 minutes
- Yield: 6-8 suncatchers
- Category: Craft
- Method: Crafting
- Cuisine: N/A
- Diet: Vegan
Ingredients
- 1 tablespoon cornstarch
- 1 tablespoon distilled water
- 1 teaspoon glycerin
- A few drops of vinegar or lemon juice
- Parchment paper (for drying)
- Pressed botanicals, thin leaves, or tissue paper (for decoration, optional)
- Food coloring or mica powder (optional)
Instructions
- Measure and combine ingredients in a small saucepan, stirring to create a thin slurry.
- Warm the mixture gently over low heat, stirring constantly until it thickens into a clear gel.
- Prepare your work surface by laying down parchment paper.
- Pour a small puddle of the mixture onto the parchment and spread it into a thin, even layer.
- Arrange botanicals or add color by pressing them into the wet surface.
- Allow the mixture to dry in a warm, well-ventilated spot for 12 to 48 hours.
- Once dry, carefully peel the suncatcher from the parchment paper.
- Cut or punch shapes and add a hanging thread for display.
- Cure for an additional day if necessary before regular handling.
Notes
Store finished suncatchers flat in an airtight container. Avoid direct heat and strong sunlight for longevity.