

I hold a cool glass jar in my hands and watch the light bend through the pale solution inside. Tiny motes drift like slow snow, and the pipe cleaner petal I placed there the night before looks as if it wears a fine, frosty coat. I call these pieces Crystal Flowers because they bloom in quiet, patient stages. If you are curious, you can start with my cozy guide to crystal flowers and gently adapt what feels right for your hands and your space.
Why Crystal Flowers Feels Comforting to Create

Making Crystal Flowers asks for slow attention and small, repeatable gestures. You mix warm water, stir until the powder dissolves, bend a pipe cleaner into petals, and then wait while the solution quiets and the crystals decide where to gather. The rhythm is soft: measure, stir, shape, and watch. You feel the slight warmth of the jar in your palm. You hear a whisper of cooling. You see clarity turn to pattern.
This project helps you slow down because its success depends on time, not speed. You will return to the jar over hours or a day and find something new has formed. That gentle reveal gives a steady, comforting heartbeat to the making process. If you enjoy related crystal explorations, you might like the method in my baking soda crystal growing tree project, which uses many of the same mindful steps and sensory cues.
Creating these little floral sculptures also connects you to natural processes. Crystals grow in layers, and watching those layers appear trains a calm kind of attention. The tactile memory of shaping the core, the coolness of the finished bloom, and the visual sparkle of tiny facets all add to a quiet, sensory way of being present.
A Gentle Look at the Process
Before you gather materials, imagine the flow. You will make a saturated solution by dissolving baking soda in warm water. You will twist pipe cleaners into flower shapes and suspend them so that the crystals can find a place to start. Then you will wait as evaporation and cooling let crystals form along the fibers.
The movements feel simple and small. Bending a stem takes the same motion you use when threading yarn through a needle. Stirring the water is a soft, circular action. The steady thing to remember is patience. The forming crystals move at their own pace, and you will learn to sit with that pace.
While the method stays the same, you can vary color, the thickness of petals, or the size of the jar. Each small choice changes how the light catches the finished piece. For a practice in calm making, try choosing one or two elements to change and leave the rest familiar. If you want more crystal experiments to explore after finishing, try my baking soda crystal growing trees, which follow a similar path but offer a different shape for watching crystals accumulate.
Materials You’ll Need
- Baking soda (sodium bicarbonate) easy to find and gentle for home projects
- Clear glass jar or heat-safe cup choose a shallow, wide one for faster evaporation or a narrow one for taller blooms
- Warm water tap-warm is usually fine; not boiling
- Pipe cleaners in the colors you like flexible and absorbent, they act as the skeleton for crystals
- String or thin thread to suspend the flower if you are using a tall jar (optional)
- Clothespins or a small stick to balance the pipe cleaner over the jar rim (optional)
- Small tray or plate to rest your jar and catch any drips
- Food coloring (optional) a drop or two will tint the solution and the crystals subtly
- Tweezers (optional) for delicate positioning once crystals have formed
- Gloves and a small towel for gentle safety and tidy hands
Notes: You can substitute alum or borax for stronger, faster-growing crystals, but those need more safety care. Baking soda gives a softer, more approachable crystal and works well for a mindful, sensory experience.
Step-by-Step Directions
- Prepare your workspace and tray.
Place the jar on a tray and lay out your pipe cleaners, clothespins, and towel. Enjoy a moment of stillness before you begin. - Bend the pipe cleaner gently into a flower shape.
Make a small loop for the center and create five or six petal loops. Keep movements slow and aware. - Add two tablespoons of baking soda per cup of warm water into the jar.
Stir slowly in one direction until most of the powder dissolves. The water will look cloudy at first. - If you want color, add one drop of food coloring and stir with soft circles.
Watch how the color diffuses. The shade will affect the crystal tone. - Suspend your pipe cleaner flower just above or into the solution.
Balance the stem across the jar rim with a clothespin or rest the jar lip on a stick. Position gently. - Leave the jar in a quiet spot where it can stay undisturbed.
Avoid strong drafts and direct sun. A low, stable temperature helps the crystals grow evenly. - Check after a few hours, and then again the next day.
Crystals often form first at the loops and where the fibers touch the liquid. Notice the gradual texture changes. - When you see a pleasing amount of crystals, lift the flower slowly.
Use tweezers or gloves if the edges feel wet. Hold it above the jar briefly so excess solution drips back. - Set the flower on a paper towel or tray to dry.
The drying stage will firm the crystals and make tiny facets more visible. Give it at least a day to harden. - Display, photograph, or gently handle your bloom.
If you want to preserve it longer, keep it away from heavy humidity and direct sunlight.
Each step shows how the materials work together. The baking soda dissolves in warm water because warmth increases solubility. As the solution cools or water evaporates, it can no longer hold as much dissolved material. The excess material organizes itself into a crystalline structure, and the pipe cleaner fibers give the crystals a starting point. The fuzzy texture of the pipe cleaner holds tiny nuclei where crystals can start to form. This is why the shape of your pipe cleaner and the steadiness of your suspension matter.
Bringing Crystal Flowers Into Your Space

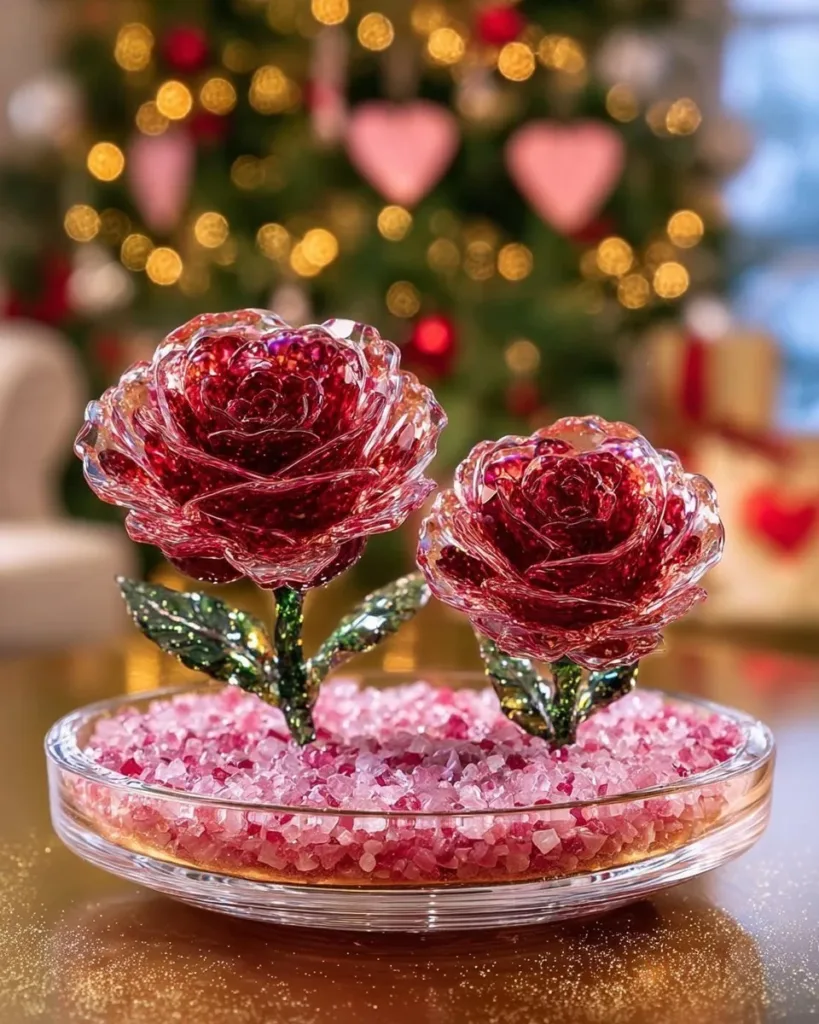
When a Crystal Flower finishes drying, you can treat it like a small sculpture. Set a single bloom on a narrow shelf and let sunlight skim across the facets. Place several together in a shallow bowl to make a frosted bouquet. You can also thread a thin ribbon through the stem and hang a flower in a north-facing window to catch gentle, indirect light.
These pieces work in quiet places. Put one beside a cup at your next tea moment, or lean a pair against a stack of books. The small, cool weight and the soft sparkle invite slow looking. If you make a few in different colors, arrange them by tone to make a small color progression that feels soothing to the eye.
If you want to explore pairing them with other handmade objects, consider placing Crystal Flowers near dried seed heads or pressed leaves. The contrast between soft organic textures and the geometric crystals creates a calm visual balance.
I also like to use a Crystal Flower as a regular part of a mindful pause. I set a bloom on the table before I sit for five quiet minutes. The act of looking and breathing with a steady, slow gaze gives the same comfort as returning to a warm sweater.
For different display ideas inspired by seasonal crafts, see my take on a delicate heart-shaped crystal design in this baking soda crystal heart growth project.
Making This DIY Last

Crystals need relatively stable conditions to hold their form. High humidity and frequent handling will soften and eventually dissolve fragile growths.
Store a finished Crystal Flower in a dry, cool place away from direct sun. A small glass dome or a clear jar works beautifully because it protects from dust while still letting you see the facets. If you plan to keep your flowers long term, avoid rooms where steam builds up, like bathrooms.
If a piece loses some of its sparkle over time, you can refresh it by very gently reintroducing it to a mild, fresh solution. Do this with care: crystals will dissolve and then regrow in new patterns. Some people like this as a ritual of renewal. If you prefer stability, simply make a new bloom instead.
For reuse, you can carefully remove crystals from the pipe cleaner and re-form the core, or you can repurpose the pipe cleaner skeleton for a new shape once the old crystals gently fall away. The pipe cleaner’s fibers soften slightly after being in the solution, so treat reused stems as delicate. Always dry them completely before reusing.
If you used optional colorant, keep in mind that dyes may fade in sunlight. Storing in a shaded place helps maintain the soft hues. For longer-lived display, consider small glass cloches or shadow boxes to limit dust and humidity.
Gentle Tips & Variations
- Invite different textures: Try using wool roving wrapped around a wire instead of a pipe cleaner to create fuzzier crystals and softer outlines.
- Try a slow build: Use a shallower solution and a wider jar to encourage broader, flatter crystal growth that looks like snowflakes.
- Use safe substitutes: If you prefer a stronger crystal quickly, consider alum or borax only with gloves and adult supervision. Baking soda delivers gentle results and is easier for shared making.
- Change the color with restraint: A single drop of food coloring makes a subtle, dreamy tint. Too much can mask the crystalline detail, so start small.
- Keep a journal: Note the time you set your jars and when you check them. Small notes like temperature or jar shape help you learn what rhythm gives the most pleasing bloom.
Each tip is an invitation rather than a rule. Let your hands choose what feels right and adjust your next attempt slowly based on what you liked.
What I’ve Learned While Making This
I learned to trust small changes. The first time I tried this, I hurried the mixing and used too much color. The crystals formed, but they looked coated rather than luminous. Later, I slowed my stirring, used softer water warmth, and found the growths became more faceted and delicate.
I also learned the value of a still place. When I left jars near an open window with breezes, formations skewed and sparse patterns appeared. When I moved a jar to a quiet shelf, the crystals grew denser and more even. The environment matters.
Hands-on experience taught me that the look of success changes with each attempt. Some blooms look like frosted roses, others like tiny coral branches. I learned to value the process and not to aim for a single perfect result. Each experiment becomes a small weather report of the moment you made it.
Safety feels important and simple: wear gloves if you use stronger chemicals, keep curious hands out of the jars, and clean your workspace when you finish. I keep a small towel and a dedicated tray so everything feels intentional and calm.
FAQs About Crystal Flowers
How long does it take for crystals to form?
You often see initial growth within a few hours, and more pleasing formation after 24 hours. Full drying and hardening can take a day or two. Patience rewards you with clearer facets.
Is baking soda safe for this project?
Yes, baking soda is a gentle, household-safe powder. It does not pose the same risks as stronger chemicals. Still, avoid ingesting the solution and wash your hands after handling the jars.
Can I speed up the process with hotter water?
Warmer water dissolves more baking soda and can speed initial formation. Use warm, not boiling, water. Very hot water may warp jars or change how crystals form. Slow and steady often yields more delicate structure.
Will the crystals survive being touched?
Crystals are delicate. Gentle handling is fine, but frequent touching or exposure to moisture will soften them. Place finished pieces in a protective spot if you want them to last.
Can I use natural materials like twine or dried flowers as the base?
Yes, you can experiment. Natural fibers like twine provide interesting textures and can lead to different crystal patterns. Dried flowers are more fragile and may change color, but they can hold small crystals beautifully.
A Quiet Closing Thought
When I set a finished Crystal Flower on the table, I tell myself I made time for a small, careful miracle. The project asks little more than attention and warmth. It gives back the simple pleasure of watching a hidden process reveal itself slowly, like a secret unfurling. Take your time. Notice each tiny facet as they appear, breathe with the rhythm of patience, and give yourself permission to make something gentle and imperfect.
Conclusion
If you admire the idea of crystal ornaments and want to see refined, commercial interpretations, explore the elegant shapes in the Waterford crystal flower ornaments, which show how light plays through faceted surfaces. For a scent that carries a crystalline name and a different kind of sensory layering, read about the fragrance notes in Montale Parfums Crystal Flowers and let the idea of texture and scent inspire your next quiet making moment.
PrintCrystal Flowers

Create stunning crystal formations by dissolving baking soda in warm water and shaping pipe cleaners into flowers. A gentle, mindful craft that invites patience and creativity.
- Prep Time: 15 minutes
- Cook Time: 60 minutes
- Total Time: 75 minutes
- Yield: 1 Crystal Flower
- Category: Crafts
- Method: Crafting
- Cuisine: N/A
- Diet: N/A
Ingredients
- 2 tablespoons baking soda per cup of warm water
- Clear glass jar or heat-safe cup
- Warm water
- Pipe cleaners in various colors
- String or thin thread (optional)
- Clothespins or a small stick (optional)
- Small tray or plate
- Food coloring (optional)
- Tweezers (optional)
- Gloves and a small towel
Instructions
- Prepare your workspace and tray.
- Bend the pipe cleaner gently into a flower shape.
- Add two tablespoons of baking soda per cup of warm water into the jar.
- If you want color, add one drop of food coloring and stir.
- Suspend your pipe cleaner flower just above or into the solution.
- Leave the jar in a quiet spot to avoid disturbance.
- Check after a few hours and again the next day for crystal formation.
- When satisfied with the crystal growth, carefully lift the flower above the jar to drip excess solution.
- Set the flower on a paper towel to dry for at least a day.
- Display or handle your crystal bloom while ensuring it stays in a stable environment.
Notes
You can substitute alum or borax for stronger crystals, but use caution with these materials. Baking soda is gentler and ideal for a calm, mindful experience.