

The late afternoon light pours through the kitchen window and lands on the glass jar in a small, quiet pool. I hold the jar and feel the warm glass under my palms, the faint scent of lemon from earlier baking, and a hush that makes each tiny movement matter. A Crystal Growing Flower waits inside, its buds still rough with the first glimmer of crystals, and I breathe slow, watching the crystals catch the light like a small, patient constellation.
Why Crystal Growing Flower Feels Comforting to Create

There is something soft and steady about watching crystals form. The process invites you to slow down and notice small changes that happen over hours and days. When I make a Crystal Growing Flower, I like to set the jar in a spot where light can pass through it gently, and where the sound of the room stays calm.
This project gives you simple, tactile entry points. You bend pipe cleaners between your fingers until they make a petal, you stir warm water and feel the steam on your face, and later you tap the jar and hear a crisp, dry sound as the crystals settle. Those small sensory moments help slow your mind.
If you enjoy quiet science-inspired crafts, you might like another of our projects that uses similar slow chemistry and cozy textures, such as this baking soda crystal growing tree that blooms over a few days. See the gentle steps and photos on our page for more ideas: baking soda crystal growing tree.
A Gentle Look at the Process
I like to think of the making as a little chemistry ritual. You make a strong warm solution where the mineral can dissolve more than it would in cool water. Then you give it time to leave the solution and build onto a substrate, like pipe cleaners shaped into petals.
Movement matters in small doses. Stirring should be slow and steady, not rushed. When you suspend the shape in the jar, the solution sits still and the crystals form quietly along the edges. You check later with curiosity, not impatience. You will see fine, feathery crystals first, then larger sparkles as they grow.
If you want to see another version of a slow-growing, textural project, our post about baking soda crystal growing trees shows how the same patient approach produces different forms and tactile rewards: baking soda crystal growing trees.
Materials You’ll Need
- Borax powder, about 3 to 4 tablespoons per cup of water – common, easy to find, substitute-friendly with caution.
- Pipe cleaners in colors you love – soft, flexible, and quick to shape.
- A clear glass jar or cup that holds your shape comfortably – transparent glass helps you watch the growth.
- A pencil or chopstick to balance your hanging flower – simple and steady.
- String or thin thread to suspend the flower – natural fibers work well.
- Measuring spoon and heat-safe container for boiling water – use adult supervision for hot water.
- Food coloring or liquid watercolors, optional – for gentle hues.
- Gloves or tweezers, optional – to keep hands dry or avoid warm water.
- A tray or towel to catch drips – keeps your space calm and tidy.
I often keep a tiny notebook beside me to jot observations. Little notes like the time I placed the jar in the window or the pattern of crystals help me learn and feel connected as the plant forms. For more ideas that build on this patient, cozy approach to crystal projects, you can visit this related page: baking soda growing tree crystal.
Step-by-Step Directions
- Shape the flower
Gently twist three to five pipe cleaners into a simple flower shape. Keep the petals round and the central stem short.
Feel the soft texture and let your hands move slowly as you form each petal. - Trim and secure
Trim any long ends so the shape sits neatly. Wrap a small bit of string around the base if you need extra hold.
The small act of trimming can feel mindful and precise. - Prepare the jar
Pour boiling water into the glass jar, filling it most of the way. Wear gloves or use a heat-safe container.
The steam will rise warm and slow; breathe it in gently. - Dissolve the borax
Add borax a little at a time, stirring slowly until it dissolves. Use about 3 to 4 tablespoons per cup of hot water until the solution looks clear and a little cloudy when over-saturated.
You will notice stirring creates tiny currents and the powder glides into the water. - Add color, if desired
Drop in one or two drops of food coloring and stir until the color spreads evenly.
The color will tint the crystals subtly and make them feel like quiet jewels. - Suspend the flower
Tie one end of the string to the flower and the other to a pencil. Balance the pencil across the jar so the flower hangs without touching the bottom or the sides.
Adjust so the flower floats in the center and breath in the stillness. - Wait and watch
Place the jar in a calm, warm place away from direct sunlight. Let the jar rest undisturbed for 8 to 24 hours.
Check quietly after several hours to see the first shimmer of formation. - Remove carefully
When the crystals look full and layered, lift the pencil and let excess solution drip off. Gently lift the flower with tweezers or gloves.
Set it on a tray to dry and listen for the faint, crisp sound as it settles. - Rinse and position
If you like a cleaner look, lightly rinse the finished flower with cool water to remove loose crystals. Pat dry with a soft towel.
Place the flower in a small dish or shadow box where the light can catch its edges. - Take notes and reflect
Write down what you noticed how long it took, the textures, and how you felt. This helps you learn and savor the making.
The act of recording is another gentle finish to the ritual.
Enjoying the Finished Piece

You can set it on a tray with other small handmade items, or place it in a shadow box to keep it safe. When you move it, do so slowly. The crystals are fragile in some places and firm in others. That contrast invites a gentle touch.
If you want to display several, place them at different heights to make a tiny still life. The crystals reflect light differently from every angle, and watching that subtle change can feel like a calming ritual.
Caring for Your Finished DIY
Crystals are mostly stable, but they can be sensitive to humidity and strong handling. Keep your Crystal Growing Flower in a dry place away from curious pets and small children. If dust gathers, use a soft brush or a gentle puff of air to clean it; avoid getting it wet repeatedly.
For longer life, consider sealing the piece inside a simple glass dome or shadow box. That keeps it free from moisture and touch while still letting you enjoy the texture and light. If you ever need to remove loose bits, work over a tray so you can gather them without a mess.
If you want to explore similar preservation ideas for crystalline projects, this guide on another of our gentle crystal builds may inspire careful storage methods: baking soda crystal growing trees.

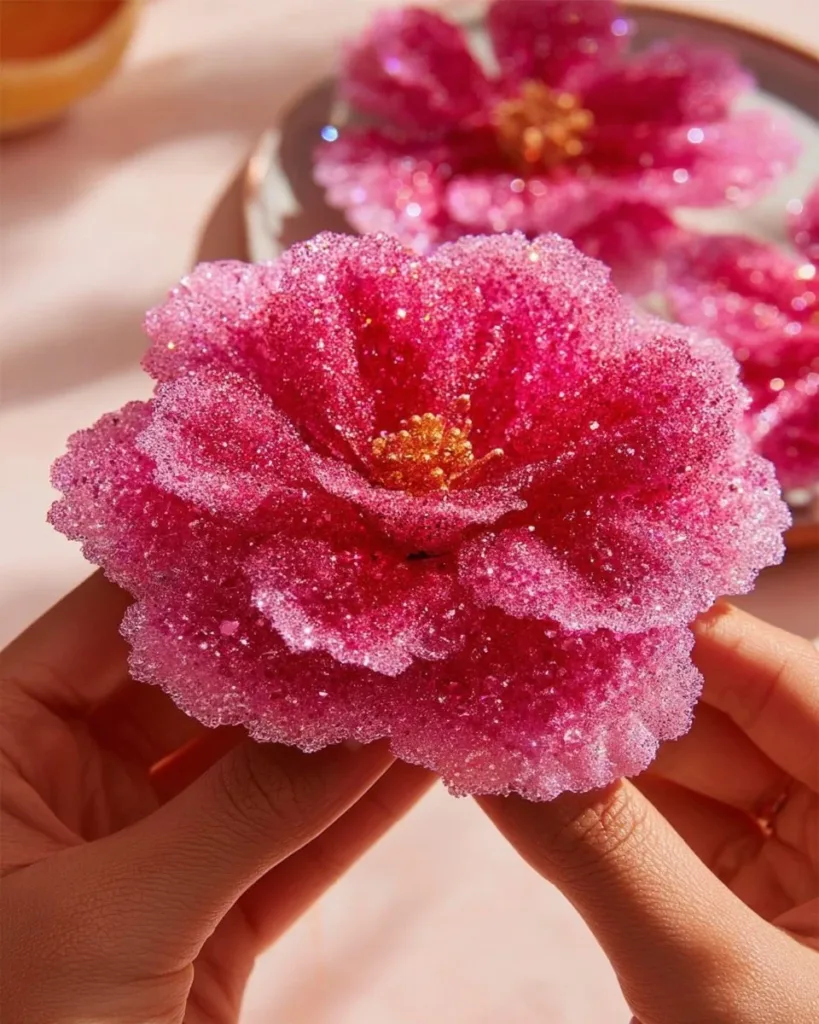
A finished Crystal Growing Flower holds its own quiet presence. I like to put mine on a small shelf near a lamp so the crystals pick up warm light in the evening. The piece feels both delicate and strong. It looks almost like frost caught mid-bloom.
Gentle Tips & Variations
- Try different bases
Invite subtle change by using wire frames, small twigs, or cardboard cutouts as the base for crystals. Each material encourages different crystal patterns. Think of this as an exploration, not a test. - Play with temperature and concentration
A hotter, more saturated solution will grow crystals faster and often larger. Cooler or less saturated solutions create finer, feathery crystals. Use this like a dial to tune how bold or delicate your flower looks. - Add scent or context
Place your finished flower near a sachet of dried lavender or a small candle dish (unlit) to create a calm vignette. The botanical scent pairs well with the crystalline look and enhances the sensory experience. - Color in layers
Try making two different solutions with slightly different shades and grow the petals in steps. The result can look gradient and soft, as if the petals caught evening light. - Make it a shared ritual
Invite a friend or family member to make a petal each and join them into one shared bouquet. The communal pace and conversation make the process feel cozier.
What I’ve Learned While Making This
I find that the act of waiting is part of the craft. In early attempts, I would check too often and feel frustrated when the crystals did not match a mental image. Over time, I learned to approach the jar with curiosity instead of expectation.
I also noticed that small changes in how the base sits in the jar completely change where crystals form. A petal that grazes the side will grow a linear ridge of crystals. Allowing a bit of asymmetry often results in the most interesting textures.
Finally, I learned to be honest about safety. Hot water and mineral powders deserve respect. I keep a steady cup of cool water nearby to handle accidental spills and use gloves when I want to avoid handling the solution directly.
FAQs About Crystal Growing Flower
Is it safe for children?
With adult supervision, children can take part in shaping and decorating the flower. Keep hot water and borax out of reach and guide them through safe stirring and handling. Use gloves and remind them not to taste any materials.
Can I use other crystals like salt or sugar?
Yes. Salt and sugar create crystals too, but they behave differently. Salt tends to form blockier crystals and may take longer. Sugar can create pretty, clear structures, but it may attract pests if left exposed. Borax often gives quick, sparkly growth on pipe cleaners.
How long will the crystals last?
Properly stored in a dry display case or away from humidity, crystal structures can last for years. They can dull if touched often or exposed to moisture. Keep them in a stable, dry spot to preserve their shine.
What if my crystals look dusty or fall off?
Loose bits can fall off during removal or transport. Gently brush them into a tray and keep the main piece intact. If the surface looks dusty, a soft brush or a light puff of air will clean it without damaging the crystal arms.
Can I re-grow crystals on the same base?
Yes. If the base remains structurally sound, you can dissolve the old crystals gently in warm water and re-grow a new layer. This can give you different textures and colors in a later session.
A Quiet Closing Thought
Sit with the finished piece for a moment. Notice how it makes you breathe a little deeper or how the light finds its edges. The true joy of making a Crystal Growing Flower lives in these quiet returns small acts of attentive care that remind you how patient processes reward with simple beauty.
Treat the making like a small season. There is planning, a warm busy hour, then days of waiting and watching. Each stage asks you to slow down in a slightly different way. Those slow minutes become stitches in a gentle rhythm you can return to again and again.
Conclusion
If you want to explore different ways to make and enjoy crystalline decorations, this neat reference shows a themed collectible version called Growing Flower Crystals on a well-known fan site: Growing Flower Crystals | Neopets Items. For a ready-made kit suitable for small hands and cozy learning, you might consider this child-friendly kit that comes with materials and simple instructions: Amazon.com: Crystal Growing Kit – Crafts for Girls Ages 6-8.
Thank you for sitting with this little project. May your making feel calm, present, and softly bright.
PrintCrystal Growing Flower

Create a beautiful crystal flower using simple materials like borax, pipe cleaners, and warm water. A soothing, hands-on craft that encourages patience and observation.
- Prep Time: 10 minutes
- Cook Time: 0 minutes
- Total Time: 1440 minutes
- Yield: 1 Crystal Growing Flower
- Category: Craft
- Method: Crafting
- Cuisine: N/A
- Diet: N/A
Ingredients
- Borax powder, about 3 to 4 tablespoons per cup of water
- Pipe cleaners in colors you love
- A clear glass jar or cup
- A pencil or chopstick
- String or thin thread
- Measuring spoon and heat-safe container
- Food coloring or liquid watercolors (optional)
- Gloves or tweezers (optional)
- A tray or towel to catch drips
Instructions
- Gently twist three to five pipe cleaners into a simple flower shape.
- Trim any long ends and wrap a small bit of string around the base if needed.
- Pour boiling water into the glass jar, filling it most of the way.
- Add borax a little at a time, stirring until it dissolves.
- Drop in food coloring and stir until the color spreads evenly.
- Tie one end of the string to the flower and the other to a pencil.
- Place the jar in a calm, warm place and let it rest undisturbed for 8 to 24 hours.
- Once the crystals look full, carefully lift the flower and let excess solution drip off.
- Lightly rinse the finished flower with cool water and pat dry.
- Record your observations of the process in a notebook.
Notes
Keep your Crystal Growing Flower in a dry place away from humidity and curious pets. Use a soft brush to clean any dust.