

A thin bowl of warm water fogs the window as you tie a small loop of string to a pipe cleaner star. Light slides through the glass and catches tiny, new crystals that cling like sugar. Your hands feel steady and slightly cool from the water. You breathe out slowly and watch the first flecks of shimmer form, a quiet, ordinary miracle between your fingers. Growing Crystal Ornaments sit on the windowsill like soft promises, and the slow wait becomes part of the making.
The Quiet Joy of Making Growing Crystal Ornaments

Making Growing Crystal Ornaments brings a gentle kind of focus. You watch tiny changes over hours and days, and small physical rhythms anchor you: stirring, dipping, hanging. The work invites a patient pace and simple tools. Each step rewards attention and quiet observation.
I make these ornaments in the late afternoon sometimes, when the house holds a soft hush. I notice the clink of the spoon in the jar, the soft scrape of the pipe cleaner as I shape it, and the cool touch of string between my fingers. Those small textures and sounds help me slow down.
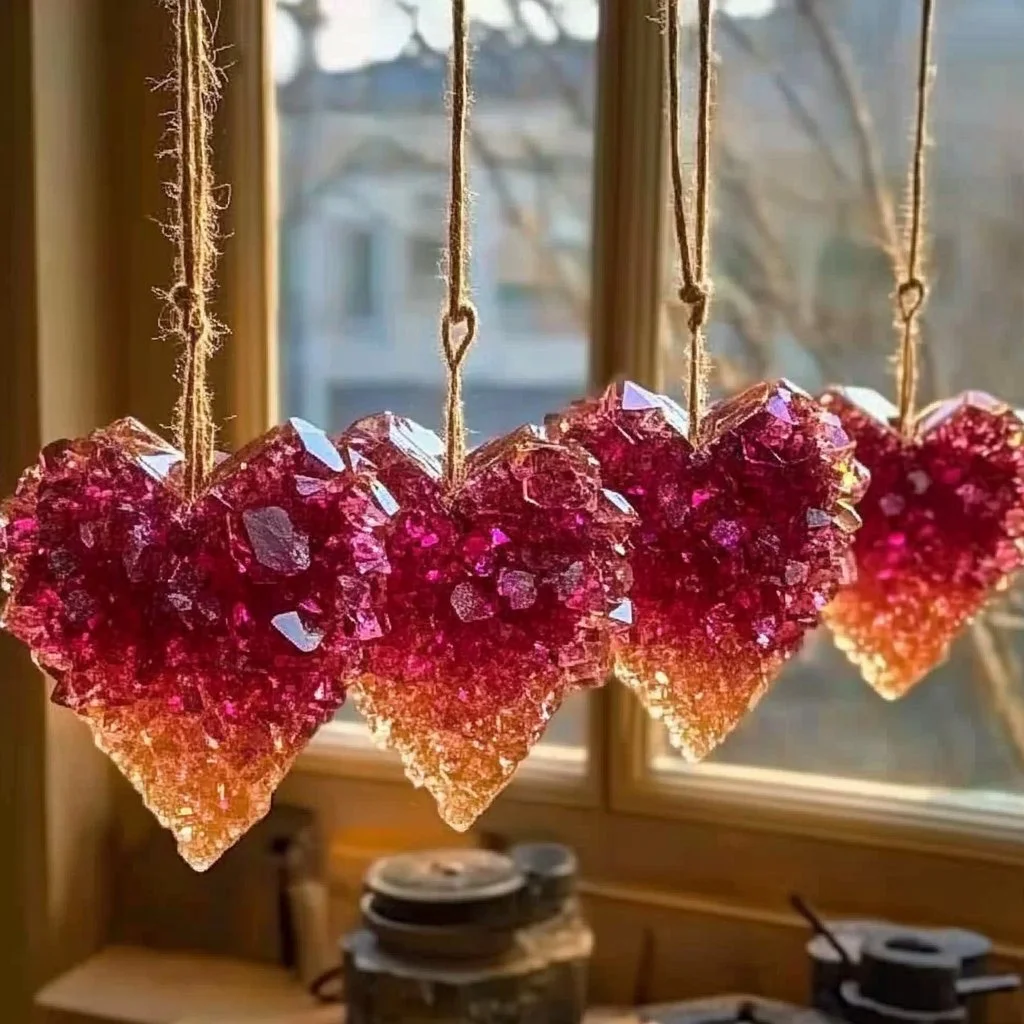
This project connects to holiday making and to slow craft for everyday calm. If you have loved simple crystal projects like my growing crystal heart ornaments, this one fits comfortably beside them. The process rewards small acts: measuring, folding, and waiting. Each ornament becomes a quiet object to touch or to hang where light can find it.
Beyond the finished ornament, the comfort comes from returning to the same small place over a few days. You check growth like you would check a seed. The gentle accumulation of crystals encourages a slower tempo, and the hang of the finished piece invites a breath and a second look. That calm, repeated attention feels both nourishing and doable.
How This DIY Comes Together
Before you gather supplies, picture the flow. You heat water, dissolve a mineral such as borax or baking soda, and suspend a shaped pipe cleaner or form in the solution. The solution cools slowly, and crystals collect on the surface where the solution meets the shape.
The motions remain simple and sensory-rich. You stir until the water glows almost clear, then hold the warm jar near your face and smell the faint mineral tang. You gently lower the ornament and hang it where the light can touch it. Over the next hours you return to check, noticing the delicate granules growing, each a tiny ridge of texture.
If you enjoy other crystal projects, you might blend techniques or motifs. I sometimes alternate between borax and baking soda solutions to see how each produces different shapes and texture. For reference and ideas, you might enjoy this baking soda approach I used for tree shapes when I wanted a softer, cloudlike crystal look baking soda crystal growing tree. Each method gives a slightly different sensory outcome and a new kind of quiet.
Work in small batches. Plan for time to watch and a safe place to hang your jewels. The rest of the making unfolds slowly, and that slow part feels like a gift.
Materials You’ll Need
- Pipe cleaners in the shape you like, or small wire frames (easy to bend)
- String, thread, or thin yarn for hanging (subtle, soft)
- Wide mouth jars or heatproof containers (sturdy and reusable)
- Boiling water (heat source required)
- Borax powder or baking soda (borax gives sharper crystals, baking soda yields a softer texture; both are easy to find)
- Spoon for stirring (metal or heatproof plastic)
- Measuring cup and measuring spoons (for consistent results)
- Pencil or chopstick to suspend the ornament across the jar
- Small tray or towel to catch drips (optional but helpful)
- Safety gloves and goggles if you prefer extra protection (borax can irritate skin)
- Decorative ribbon or twine for finishing (optional)
I keep a small note with substitutions and safety reminders near my work table. If you prefer to avoid borax, baking soda produces lovely, more frosty crystals that feel softer to touch. Borax creates clearer, more sparkly facets. Choose what feels safe and pleasant for your space.
Step-by-Step Directions
- Shape your pipe cleaner or wire into the ornament form you want. Make a small loop for the string and twist the end so it feels secure.
- Measure one cup of water and bring it to a gentle boil. Warm, rolling bubbles offer a calm, steady sound as you watch.
- Stir in borax or baking soda slowly, one tablespoon at a time, until the solution reaches saturation and no more powder dissolves.
- Tie your ornament to a string and loop the string across a pencil resting on the jar rim so the ornament hangs without touching the sides.
- Lower the ornament into the warm solution and make sure it sits centered; small adjustments feel satisfying and steady.
- Cover the jar lightly with a cloth to slow the cool-down and keep dust away. Place it somewhere still and where you can visit.
- Wait quietly for at least two to three hours for visible crystals. Check gently through the glass, avoiding sudden movements.
- After the initial growth, leave the ornament overnight for denser crystals to form; the slow cool-down encourages orderly crystal edges.
- Remove the ornament by lifting the pencil. Let the excess solution drip back into the jar, and set the ornament on a tray to dry.
- If you want clearer crystals, rinse the ornament briefly in cool water to remove loose powder, then let it dry completely on a tray.
- Once dry, tie a finishing ribbon and trim any sharp wire ends so they feel smooth to the touch.
- Hang your ornament in a place where light can pass through it and you can return to admire the little ridges and sparkle.
Take time between steps to notice textures: the fluffy look of drying crystals, the sound of a spoon against glass, or the faint mineral smell. The sensory details make each step feel present and peaceful.
Using Growing Crystal Ornaments in Everyday Life

Grow more than ornaments. These pieces function as gentle reminders in your home. Hang them in windows to catch light and throw soft sparkles across a table. Use them as small gifts wrapped in simple paper, placed where someone can find them and hold the texture for a quiet minute.
I like placing a pair of crystal stars by my bedside lamp. At dusk they catch the warm bulb and cast a subtle glint on the ceiling. On a bookshelf, a crystal heart sits near a stack of poetry. Each ornament invites a slow touch and a soft breath.
You can change placement with the seasons. Tuck crystal icicles into a winter wreath for a natural, frosted look. Organize a small mobile of three or four ornaments over a cozy chair to bring a bit of sparkle to a reading nook. In a kitchen window, they catch morning sun and feel like tiny captured moments of winter morning.
If you make sets, keep some for table decor. Small crystal pieces make gentle napkin ties or little place markers on a special evening. They feel handmade and calm, and they invite people to slow down when they notice the texture and shape.
I also pair crystal ornaments with candles for soft reflections. Never leave candles unattended, and keep crystals away from flame. The ornaments act as quiet companions rather than loud accents.
How to Store or Reuse Growing Crystal Ornaments
Crystals can break if you handle them roughly. Store finished ornaments in small boxes with tissue or soft cloth between pieces. I keep them in a shallow drawer lined with cotton, arranging each ornament so it does not brush another.
If crystals flake or lose shape, you can dissolve and regrow. Place the ornament back in a fresh, saturated solution and allow new growth. The result changes slightly each time, and I find this repeat process soothing. The ornament returns as a new object with a different grain and feel.
To reuse materials, gently remove crystals from the pipe cleaner and start a new base. Recycled pipe cleaners and recycled jars make the project feel kinder to the environment. If you used borax, strain the cooled solution and reuse the liquid for one or two more batches before discarding according to local guidelines.
Keep in mind that borax can irritate skin. Wash your hands after handling and store chemicals out of reach of children and pets. If you prefer a gentler approach, try baking soda methods that give a softer finish and use kitchen-friendly ingredients.
Gentle Tips & Variations

- Try different base shapes. Bend pipe cleaners into stars, hearts, snowflakes, or initial letters. Smaller shapes often grow crystals faster and feel more delicate in the hand.
- Change the mineral for texture differences. Borax creates more geometric facets, while baking soda yields a frosted, powdered look. I switch methods for variety and to match the mood I want.
- Add natural accents. Attach a tiny pine sprig or a dried orange slice to the top of an ornament for a mixed-media look. The weight changes how the crystals form and the scent adds another sensory layer.
- Use color subtly. Add a drop of food coloring to the solution for faint tinted crystals. The effect stays understated and keeps the overall calm feel.
- Try partial immersion. Dip only part of the ornament for a graduated effect where crystals climb from one area into the plain pipe cleaner. This creates a lovely transition and feels deliberate.
Treat these ideas as invitations rather than rules. Let one small change lead to another and enjoy the quiet discovery.
What I’ve Learned While Making This
I learned to slow my expectations. Crystals grow in their own time, and that pace becomes a small lesson in patience. I also learned that cleanup habits matter. Keeping a small towel and a tray ready removes friction from the process and keeps the making pleasant.
I noticed my hands relax more with each repeat. The tactile rhythm of bending wire and stirring hot water feels like a gentle meditation. I also learned to test small batches for safety. If children join, I make a baking soda batch with clear supervision and separate the chemical steps to keep things safe.
Materials choice changes the outcome more than I first expected. Switching from borax to baking soda gives different textures, and playing with solution temperature alters how quickly crystals form. Those small, testable variables let you feel like a quiet scientist at home.
FAQs About Growing Crystal Ornaments
Are borax crystals safe to make around children?
Borax can irritate skin and eyes, so I recommend adult supervision and gloves. For very young children, I choose the baking soda method and keep all steps closely supervised.
How long will the crystals keep?
If you store them gently and avoid heavy handling, crystals stay intact for months to years. Humidity can soften some crystal types over time, so store them in a dry place.
Can I reuse the crystal solution?
You can reuse a saturated solution once or twice for similar results. Over time, the solution loses strength and gives thinner crystals. Strain before pouring and store safely if you plan to reuse.
What happens if the ornament touches the jar side?
If the ornament touches the jar, crystals may grow flat or uneven where they meet the glass. Centering the shape prevents that and creates a more even coating.
I want clearer crystals. Any advice?
Work with the warmest safe solution you can make and allow a slow cool-down. Cover the jar to slow evaporation and leave the ornament longer. A short rinse in cool water after growth removes loose powder and sharpens the look.
A Gentle Note Before You Go
Sit with your finished ornament for a few minutes. Turn it toward the light and let the texture catch your gaze. The making gives you a small world to return to on busy days.
If you enjoyed the feeling of slow, sensory making, explore other crystal projects for more gentle variations. My collection of small experiments grows in the same simple way that these ornaments do.
Conclusion
Thank you for staying with this quiet project. If you want a detailed, step-by-step look at a similar borax star technique for clear, sparkly shapes, I found a helpful pattern in this guide on how to make crystal stars in the borax method How to Make Crystal Stars | Borax Crystal Ornaments. For a crystal icicle idea with slightly different texture and bright step photos, see this crystallized icicle method that I like Crystallized Icicle Ornaments with Borax – Happy Hooligans.
Slowly gather your things, breathe, and let the tiny crystals surprise you. I hope the making brings a small shelter of calm to your day.
PrintGrowing Crystal Ornaments

A gentle and patient project to create beautiful growing crystal ornaments using simple materials.
- Prep Time: 10 minutes
- Cook Time: 3 hours
- Total Time: 3 hours and 10 minutes
- Yield: 1 ornament
- Category: Craft
- Method: Crystal Growing
- Cuisine: N/A
- Diet: N/A
Ingredients
- Pipe cleaners in desired shapes
- String, thread, or thin yarn for hanging
- Wide mouth jars or heatproof containers
- Boiling water
- Borax powder or baking soda
- Spoon for stirring
- Measuring cup and measuring spoons
- Pencil or chopstick to suspend the ornament
- Small tray or towel to catch drips
- Safety gloves and goggles (optional)
- Decorative ribbon or twine (optional)
Instructions
- Shape your pipe cleaner or wire into the ornament form and secure a loop for the string.
- Measure and boil one cup of water.
- Stir in borax or baking soda until no more dissolves.
- Attach the ornament to string and suspend it across the jar rim with a pencil.
- Lower the ornament into the solution and make adjustments as necessary.
- Cover the jar lightly with a cloth.
- Wait for 2-3 hours to see visible crystals, then overnight for denser growth.
- Remove the ornament and let it dry, optionally rinsing for clearer crystals.
- Finish with a ribbon and hang where light can shine through.
Notes
Handle crystals gently to prevent breakage. Store in a dry place with soft cushioning.